What Happens If You Plaster Over Water Damage or Foundation Cracks?
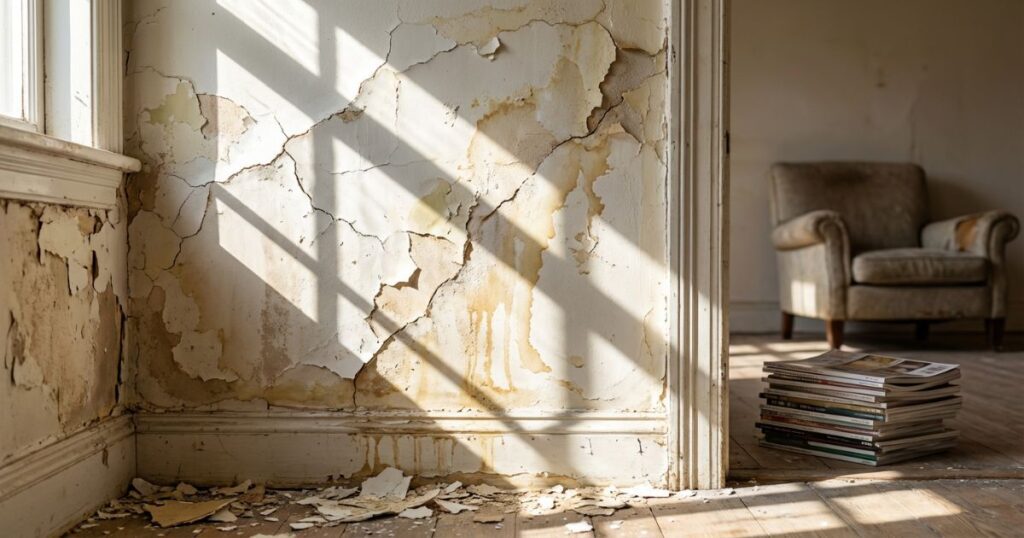
For many homeowners, plastering over a problem might feel like a fast way to fix leaks or visible damage. The problem isn’t what the plaster covers; it’s what stays active below the surface. Water damage and foundation issues do not stop just because the surface looks clean. When foundation repair is delayed, moisture can stay trapped inside the walls, and cracks continue to shift as the structure moves. In the long run, those hidden problems show up again, usually worse than before. Understanding Water Damage and Foundation Cracks Water damage and foundation cracks develop gradually and are caused by similar causes. Understanding how each problem forms can make it easier to understand why surface repair fails. Water Damage Water damage starts when moisture enters an area that should stay dry. Roof leaks, plumbing issues, poor drainage, and groundwater pressure allow water to slowly seep into your home’s structure. Wooden surfaces, drywall, concrete, and insulation all absorb moisture at different rates. Gradually, you’ll start noticing stains and damage throughout your home. Foundation Cracks At the same time, foundations crack under stress. Soil expands during wet and humid seasons, but shrinks during the summer. Temperature changes and moisture levels also lead to movement in the soil, and this puts additional strain on the foundation, eventually causing cracks near corners and in basement walls. Why Plastering Seems Like an Easy Fix Plastering is easy. It removes problems like cracks and stains immediately. For homeowners dealing with visible damage, the improvement feels instant and worth it. Plastering is also simpler than complex repairs, inspections, or major structural evaluations. Many homeowners simply assume the damage is caused by an issue that no longer exists, so they don’t think to look for the underlying cause. Cost is also a factor why homeowners opt for surface repair, which costs less than structural or moisture-related work. When the damage seems minor, spending more can feel unnecessary. But plastering over water-damaged walls or foundation cracks addresses the appearance, not the cause; while it might look good, the damage can worsen in the long run and lead to costly repairs later. What Happens if You Plaster Over Water Damage? Plastering can hide a crack. But it doesn’t stop movement. If the foundation continues to shift, the crack remains active under the surface. The walks may look stable for a while, but the structure is not. Trapped Moisture and Dampness Plaster forms a sealed layer over the surface. If a coat of plaster traps moisture, dampness spreads downwards and sideways. It can reach previously unaffected areas and lead to other materials absorbing moisture and weakening, even if they don’t show obvious signs of problems. As humidity rises due to the trapped moisture, the damage spreads further. Mold and Mildew Growth Moisture trapped behind the plaster does not dry out easily. When air cannot circulate, mold has time to develop without showing on the surface. It often grows in walls, though it can also develop inside baseboards and insulation. These areas hide the damage, so by the time the odor or discoloration appears, the spread is usually worse than before the plaster was applied. Plaster Failure and Peeling Paint Plaster relies on a stable, dry surface to bond properly. When moisture pushes behind, adhesion weakens. Cracks return, and paint bubbles, flakes, or peels. In some cases, plaster can fully separate from the wall. Repaired sections may hold for a few months before the signs return, but when damage reappears, it affects a wider area than the earliest patch. Structural Material Deterioration Water breaks the material down slowly. Wood swells and softens, metal fasteners corrode, and concrete absorbs moisture and loses surface integrity. Plaster hides these changes while they continue, but as materials degrade, they weaken further and further. What starts as a visible stain can lead to damage in frames and weak wall sections. Surface repair is no longer an option at this point; instead, you’ll likely need costly repairs. What Happens if You Plaster Over Foundation Cracks? When plaster is put over an active crack, the surface looks stable even though the structure is not. But cracks respond to soil pressure, moisture changes, and shifting loads. Covering them delays visibility, but does nothing to fix the damage. Reappearance and Worsening Damage As the structure shifts, the plaster layer absorbs the stress until it falls. Hairline cracks and wider cracks appear. In some cases, new cracks form next to the repaired area. This can create the impression of spreading damage, even though the initial cause does not change. Repeated patching does not stop the pattern—instead, each repair fails faster due to the underlying damage. Hidden Structural Movement Plaster blocks visual access to the crack. While it may appear nice, it’s now hiding changes you otherwise might notice. Cracks could be widening, or veering off in a new direction. As seasonal soil changes, moisture levels, and load distribution continue affecting the foundation, the cracks stay hidden until damage is severe enough to be noticed. Signs You Have Plastered Over an Unresolved Issue When you plaster over damage without addressing the underlying issue, the damage will repeat over time. Cracks that recur in the same spot often indicate the movement has not stopped, while paint that bubbles or flakes over repairs points to moisture spreading. You may notice a musty smell in walls that otherwise appear dry, or doors and windows sticking after surface repairs. It could even be as simple as walls that feel cool, soft, or uneven to touch. These signs don’t appear at once, but they all signal a higher likelihood of structural damage. Proper Steps to Take Before Plastering Plaster should be the last step after all the repairs have been completed. Before any surface repair, the condition behind the wall needs attention. Skipping any of these steps turns the plaster into a cover, instead of a fix. That means that full repairs will be more expensive and time-consuming. Conclusion Plaster may change the appearance, but it can’t correct the cause of
What Happens If You Plaster Over Water Damage or Foundation Cracks? Read More »