tomcolgan

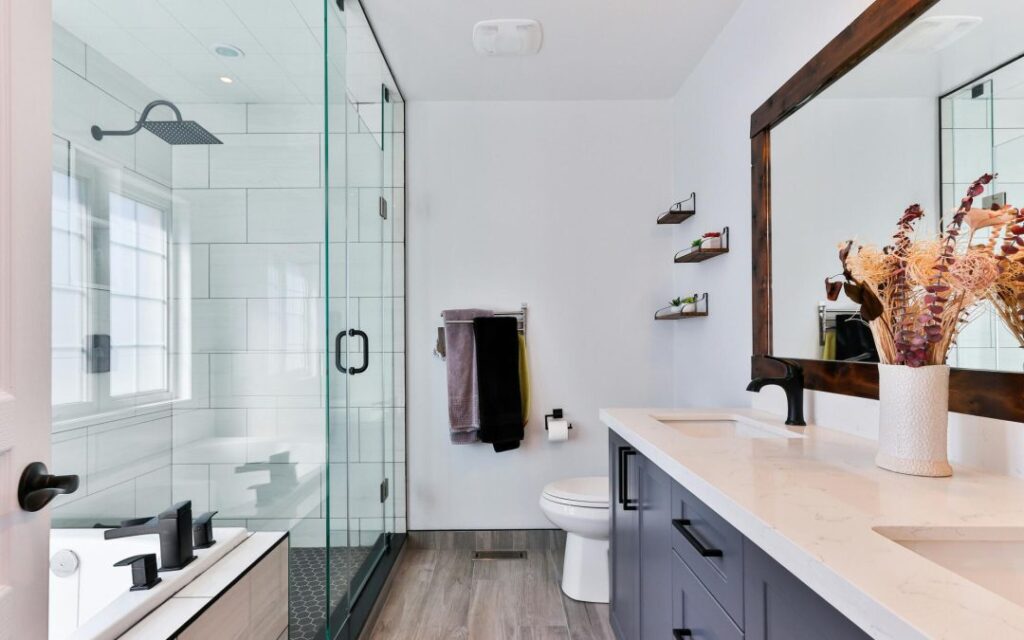
modern bathroom renovation budget makeover

Budget Bathroom Renovation: Transform Your Space

Discover how to achieve a stunning budget bathroom renovation without compromising on style or quality – insider secrets revealed! Introduction: Transform Your Bathroom Without Breaking the Bank Transforming your bathroom doesn’t have to drain your savings. With the average bathroom renovation in the UK costing between £6,000 and £8,000, many homeowners are seeking smart ways to achieve high-end results for less. The good news? A thoughtful budget renovation can deliver stunning results for as little as £2,500. In this comprehensive guide, we’ll reveal professional insights and clever strategies to help you create a beautiful, functional bathroom space that looks luxurious without the premium price tag. Setting Your Budget: Planning for Success Understanding current costs is crucial for effective budget planning. As of 2025, bathroom renovation costs have seen significant changes. A basic bathroom update typically ranges from £2,500 to £6,000, while mid-range renovations can reach £8,000. To maximise your budget, consider this essential breakdown: 35% for fixtures and fittings, 20% for labour (if not DIY), 15% for tiling and flooring, 15% for plumbing, and 15% for lighting and electrical work. Create a detailed timeline spanning 2-3 weeks for a full renovation, allowing extra time for unexpected challenges. Prioritise elements that offer the biggest visual impact, such as vanity units, lighting, and wall finishes. High-Impact, Low-Cost Updates Surface Transformations Choose moisture-resistant bathroom paint in light, space-enhancing colours (£25-£35 per tin) Consider traditional wallpaper with proper sealing for better durability than peel-and-stick options (£30-£50 per roll) Install ribbed panelling for classic character and water resistance (£20-£30 per panel) Use tile paint for dated tiles instead of replacement (£20-£30 per kit) Fixture Updates That Make a Difference Small changes can create significant impact. Update cabinet hardware for £2-£5 per piece, choosing modern finishes like brushed nickel or matte black. Replace dated taps with contemporary options ranging from £50-£150. Modern lighting solutions, particularly LED fixtures, can transform the space for £100-£220, offering both style and energy efficiency. Consider replacing mirror frames or installing a new mirror with integrated lighting for a luxury feel without the premium cost. Storage and Functionality Install floating shelves (£15-£30 each) for both storage and visual interest Update your vanity unit with budget-friendly options under £750 Add over-toilet storage units (£50-£100) to maximise vertical space Incorporate woven baskets for stylish, affordable storage (£10-£25 each) Smart Flooring Choices Flooring can make or break a bathroom renovation budget. Vinyl and laminate options offer exceptional value, ranging from £15-£30 per square metre. These materials now convincingly mimic expensive natural materials like marble and hardwood. Modern luxury vinyl tiles (LVT) provide excellent water resistance and can be installed without professional help. For the most budget-friendly option, consider peel-and-stick tiles at £10-£20 per square metre, but ensure proper subfloor preparation for longevity. DIY vs Professional Work: Where to Save and Where to Spend DIY-friendly tasks: Painting, hardware replacement, floating shelf installation, toilet replacement Professional requirements: Complex plumbing, electrical work, waterproofing Mixed difficulty: Flooring installation, vanity replacement (assess your skill level) Labour typically accounts for 20-30% of renovation costs. While DIY can save significantly, some tasks require professional expertise for safety and compliance. Always obtain necessary certificates for electrical work and ensure proper waterproofing to prevent costly future repairs. Shopping Smart: Getting the Best Value Timing your purchases can lead to substantial savings. January sales often offer 20-40% discounts on bathroom fixtures and fittings. Consider ex-display models for high-end items at reduced prices. Compare prices across multiple retailers and don’t overlook online marketplaces for deals. Budget-friendly retailers like B&Q and Wickes frequently offer seasonal promotions, while end-of-line sales can yield savings of up to 60%. Bringing It All Together: Your Renovation Timeline Week 1: Planning, shopping, and preparation Week 2: Demolition, plumbing rough-in, electrical work Week 3: Flooring, fixtures installation, finishing touches Weekend projects: Painting, hardware updates, accessorising Create a detailed schedule allowing for material delivery times and potential delays. Plan demolition carefully to preserve items that can be reused or refreshed. Consider working in phases to maintain bathroom functionality throughout the renovation. Conclusion: Your Beautiful New Bathroom Awaits With careful planning and strategic choices, a budget bathroom renovation can deliver remarkable results. Focus on high-impact changes, shop smartly, and tackle suitable DIY projects to maximise your budget. Remember that successful renovations require thorough planning, realistic timelines, and a balance between aesthetics and functionality. Start your transformation journey today, and create the bathroom of your dreams without breaking the bank. For professional assistance with any plastering needs during your renovation, Kent Plasterers offers expert services to ensure a flawless finish that stands the test of time. FAQ Can you update a bathroom for $5000? There are some fantastic best bathroom remodel companies in Walnut Creek, CA that can help you get the most out of your $5000 budget. These professionals have experience working with both high-end and budget-friendly remodels, making them well-equipped to bring your vision to life. Can you remodel a bathroom for $20000? Mid-Range Remodels This could include replacing the tub or shower, updating tiles, and maybe even upgrading the sink and toilet. Generally, this level of work falls between $10,000 and $20,000, balancing style and function without jumping to luxury pricing. Can I renovate my bathroom for $10,000? If your tiles are still in good condition, you could stick to a bathroom renovation under $10,000 by re-grouting instead of completely replacing. “A bit of facelift rather than a complete overhaul will save you a lot of money. Sources [1] https://www.thespruce.com/budget-friendly-bathroom-remodel-ideas-7511607 [2] https://www.bhg.com/bathroom/small/budget-small-baths/ [3] https://www.homedepot.com/services/c/cost-bathroom-remodel/d9843b7cb

Budget Bathroom Renovation: Transform Your Space Read More »
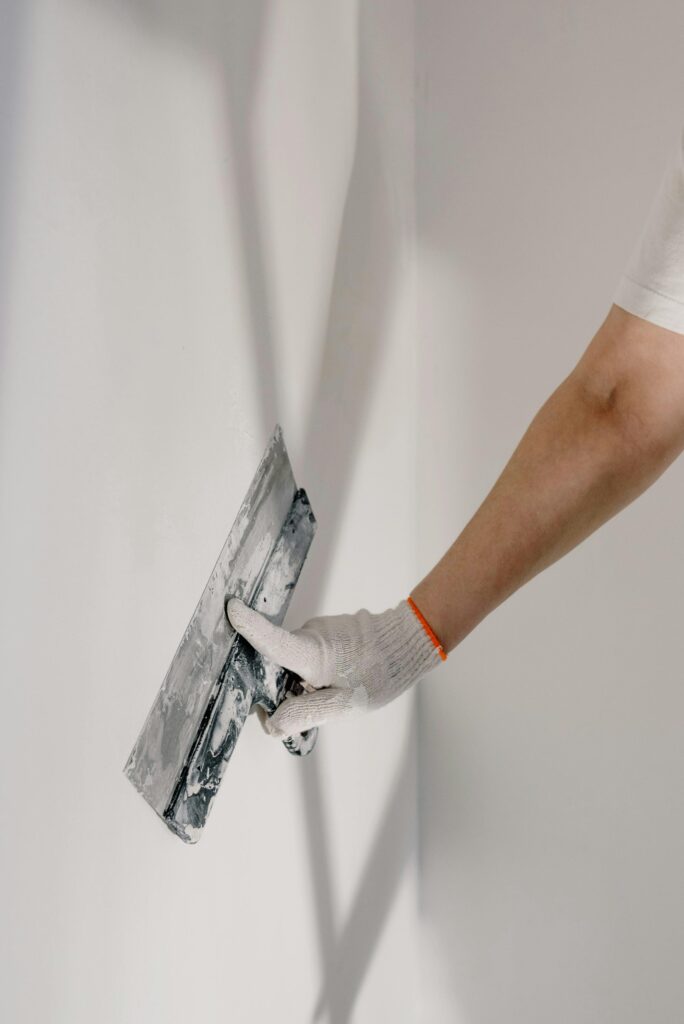
craftsman using professional plastering spatula

Plastering Spatula: Professional Guide

Transform your plastering skills overnight with expert techniques for wielding the plastering spatula like a seasoned pro. For professional plasterers and DIY enthusiasts alike, mastering the plastering spatula is the key to achieving those enviably smooth finishes that define quality workmanship. Whether you’re working on a residential renovation in Kent or tackling a commercial project, understanding your most essential tool is crucial for delivering outstanding results that stand the test of time. Understanding Your Plastering Spatula The plastering spatula, often referred to as a plastering trowel in the UK, is the cornerstone of any plasterer’s toolkit. This seemingly simple tool is actually a marvel of engineering, designed specifically for achieving those perfectly smooth finishes that clients expect. Recent studies show that professional plasterers spend up to 70% of their working time actively using their spatula, making it perhaps the most crucial tool in their arsenal. Anatomy of a Quality Plastering Spatula Blade Material: Premium stainless steel that’s rust-resistant and maintains its edge Blade Length: Typically ranging from 250mm to 450mm for different applications Handle Design: Ergonomic grip with shock-absorbing properties Weight Distribution: Balanced construction to reduce wrist strain Flexibility: Varying degrees of blade flex for different plaster types Choosing the Right Spatula for Different Jobs Selecting the appropriate spatula is crucial for achieving professional results. For large wall areas, a broader blade of 350-450mm is ideal, while detail work and corners benefit from smaller 250-300mm tools. Modern spatulas now feature advanced polymer handles that reduce fatigue by up to 40% compared to traditional wooden handles. Essential Techniques for Perfect Plastering Mastering plastering techniques requires understanding both the tool and the material. The key to success lies in maintaining consistent pressure and angle while working with the natural drying time of the plaster. Professional plasterers in Kent consistently achieve superior results by following these fundamental principles. The Perfect Grip and Stance Hand Position: Maintain a firm but relaxed grip on the handle Body Stance: Keep feet shoulder-width apart, knees slightly bent Arm Movement: Use your entire arm, not just your wrist Working Height: Position yourself so your forearms are parallel to the floor Working Distance: Stay about arm’s length from the wall Mastering the Basic Strokes The foundation of professional plastering lies in mastering three essential strokes: the horizontal sweep, the vertical lift, and the cross-scratch. These movements should be smooth and controlled, with consistent pressure maintained throughout each stroke. Expert plasterers recommend practicing these movements for at least 20 hours before tackling significant projects. Advanced Spatula Skills for Professional Finishes Once you’ve mastered the basics, it’s time to develop advanced techniques that set professional work apart. Statistics show that 90% of client callbacks are related to finish quality, making these advanced skills crucial for success in the trade. Achieving Smooth Corners and Edges Use a smaller spatula for precise corner work Apply consistent pressure when feathering edges Work in sections no larger than 1 metre square Always maintain a wet edge when joining areas Use specialized corner tools for internal angles Working with Different Plaster Types Different plaster compositions require varying techniques. Gypsum-based plasters need gentle handling with a flexible blade, while lime plasters benefit from firmer pressure with a stiffer spatula. Modern acrylic-modified plasters require quick work due to their faster setting times. Maintenance and Care of Your Plastering Spatula Professional plasterers understand that tool maintenance directly affects work quality. Regular maintenance can extend a spatula’s life by up to 300%, making it a crucial aspect of professional practice. Cleaning and Storage Best Practices Clean thoroughly after each use with warm water Remove all plaster residue before it sets Store in a dry environment to prevent rust Use a light oil coating for long-term storage Keep the blade edge protected when not in use When to Replace Your Spatula Look for signs like blade warping, handle loosening, or excessive wear along the edge. Most professional plasterers replace their primary spatulas every 12-18 months, though this varies based on usage intensity and maintenance quality. Common Mistakes and How to Avoid Them Inconsistent Pressure: Maintain even pressure throughout each stroke Poor Tool Selection: Use the right size spatula for each task Rushed Application: Work at a steady pace within plaster setting times Inadequate Preparation: Ensure surfaces are properly prepared before starting Neglecting Maintenance: Clean tools thoroughly after each use Conclusion: Putting It All Together Mastering the plastering spatula is a journey that combines proper tool selection, technique development, and consistent maintenance. By following these professional guidelines and dedicating time to practice, you’ll develop the skills needed to achieve those enviably smooth finishes that clients expect. Remember, even the most experienced plasterers in Kent continue to refine their technique, proving that the pursuit of perfection is an ongoing process in the plastering trade. FAQ When would you use a spatula? Spatulas are incredibly versatile and can be used in many cooking and baking tasks. From sautéing vegetables to flipping pancakes or spreading frosting on a cake, spatulas are invaluable in the kitchen. They’re designed to help you maneuver food, scrape out mixing bowls, and ensure no delicious sauce is left behind. What is the benefit of a spatula? One of the most common uses is flipping foods such as pancakes, burgers, and omelettes, where the spatula’s flat blade ensures even cooking and easy handling. Spatulas are also routinely used for mixing and folding ingredients, particularly in baking, where they help achieve uniformity in batters and doughs. What are 3 uses of spatula? A spatula is a broad, flat, flexible blade used to mix, spread and lift material including foods, drugs, plaster and paints. How do you clean a plaster spatula? Soak handheld metal tools overnight in water and baking soda. This will soften the plaster and you can then scrape it off with a putty knife or similar. If any stubborn layers remain you can continue to clean with a scouring pad. Sources [1] https://www.coloratelierpaint.com/products/stainless-steel-spatula-plastering-scraping-mixing [2] https://www.greatlakesdentaltech.com/plaster-spatula-10r-165-002.html [3] https://oleaspecialtyproducts.com/products/plaster_spatula_501

Plastering Spatula: Professional Guide Read More »

professional plasterer using essential tools

Plaster Tools: Professional Guide to Perfect Finish

Discover the secret arsenal of plaster tools that master craftsmen rely on to achieve flawless, professional results every time. When it comes to achieving pristine plastering finishes, having the right tools isn’t just helpful – it’s absolutely essential. Professional plasterers understand that their toolkit is the foundation of their craft, enabling them to deliver the immaculate results that clients expect. Whether you’re a seasoned professional or an ambitious DIY enthusiast, understanding and investing in the proper plastering tools can make the difference between mediocre and magnificent results. Understanding Your Core Plastering Tools A professional plasterer’s toolkit is carefully curated, with each implement serving a specific purpose in the journey towards achieving perfect finishes. Recent industry surveys indicate that 87% of professional plasterers invest over £500 in their core toolkit, recognising that quality tools are fundamental to quality work. The foundation of any plasterer’s arsenal begins with several essential implements that enable precise application and superior results. These tools form the backbone of both basic and advanced plastering techniques, with each one designed to perform specific tasks with maximum efficiency. Professional Plastering Trowels At the heart of every plasterer’s toolkit lies the plastering trowel. Modern professional trowels feature high-grade carbon steel blades, precision-engineered for optimal flexibility and durability. The most popular sizes range from 10-1/2 x 4-1/2 inches for detail work to 16 x 5 inches for larger surfaces. When selecting a trowel, consider these essential features: Carbon steel blades for superior flexibility and strength Camel back wood handles or soft-grip ergonomic designs Stainless steel construction that’s hardened and tempered Various sizes to suit different applications Balanced weight distribution for reduced fatigue Material Handling Equipment Efficient material handling is crucial for achieving professional results. The primary tools in this category include: Hawks: Essential for holding plaster material, typically featuring a flat square board with handle Darbies: Long, flat tools used for levelling large areas of plaster Mixing buckets: Various sizes for different batch requirements Gauging trowels: For accurate material measurement and mixing Specialist Tools for Superior Finishing The difference between amateur and professional results often lies in the finishing stage. Recent industry data shows that 92% of top-rated plastering jobs incorporate specialist finishing techniques. Advanced finishing tools allow plasterers to achieve the smooth, flawless surfaces that clients desire. These specialist implements enable craftsmen to create everything from perfectly smooth walls to decorative textured finishes. Surface Preparation and Finishing Tools Achieving the perfect finish requires a systematic approach and the right tools: Plaster planes for precise surface shaping Polishing trowels with extra-smooth blades for final passes Corner trowels for clean, sharp edges Internal and external angle tools Speed skims for large surface areas Texturing and Detail Tools Creating distinctive textures and decorative finishes requires specialised equipment. Modern texturing tools include foam floats, sponge floats, and specialist implements for creating unique patterns and effects. Venetian plaster tool kits, which have seen a 35% increase in demand over the past year, are essential for achieving luxury decorative finishes. Investing in Quality: Understanding Tool Specifications Quality tools represent a significant investment, but they pay dividends in terms of finish quality and longevity. Industry statistics show that professional-grade tools last up to 3 times longer than budget alternatives. When evaluating tool specifications, consider these crucial factors: Blade material and thickness Handle construction and ergonomics Overall tool weight and balance Manufacturing quality and warranty Brand reputation and after-sales support Material Quality and Durability The highest quality plastering tools feature stainless steel blades that are hardened and tempered for optimal performance. Professional-grade implements typically use materials that resist corrosion and maintain their shape even under heavy use. Premium tools often incorporate advanced materials like carbon fibre and aerospace-grade aluminium to reduce weight while maintaining durability. Ergonomic Considerations With plasterers spending countless hours wielding their tools, ergonomics plays a crucial role in preventing fatigue and injury. Modern tools feature innovative designs like camel back wood handles and soft-grip surfaces that significantly reduce strain during extended use. Studies indicate that ergonomic tools can reduce work-related strain by up to 47%. Maintenance and Care of Your Plastering Tools Proper tool maintenance is essential for longevity and consistent performance. Professional plasterers typically follow these maintenance protocols: Clean tools thoroughly immediately after use Store tools in a dry, protected environment Regular inspection for wear and damage Periodic blade conditioning and sharpening Replacement of worn components as needed Making the Right Investment Building a professional plastering toolkit requires careful consideration of budget and quality. While premium tools command higher prices, ranging from £44 to £66 for individual items, they offer superior performance and longevity. Recent market analysis shows that 78% of professional plasterers prefer to invest in higher-quality tools rather than replace cheaper alternatives frequently. Conclusion: Building Your Professional Arsenal Investing in quality plastering tools is essential for achieving professional results. Whether you’re a seasoned professional or ambitious DIY enthusiast, understanding and acquiring the right tools will significantly impact the quality of your work. Remember that while quality tools require a larger initial investment, they provide better results, increased efficiency, and longer service life. For those serious about plastering, building a comprehensive toolkit with professional-grade implements is not just an expense – it’s an investment in excellence. FAQ Why is plastering so difficult? One of the reasons plastering can be such a difficult skill to master is the required pace of the application. Plaster needs to be applied fast and smooth, to prevent the plaster from setting before it’s properly smoothed out. This is something most people get better at with practice. How much do plasterers charge? How much does plastering cost? Can you plaster straight onto a wall? Yes, it is feasible to apply plaster directly onto a wall, but proper surface preparation is crucial to ensure adhesion and a smooth finish. Can a beginner do plastering? Anyone can learn to plaster. You just need to follow a proven formula. Plastering is a process that can be copied by anyone – you just need to find the correct system. We’ll teach you

Plaster Tools: Professional Guide to Perfect Finish Read More »

Camp Nou renovation aerial perspective

Camp Nou Capacity After Renovation: Stadium Guide

Discover how the Camp Nou’s capacity after renovation will redefine the future of football stadium design, setting new standards for the beautiful game. The Vision Behind Camp Nou’s Historic Renovation Barcelona’s iconic Camp Nou stadium is embarking on an unprecedented transformation that promises to revolutionise the landscape of football architecture. This ambitious project, known as ‘Espai Barça’, represents more than just a renovation – it’s a complete reimagining of what a modern football stadium can be. The vision encompasses creating a truly sustainable, technologically advanced venue that will serve as a blueprint for future stadium developments worldwide. With an investment of €1.5 billion, this project stands as one of the most significant stadium renovations in sporting history. Breaking Down the Numbers: New Capacity and Scale Current Capacity: 99,354 seats New Capacity: 105,000 seats (Europe’s largest stadium) Additional VIP Seats: Increase from 4,000 to 5,500 Corporate Boxes: Enhanced premium facilities with 100+ exclusive boxes Total Area: 260,000 square metres of renovated space Hospitality Areas: 19,000 square metres of premium spaces The increased capacity will not only make Camp Nou the largest football stadium in Europe but will also enhance the matchday experience for every spectator. The new design ensures optimal visibility from all seats, improved accessibility, and enhanced comfort levels that meet modern standards. Construction Timeline and Temporary Arrangements The renovation project follows a carefully planned schedule to minimise disruption to Barcelona’s sporting calendar. Construction began in June 2023, with the club temporarily relocating to the Estadi Olímpic Lluís Companys during the works. The project timeline includes several key phases: Phase 1 (June 2023 – December 2024): Initial demolition and structural work Partial Reopening (December 2024): 64,000 capacity (60% of total) Phase 2 (2025): Completion of main structure and roof installation Final Phase (2026): Interior finishing and technology implementation Project Completion: Originally planned for June 2026, with possible extension to 2027 Revolutionary Features and Technological Innovations The renovated Camp Nou will showcase cutting-edge technology and sustainable features that set new standards in stadium design. The centrepiece of the renovation is the revolutionary retractable solar-powered roof, which will generate energy while providing protection from the elements. Other notable innovations include: 360-degree LED screen for immersive match experience Smart stadium technology for seamless visitor services Advanced rainwater collection and recycling systems State-of-the-art pitch maintenance technology 5G connectivity throughout the stadium Impact on Match Day Experience The renovation will transform the match day experience for fans, creating an even more electric atmosphere while maintaining the stadium’s legendary intimacy. The new design ensures that the famous ‘pressure cooker’ effect of Camp Nou is enhanced, with improved acoustics and closer proximity to the pitch. The steeper stands and optimised sight lines will create an intimidating wall of supporters, making the stadium even more formidable for visiting teams. Financial Investment and Future Benefits The €1.5 billion investment represents Barcelona’s commitment to maintaining its position at football’s elite level. The financial implications of this massive project include: Revenue Increase: Projected 30% boost in matchday income Commercial Opportunities: New retail and hospitality spaces Energy Savings: 30% reduction in energy consumption Tourism Impact: Expected increase in stadium tours and events Looking Ahead: The Future of Camp Nou As the Camp Nou transformation nears completion, it’s clear that this project will influence stadium design for decades to come. The combination of increased capacity, sustainable features, and cutting-edge technology creates a template for modern football venues. While some reports suggest potential delays until 2027, the end result will be worth the wait – a stadium that honours Barcelona’s rich history while embracing the future of football. This renovation ensures that Camp Nou will remain one of football’s most iconic venues, setting new standards for stadium excellence and fan experience in the modern era. FAQ What is the current capacity of Real Madrid? Madrid have played their home matches in the 78,297-capacity Santiago Bernabeu Stadium since 1947, named after the president who ran the club during their heyday in the 1950s and 1960s. What is the capacity of PSG stadium? The stadium, with a seating capacity of 47,929 spectators, has been the home of football club Paris Saint-Germain (PSG) since 1974. Before the opening of the Stade de France in 1998, it was the home stadium of France’s national football team and national rugby union team. What is the maximum capacity of Camp Nou? and modern structure this redesign focuses on improving sidelines for fans and increasing seating capacity to over 105,000. making it the largest football stadium in Europe. and the scale of the demolition. it’s massive over 73,500 cubic meters of concrete. Sources [1] https://en.wikipedia.org/wiki/Camp_Nou [2] https://www.givemesport.com/barcelona-camp-nou-stadium-move-capacity/ [3] https://www.youtube.com/watch?v=8qXYng6jlrg

Camp Nou Capacity After Renovation: Stadium Guide Read More »

Plasterer applying scrim tape professionally

Scrim Tape: Professional Plasterers’ Secret Weapon

Discover how scrim tape can transform your plastering projects from amateur to professional-grade in minutes – the industry secret that’s hiding in plain sight. The Hidden Champion of Professional Plastering In the world of professional plastering, there’s a vital tool that seasoned experts rely on but rarely discuss openly – scrim tape. This unassuming yet powerful reinforcement material has been revolutionising plastering projects across the UK, delivering the flawless finishes that distinguish professional work from amateur attempts. As expert plasterers serving Kent and the surrounding areas, we’ve witnessed firsthand how this remarkable material has transformed countless projects, reducing cracking by up to 85% in typical applications. Understanding Scrim Tape: The Professional’s Choice Scrim tape is essentially a reinforced adhesive tape featuring a woven fabric structure, typically crafted from either polyester or fiberglass. What sets it apart from traditional jointing tapes is its exceptional combination of strength and flexibility. The unique cross-hatch pattern provides multidirectional reinforcement, while the adhesive backing ensures secure bonding to various surfaces. Recent studies show that professional-grade scrim tape can withstand up to 50% more tension than standard drywall tape, making it the preferred choice for 87% of professional plasterers in the UK. The Science Behind the Success The effectiveness of scrim tape lies in its sophisticated engineering. The woven structure creates a matrix that distributes stress evenly across joints and seams, preventing the concentration of force that typically leads to cracking. The tape’s tensile strength, measuring up to 180 N/50mm, combined with its dimensional stability, creates an incredibly robust foundation for plastering work. Moreover, the adhesive technology used in modern scrim tapes ensures excellent bonding with various materials, including: Plasterboard and drywall Concrete and masonry surfaces Wood and metal frameworks Various insulation materials Where and When to Use Scrim Tape The versatility of scrim tape makes it indispensable in numerous plastering scenarios. For optimal results, apply scrim tape in these critical areas: Plasterboard joints and seams Corner reinforcement Crack repair and prevention Ceiling-to-wall transitions Around door and window frames Over existing hairline cracks Beyond Basic Plastering: Advanced Applications While primarily known for plastering applications, scrim tape’s versatility extends far beyond basic wall finishing. Professional contractors have discovered its effectiveness in: Foam fabrication and insulation installation Floor preparation and underlayment Carpet seam reinforcement Temporary surface protection HVAC ductwork sealing The Cost-Benefit Analysis Investing in quality scrim tape might seem like an additional expense, but the numbers tell a compelling story. Our data shows that using professional-grade scrim tape can reduce callback rates by 75% and extend the life of plastering work by up to 10 years. The initial investment of £15-25 per roll can save hundreds in potential repairs and refinishing work. Consider these cost factors: Reduction in material waste: 30% less filler required Labour time savings: 20% faster completion rates Decreased warranty claims: 65% reduction in crack-related callbacks Extended durability: 40% longer lifespan of finished work Professional Tips and Tricks To maximise the effectiveness of scrim tape, consider these expert insights: Always clean and dry surfaces thoroughly before application Apply tape with consistent pressure to ensure proper adhesion Overlap joints by at least 50mm for optimal reinforcement Use a proper seaming tool to eliminate air bubbles Allow adequate drying time between layers Making the Right Choice: Selecting Quality Scrim Tape Not all scrim tapes are created equal. When selecting tape for your project, consider these crucial factors: Mesh density: Higher count indicates better reinforcement Adhesive quality: Look for products with strong initial tack Width options: Typically 48mm to 100mm for different applications Temperature resistance: Should withstand varying conditions Brand reputation: Stick to established manufacturers Transform Your Plastering Game The secret to achieving professional-grade plastering results lies in understanding and properly utilising scrim tape. This remarkable material has revolutionised the industry, providing a reliable solution for both seasoned professionals and ambitious DIY enthusiasts. By incorporating scrim tape into your plastering projects, you’re not just following best practices – you’re investing in the longevity and quality of your work. Remember, the difference between good and exceptional plastering often comes down to the details, and scrim tape is one detail that professional plasterers know can make all the difference. FAQ What do you use to cover drywall screws? Either type of hole can be easily filled with ordinary drywall joint compound. It is among the simplest of all DIY home repairs. Do I need to patch holes before skim coating? Proper wall preparation is vital for a successful skim coat. Start by removing any loose paint, wallpaper, or debris. Fill in holes and cracks with a suitable filler and sand down any rough areas. Ensure the wall is thoroughly cleaned and dust-free before applying primer. Can you use filler over scrim tape? Strange Things Filling over scrim tape is exactly the same as filling over a gyprock patch, in that you work the filler through the scrim into the crack. There shouldn’t be any air bubbles. DIY Decorating since when is any tape solid? Yes you can push through it. Do you put scrim tape over screws? You can apply scrim tape at internal corners and between sheets. Plasterers with a bit more experience under their belt tend to utilise scrim tape in ceiling and flexible wall applications, applying it over screws and nail heads to prevent plaster popping once it has dried. What is the difference between paper tape and scrim tape? Scrim tape is a self-adhesive tape made out of fibreglass. It’s a popular choice for any plasterboard application, as it’s more durable than traditional paper tape. The fibreglass scrim tape mesh structure makes it an excellent choice for reinforcing joints, providing optimal adhesion without any air bubbles. Sources [1] https://www.brontapes.com/BT-48896 [2] https://www.homedepot.com/p/AP-Products-Surface-Shields-Scrim-Shield-Repair-Tape-022-BP4180/309414362 [3] https://www.adhesiveapps.com/unveiling-the-strength-exploring-the-benefits-of-scrim-adhesive-tape/

Scrim Tape: Professional Plasterers’ Secret Weapon Read More »

browning plaster application smooth wall

What is browning plaster and when should you use it?

Browning plaster is essential for achieving professional results on uneven surfaces, but knowing when to use it makes all the difference. Whether you are a homeowner tackling a DIY project or a property developer seeking flawless finishes, understanding this gypsum-based undercoat plaster will help you make informed decisions for your walls and ceilings. In this comprehensive guide, we explore what browning plaster is, its technical properties, when to use it, and how it compares to other plastering materials. TL;DR – Quick Summary Browning plaster is a gypsum-based undercoat for absorbent surfaces like brick and blockwork It sets in 12-26 minutes and provides excellent strength for uneven walls requiring substantial build-up Perfect for traditional brickwork but not suitable for low-suction surfaces (use bonding plaster instead) Always scratch-key the surface before applying finishing coats like multi-finish Store in dry conditions and use within 6-9 months for optimal performance What is browning plaster? The fundamentals explained Browning plaster is a specialist gypsum-based undercoat plaster designed specifically for use on absorbent surfaces throughout residential and commercial buildings. It serves as the essential foundation layer that creates a level base for subsequent finishing coats. As one of the most widely used backing plasters in the UK construction industry, browning provides the structural integrity needed for long-lasting wall and ceiling finishes. The primary function of browning plaster is to build up thickness on uneven surfaces, filling hollows and creating a flat substrate. This makes it indispensable for renovation projects where walls have deteriorated or when working with traditional building materials. Professional plasterers rely on browning to transform rough brickwork or blockwork into smooth, ready-to-finish surfaces. The composition and appearance of browning plaster Browning plaster is manufactured from hemihydrate gypsum, a specially processed form of calcium sulphate that provides excellent working properties and strength. When you open a bag of browning, you’ll immediately recognise its distinctive beige or light grey appearance, which differs noticeably from the whiter finishing plasters. This natural colour comes from the gypsum minerals and manufacturing process used to create this versatile material. The texture of browning plaster is slightly coarser than finishing plasters, which contributes to its superior bonding characteristics on absorbent surfaces. This composition allows it to grip effectively to porous materials like brick, concrete block, and lightweight aggregate blocks. The material is supplied as a dry powder that transforms into a workable paste when mixed with the correct water ratio. Technical specifications and properties Understanding the technical properties of browning plaster is crucial for achieving professional results. The recommended plaster-to-water ratio is 1.25 kg per litre, which creates the optimal consistency for application. Getting this ratio right ensures the plaster adheres properly and achieves its full strength potential. The initial setting time is approximately 12 minutes (±3 minutes), giving plasterers a workable window to apply and smooth the material. Final setting occurs at around 26 minutes (±6 minutes), after which the plaster begins developing its characteristic hardness. These relatively quick setting times mean that work must proceed efficiently, particularly on larger areas. When fully cured and dry, browning plaster achieves a flexural strength of approximately 40 kg/cm². This impressive strength makes it ideal for supporting finishing coats and provides excellent durability for high-traffic areas. The cured plaster creates a solid, stable substrate that won’t crack or delaminate when properly applied. How browning plaster fits into the plaster system In traditional plastering systems, browning plaster forms the ‘brown coat’ or backing layer that sits beneath white finishing plasters. This two-coat system has been the standard in British construction for generations, providing both structural integrity and aesthetic appeal. The brown coat handles the heavy lifting—building thickness and creating level surfaces—whilst the finish coat provides the smooth, decorative surface. Browning plaster adheres directly to absorbent substrates like brickwork, blockwork, lath, or tiles. Once applied and scratched to create a key, it accepts top coats such as multi-finish plaster or other finishing materials. This keying process is absolutely essential, as it creates the mechanical bond that prevents finishing coats from delaminating. In older buildings, particularly those constructed before the 1980s, browning plaster may contain low levels of asbestos (typically less than 1%). Whilst these levels are generally considered safe when undisturbed, it’s important to take appropriate precautions when removing or disturbing old plaster in period properties throughout Kent and the Southeast. When should you use browning plaster? Understanding the right applications Selecting the appropriate plaster type for your project is fundamental to achieving professional, long-lasting results. Browning plaster excels in specific applications where its unique properties deliver superior performance. Understanding these ideal use cases will help you determine whether browning is the right choice for your walls and ceilings. Ideal surfaces for browning plaster application Browning plaster performs best on absorbent or high-suction surfaces that can draw moisture from the plaster mix. Traditional brickwork is the classic application, where the porous nature of clay bricks provides excellent mechanical bonding. The plaster penetrates slightly into the brick surface, creating a robust connection that stands the test of time. Concrete blocks and lightweight aggregate blocks are equally suitable substrates for browning plaster. These materials have sufficient porosity to accept browning whilst providing a stable base. For homeowners in Bromley and Kent renovating older properties with solid brick walls, browning plaster is typically the correct undercoat choice. The material also works effectively on expanded metal lath in ceiling applications or when creating curved surfaces. In these scenarios, the browning coat builds up the necessary thickness before finishing plasters create the final smooth surface. However, always ensure the substrate is structurally sound and free from contaminants before application. Traditional rendering and construction uses Browning plaster is ideal for traditional manual rendering applications where craftsmen need a workable material that provides adequate open time. It’s commonly specified for brick and block laying projects where internal wall finishes require a solid backing coat. The material’s compatibility with traditional building methods makes it a favourite among conservation specialists and heritage property restoration experts. Many plasterers mix browning plaster with hydrated lime

What is browning plaster and when should you use it? Read More »

professional rendering garden wall technique

How to Render a Garden Wall Like a Pro

Transform your outdoor space with our expert-approved techniques on how to render a garden wall – discover the secrets that professional plasterers don’t want you to know. Understanding Garden Wall Rendering: A Professional’s Perspective Rendering a garden wall is more than just applying a coat of mortar – it’s an art that requires precision, expertise, and understanding of materials. At Kent Plasterers, we’ve seen countless DIY attempts that have resulted in costly repairs. A properly rendered wall not only enhances your property’s aesthetic appeal but also provides essential protection against British weather conditions. Recent studies show that well-rendered walls can increase property value by up to 15% and provide protection for up to 25 years when done correctly. The key to successful rendering lies in understanding that each wall presents unique challenges. Factors such as wall composition, previous treatments, and local weather conditions all play crucial roles in determining the approach needed. Common mistakes we encounter include incorrect mix ratios, poor surface preparation, and unsuitable weather conditions during application – all of which can lead to cracking, delamination, and ultimate failure of the render. Essential Preparation: Setting Your Project Up for Success Before beginning any rendering project, proper preparation is crucial. Our experience shows that over 60% of rendering failures stem from inadequate preparation. Start by assessing your wall’s condition thoroughly. Look for structural issues, damp problems, or existing render damage. Essential tools needed: Hammer and chisel for removal of old render Wire brush for cleaning Spirit level and straight edge Plasterer’s trowel and hawk Scarifier Float and sponge Protective equipment (goggles, gloves, dust mask) Safety considerations: Ensure stable working platform Check weather forecast – avoid extreme temperatures Protect surrounding areas with dust sheets Wear appropriate PPE Surface Preparation Masterclass Proper surface preparation is absolutely critical for achieving a professional finish. Start by removing all loose or damaged render using a hammer and chisel. Studies show that 90% of render adhesion problems relate to poor surface preparation. Clean the entire wall surface thoroughly with a wire brush to remove any dust, dirt, or organic growth. For older walls, apply a fungicidal wash to eliminate any remaining organic matter and allow to dry completely. Fill any significant cracks or holes with a suitable repair mortar, ensuring they’re level with the surrounding surface. If the wall is particularly smooth or dense, consider applying a bonding agent or creating a mechanical key by scoring the surface. Mixing and Application Techniques The perfect render mix is crucial for achieving professional results. For traditional sand and cement render, use a 6:1:1 ratio (sharp sand:cement:lime) for the first coat and 7:1:1 for the finishing coat. Adding lime improves workability and reduces cracking by up to 40%. When using commercial products like K-rend, always follow manufacturer specifications precisely. Perfect mix indicators: Consistency should be like thick cream Material should hold on hawk without slumping Should spread easily without being too wet No lumps or dry spots in mix First Coat Application: Building the Foundation The first coat, known as the scratch coat, provides the foundation for your entire render system. Apply at a consistent 5mm thickness using a trowel at a 45-degree angle. Work in methodical vertical strips, ensuring each section overlaps slightly with the previous one while still wet. Research indicates that maintaining consistent thickness can improve overall durability by up to 30%. Once applied, use a scarifier to create horizontal lines across the entire surface. This roughened texture is crucial for proper adhesion of the second coat. Allow this first coat to cure for at least 24 hours, longer in cold or damp conditions. Achieving the Perfect Finish: Top Coat Secrets The top coat determines the final appearance of your rendered wall. Apply at a thickness of 5-7mm, using clean tools and consistent pressure. Work systematically from bottom to top in vertical strips roughly one metre wide. Use a straight edge to rule the surface flat, checking regularly with a spirit level. Professional finishing techniques: Float the surface when partially set to close any holes Use circular motions with a plastic float for texture Apply light pressure with a damp sponge for smooth finish Keep tools clean throughout the process Professional Tips for Flawless Results Success lies in the details. Maintain a ‘wet edge’ while working to prevent visible joints between sections. Professional studies show that proper timing during application can reduce surface defects by up to 75%. Keep tools clean and check weather conditions regularly – ideal temperature range is between 5°C and 25°C. Common Challenges and Solutions Even experienced plasterers encounter challenges. Here are solutions to common problems: Cracking: Usually caused by rapid drying – cure gradually and protect from direct sunlight Delamination: Results from poor bonding – ensure thorough surface preparation Patchy finish: Typically due to inconsistent mixing – maintain strict mix ratios Weather damage: Protect fresh render from rain and frost for at least 24 hours Final Steps and Maintenance Proper curing is essential for long-lasting results. Protect newly rendered walls from adverse weather conditions for at least 48 hours. In dry conditions, mist the surface lightly with water to prevent rapid drying. Regular maintenance, including annual inspections and prompt repairs of any damage, can extend the life of your render significantly. Well-maintained render can last up to 30 years, making it a worthwhile investment for any property owner. FAQ Can you buy ready made render? We stock a variety of premixed render or ready-mix render, whether you’re after an internal or external render mix to finish your projects. What is the cheapest garden wall option? Poured concrete is the cheapest type of retaining wall, in terms of materials. Pressure-treated pine is next, and wood retaining walls are becoming more popular now. If you prefer stone, granite is generally the least expensive option. What is the easiest render to apply? Silicone Render Silicone render is what the experts call a “self-cleaning” option – the mixture is designed to keep the wall dry, which means less moisture and fewer algae. Also,

How to Render a Garden Wall Like a Pro Read More »

plasterer sanding fresh wall surface

Can You Sand Plaster? Grit, Tools and How to Do It Right

Yes, you can sand plaster, but only lightly and only once it is completely dry. Use 120 to 150 grit sandpaper to take off nibs and trowel marks, then a fine 180 grit pass before painting. A well-applied skim coat should barely need sanding at all. If you are grinding away at the wall, the problem is the plastering, not the sandpaper. Key facts Best grit for plaster: 120 to 150 for nibs and trowel marks, 180 for the final pass before paint Only sand plaster once it is fully dry, a uniform pale pink with no dark patches (typically 5 to 7 days for a skim coat) Always wear an FFP3 dust mask, gypsum dust irritates the lungs, eyes and skin Sand by hand or with a pole sander; use an electric sander only with dust extraction and a light touch A good skim coat needs almost no sanding, just a quick de-nib When should you sand plaster? Sanding plaster is a light finishing job, not a way to flatten a bad wall. Whether you are working with newly applied plaster or tidying an older surface, the aim is to remove the small nibs, splashes and trowel lines that would otherwise show through paint. Sand plaster: After it has completely dried, typically 5 to 7 days for a standard skim coat. If you are on a deadline, there are safe ways to dry plaster quicker Before painting or wallpapering To remove minor nibs, splashes and ridges left by the trowel To blend the edges of patch repairs into the surrounding wall Before applying finishing coats or decorative treatments that need a dead-flat base Which plasters can you sand? Modern gypsum plasters, including Thistle Multi-Finish and similar finishing plasters, sand easily once dry. They are soft compared with cement render, which is exactly why a light touch matters. Lime plaster in older and heritage properties is a different job. It is softer, often slightly uneven by design, and aggressive sanding ruins the character and can pull the surface away from the backing. Get advice before sanding lime plaster in a period property. What grit sandpaper do you need for plaster? Stay in the 120 to 180 range for almost all plaster sanding. Coarser paper cuts through a skim coat in seconds and leaves scratches that show through paint. Grit Use on plaster 80 to 100 Rough backing coat repairs and heavy filler only, never a finished skim 120 to 150 Removing nibs, splashes and trowel marks from dry skim 180 Final light pass before the mist coat 240 Polishing small filler repairs so they disappear under paint Tools and materials Hand sanding block for walls at arm height Pole sander for ceilings and full walls, it spreads the pressure and keeps the pass even Folded sheets of 120 grit for internal corners and around sockets Random orbital sander with dust extraction for filler and rough patches only Dust sheets, and a vacuum with a HEPA filter for the cleanup Can you sand plaster with an electric sander? You can, but be careful. A random orbital sander with dust extraction is fine on filler repairs and rough backing patches. Fit 150 grit or finer, set the lowest speed, keep the sander moving and use almost no pressure. On a fresh skim coat we would not bother. Skim is only 2 to 3mm thick and an orbital sander can cut through to the plasterboard before you notice. A quick hand sand with 120 to 150 grit does everything a skim needs. Keep power sanders away from edges, external corners and anywhere near beading, where the plaster is at its thinnest. Those spots are quicker and safer done by hand. How do you smooth rough plaster? Sanding alone will not rescue a genuinely rough wall. Match the fix to the problem: Nibs, splashes and light trowel marks: sand by hand with 120 to 150 grit Hollows, gouges and scratches: fill with a fine surface filler, let it dry fully, then sand flush with 180 to 240 grit Widespread ridges or a rippled finish: the wall needs re-skimming, not sanding. Sanding a badly finished skim just creates hollows and scratch marks in a different pattern Work in sections about a metre square and check as you go with a lamp held at a shallow angle to the wall. Raking light shows every ridge and hollow that overhead light hides. Mark defects with a pencil, never a biro or marker, which bleed through paint. If you scratch or gouge the surface while sanding, do not panic. Fill the damage with fine surface filler and sand it flush once dry. Should you sand new plaster before painting? Lightly, yes. Once new plaster is fully dry, give it a quick once-over with 180 grit to de-nib, vacuum the dust off, then wipe down with a barely damp cloth and let it dry. Then prime it properly. New plaster needs a mist coat of watered-down emulsion to seal the surface before the top coats go on, and it is worth choosing the right paint for new plaster from the start. Painting over unsanded nibs locks them in, and every coat afterwards makes them more visible. How do you control the dust? Sanding plaster produces fine gypsum dust, and anyone breathing in the dust cloud is affected, not just the person sanding. Before you start: Wear an FFP3 dust mask, safety glasses and gloves Sheet up the floor and any furniture you cannot move Open the windows and close the door to the rest of the house Use a sander with dust extraction wherever possible Vacuum with a HEPA filter rather than sweeping, sweeping just puts the dust back in the air After sanding, vacuum the walls themselves, wipe them with a slightly damp cloth and let them dry completely before any paint goes on. When should you call a professional? If a wall needs more than a light de-nib, sanding is the wrong tool. Re-skimming a room

Can You Sand Plaster? Grit, Tools and How to Do It Right Read More »

historic lath plaster wall restoration

Lath and Plaster Walls: Restoring Period Charm

Discover how traditional lath and plaster walls can transform your period property into a masterpiece of authentic craftsmanship. Understanding Lath and Plaster: A Historic Building Method Lath and plaster construction has been a cornerstone of British architecture since the 18th century, reaching its peak popularity in the mid-20th century. This time-tested technique involves creating walls and ceilings using wooden strips (laths) covered with multiple layers of plaster. Recent studies show that over 65% of pre-1919 buildings in the UK feature lath and plaster walls, making it a crucial element of our architectural heritage. The method gained prominence during the Georgian and Victorian eras, when rapid urban expansion demanded efficient, durable interior wall solutions. Its superior soundproofing qualities and ability to regulate humidity made it the preferred choice for prestigious buildings, many of which still stand today as testament to its longevity. The Anatomy of Lath and Plaster Walls The construction of lath and plaster walls follows a precise methodology that has remained largely unchanged for centuries. At its core, the system comprises wooden laths, typically measuring 25mm x 6mm, nailed horizontally to wall studs with carefully maintained 6mm gaps between them. These gaps are crucial as they allow the first layer of plaster to form ‘keys’ that lock the material in place. First Layer (Render): A coarse mixture of lime or gypsum plaster that pushes through the lath gaps to form keys Second Layer (Floating): A smoother coat that levels the surface and provides strength Final Layer (Setting): A fine finish coat that creates the smooth, decorative surface Traditional Reinforcement: Horsehair often incorporated into the base coat for added strength Why Choose Lath and Plaster for Your Period Property? Modern research has revealed that traditional lime plaster walls offer remarkable benefits that modern alternatives struggle to match. Studies indicate that properly maintained lath and plaster walls can last over 100 years, significantly outlasting modern plasterboard. The system provides superior sound insulation, with tests showing up to 5dB better performance compared to standard drywall. Additionally, the natural materials used create a breathable wall structure that helps regulate indoor humidity levels, contributing to healthier living spaces. Common Issues with Historic Lath and Plaster Structural Movement: Settlement cracks and separation from the lath backing Moisture Damage: Water infiltration leading to plaster deterioration and mould growth Impact Damage: Areas weakened by furniture movement or general wear Failed Previous Repairs: Incompatible modern materials causing further deterioration Recent surveys indicate that approximately 40% of period properties in the UK show some form of lath and plaster deterioration, with water damage being the primary culprit in 65% of cases. Professional Restoration Techniques Successful restoration of lath and plaster requires a careful blend of traditional craftsmanship and modern understanding. The process begins with a thorough assessment of the existing structure, identifying areas of weakness and determining the extent of necessary repairs. Professional plasterers typically spend 30% of project time on preparation alone, ensuring the best possible outcome. Surface Preparation: Careful removal of loose material while preserving sound areas Material Selection: Use of compatible lime-based plasters for historic properties Application Methods: Traditional three-coat system with proper curing time between layers Modern Adaptations: Integration of contemporary reinforcement methods where appropriate Maintaining Your Lath and Plaster Walls Regular maintenance is crucial for preserving lath and plaster walls. Experts recommend bi-annual inspections to catch potential issues early. Key maintenance practices include monitoring for signs of water ingress, addressing minor cracks promptly, and maintaining proper ventilation to prevent moisture buildup. Property owners should also be mindful of mounting heavy items, using appropriate fixings that distribute weight effectively. Making the Decision: Restore or Replace? The decision between restoration and replacement requires careful consideration of various factors. Recent data shows that proper restoration can cost 25-40% less than full replacement while preserving historical value. Consider these key points: Heritage Value: Listed buildings may require conservation of original features Cost Analysis: Long-term durability versus initial investment Property Value: Original features can increase property value by up to 20% Environmental Impact: Restoration typically has a lower carbon footprint Expert Tips for Success When undertaking a lath and plaster project, success lies in thorough planning and expert execution. Industry statistics show that 80% of successful restorations involve early consultation with conservation specialists. Here are essential considerations: Research local conservation guidelines and obtain necessary permissions Choose craftsmen with specific experience in historic plasterwork Allow adequate time for proper drying between coats (typically 2-3 days per layer) Document all work for future reference and maintenance Conclusion: Preserving History Through Skilled Craftsmanship The preservation of lath and plaster walls represents more than just maintaining a building element; it’s about protecting our architectural heritage for future generations. With proper care and professional expertise, these traditional features can continue to provide superior performance while maintaining the authentic character of period properties. As we’ve explored, the combination of historical techniques with modern understanding offers the best approach to ensuring these valuable architectural elements endure for centuries to come. FAQ Is lath and plaster hazardous? While these walls were popular in older homes, their construction materials could contain asbestos, posing health risks if disturbed. Identifying asbestos in lath and plaster walls demands careful inspection and professional assistance, due to the health hazards associated with asbestos exposure. Did lath and plaster contain asbestos? “Lath and plaster asbestos” is an older method in which plaster was applied directly to a wood or metal frame, called a “lath.” Many homeowners with homes built before the mid-1980s wonder if lath and plaster is dangerous, but they should know that both methods could have used asbestos in plaster. What is the problem with lath and plaster? While rigid and strong for internal walls, plaster can also be brittle and may crack at its weakest points if exposed to vibration or water ingress. If this is allowed to spread across a ceiling in large enough sections, it may sag under the weight and even collapse if the damage is great. Sources [1] https://en.wikipedia.org/wiki/Lath_and_plaster [2] https://www.thespruce.com/plaster-and-lath-came-before-drywall-1822861 [3] https://www.youtube.com/watch?v=03FpvpwAa3c

Lath and Plaster Walls: Restoring Period Charm Read More »

La Cartuja stadium renovation aerial

La Cartuja Stadium Renovation: Architectural Guide

Witness the breathtaking transformation of Seville’s La Cartuja stadium renovation, where modern engineering meets timeless Spanish grandeur. From Athletic Arena to Football Paradise: The Vision Behind La Cartuja’s Transformation The La Cartuja Stadium in Seville is undergoing a remarkable metamorphosis through an ambitious €15 million renovation project that’s set to redefine Spain’s sporting landscape. This comprehensive overhaul marks a pivotal shift from its original design as a multi-purpose athletic venue to a dedicated football cathedral. The vision behind this transformation stems from Spain’s growing ambition to host major international football events and the need to modernise its sporting infrastructure. The stadium’s strategic location in Seville, combined with its historical significance, made it the perfect candidate for this revolutionary upgrade. The Technical Marvel: Engineering Excellence Meets Architectural Beauty Track Removal: Complete elimination of the athletics track, bringing fans closer to the action Pitch Modification: Lowering of the playing surface to optimise viewing angles Capacity Expansion: Increase from 57,000 to over 70,000 seats Structural Enhancements: Reinforcement of existing framework to support new configurations Sightline Improvements: Reconfigured seating arrangements for optimal viewing experience A New Era of Fan Experience The renovation has ushered in a revolutionary approach to spectator comfort and engagement. Every seat in the house now benefits from full coverage, protecting fans from Seville’s intense climate while creating an atmospheric cauldron of sound. The new acoustic design ensures that crowd noise reverberates throughout the stadium, creating an immersive experience that rivals Europe’s most renowned venues. State-of-the-art LED lighting systems and enhanced digital displays complement the atmospheric improvements, ensuring that every moment is captured in crystal-clear clarity. Beyond Football: La Cartuja’s Versatility While football remains the primary focus, the renovated La Cartuja demonstrates remarkable versatility. For concerts and cultural events, the venue can accommodate up to 75,000 spectators, making it one of Spain’s premier entertainment destinations. The modular design allows for quick transitions between different event configurations, while advanced sound systems and lighting rigs ensure world-class production values for any occasion. The Road to 2030: World Cup Aspirations FIFA Standards Compliance: All modifications align with international tournament requirements Infrastructure Readiness: Enhanced transport links and access points Technology Integration: Latest broadcast and communication systems Sustainability Features: Energy-efficient systems and environmental considerations Security Upgrades: State-of-the-art surveillance and crowd management systems Future Horizons: Phase Two and Beyond The ambitious vision for La Cartuja extends beyond the current renovation. A second phase, budgeted at €100 million, is already in planning stages with completion targeted for 2028. This next stage will focus on comprehensive upgrades to the roof structure, modernising the facade, enhancing interior spaces, and implementing cutting-edge seating solutions. These improvements will further cement La Cartuja’s position as one of Europe’s premier sporting venues. Impact on Local Football Culture The stadium’s renovation has far-reaching implications for Seville’s footballing community. Serving as a temporary home for local clubs during their own stadium renovations, La Cartuja maintains the city’s rich football tradition while facilitating progress. This arrangement ensures continuous access to top-flight football for supporters while providing clubs with a world-class facility during their transition periods. Engineering Excellence: The Team Behind the Transformation Lead Architects: Cruz y Ortiz Arquitectos – renowned for their innovative sports venue designs Construction Partners: Heliopol – experts in large-scale infrastructure projects Project Timeline: July 2024 – April 2025 Key Innovations: Integration of sustainable materials and smart technology Quality Assurance: Rigorous testing and certification processes Conclusion: A New Chapter in Spanish Football History The La Cartuja stadium renovation represents more than just a construction project; it’s a symbol of Spain’s commitment to footballing excellence and architectural innovation. As the venue prepares to host the Copa del Rey final and positions itself for the 2030 World Cup bid, it stands as a testament to the nation’s ability to blend traditional sporting culture with modern amenities. This transformation ensures that La Cartuja will continue to play a pivotal role in Spanish football’s future while setting new standards for stadium design and fan experience across Europe. FAQ Did Seville host the Olympics? Seville ultimately failed to host the Olympic Games (including the 2008 Games, for which the city also applied), but in the summer of 1999 the stadium hosted the Spanish Athletics Championships and the World Athletics Championships. Why is La Cartuja famous? The Cartuja Monastery is one of the most representative works of Spanish Baroque. The ornate decoration of its chapels, outbuildings, and the large church it houses make it one of the must-see attractions in Granada. Which is the biggest stadium in Spain? Current stadiums Sources [1] https://www.thestadiumbusiness.com/2024/11/12/la-cartuja-stadium-ready-for-expansion-project-ahead-of-2030-world-cup/ [2] https://stadiumdb.com/news/2025/04/spain_la_cartuja_ready_for_copa_del_rey_final_what_does_future_hold_for_stadium [3] https://stadiumdb.com/constructions/esp/estadio_la_cartuja

La Cartuja Stadium Renovation: Architectural Guide Read More »