Problems & Repairs

How to Repair Cracked Plaster Walls: Step-by-Step Guide

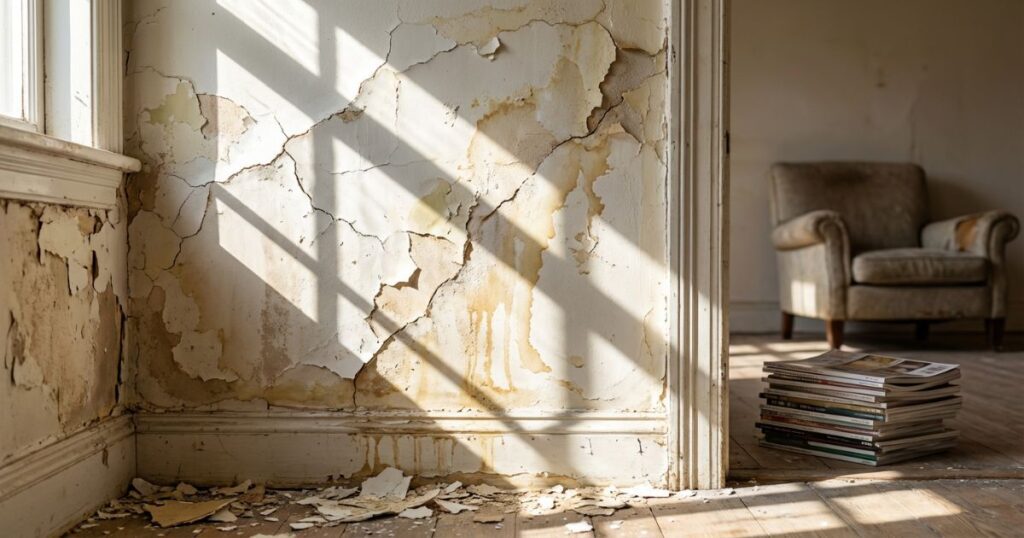
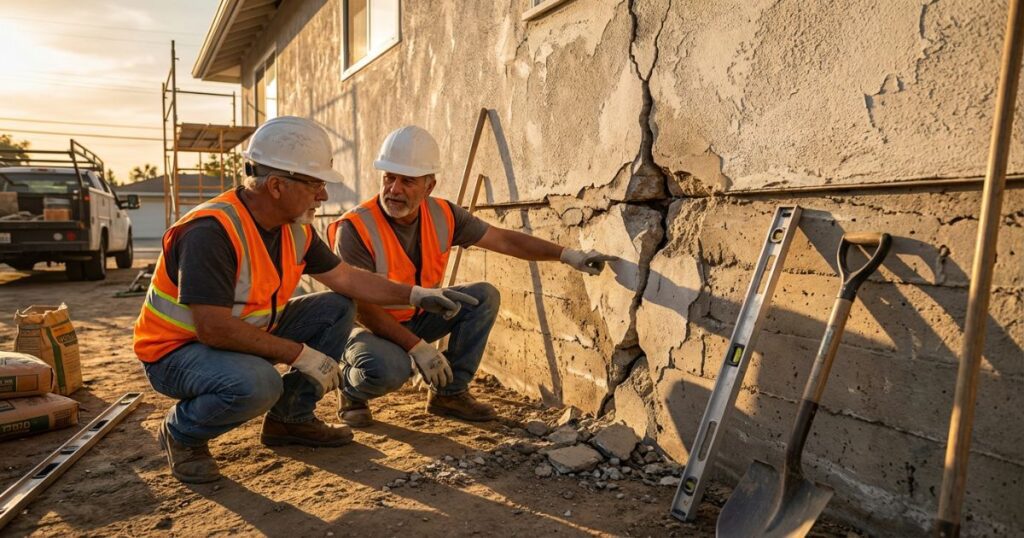
Quick Answer: Most cracked plaster walls can be repaired DIY using flexible filler for hairline cracks (under 2mm) or proper filling and replastering techniques for larger structural cracks (over 5mm). Small cosmetic cracks take 1-2 hours and cost £10-£30 in materials, whilst major crack repairs requiring replastering typically cost £200-£600 professionally. The key is identifying why the crack formed — settlement, moisture, or structural movement — before attempting repairs. Understanding Why Plaster Cracks Matter Cracked plaster walls are one of the most common issues we encounter as professional plasterers in Kent, and they’re rarely just a cosmetic problem. Whether you’re dealing with fine hairline cracks around door frames or worrying splits that seem to be getting wider, understanding what’s causing the damage is essential before you reach for any filler. The good news? Most plaster cracks are perfectly repairable, and many smaller ones are well within the capabilities of a competent DIY enthusiast. The challenge lies in distinguishing between harmless surface crazing and cracks that signal something more serious like subsidence or structural movement. This comprehensive guide will walk you through everything you need to know about repairing cracked plaster walls, from diagnosis through to professional finishing techniques. We’ll cover the tools you’ll need, the materials that actually work, and the step-by-step processes that deliver lasting results. Types of Plaster Cracks and What They Mean Not all cracks are created equal. Before you start any repair work, you need to identify what type of crack you’re dealing with and what’s causing it. Here’s what different crack patterns typically indicate: Crack Type Appearance Likely Cause Severity Hairline cracks Under 2mm wide, surface level Natural settlement, thermal movement, plaster shrinkage Low — cosmetic only Vertical cracks 2-5mm, running floor to ceiling Wall movement, drying out of new buildings, seasonal changes Low to medium Diagonal cracks Running from corners of doors/windows Lintel failure, settlement, structural movement Medium to high Horizontal cracks Running along walls, often mid-height Structural issues, ceiling joist movement, subsidence Medium to high Crazing/map cracking Multiple fine cracks in random pattern Plaster applied too quickly, poor suction control, overworking Low — surface issue Stepped cracks Following mortar joints in brickwork Serious subsidence or structural movement High — professional assessment needed ⚠️ Warning: Any crack wider than 5mm, cracks that are visibly getting wider, or multiple cracks appearing in a short timeframe should be assessed by a structural engineer before attempting cosmetic repairs. These may indicate serious foundation or structural issues that need professional attention. According to RICS guidance, cracks over 15mm can indicate severe structural damage requiring urgent professional intervention. When to DIY vs When to Call a Professional Knowing your limits is crucial when it comes to plaster crack repair. Here’s an honest assessment of what you can tackle yourself and when you need to bring in the professionals: Safe for DIY Repair: Hairline cracks under 2mm caused by natural settlement or minor thermal movement Cosmetic surface cracks in plasterwork that’s otherwise sound and stable Small areas of damaged plaster (under 1 square metre) where the backing is solid Cracks around door frames and windows that haven’t changed in 6+ months Map crazing or spider web patterns that are purely surface level Requires Professional Assessment: Any crack over 5mm wide or showing signs of active movement Stepped cracks following mortar joints in the brickwork beneath Cracks accompanied by damp patches, which may indicate water ingress issues (see our damp proofing guide for more information) Bulging or bowing walls where plaster has separated from the substrate Multiple new cracks appearing over a short period (3-6 months) Cracks in newly built properties under warranty — document and report to your builder If you’re unsure about the severity of cracking, it’s worth monitoring it for 3-6 months using tell-tales — small strips of glass or plaster fixed across the crack with reference marks and dates. If the tell-tale breaks, your crack is still moving and needs professional investigation before repair. Essential Tools and Materials for Crack Repair Having the right tools and materials makes all the difference between a repair that lasts and one that fails within months. Here’s what you’ll need based on the type of repair you’re undertaking: For Hairline Crack Repair (Under 2mm): Flexible crack filler — Polyfilla Fine Surface Filler or Toupret Interior Filler (£6-£10 per tub) Filling knife — 75mm and 150mm widths (£8-£15 from Screwfix) Fine sandpaper — 120 grit and 180 grit (£3-£5) Paintbrush for dusting and applying mist coat Decorator’s sponge for smoothing and blending Mist coat paint — white emulsion diluted 70/30 with water For Larger Cracks (2-5mm): Crack rake or scraper to widen and clean the crack (£5-£8) Scrim tape or fibreglass mesh (£4-£7 per roll from Wickes) Bonding plaster or filler — Gyproc EasiFill or similar (£8-£15 per bag) Filling knives — multiple sizes from 75mm to 200mm PVA solution for sealing (diluted 3:1 with water) Finishing plaster — Thistle Multi-Finish for final skim (£9-£12 per 25kg bag) Plasterer’s hawk and trowel for final finishing (£15-£35) For Major Replastering Work: Everything from the above lists, plus: Float and devil float for keying backing coats (£12-£20) Mixing paddle and drill for consistent plaster mixing (£15-£40) Bucket and water supply — clean water is essential Dust sheets and masking tape for protection Spirit level and straight edge to check flatness Pro Tip: Always buy slightly more material than you think you’ll need. A 25kg bag of finishing plaster covers roughly 10-12 square metres at 3mm thickness, but having extra on hand prevents mid-job trips to the builders’ merchants and allows for inevitable wastage. Unopened bags of multi-finish can last 3-4 months if stored properly in a dry location. Step-by-Step: Repairing Hairline Cracks Hairline cracks are the most common type we see, and fortunately they’re also the easiest to repair effectively. Here’s the professional method that delivers invisible, long-lasting results: Step 1: Clean and Prepare the Crack Use a dry paintbrush to remove all loose dust and debris from the crack. Don’t skip this

How to Repair Cracked Plaster Walls: Step-by-Step Guide Read More »

Common Plastering Problems and How to Fix Them

Quick Answer: Most plastering problems stem from poor preparation, incorrect mixing ratios, or rushing the drying process. The most common issues include cracking (caused by rapid drying, structural movement, or inadequate keying), delamination (poor suction control or contaminated backgrounds), bubbling (trapped air or moisture), and staining (water ingress or soluble salts). While minor surface cracks and small patches are DIY-friendly, extensive cracking, structural issues, or damp-related problems require professional assessment. Proper diagnosis is essential — treating symptoms without addressing the root cause will lead to recurring failures. Understanding Why Plastering Problems Occur After thirty years in the trade, I can tell you that most plastering defects aren’t random — they follow predictable patterns. The majority of problems I encounter on remedial jobs could have been prevented with proper preparation, correct material selection, and adequate drying time. Plastering is a system, not just slapping gypsum on a wall. Every component matters: the background substrate, the bonding agent, the plaster mix, ambient conditions, and the finishing technique. When one element fails, the entire system can break down. Understanding the root cause of plastering problems is crucial because treating symptoms without fixing the underlying issue leads to recurring defects. A crack filled with decorator’s caulk will reappear if structural movement continues. Stains will bleed through fresh paint if the moisture source isn’t eliminated. The Most Common Plastering Problems Based on thousands of remedial jobs across Kent, these are the defects I encounter most frequently: Cracking — from hairline surface crazing to structural cracks several millimetres wide Delamination — plaster losing adhesion and hollowing from the substrate Bubbling and blistering — trapped air or moisture creating raised areas Staining and discolouration — brown patches, efflorescence, or yellow marks bleeding through Poor finish quality — uneven surfaces, trowel marks, ridges, or excessive porosity Slow drying or persistent dampness — walls remaining soft or dark weeks after plastering Crumbling or powdery surfaces — weak plaster that dusts off or won’t take paint Let’s examine each problem in detail, diagnose the causes, and provide professional-grade solutions that actually work. Cracking: Types, Causes, and Solutions Not all cracks are created equal. The pattern, width, and location tell an experienced plasterer exactly what’s gone wrong. According to BRE (Building Research Establishment) guidance, cracks wider than 2mm indicate potential structural issues requiring investigation before cosmetic repairs. Map Cracking (Crazing) These fine surface cracks create a random network pattern resembling a road map. They’re typically shallow — less than 1mm deep — and purely cosmetic. Common causes: Excessive trowelling or over-working the surface during finishing Too-rapid drying due to hot weather, direct sunlight, or forced heating Incorrect water content in the final mix (too wet or too dry) Applying finishing plaster over an excessively porous background without proper suction control Using expired or contaminated plaster (British Gypsum products have a 4-month shelf life from manufacture) Professional fix: For minor crazing on multi-finish or board finish, a light mist-coat with diluted PVA (1:5 ratio) followed by a thin skim of fresh plaster will fill the network. For deeper crazing, scrape out loose material, apply a bonding agent, and patch with finishing plaster matched to the existing surface. Pro Tip: Never apply heat to accelerate drying in the first 48 hours. British Gypsum recommends maintaining temperatures between 13-18°C with good ventilation. Use a dehumidifier if conditions are humid, but avoid direct heat sources like fan heaters pointed at fresh plaster. Settlement Cracks These are straight or diagonal cracks, typically running from ceiling corners or around door frames. They indicate structural movement in the building fabric. Common causes: New build settlement (normal in properties under 12 months old) Foundation subsidence or heave due to clay soil movement Thermal expansion and contraction (especially in buildings with inadequate expansion joints) Lintel deflection above openings Removal of load-bearing walls without proper support ⚠️ Warning: Settlement cracks wider than 5mm, horizontal cracks in walls, or cracks that continue to widen require immediate structural engineer assessment. Don’t plaster over potentially dangerous structural defects. Building Regulations Part A (Structure) must be satisfied before cosmetic repairs. Professional fix: Monitor cracks for 6-12 months using tell-tales (glass or plastic markers). If movement has ceased, rake out cracks to 10mm depth, fill with a flexible filler like Everbuild StixAll or CT1, then apply scrim tape before skim coating. For active cracks, flexible crack bridging systems are necessary. For further guidance on structural concerns, our article on why plaster cracks and prevention methods covers this in depth. Shrinkage Cracks These appear as the plaster cures, typically within 24-72 hours. They often run along joints between plasterboards or where different materials meet. Common causes: Excessively thick coats (over 15mm in one application) High-suction backgrounds not adequately controlled Rapid moisture loss during curing Missing or improperly installed scrim tape at board joints Incompatible backing materials with different expansion coefficients Professional fix: Prevention is key. Apply proper scrim tape to all plasterboard joints before the first coat. For remedial work, cut out the crack in a V-shape, apply scrim, and fill with easy-fill compound (Gyproc EasiFill is excellent for this). Two thin coats are always better than one thick application. Delamination and Hollow Plaster Delamination occurs when plaster loses adhesion to the background substrate. You’ll hear a hollow sound when tapping affected areas — a dead giveaway that the plaster’s about to fail catastrophically. Primary causes: Poor suction control — plastering onto bone-dry backgrounds or non-absorbent surfaces without proper preparation Contaminated substrates — dust, paint, wallpaper paste, or grease preventing mechanical key Wrong backing coat — using finishing plaster on unsuitable backgrounds (it needs undercoat plaster or bonding first) Frozen plaster — mixing or applying below 5°C causes crystals to form, destroying bond strength Movement differential — new plaster applied over incompatible materials (timber to masonry transitions without proper detailing) Background Type Preparation Required Bonding Agent Painted walls Remove loose paint, score surface, wash down Blue Grit or Thistle Bond-It Engineering bricks Hose down to saturate Thistle Bond-It neat coat Plasterboard (grey side) Check all fixings,

Common Plastering Problems and How to Fix Them Read More »

Why Renovation Projects Fail: Plasterer’s Guide

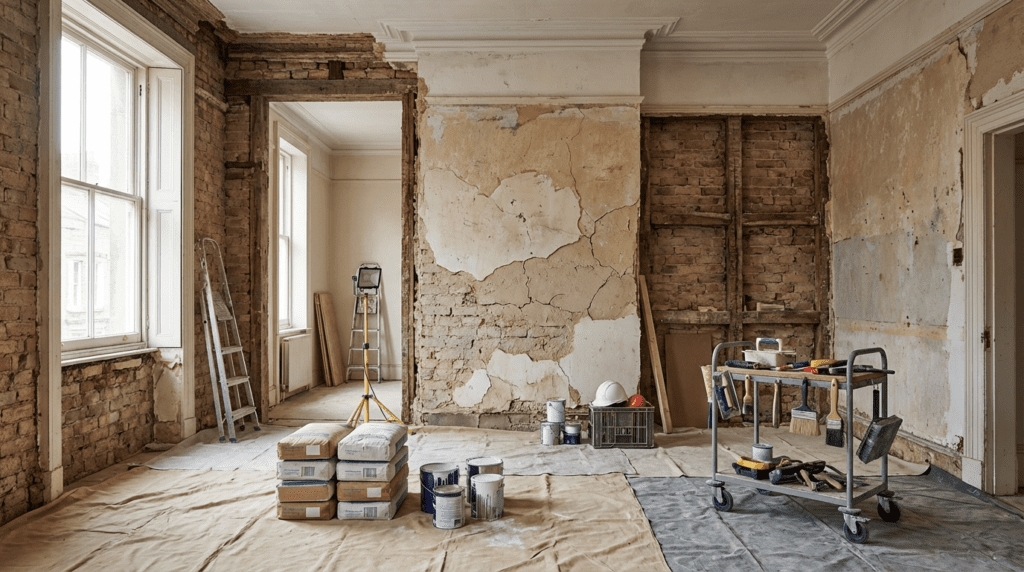
Quick Answer: Renovation projects fail primarily due to inadequate initial surveys, unforeseen hidden conditions, and poor coordination in occupied buildings. Protect your plastering business by conducting thorough site surveys, using clear contract terms, building appropriate contingencies into pricing, and maintaining professional communication throughout the project lifecycle. Renovation and refurbishment projects represent a significant portion of work for many plastering businesses. Whether it is updating tired residential interiors, refreshing commercial spaces, or restoring period properties, renovation work offers steady opportunities. However, these projects also carry unique risks that can transform promising jobs into money losing nightmares. Understanding why renovation projects go wrong and how to protect your business requires looking beyond plastering technicalities to the broader planning and coordination that determines project success or failure. The fundamental challenge with renovation work is uncertainty. Unlike new build projects where everything is specified from scratch, renovations involve working with existing buildings that may contain surprises. Hidden damage, undocumented modifications, asbestos, structural issues, and services in unexpected locations all emerge once work begins. These discoveries force changes to plans, additional work beyond original scope, and delays whilst solutions are found. Even experienced contractors with thorough site surveys cannot eliminate all uncertainty from renovation projects. For plasterers, this uncertainty affects every aspect of job planning and execution. Walls that appeared sound may prove defective once old finishes are removed, requiring extensive repair before plastering. Ceilings may conceal structural issues or services that complicate planned work. Room dimensions taken during survey may prove inaccurate once work begins and precise measurements become possible. Budget and programme assumptions made during quotation may become unrealistic once actual conditions are revealed. Managing these risks requires both technical capability and business savvy. When Initial Surveys Miss Critical Information Most renovation problems stem from inadequate information when work is planned and priced. Site surveys conducted before quotation are often rushed, with limited opportunity to investigate hidden conditions. Clients may not allow destructive investigation that would reveal concealed issues, expecting contractors to quote based on what is visible. This creates a fundamental mismatch between the information needed for accurate quotation and what is actually available, forcing contractors to make assumptions that may prove incorrect. The temptation when facing this uncertainty is to quote low to win work, hoping that hidden problems will not materialise. This approach backfires when issues inevitably emerge, leaving contractors absorbing unexpected costs or facing difficult conversations about variations. Alternatively, adding large contingencies to cover potential problems makes quotes uncompetitive, potentially losing work to competitors willing to take more risk. Neither approach is satisfactory, yet the uncertainty inherent in renovations forces difficult choices. Better information before quoting reduces but cannot eliminate this uncertainty. More thorough surveys taking time to investigate properly identify more potential issues. Opening up sample areas to check concealed conditions provides valuable insight Reviewing building records reveals information not apparent from visual inspection Speaking to owners about building history uncovers undocumented modifications However, all this investigation takes time clients may be unwilling to allow or pay for before committing to projects. Convincing clients that investment in proper survey delivers value through more accurate pricing and fewer problems requires education about how inadequate information creates risks. Pro Tip: Invest in modern survey technology like laser measuring devices, thermal imaging cameras, and moisture meters. These tools provide accurate data quickly and help identify hidden issues that would otherwise emerge mid-project, protecting your margins and reputation. Modern survey technology offers tools that improve understanding of existing buildings: Laser measuring devices provide accurate dimensional data quickly Thermal imaging can reveal hidden moisture, missing insulation, or concealed structural elements Moisture meters identify damp issues not obvious visually These tools help plasterers understand site conditions more completely, supporting better quotations and reducing risk of unexpected discoveries. The investment in survey equipment pays for itself through more accurate job assessment and fewer costly surprises. The Coordination Nightmare in Occupied Buildings Renovations in occupied homes or operating businesses create coordination challenges absent in empty buildings or new construction. Work must proceed around occupants and their activities, with noise, dust, and disruption minimised. Access to work areas may be restricted to certain hours or days. Storage of materials and equipment must not interfere with building use. These constraints slow productivity and complicate logistics, affecting both programme and cost. Coordination between multiple trades becomes more complex when work must be sequenced carefully to maintain building functionality. Plasterers may need to complete rooms in stages so occupants can continue using the building. Services may need to remain operational whilst being modified, requiring temporary arrangements and careful sequencing of disconnection and reconnection. These coordination requirements are difficult to predict accurately during survey and quotation, creating risk of underestimating time and resource requirements. Design changes during renovation projects occur more frequently than in new build because occupants better understand their needs once seeing work progress and spaces transform. What seemed adequate during planning may appear insufficient once partially implemented, prompting requests for changes. Whilst these variations offer opportunities for additional revenue, they also disrupt planned workflows and require repricing and agreeing before proceeding. Managing variation processes professionally protects profit margins whilst maintaining client relationships. The involvement of professional designers and project managers varies enormously across renovation projects. High end residential and commercial renovations typically involve architects or designers who produce detailed specifications and coordinate trades. These projects, whilst demanding in terms of quality expectations, provide clear scope and professional coordination that helps work proceed smoothly. Smaller domestic renovations may have no professional input beyond the contractors themselves, requiring plasterers to provide guidance on finishes and coordinate their work with other trades informally. These projects carry different risks around scope definition and coordination. How Digital Planning Tools Change Renovation Outcomes Traditional renovation planning relied on measured surveys producing 2D drawings showing existing conditions and proposed changes. These drawings required skill to create and interpret, with spatial relationships and dimensions sometimes unclear. Understanding how proposed changes would look and function required mental visualisation from 2D representations, with scope for misunderstanding between

Why Renovation Projects Fail: Plasterer’s Guide Read More »

Comparison of damaged plastered wall with cracks and patches versus smooth freshly renovated white plasterwork in home interior

Should you patch up or renovate your plastered walls?

Quick Answer: Patch repairs work best for isolated damage affecting less than 10-15% of wall area with sound surrounding plaster, costing 70-80% less than full renovation. Full renovation is necessary when damage exceeds 30% of surfaces, persistent moisture issues exist, or widespread loss of adhesion occurs. The key deciding factors are extent of damage, underlying structural issues, and your long-term property plans. Deciding whether to patch up or renovate your plasterwork isn’t always straightforward—here’s expert guidance to help you make the right choice. When homeowners in Bromley and Kent face deteriorating plasterwork, the decision between a simple repair or full renovation can feel overwhelming. Every day, property owners across the region grapple with this dilemma, often uncertain whether a quick patch will suffice or if complete replastering is the only viable solution. The answer depends on several factors including the extent of damage, your budget, and your long-term plans for the space. Understanding the differences between patch repairs, restoration, and complete renovation will help you make an informed decision that protects your investment whilst ensuring your walls remain structurally sound and aesthetically pleasing. According to recent industry data, approximately 35% of homeowners who initially opt for patching eventually require full renovation within three years, highlighting the importance of making the right choice from the outset. This comprehensive guide will walk you through everything you need to know about whether to patch up or renovate your plastered walls, helping you avoid costly mistakes and achieve the flawless finish your Bromley or Kent property deserves. Understanding your plastering options: From repair to full renovation Before deciding whether to patch up or renovate, it’s essential to understand what each approach entails and when each method makes the most sense for your property. The terminology surrounding plasterwork can be confusing, with terms like repair, restore, renovate, revamp, remodel, and redecorate often used interchangeably despite representing distinctly different approaches. Each method serves a specific purpose and suits particular circumstances, and choosing the wrong approach can lead to wasted money, repeated work, and frustration. Let’s clarify exactly what each option means and explore the spectrum of solutions available for your plastered walls, from minimal intervention to complete transformation. What does it mean to patch up plastered walls? Patching up your walls is fundamentally about repair—a targeted approach that restores something broken to a like-new condition, often addressing only the specific issue without disturbing surrounding areas. This method involves fixing localised damage such as cracks, holes, small areas of blown plaster, or impact damage where the underlying structure remains sound. The process typically includes: Removing loose material from the damaged section Preparing the substrate Filling with appropriate plaster or filler Finishing to match the existing wall texture Professional plasterers in Kent use various plastering techniques including cutting back to sound plaster, applying bonding agents, building up layers gradually, and carefully feathering edges to create seamless repairs. Patch repairs are generally completed within hours rather than days, making them an attractive option for homeowners who need quick solutions. The skill lies in matching the repair to the existing finish—whether that’s smooth skim, textured, or decorative plaster—so the patched area becomes virtually invisible once painted. However, patching is only appropriate when the majority of your plasterwork remains in good condition, with damage confined to specific, isolated areas rather than widespread deterioration. Pro Tip: Before committing to patch repairs, tap gently around the damaged area with your knuckles. If the surrounding plaster sounds hollow or feels spongy, the damage may be more extensive than it appears, and full renovation might be more cost-effective in the long run. When does revamp make sense for your walls? The concept of revamping occupies the middle ground in the spectrum of plastering solutions. To revamp means to patch up or renovate by updating or modernising a space, item, or system to give it a fresh or improved appearance, often without changing its core structure. For plastered walls, this approach might involve: Skim coating over existing plaster that’s sound but tired-looking Applying decorative finishes to refresh dated walls Strategically updating specific sections whilst leaving others intact Revamping makes particular sense when your walls are structurally sound but aesthetically outdated, or when you’re undertaking broader room updates that require walls to look fresh without the expense and disruption of complete replastering. This approach has gained popularity in Bromley and Kent, particularly among homeowners renovating period properties where preserving original plaster substrate whilst updating the surface finish maintains architectural integrity whilst achieving contemporary aesthetics. The investment sits between simple patching and full renovation, typically costing 40-60% of complete replastering costs whilst delivering significantly improved appearance and extending the life of your plasterwork by another decade or more. What full renovation actually involves When we discuss renovation in plastering terms, we’re talking about a comprehensive approach where you fully replace or upgrade existing features with new and improved solutions. Complete wall renovation means stripping plaster back to the substrate—whether that’s brick, block, or lath—addressing any underlying issues with the structure, damp-proofing, or insulation, and applying entirely new plaster systems from scratch. This process is considerably more involved than patching or revamping, typically requiring several days for a standard room and involving significant preparation, mess, and temporary disruption to your home. The renovation process begins with: Protecting floors and furniture Carefully removing old plaster (which may require disposal as controlled waste if it contains hazardous materials) Inspecting and preparing the substrate Applying bonding or base coats Finishing with skim coats to achieve perfectly flat, smooth surfaces ready for decoration Modern plastering renovation in Kent properties often includes improvements like upgraded insulation boards, moisture-resistant backing systems, or acoustic treatments that weren’t part of the original construction. Full renovation becomes necessary when more than 30% of wall surfaces show damage, when underlying structural or moisture issues affect plaster integrity, or when you’re remodelling spaces and want to remodel by transforming the design and function with completely fresh surfaces. Whilst representing the largest investment in both time and money, renovation delivers

Should you patch up or renovate your plastered walls? Read More »

Professional close-up showing realistic plaster cracks on an interior wall

Why does plaster crack and how can you prevent it?

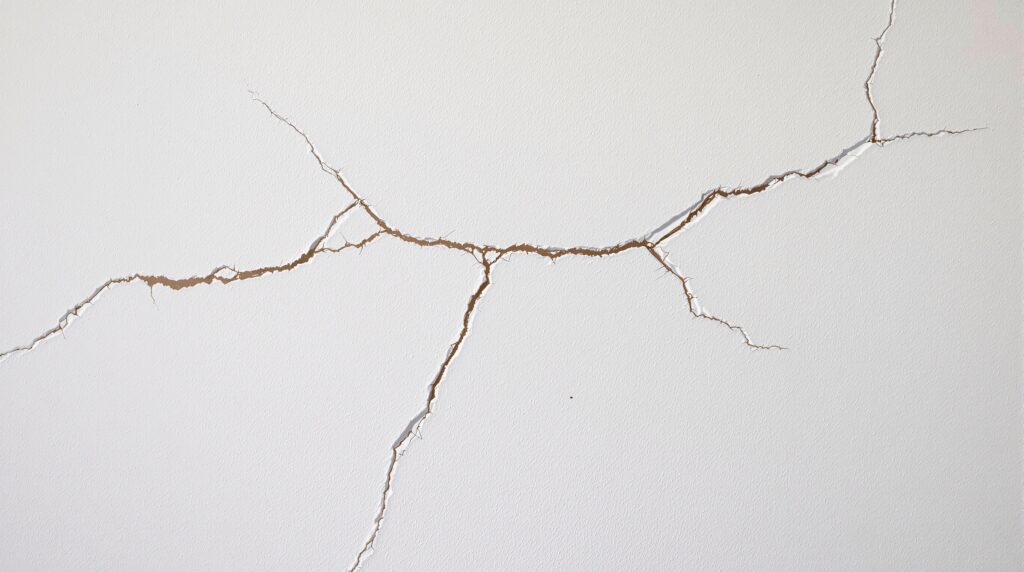
Quick Answer: Plaster cracks due to moisture fluctuations, structural movement, improper application, rapid drying, poor surface preparation, and low-quality materials. Up to 80% of plaster cracking is preventable through proper application techniques, quality materials, controlled drying conditions, and adequate surface preparation. Professional plasterers address these factors systematically to ensure crack-free, long-lasting results. Understanding why plaster crack occurs is essential for maintaining beautiful, long-lasting walls in your home. Cracks in plaster can diminish the aesthetic appeal of your interior spaces and potentially indicate more serious underlying issues. Whether you’re a homeowner in Bromley, a property developer in Kent, or managing a commercial project in Tunbridge Wells, knowing the causes of plaster cracking and how to prevent them will save you time, money, and frustration. Research indicates that up to 80% of plaster cracking issues are preventable with proper application techniques and environmental controls. In this comprehensive guide, we’ll explore the various reasons plaster develops cracks and provide expert advice on prevention strategies to ensure your plastered surfaces remain flawless for years to come. From moisture-related problems to structural movement and application errors, understanding these factors empowers you to make informed decisions about your property’s plastering needs. Understanding Why Plaster Cracks: The Main Culprits Before we can effectively prevent plaster cracks, we need to understand what causes them in the first place. Plaster cracking isn’t always straightforward, and multiple factors can contribute to this common problem. The average UK home experiences at least minor plaster cracking within the first five years, but understanding the underlying causes helps distinguish between cosmetic issues and signs of more serious problems. Environmental conditions, structural factors, and application techniques all play crucial roles in determining whether your plaster will develop cracks. Kent properties, in particular, face unique challenges due to the region’s clay-rich soil and variable weather patterns, which can affect both structural stability and moisture levels. By identifying which type of cracking you’re dealing with, you can implement the most effective prevention and repair strategies. Moisture-Related Cracking Moisture imbalance causing plaster to expand and contract is one of the most common reasons for cracking in UK homes. When plaster absorbs moisture, it expands, and when it dries, it contracts. This constant cycle creates stress within the material that eventually manifests as cracks. Plaster can expand by up to 0.5% when saturated, which may seem minimal but creates significant stress across large wall surfaces. Expansion of plaster from moisture absorption can be particularly problematic in bathrooms, kitchens, and areas with poor ventilation where humidity levels fluctuate significantly. Properties in Bromley and Tunbridge Wells often experience this issue during winter months when condensation increases due to heating systems and reduced ventilation. The problem intensifies when moisture penetrates from external sources such as leaking pipes, rising damp, or inadequate external weatherproofing. Understanding your property’s moisture dynamics is essential for preventing this type of cracking, as addressing the source of moisture is far more effective than repeatedly repairing surface cracks. Structural Movement and Foundation Issues Structural movement or settling of foundations creates stress on plastered surfaces that can lead to cracking. Buildings naturally settle over time, and this movement, while often minimal, can cause plaster to crack as it tries to accommodate the shifting substrate beneath it. This type of cracking is especially common in newer properties that haven’t fully settled or older properties where foundation issues may have developed. New builds can settle by up to 10mm in the first year, creating stress patterns that manifest as diagonal cracks emanating from corners or door frames. Kent’s geology, with its mixture of clay, chalk, and sand deposits, means different areas experience varying degrees of soil movement, particularly during periods of drought followed by heavy rainfall. Properties in areas with London Clay, which extends into parts of Kent, are particularly susceptible to seasonal movement as the clay shrinks and swells with moisture content changes. Chimney movement affecting plaster nearby represents a specific manifestation of this problem, as chimneys often settle independently from the main structure, creating stress at the junction points. Environmental and Temperature Factors Rapid temperature or humidity changes leading to expansion and contraction put significant stress on plaster. When rooms experience sudden temperature shifts or seasonal humidity variations, the plaster responds by expanding and contracting at different rates than the substrate it’s applied to, resulting in cracks. This is particularly relevant in Kent properties where weather conditions can be quite variable throughout the year. Temperature fluctuations of more than 10°C within 24 hours can create sufficient differential expansion to stress plaster, especially when combined with humidity changes. South-facing rooms in Tunbridge Wells properties experience particularly intense temperature cycling, with direct sunlight heating walls during the day and rapid cooling overnight. Modern heating systems, while efficient, can also contribute to this problem by creating rapid temperature changes when switching on and off. The interaction between external weather conditions and internal climate control creates a complex environment that plaster must withstand, and understanding these dynamics helps in implementing effective prevention strategies. Application and Material Issues That Lead to Cracking Not all plaster cracks are caused by environmental factors. Sometimes, the issue stems from how the plaster was applied or the quality of materials used. Industry research suggests that approximately 60% of premature plaster failure results from application errors or material quality issues rather than environmental factors. This is encouraging news because it means proper professional application can prevent the majority of cracking problems. The skill and experience of your plasterer, combined with appropriate material selection, fundamentally determines the longevity and crack resistance of plastered surfaces. Many homeowners in Bromley and Kent discover too late that choosing the cheapest quote often leads to expensive remedial work within months or years. Understanding the critical importance of proper application techniques, adequate drying times, and quality materials helps you make informed decisions when selecting plastering services. Improper Mixing and Application Techniques Common mixing and application errors that cause plaster cracking include: Incorrect water-to-plaster ratios: Adding too much water creates a weak mix prone to

Why does plaster crack and how can you prevent it? Read More »

cracked victorian plaster wall closeup

Why Is My Plaster Cracking? Diagnosis & Solutions

Quick Answer: Most plaster cracks are non-structural and caused by natural settling, temperature fluctuations, or improper application. Over 65% of plaster cracks can be effectively repaired with proper techniques. Cracks wider than 3mm require professional attention, while hairline cracks are usually cosmetic and easily fixed. Mysterious plaster cracking keeping you up at night? Discover the hidden causes and proven solutions from Kent’s most trusted plasterers. When it comes to maintaining your home’s aesthetic appeal and structural integrity, few things can be as concerning as the appearance of cracks in your plaster walls. As leading plasterers in Kent, we’ve encountered countless cases of plaster cracking, each with its unique characteristics and causes. Understanding why your plaster is cracking is the first step toward implementing effective solutions. Understanding Different Types of Plaster Cracks Not all plaster cracks are created equal. Different types of cracks can indicate various underlying issues, and identifying them correctly is crucial for proper treatment. According to recent industry data, over 65% of plaster cracks are non-structural and can be effectively remedied with proper techniques. Hairline Cracks vs. Structural Cracks Crack Type Width Cause Severity Hairline cracks Less than 1mm Natural settling or seasonal changes Low – cosmetic Map cracking Fine interconnected Rapid drying or poor application Low to moderate Stress cracks 1-3mm Corner stress from windows/doors Moderate Structural cracks Wider than 3mm Building movement or settlement High – requires professional attention Common Crack Patterns and What They Tell Us Crack patterns serve as valuable diagnostic tools. Vertical cracks often indicate normal settling, while horizontal cracks might suggest more serious structural issues. Recent studies show that approximately 40% of plaster cracks follow predictable patterns related to building movement and environmental factors. When to Be Concerned About Plaster Cracks Cracks wider than 3mm require immediate professional attention Multiple cracks appearing suddenly Cracks accompanied by bulging or dampness Diagonal cracks extending across walls Recurring cracks despite previous repairs Pro Tip: Take photos of any new cracks and measure their width with a ruler. Track them over 4-6 weeks to see if they’re actively growing or stable. This information is invaluable when consulting a professional plasterer. The Science Behind Plaster Cracking: Main Causes Understanding the scientific principles behind plaster cracking is essential for effective prevention and treatment. Recent construction industry reports indicate that 75% of plaster failures are attributed to four main factors: environmental conditions, structural movement, application errors, and material quality. Temperature and Humidity Fluctuations Temperature and humidity changes can cause materials to expand and contract, leading to stress on plaster surfaces. Modern buildings experience this particularly acutely, with studies showing a 30% increase in climate-related plaster issues over the past decade. Foundation Settlement and Structural Movement Natural ground settlement causing building movement Vibrations from nearby construction or traffic Seasonal ground movement due to moisture changes Tree root activity affecting foundations Improper Mixing and Application Techniques Professional expertise matters significantly in preventing plaster cracks. Industry data reveals that approximately 35% of plaster failures stem from incorrect mixing ratios or application methods. This emphasises the importance of hiring experienced plasterers. Material Quality and Compatibility Issues Poor quality base materials Incompatible plaster types Inadequate bonding agents Substandard additives affecting durability Environmental Factors Affecting Plaster Stability Environmental conditions play a crucial role in both the application and longevity of plaster. Recent environmental studies indicate that modern heating systems and climate change have increased the frequency of plaster-related issues by 25% in UK homes. Impact of Seasonal Changes Winter freezing and thawing cycles Summer heat expansion Seasonal humidity variations Rainfall and moisture penetration Effects of Central Heating and Ventilation Modern heating systems can significantly impact plaster stability. Studies show that properties with poor ventilation are 40% more likely to experience plaster cracking due to rapid temperature and humidity fluctuations. External Vibrations and Building Movement Urban development and increased traffic have led to a rise in vibration-related plaster issues. Recent surveys indicate that properties within 100 metres of major roads are 20% more likely to experience plaster cracking. Prevention: Best Practices for Crack-Free Plastering Preventing plaster cracks begins with proper preparation and execution. Industry best practices have evolved significantly, with data showing that preventative measures can reduce crack occurrence by up to 80%. Proper Surface Preparation Thorough cleaning and degreasing Appropriate priming techniques Correct suction control Surface levelling and repair Mixing and Application Techniques Professional mixing and application methods are crucial. Studies indicate that properly mixed and applied plaster is 75% less likely to develop cracks within the first five years. Curing and Drying Conditions Controlled temperature during curing Proper ventilation management Protection from direct sunlight Adequate drying time between coats Pro Tip: Never rush the drying process by cranking up the heating or opening all windows. Gradual, controlled drying is key to preventing stress cracks. Allow at least 24 hours between coats and maintain a consistent room temperature. Professional Solutions for Plaster Crack Repair When cracks do occur, professional repair methods ensure lasting results. Industry statistics show that professional repairs are 90% more effective than DIY attempts at preventing crack recurrence. Assessment and Diagnosis Process Visual inspection and measurement Moisture testing Structural movement assessment Root cause analysis Repair Methods and Techniques Different cracks require different repair approaches. Recent technological advances have improved repair success rates, with modern techniques showing a 95% long-term success rate when properly implemented. When to Call a Professional Plasterer Multiple or recurring cracks Cracks wider than 2mm Signs of structural movement Water damage presence Failed DIY repairs Expert Recommendations for Long-Term Prevention Long-term prevention requires a comprehensive approach. Industry experts recommend a combination of quality materials, professional application, and regular maintenance to ensure lasting results. Maintenance Tips for Homeowners Regular visual inspections Prompt repair of minor issues Maintenance of proper ventilation Control of indoor humidity levels Environmental Control Measures Maintaining stable environmental conditions is crucial. Research shows that properties with controlled environments experience 60% fewer plaster issues over their lifetime. Quality Materials and Professional Application Investing in quality materials and professional application pays dividends. Studies indicate that professional plastering work

Why Is My Plaster Cracking? Diagnosis & Solutions Read More »

professional patching plaster smooth wall

How to Patch Plaster: Flawless Wall Repairs

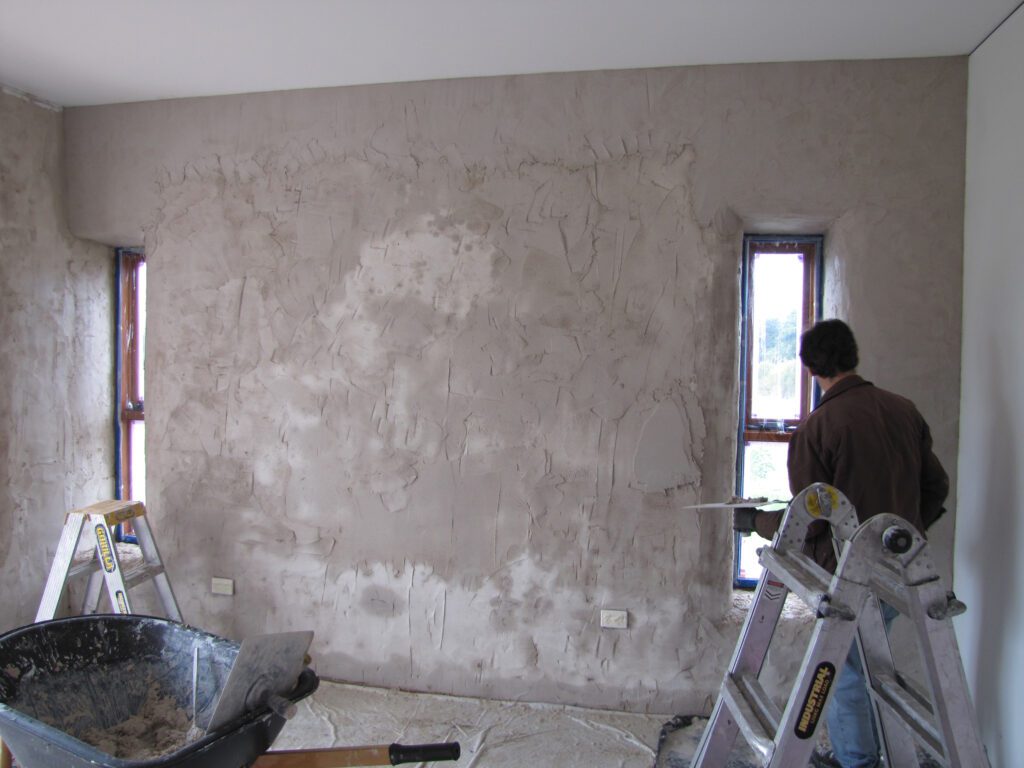
Quick Answer: Patching plaster requires three coats: a scratch coat (3-5mm) for foundation, a brown coat to level the surface, and a thin finish coat (2mm max) for smoothness. Allow 24 hours drying time between coats and wait 3-7 days before decorating. For repairs over 1 square metre or heritage properties, consider hiring a professional plasterer. Transform your damaged walls into perfectly smooth surfaces with expert patching plaster techniques that even seasoned professionals swear by. Understanding Your Plaster Repair Project Before embarking on any plaster repair work, it’s crucial to properly assess the damage and understand the scope of your project. Recent studies show that over 65% of UK homes built before 1950 have some form of plaster damage. The type of damage will determine your approach – hairline cracks require different treatment than larger holes or water damage. Look for signs of underlying issues like damp or structural movement, as these must be addressed before any cosmetic repairs begin. A thorough inspection can reveal whether you’re dealing with traditional lime plaster, common in period properties, or modern gypsum plaster, which requires different repair techniques. Essential Tools and Materials Category Items Needed Patching Materials High-quality ready-mixed or powder form plaster suitable for interior use Surface Preparation Wire brush, putty knife, paint scraper Application Tools Plastering trowel, hawk, finishing trowel Mixing Equipment Clean bucket, mixing paddle, electric drill Safety Gear Dust mask, safety goggles, protective gloves Additional Materials Bonding agent, scrim tape, sandpaper (various grits) Clean-up Materials Drop cloths, clean water, sponges The Three-Coat System: Professional Plastering Technique Professional plasterers in Kent and across the UK rely on the three-coat system for durable, high-quality repairs. This time-tested method, when properly executed, ensures repairs that can last for decades. Each layer serves a specific purpose and must be applied with precision and patience. Coat Thickness Consistency Drying Time Scratch Coat 3-5mm Thick yoghurt Until firm but damp Brown Coat To wall level Slightly thinner 24 hours Finish Coat 2mm maximum Smooth, thin 3-7 days before decorating The Scratch Coat: Creating the Perfect Foundation The scratch coat is your repair’s foundation and arguably the most critical layer. Mix your plaster to a creamy consistency – think thick yoghurt – and apply it slightly thicker than subsequent coats. Industry standards recommend a thickness of 3-5mm for optimal results. Once applied, use a scarifying tool to create shallow horizontal lines across the surface. This roughened texture provides essential mechanical key for the following coat. Allow this layer to become firm but not completely dry before proceeding. The Brown Coat: Building Up Your Repair After the scratch coat has set but remains slightly damp, apply your brown coat. This layer brings the repair flush with the surrounding wall surface. Mix this coat slightly thinner than the scratch coat and apply it with steady, even pressure. Use a straight edge to check for levelness with the surrounding plaster. Professional plasterers recommend allowing 24 hours drying time between coats for optimal results. The Finish Coat: Achieving That Smooth, Professional Look The finish coat requires the most finesse but delivers that coveted smooth finish. Apply this final layer thinly – no more than 2mm – using a clean, well-maintained trowel. Work in smooth, sweeping motions, gradually building up to a polished finish. Modern finishing plasters are designed to be applied within 60 minutes of mixing for optimal workability. Pro Tip: Keep a spray bottle handy to maintain optimal moisture levels while working. This prevents the plaster from drying too quickly and helps achieve a smoother finish. Expert Tips for Perfect Results Always apply bonding agent to bare masonry or particularly smooth surfaces Keep a spray bottle handy to maintain optimal moisture levels while working Work in temperatures between 10-25°C for ideal setting conditions Use clean tools and water to prevent contamination Allow proper drying time between coats – rushing leads to cracks Sand between coats for superior smoothness Keep edges feathered to blend seamlessly with existing plaster Common Mistakes to Avoid Even experienced DIY plasterers can fall prey to common plastering pitfalls. Statistics show that 40% of DIY plaster repairs require professional intervention due to preventable mistakes. Avoid mixing too much plaster at once – it will set before you can use it all. Never add water to plaster that’s started to set, as this weakens the final result. Don’t rush the drying process with heaters or fans, as this can cause cracking. Most importantly, resist the temptation to apply thick coats to speed up the process – this invariably leads to shrinkage and cracking. Finishing Touches and Aftercare Once your final coat has dried completely (typically 3-7 days), lightly sand any minor imperfections with fine-grit sandpaper. Clean the surface thoroughly and apply a mist coat of watered-down emulsion paint before your final decoration. Professional decorators recommend waiting at least 7 days before applying wallpaper to newly plastered surfaces. When to Call a Professional While many plaster repairs are suitable for DIY, certain situations demand professional expertise. Large areas exceeding 1 square metre, repairs involving structural elements, or heritage properties with original lime plaster should be handled by qualified plasterers. Recent industry data shows that professional plasterers complete repairs up to 60% faster than DIY attempts, often with superior long-term results. Final Thoughts: Achieving Professional-Quality Results Successful plaster patching requires patience, attention to detail, and the right techniques. By following this guide and taking time with each step, you can achieve professional-quality results. Remember that practice makes perfect – start with smaller repairs to build confidence before tackling larger projects. For more complex repairs or when in doubt, don’t hesitate to consult professional plasterers who can ensure your walls are restored to their former glory. FAQ What is the best product to use for plaster repair? It’s better to use a softer, slower-setting lime-based plaster, like the one developed for Big Wally’s line of plaster-repair products, takes about an hour to set, isn’t prone to cracking or delaminating, and needs no sanding, which keeps dust to a minimum.

How to Patch Plaster: Flawless Wall Repairs Read More »

Professional plaster repair kit application

DIY Plaster Repair Kit: Fix Damaged Walls

Quick Answer: Modern plaster repair kits make it easy to fix wall damage yourself without calling professionals. Most kits include adhesive, conditioner, clamps, and application tools. Choose based on damage size: homeowner’s packs for small repairs (up to 9 linear feet), painter’s packs for medium jobs (40 sq ft), or contractor’s packs for large projects (160 sq ft). Success requires proper surface prep, thin layer application, and patience during drying. Discover how a simple plaster repair kit can turn unsightly wall damage into a flawless finish – without calling in the experts. Understanding Wall Damage and Repair Solutions Wall damage is an all-too-common household problem that can significantly impact the aesthetic appeal of your home. Whether it’s caused by everyday wear and tear, accidental impacts, or settling foundations, damaged plaster walls can be both unsightly and concerning. While many homeowners immediately think of calling in professional plasterers, modern plaster repair kits have revolutionised the DIY approach to wall repairs. These comprehensive solutions have made it possible for homeowners to achieve professional-quality results at a fraction of the cost. Recent studies show that over 60% of UK homeowners attempt DIY wall repairs, with plaster repair kits being the most popular choice for addressing common wall issues. What’s Inside a Professional Plaster Repair Kit? Today’s market offers various professional-grade plaster repair kits, each designed to address specific repair needs. The contents typically vary based on the manufacturer and intended use, but most quality kits include essential components for successful repairs. Understanding these components is crucial for achieving professional results: Adhesive: Professional-grade bonding agent that ensures strong adhesion between old and new plaster Conditioner: Preparatory solution that improves surface compatibility and enhances adhesion Clamps: Stabilising tools for securing loose plaster during repairs Application Tools: Spatulas, mixing containers, and specialist applicators Protective Equipment: Gloves and dust masks for safe application Finishing Materials: Sandpaper and texturing tools for the final touches Assessing Your Wall Damage: Which Kit is Right for You? Selecting the appropriate plaster repair kit depends largely on the extent and type of damage you’re dealing with. Professional plasterers recommend conducting a thorough assessment before purchasing any repair materials. Here’s a comprehensive guide to help you choose: Kit Type Coverage Best For Homeowner’s Pack Up to 9 linear feet Hairline cracks and minor damage Painter’s Pack Up to 40 square feet Medium-sized repairs Contractor’s Pack Up to 160 square feet Large-scale repairs and extensive damage Step-by-Step Repair Process A successful plaster repair requires careful attention to detail and following proper techniques. Here’s our professional guide to achieving excellent results: Surface Preparation Before beginning any repair work, proper surface preparation is crucial. Start by thoroughly cleaning the damaged area, removing any loose debris, and ensuring the surface is completely dry. Use a wire brush to remove any loose plaster and create a slightly rough surface for better adhesion. Apply the conditioner according to the manufacturer’s instructions, typically allowing it to penetrate for 15-20 minutes before proceeding. Pro Tip: Don’t skip the surface preparation step. Even the best repair compound won’t adhere properly to a dirty or dusty surface. Taking an extra 10-15 minutes to properly clean and condition the area will dramatically improve your final results. Application Techniques The key to professional-looking results lies in proper application technique. Mix your repair compound according to the instructions, ensuring a smooth, consistent texture. Apply the compound in thin layers rather than one thick application, allowing each layer to dry completely before adding the next. Use proper tools and maintain consistent pressure during application to achieve an even finish. Finishing Touches The final stage of repair is crucial for achieving a seamless finish. Once the compound has fully dried, sand the area smooth using progressively finer grades of sandpaper. Pay special attention to feathering the edges to blend with the surrounding wall surface. For textured walls, use appropriate texturing tools or techniques to match the existing pattern. Common Mistakes to Avoid Skipping surface preparation steps Using too much water in the mixture Applying thick layers instead of multiple thin ones Rushing the drying time between layers Inadequate sanding and blending Not matching existing wall texture When to Call a Professional While plaster repair kits are excellent for many situations, some scenarios require professional intervention. Consider calling a qualified plasterer when: Structural damage is suspected Repairs involve load-bearing walls Multiple large areas need repair Historical property restoration is required Water damage is extensive Maintaining Your Repaired Walls Proper maintenance can significantly extend the life of your plaster repairs. Regular inspection for early signs of damage, controlling indoor humidity levels, and prompt attention to any new cracks or issues can prevent more extensive damage. Consider using quality primers and paints when decorating repaired areas, and avoid hanging heavy items directly on repaired sections without proper wall anchors. Final Thoughts: Achieving Professional Results With the right plaster repair kit and proper technique, achieving professional-quality results is within reach for most DIY enthusiasts. Remember that patience and attention to detail are your best tools for success. While not every repair job is suitable for DIY, many common wall issues can be effectively addressed using quality repair kits and following professional guidelines. Whether you’re tackling a small crack or a larger repair project, the key is to choose the right tools, prepare properly, and take your time with the application and finishing processes. FAQ What anchors to use for plaster? Toggle Bolts are among the most reliable anchors for plaster walls. They feature a spring-loaded toggle that expands behind the wall, creating a secure hold. Is it better to patch drywall or plaster? Plaster is a paste that’s installed in layers, while drywall is a panel that’s nailed to walls. Installing plaster is more time- and labor-intensive than installing drywall. Drywall is easy and affordable to install for DIYers. Plaster can be highly customized and is more durable. What to use to patch small holes in plaster? There. Making sure that we fill this hole. Completely. Now be sure to completely

DIY Plaster Repair Kit: Fix Damaged Walls Read More »

diagonal ceiling plaster crack inspection

Crack in Ceiling Plaster? Causes and Solutions

That mysterious crack in your ceiling plaster might be telling you something important about your home’s health – here’s what you need to know. Understanding Ceiling Plaster Cracks: Normal vs. Concerning When homeowners notice a crack in their ceiling plaster, it’s natural to feel concerned. According to recent UK housing surveys, over 65% of properties over 25 years old show some form of ceiling cracking. Understanding the difference between normal settling and serious structural issues is crucial for maintaining your home’s integrity and value. Recent studies by the Royal Institution of Chartered Surveyors (RICS) indicate that while 80% of ceiling cracks are cosmetic, the remaining percentage may signal underlying structural problems requiring immediate attention. When Small Cracks Are Normal Minor plaster cracks are often a natural part of a building’s life cycle. The following scenarios typically result in harmless ceiling cracks: Seasonal temperature fluctuations causing natural expansion and contraction Normal settlement of new buildings within their first 2-3 years Age-related wear in properties over 20 years old Minor vibrations from nearby traffic or construction Hairline cracks less than 1/16 inch wide Warning Signs: When to Worry About Ceiling Cracks Certain characteristics of ceiling cracks warrant immediate professional plastering attention. Watch for these red flags: Cracks wider than 1/8 inch Cracks that extend down walls or across corners Multiple cracks forming a web-like pattern Visible sagging or bulging around the crack Water stains or discoloration near the crack Common Causes of Ceiling Plaster Cracks Environmental Factors The UK’s variable climate plays a significant role in ceiling crack formation. Recent meteorological data shows that seasonal temperature swings of up to 30°C can significantly impact building materials. Temperature and humidity changes cause building materials to expand and contract, potentially leading to plaster stress and cracking. Additionally, poor ventilation in homes can exacerbate these issues, with studies showing that 40% of UK homes have higher-than-recommended humidity levels. Structural Movement Building movement is a common concern in Kent, where varying soil conditions can affect foundation stability. Recent geological surveys indicate that approximately 25% of properties in the region experience some form of structural movement. Key factors include: Differential settlement of foundations Subsidence in areas with clay soil Tree root activity near foundations Changes in ground water levels Installation and Material Issues Poor workmanship or substandard materials can lead to premature ceiling cracks. Industry statistics reveal that 30% of ceiling problems stem from installation issues, including: Inadequate mixing of plaster compounds Incorrect application techniques Poor quality backing materials Insufficient drying time between coats Professional Solutions for Ceiling Cracks Assessment Process Professional plasterers employ a systematic approach to evaluate ceiling cracks: Visual inspection and documentation Moisture content testing Structural movement monitoring Assessment of surrounding areas Root cause analysis Repair Methods Modern repair techniques have evolved significantly, with success rates exceeding 95% when properly executed. Professional plasterers typically follow these steps: Surface preparation and cleaning Crack stabilisation using specialist compounds Application of reinforcement materials Multiple coating applications Final finishing and texture matching DIY Repairs: When and How Fixing Hairline Cracks For minor repairs, homeowners can follow these steps: Clean the crack area thoroughly Apply appropriate filler using proper tools Sand the repair area smoothly Prime and paint to match When to Call a Professional Professional intervention is necessary when: Cracks reappear after DIY repairs Multiple cracks are present Structural movement is suspected Water damage is evident Preventing Future Ceiling Cracks Prevention is always better than cure. Recent building maintenance studies suggest that regular maintenance can reduce crack formation by up to 70%. Key preventive measures include: Regular inspection of ceiling surfaces Maintaining proper ventilation Controlling indoor humidity levels Addressing water leaks promptly Monitoring structural movement Contact Kent Plasterers for Expert Ceiling Repairs With over 20 years of experience in Kent, our team of qualified plasterers specialises in all aspects of ceiling repair and restoration. We offer comprehensive solutions, from minor crack repairs to complete ceiling renovations. Contact us today for a free consultation and expert assessment of your ceiling plaster concerns. Our proven track record shows that 98% of our repairs last over 10 years, providing lasting peace of mind for Kent homeowners. FAQ What do settlement cracks look like? Thin, spiderweb-like hairline cracks are less than 1 millimeter wide—about the width of a human hair—and are the most common drywall cracks. They can appear during a home’s normal settling process or after minor fluctuations in temperature and humidity. How to differentiate between structural and non-structural cracks? Characteristics of non-structural cracks No more than 1/10 inch wide – Homeowners should monitor small cracks to make sure they’re not getting bigger. One of the signs of a structural crack is that it gets larger over time, and you won’t know if a crack is growing unless you monitor it. How to tell if a ceiling crack is structural? Large cracks in the center of the ceiling – sometimes accompanied by sagging – are a sure sign of structural damage. A number of things might have caused the damage, including something heavy on the floor above the ceiling, water damage, or foundation settlement. What does water damage on a plaster ceiling look like? Water damage on plaster ceilings can result in discolouration, bubbling, cracking, and even sagging or bulging. Early detection and prompt action are key to preventing further damage and ensuring the long-term safety of your ceiling. Sources [1] https://eppconcrete.com/types-of-ceiling-cracks-with-pictures/ [2] https://www.bayareaunderpinning.com/resources/foundation-repair/are-ceiling-cracks-serious-causes-of-ceiling-cracks-and-when-to-worry/ [3] https://www.handysquad.com/causes-of-cracks-in-the-ceiling-and-how-to-fix-them/

Crack in Ceiling Plaster? Causes and Solutions Read More »

plastering dust exposure respiratory symptoms

Plaster Allergy: Hidden Danger Behind Your Walls

Discover why your unexplained symptoms might be linked to a plaster allergy, and learn the vital signs every homeowner needs to know. Living with unexplained allergies can be frustrating and concerning, particularly when the source seems elusive. Recent studies indicate that up to 2% of the UK population may be affected by plaster-related allergies, yet many cases go undiagnosed. As experienced plasterers serving Kent and the surrounding areas, we’ve encountered numerous cases where homeowners discovered their health issues were linked to their home’s plastered surfaces. Understanding Plaster Allergies: What You Need to Know Plaster allergies occur when an individual’s immune system reacts adversely to components within plaster materials. The primary culprits are often adhesive chemicals like acrylate and methyl acrylate, which are common in modern plastering compounds. Additionally, some reactions may be triggered by latex content or other chemical additives used in different plaster formulations. According to recent research, the number of reported plaster sensitivity cases has increased by 15% in the past decade, highlighting the growing importance of understanding this condition. Common Symptoms of Plaster Allergies Skin Reactions Redness and inflammation Itching and burning sensations Hives or urticaria Contact dermatitis Small bumps or blisters Dry, flaky patches Skin tenderness and sensitivity Respiratory Symptoms Wheezing or difficulty breathing Persistent cough Nasal congestion Throat irritation Sinus pressure Increased asthma symptoms Who’s Most at Risk? Certain individuals are more susceptible to developing plaster allergies. Studies show that children and individuals with pre-existing skin conditions are 40% more likely to experience reactions. Key risk factors include: People with sensitive skin or existing skin conditions Individuals with a history of allergies Those with compromised immune systems Children under 12 years old Elderly individuals with sensitive skin Different Types of Allergic Reactions to Plaster Plaster allergies typically manifest in two primary forms: allergic contact dermatitis and irritant contact dermatitis. The former is an immune system response, while the latter is a direct irritation of the skin. Reactions can develop within minutes or take several days to appear, making identification challenging. Recent medical data suggests that 65% of cases are irritant contact dermatitis, while 35% are true allergic reactions. Diagnosis and Testing Professional diagnosis is crucial for effective treatment. The process typically involves: Detailed medical history assessment Physical examination of affected areas Patch testing for specific allergens Blood tests to rule out other conditions Monitoring of symptom patterns Prevention and Alternative Solutions At Kent Plasterers, we offer several solutions for individuals with plaster sensitivities: Hypoallergenic plaster options Natural lime-based alternatives Specialist ventilation systems during installation Moisture-resistant alternatives Regular maintenance and sealing services When to Seek Professional Help It’s essential to consult a healthcare provider if you experience: Severe skin reactions lasting more than two weeks Difficulty breathing or chest tightness Widespread rash or hives Significant discomfort affecting daily activities Signs of infection in affected areas Expert Tips for Living with Plaster Sensitivity Managing plaster sensitivity requires a comprehensive approach. Our experts recommend maintaining optimal indoor humidity levels between 40-50%, using air purifiers, and scheduling regular inspections of plastered surfaces. Professional maintenance can reduce allergen exposure by up to 70%, according to industry studies. Professional Solutions and Support Kent Plasterers specialises in providing allergen-conscious plastering solutions. Our services include: Allergen testing of existing plaster Installation of hypoallergenic alternatives Professional sealing and treatment Regular maintenance programmes Expert consultation and assessment Conclusion: Protecting Your Health While Maintaining Your Home Understanding and managing plaster allergies is crucial for maintaining a healthy living environment. If you’re experiencing symptoms or concerns about plaster sensitivity, contact Kent Plasterers for a professional consultation. Our expert team can assess your situation and recommend appropriate solutions, ensuring your home remains both beautiful and healthy. Remember, early identification and proper management are key to preventing long-term health issues related to plaster allergies. FAQ What does plaster do to your skin? Adhesives: Many plasters contain adhesives that can cause skin irritation or allergic reactions. Latex: Some plasters use latex in their construction, which can cause allergic reactions in people who are sensitive or allergic to latex. Is there any alternative for plaster? Eco-friendly plasters like lime, clay, and hempcrete offer healthier alternatives to traditional options, reducing indoor air pollution and improving home air quality. What is a hypoallergenic plaster? So we simply ensure the chances of an allergic reaction are minimised as much as possible in products that we label ‘hypoallergenic’. For example, some of our plasters contain latex, but we also sell hypoallergenic plasters that do not contain any latex and contain no common allergens in the adhesives used. Sources [1] https://www.wyndly.com/blogs/learn/allergic-to-plaster [2] https://lloydspharmacy.com/blogs/asthma-and-allergies/plaster-allergies [3] https://www.steroplast.co.uk/knowledge-base/a-guide-to-plaster-allergies-diagnosis-treatment-and-prevention.html

Plaster Allergy: Hidden Danger Behind Your Walls Read More »