Painting & Decorating

Exterior Painting: How to Paint a House Outside in the UK

Exterior Painting: How to Paint a House Outside in the UK

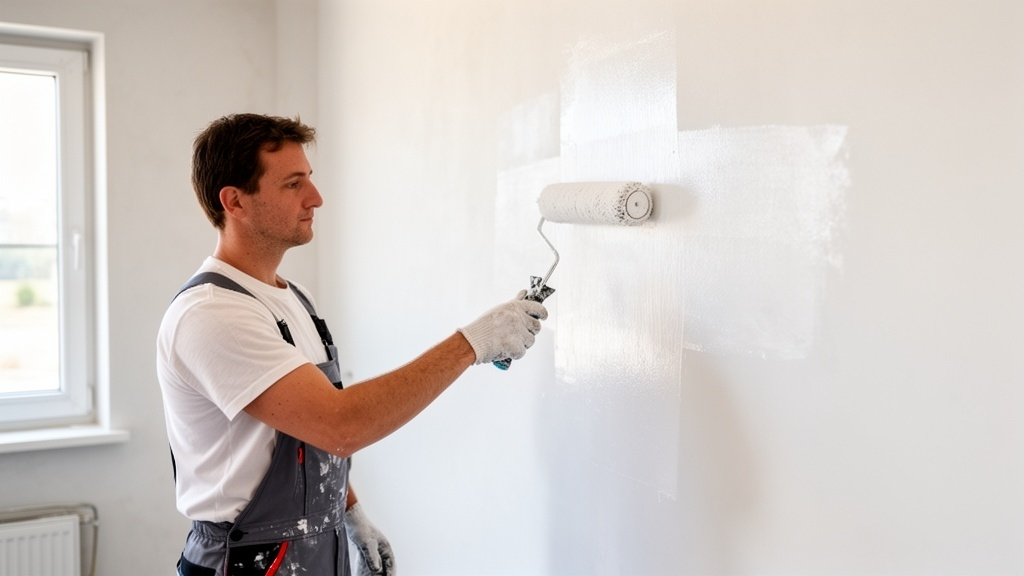
Quick Answer: Painting a house exterior in the UK typically takes 3-7 days and costs £800-£3,500 for an average semi-detached property. The process involves power washing, repairing render/masonry, priming, and applying 2 coats of quality masonry paint. Best results come from painting between May-September when temperatures stay above 10°C. Expect to pay £25-45/m² for professional work, or £300-600 for DIY materials alone. Why Exterior Painting Matters for UK Properties Your home’s exterior paintwork does far more than just look nice. It’s the first line of defence against British weather — driving rain, winter frost, summer UV, and everything in between. Most UK properties need repainting every 5-10 years depending on exposure, paint quality, and substrate type. South-facing walls and exposed coastal properties deteriorate faster due to increased UV and salt exposure. Beyond aesthetics, proper exterior painting: Protects render and masonry from water penetration Prevents freeze-thaw damage during winter months Reduces heat loss through micro-cracks (improving thermal efficiency) Increases property value by 2-5% according to estate agents Stops biological growth (algae, lichen, moss) on north-facing walls Skip maintenance too long and you’ll face render repairs costing £40-90/m² rather than a simple repaint at £25-45/m². We see this constantly — penny-wise homeowners end up needing full render replacement because they ignored peeling paint for years. Understanding UK Masonry Paint Types Not all exterior paints are created equal. UK conditions demand specific formulations that handle moisture movement and temperature fluctuations. Paint Type Coverage (m²/L) Coats Required Lifespan Cost per 10L Standard Masonry Paint 6-8 2 5-7 years £30-50 Textured/Stipple Masonry 4-6 2 7-10 years £40-70 Premium Silicone-Enhanced 7-9 2 10-15 years £80-120 Masonry Stabilising Solution 4-5 1 N/A (primer) £35-55 Smooth vs Textured Masonry Paint Smooth masonry paint provides a clean, modern finish but shows every imperfection. You’ll need pristine render underneath — any cracks, hollows, or patches will telegraph through. Textured masonry paint (also called stipple or roughcast paint) hides minor surface irregularities and provides better weather protection through its thicker film build. It’s the go-to for older properties with less-than-perfect render. Popular UK brands include Dulux Weathershield, Sandtex Ultra Smooth, Crown Breatheasy Masonry, and Johnstone’s Stormshield. We’ve had excellent results with Dulux Trade Weathershield for its durability and colour retention — it’s worth the extra £20-30 per tin over budget alternatives. Planning Your Exterior Painting Project Proper planning prevents poor performance. Here’s what you need to consider before buying a single brush. Timing and Weather Windows Exterior painting in the UK requires a precise weather window. According to Building Regulations guidance on external works, ideal conditions are: Temperature: 10-25°C during application and drying (minimum 8°C overnight) Humidity: Below 80% relative humidity Wind: Less than 15mph (stronger winds cause flash drying and poor adhesion) Rain forecast: No rain for 24 hours after application (48 hours ideally) Dew point: Wall temperature must be 3°C above dew point to prevent condensation forming on fresh paint In practice, this means May through September are your best months. April and October are borderline — you might get lucky, but equally you might waste materials on paint that washes off in an unexpected shower. ⚠️ Warning: Never paint exterior walls in direct strong sunlight or when surface temperature exceeds 30°C. The paint will skin over before properly bonding, leading to premature failure. Early morning or late afternoon application works best. Calculating Paint Quantities Most homeowners underestimate how much paint they need. Here’s the professional approach: Measure each wall (length × height in metres) Subtract windows and doors (approximate 15-20% for typical semi-detached) Add 10% wastage factor for cutting in, spillage, and absorption Divide by coverage rate (typically 6-8 m²/L for first coat, 7-9 m²/L for second coat on sealed surfaces) Example for a typical UK semi-detached house: Total wall area: 180m² (minus windows/doors = 145m²) With 10% wastage: 160m² First coat at 6m²/L: 27 litres required Second coat at 8m²/L: 20 litres required Total: 47 litres (buy five 10L tins) Budget brands from B&Q or Wickes cost £30-40 per 10L tin. Trade-quality paint from Travis Perkins or Brewers Decorator Centres runs £50-75 per 10L. Surface Preparation: The Make-or-Break Stage Professional decorators spend 60-70% of project time on preparation. It’s not glamorous, but it’s where quality work separates from cowboy jobs. Power Washing and Cleaning Start with a thorough pressure wash at 100-150 bar (1500-2200 PSI). Higher pressure damages render — we see gouged surfaces regularly from DIYers hiring commercial-grade machines. Rent a domestic pressure washer from HSS Hire or Jewson for £35-50/day. Focus on: Removing all loose paint, dirt, organic growth, and efflorescence Working from top to bottom to avoid re-soiling cleaned areas Keeping the lance 300-450mm from the surface Allowing 48-72 hours drying time before painting For biological growth (green algae, black mould, lichen), apply a fungicidal wash like Dulux Weathershield Multi-Surface Fungicidal Wash (£15-20 per 5L). Brush or spray onto dry walls, leave for 24 hours, then rinse thoroughly. Repairing Render and Masonry Any cracks wider than 2mm need filling. Hairline cracks below 2mm can usually be bridged by quality masonry paint, but wider defects will reappear within months. For sand-cement render repairs, mix 5:1 sharp sand to cement with a waterproofer added. Our detailed guide on sand and cement render mix ratios covers the specifics, but key points are: Rake out cracks to at least 20mm depth using a plugging chisel Brush out dust and debris, then dampen with water Apply PVA bonding agent (5:1 water dilution) to edges Press mortar firmly into crack, building up in layers if deep Texture to match surrounding render using a damp sponge or stipple brush Allow 7-14 days curing before painting For small patches (less than 50mm), ready-mixed exterior filler like Polyfilla Exterior Filler (£6-8 per tub) saves mixing mortar. Just ensure you get exterior-grade filler — interior products disintegrate within weeks outdoors. Pro Tip: For blown render (sounds hollow when tapped), don’t just paint over it hoping for the best. Hack off the loose section back to sound material, then patch properly. Paint won’t fix

Exterior Painting: How to Paint a House Outside in the UK Read More »
How to Prepare Walls for Wallpapering After Plastering

How to Prepare Walls for Wallpapering After Plastering

Quick Answer: Wait a minimum of 4 weeks after plastering before wallpapering. New plaster must be completely dry (moisture content below 12%), properly sized with diluted wallpaper paste or dedicated size, and free from blown areas. Apply a mist coat first if the plaster was previously painted, and always test a small area before committing to the full wall. Rushing this process causes bubbling, peeling, and mould growth behind the wallpaper. Why Proper Wall Preparation Matters for Wallpaper Success Wallpapering over freshly plastered walls seems straightforward enough, but it’s one of the most common areas where DIYers and even some decorators go wrong. I’ve seen countless jobs where expensive wallpaper has bubbled, peeled, or developed mould patches within months because the preparation wasn’t done properly. The truth is, new plaster behaves completely differently to aged, sealed surfaces. It’s porous, alkaline, and releases significant moisture as it cures. Apply wallpaper too soon or without proper sizing, and you’re essentially trapping that moisture behind a decorative barrier—creating the perfect environment for adhesion failure and mould growth. Whether you’ve just had a multi-finish skim coat applied or you’re working with older plaster that needs refreshing, this guide will walk you through every step of preparing walls for wallpaper that stays put for years. Understanding the Drying Process: When Can You Wallpaper New Plaster? This is the question I hear most often, and the answer frustrates impatient homeowners: you need to wait at least 4 weeks after plastering. In some cases, particularly during winter or in poorly ventilated rooms, it can take 6 weeks or longer. Fresh gypsum plaster contains significant water content—typically around 50% of its weight when first applied. As it cures, this moisture evaporates through the surface. According to British Gypsum’s technical guidance, plaster should reach a moisture content below 12% before decoration. Factors Affecting Drying Time Room temperature: Ideal drying occurs between 15-20°C. Too cold, and drying slows dramatically; too hot, and surface drying can seal moisture inside. Ventilation: Good air circulation is essential. Open windows slightly and use dehumidifiers in damp conditions. Heating: Central heating helps but avoid blasting radiators directly at fresh plaster—gentle, consistent warmth works best. Plaster thickness: A standard 2-3mm skim coat dries faster than thick browning or bonding layers. Substrate: Plaster on solid walls takes longer to dry than plasterboard. Time of year: Summer drying takes 3-4 weeks; winter can extend to 6-8 weeks. Pro Tip: Use a digital moisture meter (available from Screwfix for £15-30) to check moisture levels. Take readings from multiple points across the wall. Anything above 12% means wait longer. Professional decorators never trust timescales alone—they always verify with a meter. Visual Signs of Dry Plaster While a moisture meter gives you certainty, you can also look for these indicators: Colour change from dark pink/grey to uniform pale pink or light grey No cold spots when you touch the wall (damp areas feel noticeably cooler) No darker patches or variations in colour across the surface The surface feels warm and dry to touch, not clammy Step-by-Step Preparation Process for New Plaster Once your plaster has fully dried, follow these steps before even thinking about opening that wallpaper roll. 1. Check for Surface Defects Run your hand across the entire wall surface. You’re checking for: Blown areas: Sections where plaster has separated from the substrate (sounds hollow when tapped) High spots or ripples: Should have been addressed during plastering, but check anyway Loose material: Any crumbling or powdery sections need repair Cracks: Small hairline cracks are normal in corners; wider cracks need filling If you find issues, address them now. Small defects can be filled with fine surface filler (Polyfilla or similar), but significant problems need a plasterer’s attention before you proceed. 2. Remove Any Dust and Debris New plaster often has a fine dust layer from final trowelling. This must be removed or it will interfere with sizing and wallpaper adhesion. Brush the entire surface with a soft-bristled brush or clean broom Vacuum thoroughly using a brush attachment Wipe down with a slightly damp cloth (not wet—you don’t want to re-wet the plaster) Allow 24 hours for any dampness to evaporate completely 3. Apply Size to Seal the Surface This is the critical step that many people skip or do incorrectly. Sizing serves two essential purposes: Seals the porous plaster surface so it doesn’t suck moisture from the wallpaper paste too quickly Provides a slightly tacky surface that improves wallpaper adhesion and allows positioning time What Size Should You Use? You have two main options, both perfectly acceptable: Size Type Application Cost (2026) Drying Time Best For Dedicated wallpaper size (e.g., Solvite Size) Ready-mixed or powder to mix with water £8-12 per 5L 4-6 hours Professional finish, easier application Diluted wallpaper paste Mix paste thinner than hanging strength (typically 1:3 ratio) £5-8 (using paste you’ll buy anyway) 4-6 hours Budget-conscious, works well for most papers PVA solution (NOT recommended) Diluted PVA glue £6-10 2-4 hours AVOID: Creates waterproof barrier, makes future removal impossible ⚠️ Warning: Never use PVA as a size on new plaster before wallpapering. While it was common practice decades ago, it creates a waterproof layer that traps moisture, prevents proper adhesion, and makes wallpaper removal nearly impossible in the future. Professional decorators and manufacturers like Graham & Brown explicitly recommend against it. How to Apply Size Correctly Follow these steps for proper sizing: Mix your size according to manufacturer instructions (or dilute paste to roughly the consistency of single cream) Pour into a paint tray and use a large roller with medium pile (9-12mm) Apply in vertical strips, working from top to bottom Cover the entire surface evenly—don’t miss sections or apply too thickly Pay extra attention to edges, corners, and around fixtures Allow to dry completely (4-6 hours minimum, overnight is better) The dried surface should feel slightly tacky but not sticky when touched For a standard 4m x 2.5m wall, you’ll need approximately 2-3 litres of size. Always mix slightly more than you think you’ll

How to Prepare Walls for Wallpapering After Plastering Read More »

What is Zinsser Gardz and when should plasterers use it?

Zinsser Gardz is a game-changing primer that professional plasterers rely on for problem surfaces, but knowing when to use it makes all the difference. In the plastering trade, surface preparation is everything, and having the right primer can mean the difference between a flawless finish and a costly comeback. Understanding when and how to deploy Zinsser Gardz can transform challenging projects into straightforward successes. TL;DR – Quick Summary Zinsser Gardz is a water-based acrylic resin sealer that penetrates and binds damaged, porous, or chalky surfaces Perfect for damaged drywall, old wallpaper adhesive residue, calcimine, and unstable substrates Dries in 30 minutes, recoatable in 3 hours, and creates a rock-hard moisture-resistant foundation Prevents common plastering failures like blistering, bubbling, and adhesion problems Essential tool for professional plasterers working on renovation and repair projects in Kent and across the UK What is Zinsser Gardz? Understanding this water-based acrylic resin sealer When plasterers encounter problem surfaces, Zinsser Gardz provides the solution that transforms unstable substrates into workable foundations. This innovative product is specifically engineered as a water-based acrylic resin sealer designed to penetrate and bind porous, chalky, or crumbling surfaces. Unlike traditional primers that simply sit on the surface, Gardz actually penetrates deep into damaged materials to create structural integrity from within. The product’s unique formulation allows it to dry water clear and form a rock-hard, moisture-resistant film that provides the perfect base for plastering work. This characteristic makes it invaluable for plasterers in Kent and throughout the UK who regularly deal with renovation projects where substrate quality varies considerably. The moisture-resistant properties are particularly important in British homes where damp issues are a common concern. The science behind Gardz: How it works The magic of Zinsser Gardz lies in its advanced acrylic resin technology. When applied to damaged or porous surfaces, the water-based formula penetrates deeply into the substrate rather than simply coating the surface. This penetration allows the acrylic resins to bind loose particles, seal porous areas, and consolidate crumbling materials at a molecular level. During application, plasterers will notice that Gardz appears milky blue-white, which helps ensure complete coverage and prevents missed areas. This visual indicator is particularly helpful when working in poor lighting conditions or on complex surfaces. However, as it cures, the product dries completely clear, leaving no visible residue that might affect subsequent finishes. The formation of a rock-hard film creates a sealed, uniform surface that regulates suction rates across the substrate. This consistent suction is critical for achieving professional plastering results, as it ensures even adhesion and prevents differential drying that can lead to cracking, discolouration, or adhesion failures. Key properties that make Gardz unique Professional plasterers appreciate Gardz for its practical working properties that align with the demands of busy construction sites. The low odour water-based formula makes it suitable for occupied homes and commercial properties where strong solvent smells would be problematic. This is particularly valuable when working in Kent’s residential areas where homeowners may be living in the property during renovations. The product cleans up easily with soap and water, eliminating the need for harsh solvents and simplifying site cleanup. This convenience translates to time savings and reduced material costs, making projects more profitable for plastering contractors whilst maintaining environmental responsibility. Timing is crucial on any plastering project, and Gardz delivers impressive performance in this area: Touch dry in 30 minutes – allowing quick assessment and progress Recoatable after 3 hours – enabling same-day plastering on most projects Full cure in 3 days – achieving maximum strength and moisture resistance Coverage of 5-10 square metres per litre – providing economical application rates These working times make Gardz particularly suitable for the tight schedules common in property development and renovation projects across Kent and the Southeast. Available sizes and application methods Zinsser Gardz is available in a range of sizes to suit different project scales, from small repairs to large-scale renovations. The product comes in 500ml, 1L, 2.5L, and 5L containers, allowing plasterers to purchase the appropriate quantity without waste or shortage. Property developers working on multiple units often find the larger containers most economical, whilst homeowners tackling single-room projects benefit from the smaller sizes. Application flexibility is another key advantage. Gardz can be applied via brush, roller, or airless sprayer, allowing plasterers to choose the most efficient method for each specific situation. Brushes work well for detailed work around edges and fixtures, rollers are ideal for flat wall surfaces, and airless sprayers excel on large-scale commercial projects or entire properties. The product is formulated exclusively for interior use, making it the go-to solution for all internal plastering preparation work on residential and commercial properties throughout Tunbridge Wells, Bromley, and the wider Kent region. When should plasterers use Zinsser Gardz? Problem surfaces it solves Understanding when to deploy Zinsser Gardz separates experienced professional plasterers from those who struggle with callbacks and failures. This primer excels in specific scenarios where conventional primers simply cannot deliver the required performance. Recognising these situations and specifying Gardz appropriately protects both the plasterer’s reputation and the client’s investment. Damaged and torn drywall repairs Torn or damaged drywall paper is one of the most common challenges plasterers face, particularly in renovation projects. When drywall facing paper is damaged, torn, or delaminated, the exposed gypsum core becomes highly absorbent and structurally compromised. Attempting to skim coat directly over damaged drywall almost inevitably leads to blistering and bubbling as moisture from the plaster reactivates the paper and creates air pockets. Zinsser Gardz solves this problem definitively by penetrating into the torn paper fibres and exposed gypsum, binding everything together into a consolidated surface. The product effectively repairs torn paper on damaged drywall by gluing down loose fibres and sealing the absorbent core. This prevents moisture penetration and eliminates the blistering that would otherwise ruin the plastering work. When working on damaged drywall, plasterers should apply Gardz generously to all affected areas, ensuring complete saturation. The milky blue-white appearance during application helps identify which areas have been treated. After the 3-hour recoat

What is Zinsser Gardz and when should plasterers use it? Read More »

Wallpaper vs Paint: Pros, Cons and Costs in 2026

Quick Answer: In 2026, paint remains the most cost-effective option at £400-800 for an average room, whilst wallpaper costs £600-1,500+ but offers superior durability (10-15 years vs 3-5 years for paint). Paint is easier to apply and change, making it ideal for rental properties and frequent redecorators. Wallpaper provides better coverage for imperfect walls, adds texture and depth, and can increase property value. Your choice depends on budget, wall condition, lifestyle, and long-term plans. Understanding the Wallpaper vs Paint Decision in 2026 When it comes to finishing your walls, the wallpaper vs paint debate has been raging since Victorian times — and it’s more relevant than ever in 2026. As someone who’s prepared countless walls for both treatments, I can tell you that the “right” choice isn’t always obvious. The decision depends on several factors: your budget, the condition of your walls, how often you like to change your décor, and whether you’re planning to sell. Modern wallpaper technology has advanced significantly, with paste-the-wall options and eco-friendly materials changing the game, whilst paint formulations now offer everything from washable finishes to anti-mould properties. Let’s break down exactly what you need to know to make an informed decision for your Kent property. Cost Comparison: Wallpaper vs Paint in 2026 Budget is often the deciding factor, so let’s look at real-world costs for a standard 4m x 4m room with 2.4m ceiling height (approximately 38.4m² of wall area after deducting doors and windows). Finish Type Materials Cost Professional Labour Total (DIY) Total (Professional) Budget Emulsion Paint £80-150 £250-400 £80-150 £330-550 Premium Paint (Farrow & Ball) £200-350 £250-400 £200-350 £450-750 Budget Wallpaper £150-300 £450-700 £150-300 £600-1,000 Mid-Range Wallpaper £300-600 £450-700 £300-600 £750-1,300 Designer Wallpaper £600-1,500+ £500-800 £600-1,500+ £1,100-2,300+ These costs assume your walls are already in good condition. If you need plastering or skim coating work, add £400-800 for an average room. Important note: Wallpaper labour costs are higher because hanging wallpaper requires more skill, precision, and time than painting. A professional decorator can paint a room in 1-2 days but may need 2-3 days for wallpaper installation. The Pros and Cons of Paint Advantages of Painting Your Walls Lower upfront cost: Paint is significantly cheaper than wallpaper, especially for budget-conscious homeowners Easy to change: You can repaint a room over a weekend without professional help Faster application: Most rooms can be painted in 1-2 days including preparation and drying time Ideal for rental properties: Landlords prefer paint because it’s economical to refresh between tenants Works on any surface: Paint adheres to plasterboard, brick, wood, and previously painted surfaces Unlimited colour options: Custom colour matching is available at most DIY stores like B&Q and Wickes Specialist finishes available: Anti-mould, washable, magnetic, and chalkboard paints offer functional benefits Low-VOC options: Modern eco-friendly paints meet strict UK indoor air quality standards Disadvantages of Paint Shorter lifespan: Paint typically needs refreshing every 3-5 years in high-traffic areas Shows wall imperfections: Paint, especially in matt or eggshell finishes, highlights every bump, crack, and irregularity Less visual depth: Even textured paint can’t replicate the dimensional quality of wallpaper patterns Requires perfect preparation: You’ll need to fill, sand, and prime walls properly — rushed prep work shows immediately Can look flat: Solid colours may lack the character and interest that patterned wallpaper provides Susceptible to damage: Paint chips, scuffs, and marks more easily than quality wallpaper Multiple coats needed: Bold colours often require 3-4 coats for even coverage, increasing labour time Pro Tip: If you’re painting over freshly skimmed walls, always apply a mist coat first — 70% emulsion, 30% water. This seals the plaster and prevents the topcoat from peeling. Most paint failures I see are due to skipping this crucial step. For more details, see our guide on how to paint newly plastered walls. The Pros and Cons of Wallpaper Advantages of Wallpaper Exceptional durability: Quality wallpaper lasts 10-15 years, making it more cost-effective long-term Hides wall imperfections: Textured and patterned wallpapers disguise minor cracks, bumps, and uneven surfaces Adds texture and depth: Creates visual interest that flat paint cannot match Increases property value: Quality wallpaper in key rooms (dining rooms, feature walls) can enhance perceived value Protects walls: Acts as a protective layer, particularly beneficial in period properties Washable options: Vinyl and vinyl-coated wallpapers are wipeable, ideal for kitchens and hallways Easier pattern matching: Modern paste-the-wall wallpapers have improved alignment and application Acoustic benefits: Heavy-weight wallpaper provides minor sound dampening Unique designs: Access to patterns, textures, and effects impossible to achieve with paint alone Disadvantages of Wallpaper Higher initial cost: Both materials and professional installation cost significantly more than paint Difficult to remove: Stripping old wallpaper is time-consuming and can damage plaster underneath Requires professional installation: Pattern matching and seamless hanging demand skill and experience Limited flexibility: Changing wallpaper means complete removal and reapplication, not just a fresh coat Moisture sensitivity: Not suitable for damp-prone areas unless specifically designed for bathrooms Longer installation time: Hanging wallpaper takes 2-3 times longer than painting Pattern limitations: Once you commit to a pattern, you’re living with it for years Seam visibility: Poorly hung wallpaper shows obvious joins and bubbles Trend risk: Bold patterns may date quickly, whilst neutral paint remains timeless ⚠️ Warning: Never wallpaper over damp patches or water-damaged plaster. The wallpaper will trap moisture, leading to mould growth and further deterioration. Always address the underlying cause of dampness first — check for leaking pipes, rising damp, or condensation issues. If you’re unsure about wall condition, consult a damp surveyor before proceeding. Wall Preparation Requirements Regardless of whether you choose paint or wallpaper, proper wall preparation is non-negotiable. Here’s what each option demands: Preparing Walls for Paint Paint is unforgiving when it comes to wall condition. Every imperfection will show, particularly under natural light or with darker colours. Fill all cracks and holes: Use a flexible filler like Polyfilla or Toupret for cracks, exterior filler for deeper holes Sand smooth: Use 120-grit sandpaper on filled areas, then 180-grit for final smoothing Remove loose material: Scrape off any

Wallpaper vs Paint: Pros, Cons and Costs in 2026 Read More »

Best Paint for Plastered Walls UK: Top Brands Compared

Quick Answer: For plastered walls in the UK, Dulux Trade Diamond Matt offers the best balance of durability and value (£35-45/5L), whilst Farrow & Ball Modern Emulsion provides superior depth of colour for premium projects (£89/2.5L). For new plaster, always apply a mist coat first with 10% water dilution. Contract matt emulsions from Johnstone’s or Crown Trade provide the most cost-effective option for larger projects at £20-30/10L. Why Paint Selection Matters After Plastering Choosing the right paint for your freshly plastered walls isn’t just about colour—it fundamentally affects how your finish looks, how long it lasts, and whether moisture issues develop down the line. I’ve seen countless homeowners rush to the nearest B&Q, grab the cheapest emulsion, and end up with patchy coverage, peeling edges, or colour that looks completely different from the tin. The UK market offers hundreds of paint options, from budget tins at £12 to premium brands exceeding £100 per tin. Understanding what you’re actually paying for—and what your specific walls need—saves both money and frustration. After preparing new plaster for painting correctly, your paint choice determines the final result. Let’s break down the actual differences between brands, formulations, and price points. Understanding Paint Types for Plastered Walls Emulsion Paint Basics All interior wall paints in the UK are water-based emulsions—essentially microscopic plastic particles suspended in water. When you apply the paint, water evaporates and these particles fuse together, creating a solid film that adheres to your plaster. The key differences between paints come down to: Binder quality: Higher-grade acrylic or vinyl resins create tougher, more washable surfaces Pigment concentration: More pigment means better coverage and richer colour depth Opacity: Premium paints cover in fewer coats due to superior hiding power Sheen level: Matt, silk, or satin finishes affect both appearance and durability Additives: Anti-mould agents, stain resistance, and scuff protection Finish Types Explained Finish Type Sheen Level Best For Washability Matt 0-5% sheen Living rooms, bedrooms, ceilings Moderate (Trade versions better) Vinyl Matt 2-8% sheen General walls, high-traffic areas Good Silk/Satin 20-30% sheen Kitchens, bathrooms, hallways Excellent Soft Sheen 10-15% sheen Compromise between matt and silk Very good For freshly plastered walls, matt emulsion is standard because it hides minor imperfections better than shinier finishes. However, trade-grade matt paints offer surprisingly good washability compared to cheap retail versions. Top Paint Brands for Plastered Walls: Detailed Comparison Dulux: The UK Market Leader Dulux Trade Diamond Matt remains the professional’s choice for good reason. At £40-45 for 5 litres from specialist decorating merchants, it offers exceptional toughness for a matt finish. Key specifications: Coverage: 16m² per litre (theoretical), realistically 12-14m² on fresh plaster Drying time: Touch-dry in 2-4 hours, recoatable after 4 hours Durability: 10 times more scuff-resistant than standard emulsion Washability: Passes BS EN 13300 Class 2 (wet scrub resistance) VOC content:

Best Paint for Plastered Walls UK: Top Brands Compared Read More »

From Plastering to Painting: A Step-by-Step Guide to Perfect Walls

A freshly painted wall gives your home a charming and welcoming appearance. However, most homeowners forget that preparing the surface is critical to achieving a stunning finish and protecting the home from damage. They often overlook plastering and priming the surface, which maintains the home and improves the durability and long-term value of the paint. By hiring an experienced painting company, you can avoid these common problems and achieve a durable finish that blends beauty, strength, and perfection to improve your home’s appearance.  Understanding the Walls  Concrete, brick, drywall, and gypsum boards are used in the most common walls. Brick and concrete walls are durable, but their surfaces are uneven for paint or plaster. Drywall is smooth but easily gets damaged by moisture. Plaster helps to smooth these surfaces and strengthen the walls, protecting them from regular wear and weather damage.  No matter the material, most walls face issues such as cracks, damp patches, and uneven surfaces. Identifying these issues early is essential; it helps the plaster adhere and results in a perfect paint finish, avoiding issues such as uneven coverage, weak bonding, and premature peeling.  Essential Steps for Perfect Walls  Painting walls is a simple project, but it requires patience and precision in each step. These steps can help you achieve an even and polished finish. Surface Preparation Surface preparation begins with thorough cleaning. Wipe the surface with a brush or vacuum to collect dirt and make sure the wall is free of dirt, debris, grease, old paint, or loose materials. Use a damp cloth or sponge to collect residual dust without wetting the surface.  The next step is addressing signs of damage, such as cracks, holes, and leaks. Fix these issues before plastering the walls with fillers and seals. If you have leaks, address the main cause to prevent future structural damage and wet spots. Plastering the Walls Plaster is a shield for the wall and a base for smooth, decorative, or textured finishes. Lime-based plaster offers a classic finish to older buildings, durable cement plaster can be used for interior and exterior walls, and gypsum plasters are eco-friendly and lightweight. Select the plaster type depending on the wall’s location and your desired finish. Form the plaster into a creamy consistency. Try to break up any lumps as you go; it’s ready when it’s smooth under a trowel. Avoid poor mixing or rushed curing time after application because this leads to uneven finishes and cracks. Spread the plaster evenly across the wall, aiming for a 10-15 mm thickness for interior walls or 20 mm thickness for exterior walls needing more protection.  Wall Curing and Drying  Proper wall curing and drying determine the final paint finish. After applying plaster, lightly dampen the wall with water or a bonding agent to let the plaster spread and slowly dry. This helps it strengthen and bond properly. After curing, leave the plaster to dry at room temperature. Keep the windows open for ventilation and use a dehumidifier to control moisture levels. Rushing the curing and drying step traps moisture, causes cracks, leads to peeling, and increases the risk of fungal and mold growth. Putty Application  Putty creates a smooth base by filling cracks and smoothing imperfections after plastering. White cement-based putty is ideal for both interior and exterior house painting, providing a durable and water-resistant base for paint. Acrylic putty, suitable for interior surfaces, is made from emulsion and other additives. Usually, one or two layers of putty are required to create a smooth surface for painting. Apply a thin layer with a putty knife or trowel, spread it uniformly, and let it dry for 8 hours. Sand the imperfections and uneven spots with fine-grit sandpaper, then apply the second coat and let it dry for another 6-8 hours. Priming the Walls Primer creates a smooth bridge between the surface and paint and prevents the walls from absorbing paint too quickly, leading to an uneven, patchy finish. Priming seals porous surfaces, covers stains and repaired spots, and provides a consistent neutral base for paint. It helps with color development and reduces the number of coats of paint required, but must be applied and left to dry according to the manufacturer’s instructions before painting.  Water-based primer is easier to clean up and ideal for interior walls. Oil-based primer is used to cover porous surfaces, stains, and smoke damage. Shellac primers are known for sealing odors and stains and drying quickly. Exterior primers are applied to walls to improve durability and adhesion, and to protect the structure from UV rays, wind, moisture, and temperature changes.  Painting the Walls With the surface plastered and primed, you’re now ready to color the walls. The right type of paint depends on the wall’s location and purpose. Water-based emulsion paints are suitable for interior use as they dry quickly, have less odor, and are easier to clean up, while enamel creates a hard, glossy finish in kitchens and bathrooms. You can even use textured paint to create patterns or hide wall imperfections. Choose the right finish to improve the appearance and lower future maintenance costs. Apply thin coats of paint and use the right tools as needed; angled brushes help you reach edges and corners, while rollers and sprayers cover larger surface areas quickly and smoothly. Focus on consistency and give the paint enough time to dry to achieve a professional finish. Final Inspection and Touch-Ups Once the painting is complete, inspect the walls under different lighting conditions. This is the right time to make corrections and achieve a flawless finish. Check for crisp, clean lines in edges and corners, and pay close attention to uneven areas, cracks, patches, or missed spots. If needed, correct these problems with light sanding and touch-ups. A proper inspection helps achieve an attractive and professional finish.  Final Thoughts Wall painting requires careful planning, materials, and skilled execution. Painters and homeowners must work with patience and attention to detail, from surface preparation and plastering to curing, priming, and painting. With a systematic

From Plastering to Painting: A Step-by-Step Guide to Perfect Walls Read More »

How to Paint Newly Plastered Walls: Mist Coat and Beyond

Quick Answer: You must apply a mist coat (watered-down emulsion paint at a 70:30 paint-to-water ratio) to newly plastered walls before applying regular paint. Wait 4-6 weeks for plaster to dry completely, then apply one mist coat followed by two full coats of emulsion. Skipping the mist coat will cause paint to flake, bubble, and peel within weeks. Expect to spend £15-25 per room on mist coat materials. Why New Plaster Needs Special Treatment Fresh plaster isn’t ready for standard paint straight away. The surface is highly porous and alkaline, which creates two significant problems if you skip proper preparation. First, the porosity issue: newly skimmed plaster absorbs moisture like a sponge. Apply regular emulsion directly, and the wall will suck the water out so quickly that the paint can’t form a proper bond. You’ll see patchy coverage, inconsistent sheen, and within days or weeks, the paint will start flaking off in sheets. Second, the alkalinity problem: fresh gypsum plaster has a high pH level (around 11-12) as it cures. This alkalinity can react with certain paint binders, causing discolouration, poor adhesion, and long-term durability issues. The mist coat acts as a barrier layer that seals the surface whilst allowing the plaster to continue breathing and curing properly. We see homeowners and even inexperienced decorators make this mistake regularly. They’ll paint freshly plastered walls with standard emulsion, admire the finish for a few days, then watch it peel off within a fortnight. It’s a costly error that requires stripping everything back and starting again. Understanding Plaster Drying Times Before you even think about paint, the plaster must dry thoroughly. This is non-negotiable for achieving a lasting finish. Plaster Type Minimum Drying Time Recommended Wait Visual Indicator British Gypsum Multi-Finish (standard 2-3mm skim) 4-6 weeks 6 weeks Uniform pale pink colour, no dark patches Thistle Board Finish 4-6 weeks 6 weeks Consistent light pink throughout Lime plaster 8-12 weeks 12 weeks minimum Light grey-white, no dampness Backing coat (Bonding/Browning) 7-10 days before skim N/A (receives skim coat) Firm to touch, lighter colour Drying times vary based on several environmental factors. A centrally heated room in winter might dry faster than a cold, damp room in autumn. However, forced drying with heaters or dehumidifiers isn’t recommended—it can cause the plaster to dry unevenly, leading to cracking and poor strength. Pro Tip: Press a clean sheet of kitchen roll against the wall for 30 seconds. If it comes away damp or shows moisture marks, the plaster isn’t ready. Always test multiple areas, particularly corners and areas near external walls where moisture can linger. The British Gypsum technical guidance recommends a full 4-6 weeks drying time under normal conditions (18-20°C ambient temperature, 50-70% relative humidity). If you’ve had British Gypsum Multi-Finish applied, don’t rush this stage regardless of what your decorator might say about quick turnarounds. What Exactly Is a Mist Coat? A mist coat is simply a diluted coat of emulsion paint applied to bare plaster to seal the surface and provide a key for subsequent coats. It’s not a separate product—it’s standard emulsion paint mixed with clean water. The correct ratio is critical. Too thick and it won’t penetrate properly; too thin and it won’t provide adequate sealing. Standard Mist Coat Ratio 70% paint to 30% water (approximately 7 parts paint to 3 parts water) Alternative measurement: Add 300ml of water to 1 litre of paint Consistency should resemble semi-skimmed milk Mix thoroughly for 2-3 minutes to ensure complete integration Some professionals prefer ratios ranging from 60:40 to 80:20 depending on the plaster’s porosity, but 70:30 is the industry standard that works in the vast majority of situations. We’ve been using this ratio on new plaster for over 20 years with consistent results. ⚠️ Warning: Never use vinyl silk or vinyl matt for a mist coat. Only use standard contract matt or trade matt emulsion. Vinyl-based paints contain additional resins that prevent proper adhesion to bare plaster and will cause the exact peeling problems you’re trying to avoid. Choosing the Right Paint for Mist Coating Not all emulsion paints are suitable for mist coating new plaster. You need a breathable, water-based emulsion without vinyl additives or heavy acrylic content. Recommended Paints for Mist Coats Product Type Coverage Price (2026) Where to Buy Dulux Trade Contract Matt Trade emulsion 14m² per litre (undiluted) £35-42 per 5L Dulux Decorator Centres, Screwfix Johnstone’s Trade Matt Trade emulsion 16m² per litre (undiluted) £38-45 per 5L Johnstone’s Trade Centres Crown Trade Contract Matt Trade emulsion 15m² per litre (undiluted) £33-40 per 5L Travis Perkins, Wickes Leyland Trade Contract Matt Trade emulsion 13m² per litre (undiluted) £28-35 per 5L Screwfix, B&Q Professional decorators typically use trade-grade contract matt emulsion for mist coats. These formulations are specifically designed for bare plaster and offer excellent breathability and adhesion. Retail-grade paints from supermarkets or budget ranges often contain additives that aren’t suitable for first coats on fresh plaster. Colour choice matters too. Always use white or very pale colours for the mist coat. Dark or heavily pigmented colours can streak badly when diluted and may require multiple mist coats to achieve even coverage, defeating the purpose entirely. Step-by-Step: Applying a Mist Coat Proper application technique ensures the mist coat penetrates evenly and seals the entire surface effectively. Materials You’ll Need 5L tin of trade contract matt emulsion (white or magnolia) Empty bucket for mixing (2L capacity minimum) Measuring jug or container 9-inch roller sleeve (medium pile, 12mm nap) Roller frame and extension pole 2-inch angled brush for cutting in Roller tray Dust sheets and masking tape Clean water supply Application Process Step 1: Prepare the Surface Brush or vacuum the walls to remove all loose dust and debris. Fresh plaster sheds a fine dust layer even when fully dry. Use a soft brush or vacuum with a brush attachment—don’t use a damp cloth as this will wet the plaster again. Step 2: Mix the Mist Coat Pour 700ml of paint into your bucket, then add 300ml of clean tap water.

How to Paint Newly Plastered Walls: Mist Coat and Beyond Read More »

Complete Guide to Painting and Decorating Your Home

Quick Answer: Painting and decorating a home properly requires thorough surface preparation (including allowing plaster to dry for 2-4 weeks), applying mist coats to new plaster at 10:1 water-to-paint ratio, using quality materials (Dulux Trade, Crown, Johnstone’s), and working methodically room by room. Expect to pay £150-£350 per room for professional decoration in 2026, or £800-£2,500 for DIY materials for an entire house. The key to a professional finish lies in preparation (70% of the job), choosing the right paint type for each surface, and applying thin, even coats with proper drying time between layers. Understanding the Importance of Proper Surface Preparation The difference between a professional-looking paint job and an amateur one comes down to preparation. Any experienced decorator will tell you that 70% of painting and decorating is preparation work, not the actual painting itself. When we complete plastering work at Kent Plasterers, we always advise clients on proper timing before decoration. Different plaster types require different drying times, and painting too early is one of the most common mistakes homeowners make. Surface Preparation Checklist Before you pick up a paintbrush, your walls need to be in optimal condition: Clean all surfaces — Remove dust, grease, and cobwebs using sugar soap solution (available at Screwfix or B&Q for £4-£8 per litre) Fill cracks and holes — Use Polyfilla, Toupret, or Everbuild fillers for imperfections up to 20mm deep Sand filled areas — Use 120-grit sandpaper followed by 180-grit for a smooth finish Check for damp — Address any moisture issues with damp proof plaster or tanking systems before decorating Remove loose paint — Scrape off any flaking or peeling paint with a paint scraper Wash down glossy surfaces — Lightly sand gloss woodwork with 120-grit paper to provide a key for new paint Pro Tip: Always work from top to bottom when preparing rooms. Start with ceilings, then walls, then woodwork and skirting boards. This prevents dust and debris from settling on already-prepared surfaces. Mist Coating New Plaster: The Critical First Step If you’ve had fresh plastering work done, the mist coat is absolutely essential. This diluted first coat allows the plaster to breathe while creating a stable base for subsequent coats. Skip this step, and you’ll likely see paint peeling or blistering within months. According to British Gypsum’s technical guidance, new plaster must be completely dry before any decoration begins — typically 2-4 weeks depending on conditions. Mist Coat Application Guidelines Plaster Type Drying Time Mist Coat Ratio Number of Coats Gypsum skim coat 2-4 weeks 10:1 (water:paint) 1-2 mist coats Bonding plaster 3-4 weeks 10:1 to 8:1 2 mist coats Multi-finish 2-3 weeks 10:1 1-2 mist coats Lime plaster 4-8 weeks Use lime wash Multiple thin coats For detailed guidance on how many mist coats to apply, we’ve covered the specific requirements for different plaster finishes. ⚠️ Warning: Never use vinyl emulsion for mist coats. The vinyl content creates a barrier that prevents the plaster from breathing, leading to trapped moisture and eventual paint failure. Always use contract matt emulsion diluted with clean water. Choosing the Right Paint for Each Surface Not all paints are created equal, and using the wrong type for a particular surface is a false economy. In 2026, paint technology has advanced significantly, with improved coverage, durability, and environmental credentials. Paint Types and Their Applications Matt Emulsion — The workhorse of interior decoration, ideal for ceilings and low-traffic wall areas. Hides imperfections well but can mark easily. Expect to pay £18-£35 per 5L tin for quality brands like Dulux Trade or Crown Trade. Vinyl Silk/Satin — More durable than matt, suitable for high-traffic areas like hallways, kitchens, and bathrooms. The slight sheen makes surfaces easier to wipe clean. Price range: £22-£45 per 5L. Kitchen & Bathroom Emulsion — Contains fungicidal additives to resist mould growth in humid environments. Essential for bathrooms, shower rooms, and kitchens. Cost: £25-£50 per 5L for products like Dulux Bathroom+ or Johnstone’s Aqua Guard. Eggshell — Mid-sheen finish traditionally used on woodwork and trim. Increasingly popular for walls in modern homes. More forgiving than gloss, easier to apply. Price: £30-£55 per 2.5L. Satinwood — Modern alternative to gloss for woodwork. Water-based formulations dry quickly with minimal odour. Ideal for skirting boards, door frames, and window frames. Cost: £28-£50 per 2.5L. Gloss — Traditional high-sheen finish for woodwork and metalwork. Requires more preparation and skill to apply smoothly. Oil-based versions offer superior durability but have longer drying times (6-8 hours between coats). Price: £25-£45 per 2.5L. Premium vs Budget Paint: Is It Worth It? Factor Budget Paint (£12-£18/5L) Trade Paint (£25-£45/5L) Coverage 8-10 m²/L 12-16 m²/L Coats needed 3-4 coats 2 coats Durability 2-3 years 5-8 years Washability Poor to fair Excellent Colour accuracy Variable Consistent The Paint Quality Institute recommends investing in quality paint for high-traffic areas and rooms you use daily, while budget options may suffice for storage rooms or spaces you plan to redecorate soon. Essential Painting Tools and Equipment Having the right tools makes an enormous difference to both the quality of finish and the speed of work. Professional decorators invest in quality equipment because it lasts longer and produces better results. Core Painting Kit (£150-£300 for quality equipment) Roller frame and sleeves — 9″ frame (£8-£15) with medium-pile sleeves for walls (£3-£6 each). Buy multiple sleeves to avoid washing between colours Roller tray — Metal tray with disposable liners (£6-£12). Plastic trays crack easily Extension pole — Telescopic pole (£12-£25) for ceilings and high walls without ladders Brushes — 2″ and 3″ angled cutting-in brushes (£8-£18 each for Purdy or Harris brands). Cheap brushes shed bristles Dust sheets — Cotton twill dust sheets (£15-£30 each) are better than polythene — they don’t slip and absorb spills Masking tape — FrogTape or Tesa precision tape (£5-£8 per roll). Remove within 30 minutes of painting for clean lines Paint kettle — 2L metal kettle (£6-£10) for decanting paint and reducing contamination Filling knife — 4″ flexible filling knife (£4-£8) for repairs and filling Sandpaper and

Complete Guide to Painting and Decorating Your Home Read More »

Decorative Plaster: Benefits for Your Home

Quick Answer: Decorative plaster transforms ordinary walls into stunning architectural features. Whether you’re solving a crossword clue (STUCCO, PARGET, or ARTEX are all 6-letter answers) or planning a renovation, decorative plaster offers durability, luxury finishes, and increased property value. Popular techniques include Venetian plaster, stucco, and polished finishes suitable for any room in your home. Decorative plaster transforms ordinary walls into stunning architectural features that elevate any interior space. Whether you’re renovating a period property in Bromley or adding character to a modern Kent home, decorative plaster offers endless possibilities for creating unique, high-end finishes that reflect your personal style and increase property value. TL;DR – Quick Summary Decorative plaster 6 letters crossword answers include STUCCO, PARGET, and ARTEX – three distinct techniques with unique characteristics Decorative plaster increases property value by creating architectural character and luxury finishes that appeal to discerning buyers Popular techniques include Venetian plaster, stucco, and polished finishes suitable for living rooms, bathrooms, and commercial spaces Professional installation delivers durable, long-lasting results that outperform wallpaper and standard paint Cost varies based on technique complexity, but decorative plaster offers exceptional return on investment for Kent homeowners What is decorative plaster? Understanding the basics Defining decorative plaster and its historical significance Decorative plaster represents an ancient craft that has evolved dramatically to meet modern interior design needs. Unlike standard plastering that simply creates smooth, functional surfaces, decorative plaster transforms walls and ceilings into textured, ornamental features that serve as works of art. This specialized technique has graced buildings from ancient Roman villas to contemporary luxury homes across Kent. The craft dates back thousands of years, with evidence of decorative plasterwork found in Egyptian tombs and Pompeii ruins. Throughout history, skilled artisans have refined these techniques, passing down knowledge through generations. Today’s decorative plasterers combine traditional methods with modern materials to create finishes that honour heritage whilst meeting contemporary performance standards. What distinguishes decorative plaster from standard work is the artisan’s intention to create visual impact beyond mere functionality. These finishes incorporate texture, pattern, depth, and sometimes colour directly into the plaster itself. The result elevates walls from simple backdrops to focal points that define a room’s character and atmosphere. Common types of decorative plaster finishes Homeowners and interior designers can choose from numerous decorative plaster varieties, each offering distinct aesthetic qualities. Finish Type Characteristics Best For Venetian Plaster Smooth, marble-like surfaces with subtle depth and luminosity Luxury bathrooms, reception rooms Polished Plaster Contemporary elegance with semi-gloss finish that reflects light Modern living spaces, feature walls Textured Finishes Add dimension and tactile interest, from subtle stippling to dramatic relief patterns High-traffic areas, traditional interiors Relief Work Raised decorative elements replicating classical or modern designs Period properties, statement walls Each type requires specific skills, materials, and application methods. The choice depends on your design vision, room function, and desired maintenance level. Professional plasterers can guide you through options that complement your property’s architectural style whilst achieving your aesthetic goals. Pro Tip: Request sample boards from your plasterer showing different finishes in your actual room lighting. Decorative plaster looks dramatically different under natural daylight versus artificial lighting, and what works in one space may not suit another. Popular decorative plaster techniques and styles Stucco: The classic decorative plaster technique If you’ve encountered the decorative plaster 6 letters crossword clue, STUCCO represents one of the most common answers. This traditional technique combines cement, lime, sand, and water to create durable, textured finishes suitable for both interior and exterior applications. Stucco has adorned buildings throughout history, from Italian Renaissance palaces to Georgian townhouses in Kent. Interior stucco work creates elegant period-appropriate finishes that add architectural gravitas to reception rooms and hallways. The material can be applied smoothly or textured, coloured or left natural, depending on the desired effect. Its versatility makes it ideal for homeowners restoring period properties or those seeking classical elegance in new builds. The application process requires considerable skill to achieve consistent texture and proper adhesion. Professional plasterers build up layers methodically, allowing proper curing between coats. When executed correctly, stucco delivers exceptional durability that can last decades with minimal maintenance, making it a wise investment for discerning Kent property owners. Parget: Traditional ornamental plastering PARGET represents another decorative plaster 6 letters crossword answer that refers to ornamental plastering featuring raised patterns and designs. This historic technique originated in Tudor architecture, where skilled craftsmen created elaborate decorative panels depicting foliage, heraldic symbols, and geometric patterns. Examples of historic parget work can still be seen on period buildings throughout Kent and Suffolk. Traditional parget involved combing, moulding, or stamping wet plaster to create relief patterns that added visual interest to otherwise plain façades. Interior parget work adorned ceilings and wall panels in grand homes, showcasing the homeowner’s wealth and taste. The technique required exceptional artistry and technical skill to execute complex designs that remained crisp and clear. Modern plasterers adapt this ancient craft for contemporary homes, creating bespoke decorative panels and feature walls that honour traditional methods whilst incorporating modern design sensibilities. Whether replicating historic patterns during restoration work or developing original designs for new projects, parget offers unique opportunities to create truly distinctive interiors. Artex and textured finishes ARTEX, another decorative plaster 6 letters crossword answer, dominated mid-century British interiors with its distinctive textured patterns. This textured coating gained popularity from the 1960s through the 1980s, offering homeowners affordable decorative finishes in swirl, stipple, and geometric patterns. Whilst fashion has shifted, Artex remains recognizable in many period properties. The question facing many Kent homeowners today concerns whether to preserve, update, or remove Artex finishes during renovations. Original Artex may contain asbestos if applied before the mid-1980s, requiring professional assessment and removal. Even asbestos-free Artex can feel dated in contemporary schemes, prompting many to skim over it for smooth, modern finishes. However, some interior designers are reconsidering textured plaster finishes, not Artex specifically, but sophisticated alternatives that add depth without appearing dated. Contemporary textured plasters offer subtle dimension that creates visual interest whilst maintaining modern aesthetics. The key lies in

Decorative Plaster: Benefits for Your Home Read More »

Newly plastered wall ready for painting with professional painting equipment and supplies

How Many Mist Coats on New Plaster? One Is Usually Enough

One mist coat is usually enough on new plaster. Mix standard contract matt emulsion with water, roughly 70:30 paint to water, and let it dry for 24 hours. Very porous backgrounds such as hardwall or sand and cement render sometimes need a second, slightly thinner coat. Once the wall stops drinking the paint in, you are ready for two undiluted top coats. Key facts One mist coat suits most new plaster; use two on very porous or hardwall backgrounds Mist coat ratio: typically 70:30 emulsion to water, up to 50:50 on very thirsty surfaces Use cheap non-vinyl contract matt emulsion, never silk or kitchen and bathroom paint Leave 24 hours between the mist coat and the first top coat The plaster must be bone dry first: light pink all over, usually 3 to 7 days for a skim This page answers one question properly: how many mist coats your new plaster needs, and how to judge when one is not enough. For the full background on what a mist coat is and why fresh plaster needs one, read our guide to mist coats for new plaster. How many mist coats do you need on new plaster? In most residential jobs, one properly applied mist coat is sufficient to seal the plaster and give your top coats something to grip. Mixed to the correct dilution and applied without overworking, a single coat penetrates the surface and creates the bond that stops paint peeling later. When do you need a second mist coat? Apply a second mist coat when the first one vanishes into the wall. If patches of bare plaster still show after 24 hours, or absorption looks uneven across the surface, put on another thinned coat before any top coats. Very porous backgrounds are the usual culprits. Hardwall, bonding coat and sand and cement render drink paint far faster than a multi-finish skim, so plan for two mist coats on these surfaces from the start. Older buildings and walls with mixed substrates often need the same treatment. Professional plasterers judge it by eye 24 hours after the first coat. The wall should look uniformly sealed, with no chalky bare patches and no areas still soaking paint in like a sponge. If it passes that check, stop at one coat. Extra mist coats you do not need just waste paint and add a day to the job. How to apply a mist coat properly Application technique matters as much as timing and dilution. Start with a clean, dust-free, ventilated room. Mix your emulsion with clean water in a bucket, starting at a 70:30 paint-to-water ratio. Stir thoroughly, because any unmixed paint will give you inconsistent coverage. Use a large emulsion roller with a medium pile for the walls and a brush for edges and corners. The technique differs from standard painting: apply the paint generously but quickly, letting it soak into the plaster rather than working it back and forth. You are not aiming for perfect coverage on the first pass. Some slight patchiness is acceptable and expected. Work in manageable sections and keep a wet edge to avoid lap marks. Key equipment: Large roller and tray suitable for emulsion paint Medium-pile roller sleeve (avoid foam rollers, which don’t hold enough diluted paint) Quality brushes for cutting in at edges and corners Clean bucket for mixing paint and water Stirring stick for thorough mixing Dust sheets to protect floors and furniture Step ladder for reaching high areas safely If a second mist coat is needed, wait at least 24 hours so the first has dried completely. The second coat can be slightly less diluted, around 80:20, as the plaster is now partially sealed. What ratio should you mix a mist coat? A mist coat is heavily diluted emulsion paint applied to fresh plaster as the first layer of decoration. The standard mix is 70% paint to 30% water, though ratios from 80:20 down to 50:50 all get used depending on the paint and how porous the plaster is. Check the tin first, as some manufacturers state their own dilution. The thinned consistency lets the paint penetrate deep into the porous plaster and form a proper bond. Aim for something close to milk: thin enough to soak in, but still carrying enough pigment to show where you have been. Paint-to-Water Ratio When to Use Consistency 70:30 (Standard) Most new plaster applications Similar to milk 60:40 to 50:50 (Thinner) Very porous plaster, hardwall, sand and cement Watery, maximum penetration 80:20 (Thicker) Second mist coat or less porous surfaces Slightly thicker than milk Why bother diluting at all? Freshly applied plaster is absorbent like a sponge. Put undiluted paint straight on it and the plaster pulls the moisture out of the paint before the binder can form a proper film, leaving a weak surface layer that flakes, peels and cracks, often within a few months. A mist coat soaks into the plaster’s pores and seals the surface while keeping it breathable. Skipping it leads to: Premature paint failure and peeling Uneven coverage and patchy finishes Cracking and bubbling of the paint surface Complete repainting needed within months Poor adhesion requiring extensive remediation Can you use any emulsion for a mist coat? No. Use a cheap, non-vinyl contract matt emulsion and nothing else. Contract matt is made for new plaster, stays breathable, and costs less than the paint you will use for the colour coats. Avoid vinyl silk, kitchen and bathroom formulations, and anything marketed as scrubbable or moisture resistant. The additives that make those paints wipeable stop them soaking into the plaster, so the mist coat sits on the surface instead of bonding with it. Oil-based paints are worse still: they seal the wall completely and stop the plaster curing. Our guide to the best paint for new plaster compares specific products for both mist coats and top coats. How long should you wait before applying a mist coat? Timing matters more than anything else here. Rush it and you trap moisture beneath

How Many Mist Coats on New Plaster? One Is Usually Enough Read More »