Renovating for Calm: Stress-Free Home Tips
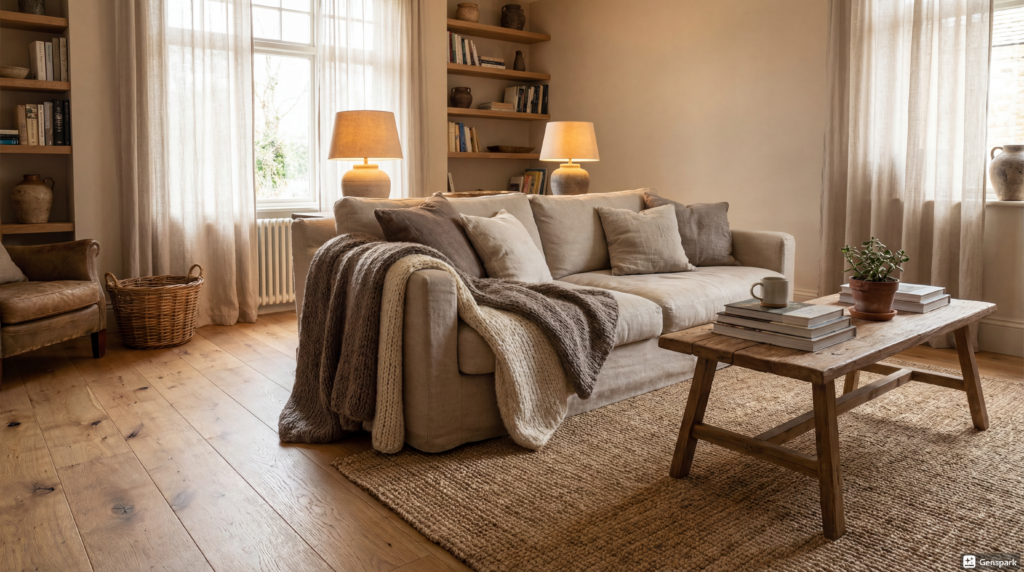
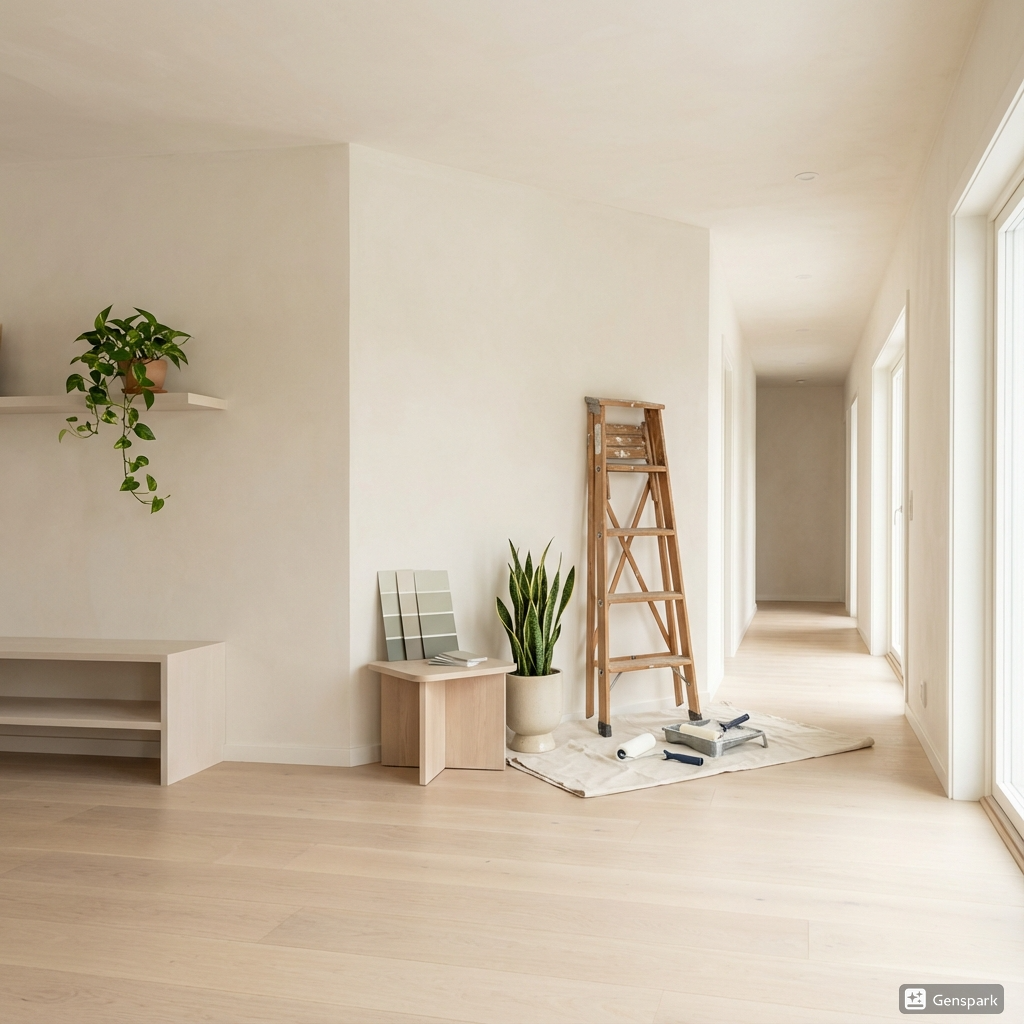
At a Glance: Creating a calm, stress-free home environment starts with thoughtful renovations that reduce visual clutter and improve the quality of your living spaces. Focus on smooth wall finishes, calming colour palettes, natural light, and better room flow. Simple changes like decluttering, replastering walls, and adding plants can significantly reduce daily stress levels and help you feel more balanced at home. Home is meant to be the place where the day slows down. It’s where people unwind, spend time with family, and recharge for what the next day holds in store for them. However, when a home feels noisy, cluttered, or visually busy, that sense of ease can gradually disappear. If this happens, little details within your living spaces can start to matter more to you than they should. This, in turn, makes it harder to relax. Many homeowners look to counter this by creating a calmer living space. And the most successful transformations happen when they focus on how a home is put together rather than what is added to it. Making thoughtful renovation choices, introducing clean finishes, and implementing well-considered layouts can go a long way towards helping your everyday life feel more balanced. Primarily, that is because renovating for calm is about creating a home that has a stress-free environment. Here is how you can do so. How Does Your Home Environment Impact on Your Stress Levels? Throughout the day, the spaces we spend our time in can affect our mood more than we realise. Exposure to busy layouts, damaged walls, harsh lighting, and visual clutter can quietly increase our stress levels over time. That is why it is vital to maintain a calm home that enables you to rest, focus, and improve your emotional balance. The best way to do this is to remove unnecessary distractions. Some of the savviest renovation choices that improve comfort around the home often revolve around clean surfaces, simple layouts, and materials that feel stable and grounding. This is where wall finishes, lighting, and furniture choices come together, along with therapeutic sensory furnitures to create a relaxing environment through texture, movement, and visual softness. Tips To Create a Stress-Free Home Environment So how do you go about renovating your home to make it as calm and stress-free as possible? Here are six tips you can follow. 1. Declutter and Simplify Your Space For any renovation, especially one aimed at creating calmer spaces, it is always a good idea to declutter thoroughly first. By doing this, you will reduce the visual noise and instantly make the room feel more open. It is worth going through each room of your home individually and removing everything you don’t use, that is broken, or has seen better days. To make things easier, sort what you no longer want into separate piles: Items you will sell Items to give to charity Items to recycle Items to dispose of at the local tip For the items you want to sell, you can do so on sites like Facebook Marketplace, eBay, or Gumtree. There are also plenty of charities that would be willing to accept your donations, and Recycle Now gives you lots of advice on the best way to recycle your possessions. 2. Improve The Condition of Your Walls and Surfaces In most homes, walls and surfaces are the largest visual elements. While they can be very calming if they have certain colours and features (more on that later), even the tiniest defects, such as cracks or uneven joins, can be unsettling. At the same time, surfaces influence how light moves across a room and how polished the space feels overall. For these reasons, it is advisable to replaster your walls and surfaces to make them as unblemished as possible. The smoother and cleaner they are, the more relaxed an impression they will make. Pro Tip: Investing in professional plastering creates a smooth, seamless finish that not only looks better but also reflects light more evenly throughout the room, enhancing the calm atmosphere you’re trying to achieve. 3. Choose Calm Colours and Finishes The colours you choose in your home have a strong influence on how calming it feels. As a general rule, soft neutrals, warm whites, and muted earth tones can all create a sense of balance without demanding your attention. One reason, as mentioned, is that these colours reflect light more evenly. Therefore, it tends to make spaces feel larger and calmer. Similarly, finishes are just as important as colour. Heavy textures and patchy surfaces can interrupt the flow of a room. By contrast, smooth wall finishes provide a level of consistency that helps rooms feel more complete. 4. Using Light and Space Better Increasing natural light is often a major motivation for a home renovation. Indeed, rooms that get plenty of it often feel easier to spend time in. Conversely, when light is blocked or uneven, living spaces can often feel smaller and more closed in (even if they are well-sized). One popular way to create a sense of space and introduce more light into your home is to knock down a wall. Another is to add a skylight or new windows. However, you don’t have to take as drastic an action as that because even simple fixes like decorating rooms minimally and opening up sightlines can make a massive difference. If that isn’t feasible, you could always try adding artificial lighting. 5. Create a Better Flow Between Rooms There is no question that your home will feel calmer if you can effortlessly move from one room to the next. When spaces connect naturally, there is less visual interruption. You also have to make fewer mental adjustments as you go about your day. Creating a sense of flow helps the home feel settled rather than broken up into separate, competing areas. One good way to do this is to maintain a consistent wall finish throughout your home, using similar colours across shared spaces. This can work particularly well when complemented with flooring
Renovating for Calm: Stress-Free Home Tips Read More »