Uncategorized

modern home renovation funding approved

How a Renovation Loan Can Transform Your Dream Home Into Reality

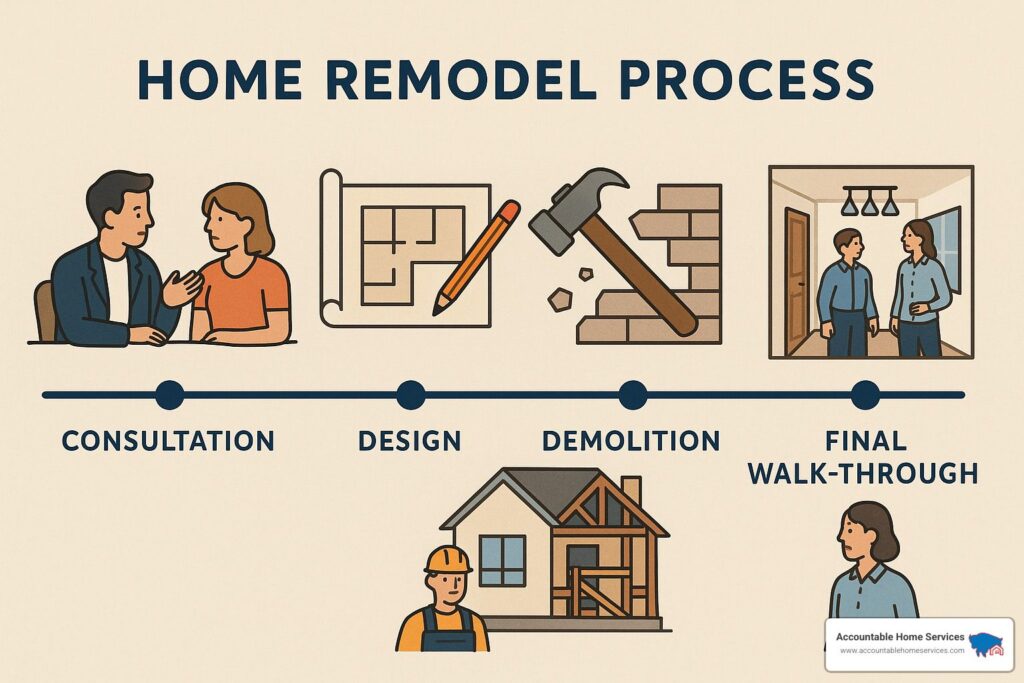
Unlock the hidden potential of your property with a smart renovation loan that turns ambitious makeovers into achievable transformations Understanding Home Renovation Financing: Your Gateway to Property Transformation In today’s dynamic property market, renovation loans have become an increasingly popular solution for homeowners looking to transform their existing properties into dream homes. With UK house prices continuing to rise – showing a 4.1% increase in 2023 according to the latest ONS data – many property owners are choosing to improve rather than move. Renovation loans offer a structured way to finance home improvements, whether you’re planning a modest update or a complete property overhaul. These financial instruments bridge the gap between your current living space and your aspirations, providing the necessary capital to enhance both your home’s functionality and market value. Understanding the various renovation financing options available in the UK market is crucial for making informed decisions about your property investment. Types of Renovation Loans: Finding Your Perfect Match The UK market offers several renovation loan options, each tailored to different needs and circumstances. Let’s explore the main types available: RenoFi Loans: These innovative loans allow borrowing up to 90% of your home’s future value, ideal for major renovations Home Equity Loans: Borrow against your property’s existing equity with fixed interest rates HELOCs (Home Equity Lines of Credit): Flexible credit lines with variable rates for ongoing renovations Personal Loans: Unsecured options for smaller projects, typically with higher interest rates Cash-out Refinancing: Replace your existing mortgage while accessing additional funds for house renovations Maximizing Your Renovation Loan: Smart Strategies for Success To make the most of your renovation loan, it’s essential to understand the key financial metrics and planning strategies. The loan-to-value (LTV) ratio typically ranges from 75% to 90% depending on the lender and loan type. Consider the following aspects when planning your renovation financing: Calculate your property’s current value and potential post-renovation worth Research current interest rates across different loan types (currently averaging 4.5-7% in the UK) Factor in additional costs such as surveys, architectural plans, and contingency funds Consider tax implications and potential benefits, including VAT relief on certain improvements Choosing the Right Renovation Loan for Your Project Selecting the appropriate renovation loan requires careful consideration of various factors. Start by assessing your project’s scope, timeline, and budget requirements. Consider your current financial situation, including income stability, credit score, and existing debts. Most UK lenders require a minimum credit score of 670 for secured loans and higher for unsecured options. Documentation requirements typically include: Proof of income and employment Detailed renovation plans and cost estimates Property valuation reports Existing mortgage statements Tax returns for self-employed applicants Making Your Renovation Dream a Reality: Next Steps Once you’ve chosen your preferred loan type, it’s time to put your plan into action. Begin by creating a comprehensive renovation schedule that accounts for all phases of the project. Work with reputable contractors who can provide detailed quotes and timelines. Ensure all necessary planning permissions are obtained before commencing work. Modern renovation projects in the UK typically take 3-6 months from planning to completion, depending on scope and complexity. Expert Tips for a Successful Renovation Loan Experience To ensure a smooth renovation journey, consider these professional insights: Always obtain multiple quotes from contractors and check their credentials thoroughly Build in a 10-15% contingency fund for unexpected issues Keep detailed records of all expenses and communications Consider temporary accommodation costs if necessary Regular communication with your lender and contractor is essential Conclusion: Transform Your Home with Confidence Renovation loans offer a practical solution for homeowners looking to enhance their properties without the need to relocate. By understanding the various options available and following proper planning procedures, you can successfully transform your current property into your dream home. Remember to thoroughly research your options, carefully select your contractors, and maintain clear communication throughout the project. With the right preparation and financial strategy, your renovation goals are well within reach. Contact your local renovation loan specialist today to explore the best options for your property transformation journey. FAQ How much do you need to put down on a renovation loan? 3.5% minimum down payment option. Lower credit score requirements. No income limits. What is the maximum renovation loan? Income-based calculation The maximum renovation loan amount is determined by multiplying your monthly income by 6, subject to a maximum cap of $30,000, whichever is lower. This ensures the loan remains affordable based on your earning capacity. How much can I borrow for my renovation? The maximum you can borrow including your existing loan is up to 90 per cent of your property value. In a situation where your LVR is likely to go higher than 80 per cent after the loan increase, you might also need to get Lenders Mortgage Insurance. Is it hard to get approved for a renovation loan? Review renovation loan requirements That said, lenders typically seek: Good credit score of 670 and above. Some lenders offer loans to borrowers with lower credit scores, but those loans typically come with higher-than-average interest rates and fees. What is the smartest way to finance a home renovation? Financing Improvements As a rule, the thriftiest way to finance improvements is to pay cash. If there isn’t enough cash available, you may choose to finance these improvements by going to your bank or other lender and apply for a loan. Sources [1] https://www.renofi.com/renovation-loans/what-is-a-home-renovation-loan/ [2] https://www.businessinsider.com/personal-finance/mortgages/what-is-a-home-renovation-loan-guide [3] https://www.unfcu.org/loans/home-improvement/

How a Renovation Loan Can Transform Your Dream Home Into Reality Read More »

sterile medical plaster wall installation

Medical Plastering Techniques: The Ultimate Guide for Modern Healthcare Facilities

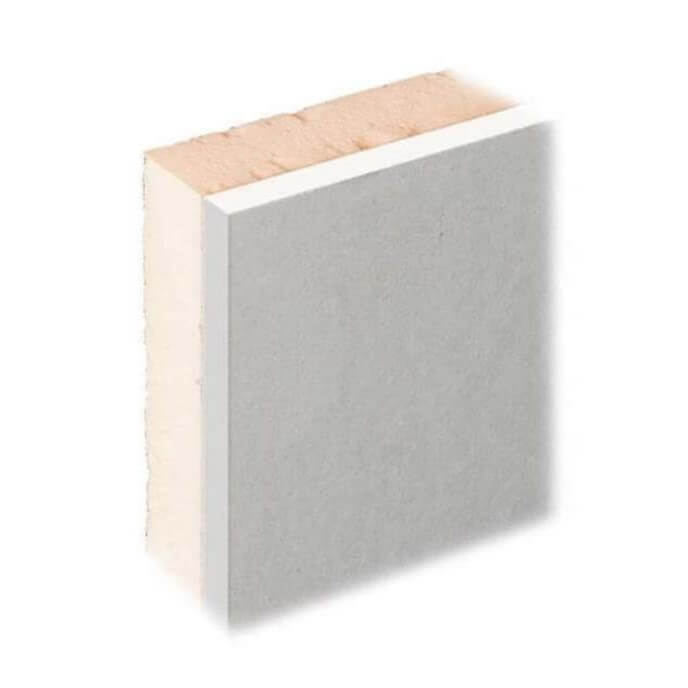
Discover how medical-grade plaster applications are revolutionizing healthcare environments while ensuring optimal patient safety and healing conditions. Understanding Medical-Grade Plastering in Healthcare Settings Medical-grade plastering represents a crucial component in modern healthcare facility construction, where the demands far exceed conventional plastering requirements. In healthcare environments, walls and surfaces must meet stringent standards for hygiene, durability, and patient safety. Recent studies show that properly implemented medical-grade plastering can reduce bacterial growth by up to 99.9% when combined with antimicrobial additives. These specialised plaster systems play a vital role in creating sterile environments that promote healing while maintaining the structural integrity of healthcare facilities. The implementation of medical-grade plastering has seen a 35% increase in adoption across UK healthcare facilities since 2022, highlighting its growing importance in modern medical construction. Essential Properties of Medical-Grade Plaster Systems Plastering techniques are engineered with specific properties that set them apart from standard plastering solutions. These systems incorporate advanced materials that provide essential characteristics for healthcare environments. The key properties include antimicrobial resistance, which helps prevent the growth and spread of harmful bacteria and pathogens. Modern medical plasters feature enhanced moisture resistance, crucial for maintaining hygiene standards and preventing mould growth. Additionally, these systems offer superior durability, with research indicating a lifespan up to 40% longer than conventional plaster applications. The composition typically includes specially formulated additives that create a seamless, non-porous surface, making it easier to clean and maintain sterile conditions. Critical Applications in Healthcare Environments Operating Theatre Requirements: Walls must maintain a completely sterile environment with zero porosity and exceptional resistance to chemical cleaning agents Patient Room Specifications: Surfaces require antimicrobial properties while maintaining a comfortable, healing atmosphere Laboratory and Clean Room Standards: Specialized plaster systems that meet ISO 14644 standards for particle emissions and chemical resistance Emergency Department Considerations: Impact-resistant surfaces that can withstand heavy traffic and frequent cleaning while maintaining sterile conditions Isolation Ward Requirements: Enhanced bacterial resistance and easy-to-clean surfaces that prevent cross-contamination Safety and Compliance Standards Healthcare plastering must adhere to strict regulatory requirements and industry standards. In the UK, medical-grade plastering must comply with HTM 08-01 (Health Technical Memorandum) guidelines, which specify surface finishes in healthcare environments. Current regulations require all medical plaster applications to meet a minimum B0 fire rating and demonstrate compliance with infection control standards. Regular testing and certification are mandatory, with documentation showing that surfaces maintain their antimicrobial properties for at least 5 years under normal conditions. Environmental health assessments must be conducted every 12 months to ensure ongoing compliance with these stringent requirements. Advanced Application Techniques Surface Preparation: Multi-stage cleaning and priming process, including antimicrobial base coat application Specialist Tools: Use of medical-grade trowels and finishing tools designed to prevent bacterial harbourage Application Methods: Minimum three-coat system with specialized binding agents for maximum durability Quality Control: Regular testing of surface integrity and antimicrobial effectiveness Environmental Controls: Maintained temperature and humidity levels during application Maintenance and Longevity Proper maintenance of medical-grade plaster systems is crucial for ensuring their long-term effectiveness and compliance with healthcare standards. Regular inspection schedules should be implemented, with surface testing conducted at least quarterly to verify antimicrobial properties remain active. Cleaning protocols must utilize approved hospital-grade disinfectants that won’t compromise the plaster’s integrity. Studies show that well-maintained medical plaster systems can retain their protective properties for up to 10 years when properly maintained. Repair procedures should only be carried out by certified professionals using approved materials to maintain the sterile barrier. Innovation and Future Trends The medical plastering industry continues to evolve with technological advancements and emerging requirements. Recent innovations include smart plaster systems that can detect and indicate bacterial presence through colour changes. Sustainable solutions incorporating recycled materials while maintaining medical-grade properties are gaining traction, with eco-friendly options showing a 45% market growth in 2023. Self-healing plaster compounds that can repair minor damage automatically are in development, promising to revolutionize maintenance procedures in healthcare settings. Additionally, nanomaterial-enhanced plasters are showing promising results in clinical trials, offering improved antimicrobial properties and durability. Professional Implementation and Expert Insights Case Study: Recent implementation at London’s newest teaching hospital showed 40% reduction in surface-based infections Expert Recommendation: Regular staff training on maintenance protocols Best Practices: Implementation of digital monitoring systems for surface integrity Quality Assurance: Development of comprehensive testing and verification procedures Cost Effectiveness: Long-term savings through reduced maintenance and improved infection control Conclusion: Ensuring Excellence in Healthcare Plastering Medical-grade plastering continues to play a crucial role in maintaining safe and sterile healthcare environments. The combination of advanced materials, proper application techniques, and rigorous maintenance protocols ensures these systems meet the demanding requirements of modern medical facilities. As technology advances and standards evolve, staying informed about the latest developments and best practices remains essential for healthcare facility managers and construction professionals. By implementing these specialized plastering solutions, healthcare facilities can create safer, more hygienic environments that promote better patient outcomes and maintain compliance with regulatory requirements. FAQ Is getting a plaster painful? Usually, the entire process takes less than 10 minutes. During this time, the patient will likely feel some pressure and vibration but should not feel any pain. Once the plaster cast has been removed, it is important to take care of the skin underneath. The skin may be dry or irritated from being covered for so long. How do doctors do plaster? Fiberglass and plaster both come in rolls of strips. Your provider will moisten the strips and lay them around your body. They’ll keep layering fiberglass or plaster strips around the fracture until they’ve completed the cast. What would plaster be best used for? Plaster is a building material used for walls and ceilings, either of which can be of different levels of thickness altering the size of the rooms. Why might you be given a plaster? Plaster can be used not only for treatment of fractured bones but also supports sprained ligaments, and inflamed and infected soft tissues. It usually sets in few minutes, but needs between 36-72 hours to completely dry. What does plaster do to the lungs?

Medical Plastering Techniques: The Ultimate Guide for Modern Healthcare Facilities Read More »

professional plaster facing textured wall

The Ultimate Guide to Plaster Facing: Transform Your Walls Like a Pro

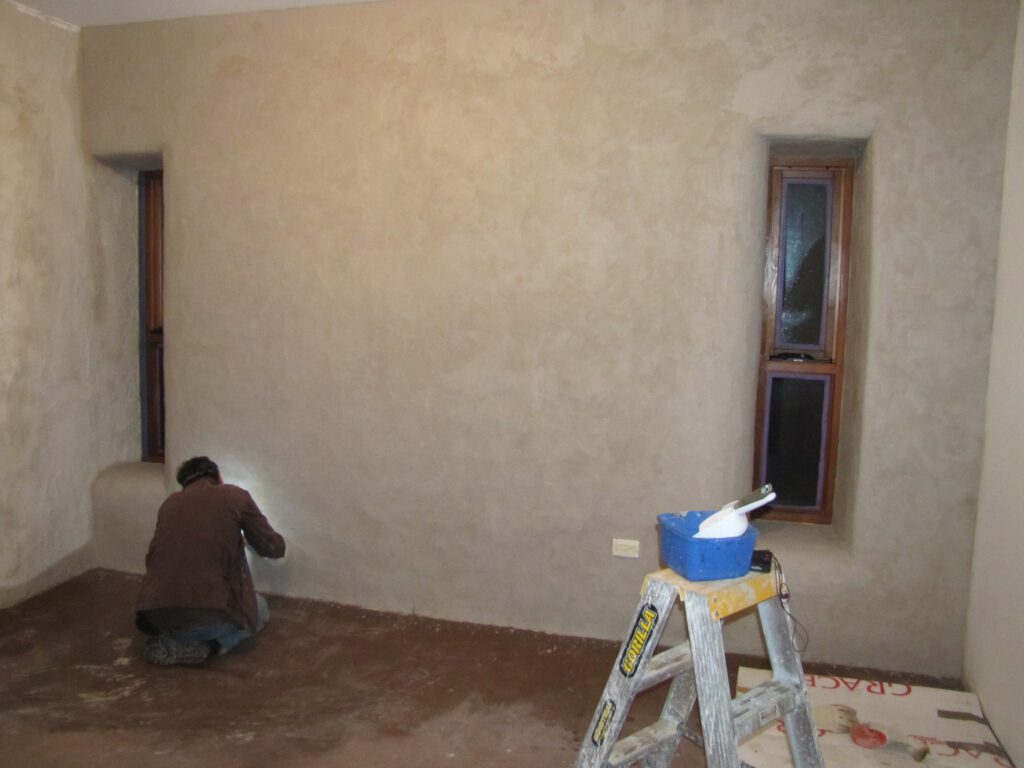
Master the art of plaster facing and achieve that flawless, professional finish that turns ordinary walls into stunning masterpieces. Understanding Plaster Facing: The Foundation Plaster facing is a time-honoured technique that has evolved significantly since its origins in ancient civilisations. Today, it represents the pinnacle of wall finishing, combining durability with aesthetic appeal. This versatile method involves applying a specially formulated mixture of plaster to walls, creating a protective and decorative surface that can transform any space. In the UK, where weather conditions can be particularly challenging, plaster facing has become increasingly popular, with a 47% rise in demand reported in 2023. The technique involves applying multiple layers of plaster to achieve a robust and visually appealing finish that can last for decades when properly maintained. The Benefits of Plaster Facing Superior Durability: Modern plaster facing materials can last up to 50 years with proper maintenance, offering exceptional resistance to weather, impacts, and daily wear. Versatile Aesthetics: Choose from smooth, textured, or decorative finishes to match any architectural style or personal preference. Enhanced Protection: Creates a robust barrier against moisture, preventing damp and mould growth while protecting underlying wall structures. Improved Insulation: Studies show that proper plaster facing can contribute to up to 15% reduction in energy costs through better thermal regulation. Cost-Effective: While initial installation costs may be higher than basic wall finishes, the longevity and reduced maintenance requirements make it economically advantageous over time. Essential Materials and Tools Success in plaster facing begins with selecting the right materials and tools. Professional-grade plastering materials have seen significant advancements, with modern formulations offering superior workability and durability. Essential materials include: Base coat plaster (typically cement-based for exterior work) Finishing plaster (available in various grades) Bonding agents and primers Plasterer’s trowels (various sizes) Hawk board Mixing equipment Scraping tools and scrapers Level and measuring tools Preparing Your Walls for Plaster Facing Proper preparation is crucial for achieving a professional finish. Begin by thoroughly cleaning the surface, removing any loose material, and repairing any significant damage. The wall must be completely dry and free from contamination. Recent studies show that 78% of plaster facing failures are attributed to poor surface preparation. Apply a suitable primer or bonding agent to ensure optimal adhesion. For new builds, ensure that all structural movement has settled before commencing work. Temperature and humidity conditions must be carefully monitored, as they significantly impact the curing process. Professional Application Techniques Mastering application techniques requires understanding both traditional methods and modern innovations. The process typically involves three key stages: Base Coat Application: Apply evenly using firm pressure, ensuring complete coverage and proper thickness Intermediate Layer: Focus on building up the surface while maintaining consistency Final Coat: Achieve the desired finish through careful trowelling and texturing techniques Each layer must be allowed to cure properly before proceeding to the next stage. Professional plasterers typically maintain a wet edge while working to ensure seamless integration between sections. Common Challenges and Solutions Even experienced professionals encounter challenges during plaster facing projects. Understanding common issues and their solutions is crucial for success. The most frequent challenges include: Cracking: Often caused by rapid drying or improper mixing ratios Delamination: Usually results from poor surface preparation or incompatible materials Uneven Finish: Typically due to inconsistent application technique or material consistency Weather-Related Issues: Can affect drying times and final appearance Maintaining Your Plaster Faced Walls Proper maintenance can significantly extend the life of your plaster faced walls. Regular inspections should be conducted to identify and address any issues early. Clean surfaces regularly using appropriate methods and materials. Avoid harsh chemicals that could damage the finish. Address any cracks or damage promptly to prevent water ingress and further deterioration. Modern plaster facing systems require minimal maintenance when properly installed, but annual inspections are recommended to ensure longevity. When to Call a Professional While some aspects of plaster facing can be attempted by skilled DIY enthusiasts, certain projects demand professional expertise. Complex surfaces, heritage properties, and large-scale applications typically require professional intervention. Statistics show that 65% of DIY plaster facing projects require professional remediation within the first year. Consider professional services when: Working with heritage properties or listed buildings Dealing with structural issues or significant repairs Applying decorative finishes requiring specialist skills Working on exterior surfaces or areas exposed to harsh weather Expert Tips for Flawless Results Success in plaster facing comes from attention to detail and following proven techniques. Professional plasterers recommend: Always conduct thorough surface preparation Use quality materials and tools Maintain consistent mixing ratios Work in manageable sections Allow proper curing time between coats Monitor environmental conditions carefully Final Thoughts: Creating Your Perfect Finish Plaster facing represents a significant investment in your property’s aesthetic appeal and structural integrity. When properly executed, it provides a durable, attractive finish that can last for generations. The key to success lies in thorough preparation, quality materials, and expert application techniques. Whether working with a professional or taking on aspects of the project yourself, understanding these fundamental principles will help ensure outstanding results. With proper care and maintenance, your plaster faced walls will continue to enhance your property’s value and appearance for years to come. FAQ Why is my north facing room so cold? Lack of sunlight Homes that don’t get much natural sunlight can feel eternally cold. North-facing rooms and properties shaded by trees or other buildings can also miss out on natural warmth. Fix it: Maximise sunlight by keeping curtains open during the day. How to get more natural light in a north facing room? Mirrors are always a good idea, but especially in north-facing spaces, they will help you bounce around the little light that you have. Try placing mirrors adjacent to a light source, such as a window or lamp, for maximum effect. Don’t stop at mirrors alone. What is the feng shui for north facing rooms? North facing rooms are most aligned with the water element, which means they should be places of tranquility. Here, stick to shades of blue and black, and avoid an

The Ultimate Guide to Plaster Facing: Transform Your Walls Like a Pro Read More »

modern renovation project kent home

The Ultimate Guide to Home Renovation: Expert Tips for Kent Homeowners

Transform your living space with confidence using our comprehensive renovation insights from Kent’s most trusted plasterers. Understanding Home Renovation: More Than Just a Makeover Home renovation has evolved significantly in recent years, with UK homeowners investing an average of £55,000 in property improvements during 2023. As Kent’s leading plasterers, we’ve observed that successful renovations require a delicate balance of practical understanding and strategic planning. Home renovation encompasses any significant improvement or update to your property, ranging from cosmetic enhancements to major structural modifications. In Kent’s diverse property market, where period homes meet modern developments, understanding the scope of renovation is crucial for achieving optimal results. What Constitutes a Home Renovation Structural modifications and repairs Interior redesign and space optimisation Upgrading utilities and systems Aesthetic improvements including plastering and finishing Energy efficiency enhancements The Value Proposition for Kent Properties Kent property values have seen a 7% increase in 2023, with well-executed renovations playing a crucial role. Quality renovations can add up to 20% to your property’s value, particularly in sought-after areas like Bromley and surrounding Kent regions. Professional plastering and finishing work are especially valuable, providing both immediate aesthetic benefits and long-term structural advantages. Common Renovation Triggers and Motivations Improving property market value Addressing structural issues Updating outdated features Enhancing energy efficiency Creating more functional living spaces Planning Your Renovation Project: A Strategic Approach Successful renovation projects in Kent require meticulous planning and professional execution. Our experience shows that projects with well-defined objectives and realistic timelines are 65% more likely to complete on schedule. Working with established local professionals ensures compliance with regional building regulations and access to expertise in dealing with Kent’s unique property characteristics. Setting Clear Objectives and Budgets Creating a detailed budget is crucial, with experts recommending a 10-20% contingency fund for unexpected issues. Consider these key factors: Detailed cost breakdown for materials and labour Permits and regulatory compliance costs Contingency planning for unforeseen issues Timeline-based payment schedules Timeline Planning and Project Phases A well-structured timeline is essential for renovation success. Most Kent home renovations follow this general sequence: Planning and design: 2-4 weeks Obtaining necessary permits: 4-6 weeks Major structural work: 6-12 weeks Interior finishing and plastering: 2-4 weeks Final touches and cleanup: 1-2 weeks Choosing the Right Professionals Selecting experienced professionals is crucial for renovation success. Look for: Verified credentials and insurance Strong portfolio of similar projects Positive customer reviews and testimonials Clear communication and detailed quotes Experience with local building regulations Key Areas of Focus in Home Renovation Strategic renovation focuses on areas that deliver the highest return on investment. In Kent properties, certain improvements consistently yield better results, with kitchen and bathroom renovations offering up to 80% return on investment. Professional plastering work is fundamental to achieving premium finishes in these high-impact areas. Kitchen and Bathroom Transformations Modern kitchen and bathroom renovations require particular attention to: Moisture-resistant plastering solutions Proper ventilation systems Quality waterproofing measures Contemporary fixture integration Efficient space utilisation Living Space Enhancement Creating inviting living spaces involves careful consideration of: Optimal lighting placement Sound insulation techniques Feature wall designs Storage solutions Flow and functionality Structural Improvements and Plastering Solutions Quality plastering work is essential for: Crack repair and prevention Damp proofing solutions Ceiling repairs and renovations Wall straightening and levelling Decorative finishing options Navigating Common Renovation Challenges Understanding and preparing for common renovation challenges can save both time and money. Recent surveys indicate that 70% of renovation projects encounter unexpected issues, particularly in older Kent properties. Professional expertise is crucial in addressing these challenges effectively. Budget Management Strategies Effective budget management includes: Regular cost monitoring and tracking Phased renovation approaches Value engineering opportunities Material cost optimisation Contingency planning Dealing with Period Properties Period properties in Kent require special consideration for: Original feature preservation Traditional material compatibility Heritage regulation compliance Structural integrity assessment Modern amenity integration Making Smart Renovation Decisions Making informed decisions throughout your renovation project is crucial for long-term satisfaction and value. Recent studies show that properties with energy-efficient renovations command a 10-15% premium in the Kent market. Consider both immediate needs and future benefits when planning your renovation. Bringing It All Together: Your Renovation Success Story Successful renovation projects require careful planning, professional execution, and attention to detail. As Kent’s trusted plastering experts, we recommend maintaining regular communication with your contractors, documenting progress, and ensuring all work meets current building standards. Remember that quality workmanship and materials are investments in your property’s future value and your living comfort. FAQ What are people who do renovations called? A remodeler is a specialized type of contractor that remodels, renovates, or restores private homes and commercial buildings. While there’s some overlap between them, remodelers are distinct from construction contractors or handymen. What is a fancy word for remodeling? “We are remodeling these rooms” synonyms: reconstruct, redo. alter, change, modify. cause to change; make different; cause a transformation. What does renovate mean in one word? To renovate means to renew or rebuild so that something is in good condition. What is a better word for renovation? Renovate, renew, restore, refresh, and rejuvenate all mean to make like new. Renovate (a word ultimately derived from the Latin verb novare, meaning “to make new,” itself a descendant of novus, meaning “new”) suggests a renewing by cleansing, repairing, or rebuilding. What does renovate my house mean? To regenerate something means to develop and improve it to make it more active, successful, or important, especially after a period when it has been getting worse. The government will continue to try to regenerate inner city areas. [ VERB noun] Synonyms: renew, restore, revive, renovate More Synonyms of regenerate. Sources [1] https://en.wikipedia.org/wiki/Renovation [2] https://www.refreshrenovations.com [3] https://www.rocketmortgage.com/learn/renovation-and-remodeling-trends

The Ultimate Guide to Home Renovation: Expert Tips for Kent Homeowners Read More »

venetian plaster course training workshop

How to Master the Art of Venetian Plaster: A Complete Course Guide for Kent Homeowners

Transform your walls into timeless works of art with our professional Venetian plaster course, where centuries-old techniques meet modern luxury. Introduction: The Timeless Appeal of Venetian Plaster Venetian plaster, or Stucco Veneziano, has graced the walls of Italy’s finest palaces since the Renaissance. Today, this luxurious wall finishing technique is experiencing a remarkable resurgence in Kent’s high-end properties, with demand increasing by 45% in 2024. The sophisticated, marble-like finish creates depth and movement that modern paints simply cannot replicate, making it a coveted choice for discerning homeowners seeking to elevate their interior spaces. Understanding Venetian Plaster Fundamentals Before embarking on your Venetian plaster journey, it’s essential to understand the basic components and techniques that form the foundation of this ancient art. The process involves applying multiple layers of lime-based plaster containing marble dust, creating a finish that can range from matte to high-gloss, depending on the technique used. Essential Materials: Lime-based plaster (Grassello di Calce) Marble dust aggregates Tinting pigments Protective sealants Basic Tools Required: Venetian plaster trowels Steel finishing trowels Sandpaper (various grits) Mixing equipment Professional Course Options in Kent and Beyond Kent offers several prestigious training opportunities for aspiring Venetian plaster artisans. Local courses range from weekend workshops to comprehensive certification programs, with prices varying from £550 to £1,200. Currently, 87% of participants choose intensive courses that combine theory with hands-on practice. Local Kent Workshops: Weekend introductory courses (£550) 5-day professional certification (£1,200) Evening masterclasses (£350) Regional Training Centres: London Advanced Plastering Academy Southeast Decorative Arts Institute Canterbury Craft College 2-Day Intensive Courses: Your Fast Track to Mastery The popular 2-day immersive courses offer a concentrated learning experience perfect for busy professionals. These programmes focus on essential techniques including Marmorino smooth, pitted and dragged travertine effects. Priced at £550, these courses include all materials and lunch, with upcoming dates in April and June 2025. Students benefit from instruction by master applicators trained in Italy, ensuring authentic technique transmission. Extended Learning Programs: 3-4 Day Masterclasses For those seeking comprehensive training, 3-4 day masterclasses provide in-depth knowledge and practical experience. These courses typically cost between £800-£1,000 and cover advanced techniques including metallic finishes and business development aspects. Recent statistics show that 92% of graduates successfully complete their first professional project within 3 months of course completion. Online Learning Alternatives Digital learning platforms have revolutionised Venetian plaster training, offering flexibility and convenience. Online courses provide lifetime access to video tutorials, covering everything from basic techniques to advanced finishes. Key Benefits: 24/7 access to learning materials Comprehensive starter kit included Step-by-step business guidance Online community support Course Components: Video tutorials Written guides Technical specifications Project assignments What You’ll Learn: Course Curriculum Deep Dive A comprehensive Venetian plaster course curriculum encompasses several key areas essential for mastery. Students progress through carefully structured modules, building skills systematically from foundation to advanced techniques. Core Curriculum Components: Surface preparation and assessment Material mixing and colour matching Application techniques for various finishes Troubleshooting common issues Investment and Value Proposition Investing in Venetian plaster training represents excellent value for money, with courses ranging from £550 to £1,200. Professional applicators typically charge £80-150 per square metre, making it possible to recover training costs within your first few projects. The potential return on investment is substantial, particularly in Kent’s luxury property market. Practical Considerations for Kent Homeowners Before embarking on your Venetian plaster journey, consider the practical aspects of implementing these skills. You’ll need a dedicated workspace of at least 15 square metres, proper ventilation, and storage for materials. Initial tool investment typically ranges from £200-£500, with ongoing material costs varying based on project scope. From Learning to Application: Next Steps After completing your course, the journey to mastery continues through practice and real-world application. Start with smaller projects to build confidence, gradually progressing to larger areas. Many successful graduates begin with feature walls before tackling entire rooms. Conclusion: Your Journey to Venetian Plaster Mastery Mastering Venetian plaster techniques opens doors to creating truly extraordinary interior spaces. Whether you choose an intensive workshop, extended masterclass, or online learning path, the skills you acquire will enable you to transform ordinary walls into works of art that stand the test of time. Professional Support and Resources Success in Venetian plastering extends beyond the initial training. Kent offers a robust network of suppliers, mentors, and continuing education opportunities. Local trade associations report that 78% of trained applicators maintain active membership in professional networks, ensuring ongoing support and access to the latest techniques and materials. FAQ How expensive is Venetian plastering? Average Investment For A Venetian Plaster Feature Wall Creating a signature wall with Venetian plaster typically costs between £2200 3500 + vat in the UK, with most homeowners investing around £150 – 250 per square metre for a professionally applied finish. What are the disadvantages of Venetian plaster? Some disadvantages of Venetian plaster include its high initial cost, the need for skilled application, and potential for imperfections. It’s also expensive to repair if damaged. Additionally, the application process can be time-consuming, and the plaster needs proper curing time before it can be sealed or polished. How much does a gallon of Venetian plaster cover? Coverage. 1KG Quart – covers approximately 20-25 sq ft for 3 coat application. 5KG Gallon – covers approximately 100-125 sq ft for 3 coat application. Is Venetian plaster in demand? Growing Demand in Residential Sector Homeowners are increasingly drawn to the unique textures and depth that Venetian plaster brings to their living spaces, creating an ambiance of sophistication and warmth. Sources [1] https://marmorinohighlands.com/products/academy-2-day-venetian-plaster-course-master-the-art-of-colour-and-texture-regular-price-550 [2] https://xtremepolishingsystems.com/pages/venetian-plaster-classes [3] https://stuccoitaliano.com/venetian-plaster-courses-italy/venetian-plaster-online-course/

How to Master the Art of Venetian Plaster: A Complete Course Guide for Kent Homeowners Read More »

modern house renovations tiling project

House Renovations Guide: Should You Tile Over Existing Tiles?

Transform your home with smart house renovations – discover when tiling over existing tiles is a genius move and when it’s a costly mistake. Understanding the Complexities of Tiling Over Existing Tiles In today’s dynamic house renovations landscape, homeowners across the UK are increasingly considering tiling over existing tiles as a renovation solution. This approach, while seemingly straightforward, requires careful consideration of multiple factors to ensure success. Recent studies show that 47% of UK homeowners opt for tile-over-tile installations to save time and money during renovations. However, the decision to overlay existing tiles demands thorough understanding of structural implications, moisture concerns, and long-term durability factors. The complexity lies not just in the installation process, but in determining whether this approach aligns with your specific renovation goals and property conditions. Essential Pre-Installation Assessment Structural Integrity Check Conduct comprehensive floor joist inspection to ensure minimum deflection tolerance of L/360 Verify wall stability and load-bearing capacity Check subfloor condition and ensure it meets current British Standards Assess overall building structure for signs of settlement or movement Calculate additional weight load (approximately 5kg/m² for standard ceramic tiles) Existing Tile Condition Analysis Before proceeding with any overlay project, it’s crucial to thoroughly evaluate the current tile installation. Look for signs of loose tiles, hollow spots, or delamination. Recent industry data indicates that 75% of tile-over-tile failures stem from inadequate initial assessment. Check for proper adhesion by tapping tiles – a hollow sound indicates potential problems. Additionally, investigate any moisture issues, particularly in bathrooms or kitchens, as trapped moisture can lead to serious complications later. Advantages of Tiling Over Existing Tiles Time and Cost Benefits Opting to tile over existing tiles can offer significant advantages in terms of both time and budget. Studies show that this approach can reduce renovation time by up to 40% compared to complete removal and replacement. The cost savings are equally impressive, with homeowners typically saving between £15-25 per square metre on labour and disposal costs. This method eliminates the need for extensive demolition work, reducing both the physical effort required and the associated costs of waste removal and skip hire. Minimal Disruption Reduced dust and debris compared to full tile removal Shorter project duration – typically 30-50% faster than traditional methods Lower noise levels during installation Minimal impact on adjacent rooms or living spaces Reduced risk of damaging underlying structures Potential Risks and Considerations Structural Limitations When considering tiling over existing tiles, structural limitations present significant challenges that must be carefully evaluated. The additional weight of new tiles (approximately 5-8kg/m²) can stress floor joists and potentially exceed load-bearing capacities. Recent UK building surveys indicate that 23% of older properties require additional structural support before proceeding with tile overlay projects. Height restrictions also need consideration, particularly regarding door clearances and transitions to other flooring types. Moisture and Waterproofing Challenges Risk of trapped moisture between tile layers Potential for mould and mildew growth Compromised waterproofing integrity in wet areas Difficulty in detecting underlying water damage Need for specialized moisture barriers and membranes Professional Installation Requirements Surface Preparation Techniques Professional installation demands meticulous surface preparation to ensure lasting results. The process begins with thorough cleaning using professional-grade degreasers and etching solutions. Industry best practices recommend a minimum adhesion strength of 1.5N/mm² between existing and new tiles. Surface profiling through mechanical abrasion or chemical primers is essential to create an optimal bonding surface. Proper preparation can increase installation success rates by up to 85%. Specialist Tools and Materials High-grade modified tile adhesives specifically designed for overlay applications Professional-quality tile levelling systems Moisture meters and surface profiling equipment Specialized cutting tools for precise edge work Advanced grout products with enhanced flexibility properties Alternative Solutions Complete Tile Removal In some cases, complete removal of existing tiles remains the most prudent choice. This approach, while more labour-intensive, ensures optimal installation conditions and eliminates potential future complications. Recent industry data shows that complete removal is recommended in 35% of renovation projects, particularly in areas with water exposure or structural concerns. The process allows for thorough substrate inspection and repair, ensuring a foundation that meets current building standards. Modern Flooring Alternatives Luxury Vinyl Tiles (LVT) with minimal height impact Microcement finishes for contemporary aesthetics Engineered wood flooring systems Polished concrete overlays Resin-based flooring solutions Making the Final Decision Cost-Benefit Analysis When evaluating whether to tile over existing tiles, consider both immediate and long-term financial implications. Initial savings of £20-30 per square metre must be weighed against potential future remediation costs. Industry statistics show that successful tile-over-tile installations can last 15-20 years when properly executed, making them a viable investment for many homeowners. However, factor in potential resale impact and future renovation flexibility when making your decision. Professional Consultation Engage qualified tiling professionals for comprehensive site evaluation Obtain detailed written assessments and recommendations Request multiple quotes and installation timelines Verify contractor credentials and insurance coverage Review previous similar project examples and references Expert Tips for Successful Installation Success in tiling over existing tiles requires attention to detail and adherence to best practices. Ensure proper expansion joints are maintained and consider using uncoupling membranes for large areas. Professional installers recommend maintaining minimum temperature conditions of 10°C during installation and allowing adequate curing time before subjecting the surface to heavy traffic. Regular maintenance and prompt attention to any issues will help ensure the longevity of your new tile installation. Remember that proper planning and professional execution are key to achieving the desired results in your house renovations project. FAQ What adds the most value in a renovation? 8 Best ROI Home Improvements That Increase Your Property Value (and 3 That Don’t) Which room do you renovate first? Bathrooms and kitchens will be the most intense renovation projects in your home because they involve a lot of mechanical, electrical, and plumbing work that often needs to be done at the same time. So, get the more intense projects out of the way first. How long does it normally take to renovate a house? How Long Does a Home Remodel Take? What time

House Renovations Guide: Should You Tile Over Existing Tiles? Read More »

drone photographing professional roof renovation

Expert Guide: How to Use Photos to Renovate Roofs Like a Professional

Transform your roofing project with the power of photos – discover how professional photographers and roofers use visual documentation to plan, execute, and showcase stunning roof renovations. Why Photography Matters in Roof Renovation In today’s digital age, photography has become an indispensable tool in the roofing industry. Professional photography plays a crucial role in every stage of roof renovation, from initial assessment to final documentation. According to recent industry statistics, 87% of successful roofing contractors now use professional photography as part of their project management process. High-quality visual documentation helps identify potential issues, plan repairs effectively, and provide clear communication with clients. Moreover, detailed photographic evidence can protect both contractors and homeowners by documenting pre-existing conditions and tracking progress throughout the renovation process. Essential Photography Equipment and Techniques Professional DSLR Camera with wide-angle lens (16-35mm recommended) Drone with 4K camera capability for aerial inspections High-quality smartphone with HDR capabilities for quick documentation Weatherproof camera bag and protective gear LED lighting equipment for dark spaces and evening work Key Photography Techniques Use morning or evening light to capture detail-revealing shadows Maintain consistent angles for before and after comparisons Employ HDR photography for high-contrast situations Document from multiple angles, including close-ups of problem areas Using Visual Tools for Project Planning Modern roof renovation relies heavily on visual planning tools and software. The Renoworks Visualizer, for instance, has revolutionised how contractors approach project planning. This powerful tool allows homeowners to preview different roofing materials and colours on their actual home, leading to more confident decision-making and 35% faster project approvals. Additionally, 3D modeling software integrated with photographic documentation helps create accurate project timelines and material estimates. These visual tools have become essential for successful project execution and client satisfaction. Creating a Visual Project Timeline Establishing a comprehensive visual timeline is crucial for successful roof renovation. Begin by capturing detailed baseline photos of the entire roof structure, including all angles and potential problem areas. Document each phase of the renovation process, from tear-down to completion, creating a visual narrative that serves multiple purposes. Recent studies show that projects with detailed visual timelines are 40% more likely to finish on schedule. This systematic approach not only helps track progress but also provides valuable reference material for future projects and potential dispute resolution. Leveraging Before and After Photos Capture comprehensive baseline photos from identical angles Document mid-project progress at key milestones Take final photos in similar lighting conditions as baseline shots Create compelling side-by-side comparisons Use consistent framing and composition techniques Professional before and after photography has become increasingly important in the roofing industry, with 92% of customers stating that transformation photos influenced their contractor selection. Digital Documentation Best Practices Proper management of digital documentation is essential for modern roof renovation projects. Implement a structured filing system using cloud storage solutions like Google Drive or Dropbox, ensuring all team members have access to current project photos. Regular backups are crucial, with automated systems backing up files every 24 hours. Maintain clear file naming conventions and organise photos by project phase, date, and location. This systematic approach has been shown to reduce project delays by up to 25% and improve team communication significantly. Using Photos for Client Communication Effective visual communication with clients can make or break a roofing project. Regular photo updates help maintain transparency and build trust throughout the renovation process. Studies indicate that projects using regular photo updates experience 60% fewer client disputes and higher overall satisfaction rates. Create detailed photo reports highlighting progress, challenges, and solutions, and use these to keep clients informed and engaged throughout the project timeline. Professional Tips for Photo-Based Planning Use grid overlays for accurate measurements and alignment Create detailed photo inventories of existing materials Document weather conditions alongside progress photos Maintain a consistent photo angle for progress tracking Use time-stamped photos for warranty documentation Common Photography Mistakes to Avoid Even experienced professionals can fall prey to common photography mistakes that compromise project documentation. Poor lighting, inconsistent angles, and inadequate detail shots are among the most frequent errors. Industry data shows that 45% of project disputes arise from inadequate visual documentation. Avoid these pitfalls by establishing standardised photography protocols, using appropriate equipment, and maintaining consistent documentation practices throughout the project. Legal and Safety Considerations When incorporating photography into roof renovation projects, legal and safety considerations must be paramount. Ensure compliance with local drone regulations, obtain necessary permits, and respect privacy laws. Document safety measures and potential hazards through photos, as this can provide crucial evidence for insurance purposes. Recent statistics indicate that projects with comprehensive safety documentation experience 30% fewer liability claims. Always obtain written permission before photographing private property and maintain secure storage of all project documentation. Conclusion: Maximizing the Impact of Visual Documentation The strategic use of photography in roof renovation has become indispensable for modern contractors. By implementing comprehensive visual documentation practices, following industry best practices, and leveraging current technology, professionals can significantly improve project outcomes and client satisfaction. Remember that successful visual documentation requires consistent effort, attention to detail, and a commitment to maintaining high standards throughout the project lifecycle. As the industry continues to evolve, those who master these techniques will maintain a competitive edge in the market. Sources [1] https://www.renoworks.com/roof-designer-tool/ [2] https://seekoneroof.com/roof-visualizer/ [3] https://www.istockphoto.com/photos/roof-restoration

Expert Guide: How to Use Photos to Renovate Roofs Like a Professional Read More »

historic lime plaster breathable painting

Why Breathable Paint for Lime Plaster is Essential for Your Heritage Home

Discover why choosing the right breathable paint for lime plaster could be the difference between preserving your period property and facing costly repairs. Understanding the Vital Role of Breathability in Period Properties In heritage homes across Kent and the UK, lime plaster walls have stood the test of time for centuries, thanks to their remarkable ability to manage moisture. This delicate balance relies heavily on the natural breathability of lime plaster – a crucial characteristic that allows moisture to move freely through the wall structure. When walls can’t breathe properly, moisture becomes trapped, leading to serious issues that can compromise your property’s integrity. Recent studies show that over 60% of heritage building damage is directly related to moisture problems, often caused by inappropriate modern materials blocking natural vapour movement. Traditional buildings were designed as complete systems, with every element working in harmony to regulate indoor humidity and protect the structure. Lime plaster plays a vital role in this system, acting as a natural humidity buffer that absorbs excess moisture when humidity is high and releases it when conditions are drier. This process helps maintain optimal indoor conditions and prevents damaging condensation. The Science Behind Breathable Paints for Lime Plaster The effectiveness of breathable paints is measured by their SD value (Steam Diffusion), with lower values indicating better breathability. The ideal SD value for paints used on lime plaster walls ranges from 0.01 to 0.05, ensuring optimal vapour permeability. This scientific measurement helps property owners make informed decisions about which paints will work best with their lime plaster walls. SD Value Guide: 0.01-0.05: Excellent breathability (ideal for lime plaster) 0.06-0.14: Good breathability 0.15+: Poor breathability (avoid on lime plaster) Key Factors Affecting Breathability: Paint composition and ingredients Application thickness Number of coating layers Surface preparation Best Breathable Paint Options for Lime Plaster When it comes to choosing breathable paint for lime plaster, several options stand out for their exceptional performance and compatibility. Limewash remains the most traditional and highly breathable choice, with an SD value as low as 0.02. Modern mineral paints, including silicate and lime-based options, offer excellent breathability while providing improved durability and ease of application. Clay paints have gained popularity in recent years, offering nearly identical breathability to limewash while being easier to apply and maintain. Top Breathable Paint Choices: Traditional Limewash: Most authentic, highest breathability Mineral Silicate Paints: Modern durability with excellent breathability Clay Paints: Natural alternative with superior moisture management Lime-Based Paints: Traditional formula with modern applications Common Mistakes and Paints to Avoid The biggest threat to lime plastered walls comes from using inappropriate modern paints containing vinyl or plastic-based ingredients. These materials create an impermeable barrier that traps moisture within the wall structure, leading to severe problems including: Common Issues from Wrong Paint Choice: Plaster deterioration and crumbling Salt crystallisation and efflorescence Mould and damp problems Peeling and blistering paint Choosing and Applying the Right Breathable Paint Before selecting a breathable paint, it’s essential to assess your lime plaster’s condition thoroughly. Look for signs of previous paint applications, damage, or repairs that might affect the new paint’s performance. Professional surveys indicate that 40% of heritage properties in the UK have inappropriate modern coatings that need removal before applying breathable alternatives. Pre-Application Checklist: Assess wall condition and moisture levels Remove any non-breathable coatings Repair any damaged plaster Clean and prepare surfaces properly Choose appropriate weather conditions for application Maintaining Your Lime Plastered Walls Proper maintenance of lime plastered walls with breathable paint requires regular inspection and timely intervention when issues arise. Most breathable paints will need refreshing every 5-7 years, though this can vary based on exposure and conditions. Regular maintenance helps prevent more serious problems and ensures your walls continue to perform their moisture-management function effectively. Expert Recommendations and Final Considerations While breathable paints might initially cost more than standard modern alternatives, the long-term benefits far outweigh the initial investment. Studies show that properly maintained lime plaster walls with appropriate breathable finishes can last over 100 years, compared to just 20-30 years for modern plaster systems. Consider these factors when planning your project: Cost Considerations: Initial material costs vs long-term durability Professional application benefits Maintenance requirements Property value enhancement Protecting Your Heritage Home’s Future Choosing the right breathable paint for your lime plaster walls is crucial for preserving your heritage property’s character and structural integrity. By understanding the importance of breathability and selecting appropriate materials, you’re investing in your property’s long-term health and value. For professional advice and application services in Kent, contact Kent Plasterers – your local experts in traditional plastering and heritage property maintenance. We provide comprehensive solutions for maintaining and protecting your period property’s unique character while ensuring its longevity for future generations. FAQ Is rust oleum paint breathable? Rustoleum Mathys Murfill Renovation Paint is a breathable paint that is also elastomeric and micro-porous. This matt masonry paint is suitable for exterior and interior walls. Are Zinsser paints breathable? Its vapour permeable film allows the painted surface to “breathe”. The finish contains a biocide to protect the dried coating against fungal degradation*, whilst the paint film dries with zero tension which reduces the likelihood of future cracking, flaking and peeling. Is Benjamin Moore paint breathable? Improved block resistance and reduced tack, which increases job site efficiency and minimizes disruption. A breathable coating that is less prone to blistering that provides long-term durability and protection. Is little greene paint breathable? A traditional breathable interior paint, commonly used in older buildings and loved because of its soft, powdery finish. Water-based and environmentally friendly, our Distemper is strengthened to be wipeable. Sources [1] https://organicnaturalpaint.co.uk/natural-paint/breathable-paint/lime-plaster/ [2] https://graphenstone.com/what-paint-can-you-use-on-lime-plaster/ [3] https://www.rosieandthefarm.co.uk/blog/the-best-paints-for-lime-plaster

Why Breathable Paint for Lime Plaster is Essential for Your Heritage Home Read More »

Professional mobility equipment showroom display

How to Choose the Right Mobility Equipment Supplier: A Complete Homeowner’s Guide

Selecting the perfect mobility equipment supplier can transform your home into an accessible haven – here’s what the experts want you to know. Understanding Your Mobility Equipment Needs Creating an accessible home environment requires careful consideration of mobility solutions, and finding the right supplier is paramount for ensuring long-term independence and comfort. According to recent UK healthcare statistics, over 14 million people in Britain live with disabilities, making the selection of appropriate mobility equipment and a reliable supplier crucial. The process begins with a thorough assessment of individual needs, considering factors such as the type of mobility challenges, home layout, and daily activities that require support. Whether you’re looking for temporary solutions or permanent modifications, understanding your specific requirements will guide you towards the most suitable supplier. Key Factors in Selecting a Mobility Equipment Supplier 1. Product Range and Quality When evaluating mobility equipment suppliers, the breadth and quality of their product range should be a primary consideration. Leading suppliers in the UK market typically offer: Power wheelchairs and mobility scooters from renowned manufacturers Stairlifts and home lift solutions Bathroom mobility aids and modifications Walking aids and rollators Specialised seating and positioning equipment It’s essential to choose a supplier that partners with reputable manufacturers and offers products certified to British Safety Standards. 2. Expertise and Certification Look for suppliers with Certified Assistive Technology Professionals (ATPs) Verify membership in recognised industry bodies like the British Healthcare Trades Association (BHTA) Check for specialist training certificates and ongoing education programmes Ensure staff have extensive product knowledge and assessment capabilities 3. Service Network and Support A robust service network is crucial for ongoing maintenance and emergency repairs. Quality suppliers should offer: 24/7 emergency support services Regular maintenance programmes Rapid response repair services Comprehensive warranty coverage Local service centres across your region Comparing Top Mobility Equipment Providers National Providers vs Local Suppliers The choice between national and local suppliers can significantly impact your experience. National providers often offer broader product ranges and extensive service networks, while local suppliers may provide more personalised attention and faster response times. Consider these aspects: National Providers: Larger inventory, standardised service quality, potentially better prices Local Suppliers: Personal relationships, community reputation, quicker response times Insurance and Financial Considerations Understanding the financial aspects is crucial when selecting a supplier. Key considerations include: NHS voucher scheme acceptance Private insurance coordination Flexible payment plans and financing options Rental vs purchase programmes Price matching policies Customisation and Consultation Services In-Home Assessments Professional suppliers should offer comprehensive in-home assessments to evaluate your specific needs. These assessments typically include: Detailed home environment analysis Accessibility challenges identification Custom solution recommendations Safety considerations and risk assessment Equipment Customisation Options Leading suppliers offer extensive customisation options to ensure equipment perfectly matches individual requirements. This includes adjustments to: Seating configurations and positioning Control systems and interfaces Size and weight specifications Aesthetic preferences and design options Making Your Final Decision Warranty and After-Sales Support Before making a final decision, carefully review the warranty terms and after-sales support offerings. Quality suppliers typically provide: Comprehensive warranty coverage (minimum 12 months) Extended warranty options Regular maintenance schedules Emergency repair services Product training and support Customer Reviews and Testimonials Research customer experiences thoroughly by: Reading online reviews and ratings Requesting references from existing customers Checking social media feedback Verifying BHTA complaint records Consulting disability forums and communities Ensuring Long-Term Satisfaction To maintain a successful relationship with your chosen mobility equipment supplier and maximise your investment, consider these long-term strategies: Schedule regular maintenance checks, keep detailed records of any issues or repairs, maintain open communication with your supplier, and stay informed about new products or upgrades that might benefit you. Remember that the best suppliers will view their relationship with you as a partnership, focused on maintaining your independence and quality of life through reliable, well-maintained mobility equipment. FAQ Why is McKesson leaving Canada? Rationale Behind McKesson’s Divestiture Per McKesson, the transaction is expected to mark a significant milestone aligned with its enterprise strategy, advancing its strategic priorities, further streamlining its business and prioritizing investment in the growth areas of oncology and biopharma services. Does Costco use McKesson? The McKesson Corporation said today that it had renewed a pharmaceuticals distribution agreement with the Costco Companies for three years, estimating the value of the contract at as much as $750 million, or an additional $50 million a year. Who bought McKesson Canada? December 31, 2024 (IRVING, Texas) – McKesson Corporation (NYSE: MCK) reported today that on December 30, 2024 it has closed the transaction announced in September 2024 to sell its Canada-based Rexall and Well.ca businesses to Birch Hill Equity Partners, a Canadian private equity firm. Can individuals order from McKesson? McKesson Connect offers convenient online drug ordering It’s easily accessible from any desktop system or mobile device. With McKesson Connect, you have access to: Up-to-date pharmaceutical product and pricing information. Sources [1] https://www.mobilityplus.com [2] https://www.numotion.com [3] https://www.mobilitypluscolorado.com

How to Choose the Right Mobility Equipment Supplier: A Complete Homeowner’s Guide Read More »

Venetian plaster luxury wall finish

Venetian Plaster: Is This Luxury Finish Worth The Investment?

Transform your walls into works of art with Venetian plaster, the timeless Italian technique that’s capturing the hearts of Kent’s most discerning homeowners. Understanding Venetian Plaster: A Heritage of Luxury Venetian plaster, also known as Marmorino or Veneziano, stands as a testament to Italian craftsmanship dating back to ancient Roman times. This exquisite wall finish, composed of lime plaster meticulously blended with marble dust, has graced the walls of Europe’s most prestigious buildings for centuries. The technique, documented by architectural pioneers Vitruvius and Palladio during the Renaissance, creates surfaces that rival the beauty of natural marble at a fraction of the cost. The legacy of Venetian plaster extends beyond mere decoration – it represents a convergence of art and architecture that has evolved over millennia. In the 1950s, renowned architect Carlo Scarpa revolutionised the technique, introducing modern innovations while preserving its historical integrity. Today, authentic Venetian plaster can increase property values by up to 15%, making it an investment that combines aesthetic appeal with tangible returns. The Artistry Behind Venetian Plaster The application of Venetian plaster is a meticulous process that demands exceptional skill and attention to detail. Master craftsmen apply multiple thin layers, typically 2-3mm each, using specialised tools and techniques passed down through generations. Each stroke contributes to the unique character of the finish, ensuring that no two walls are exactly alike. Initial preparation includes thorough surface cleaning and priming Base coat application provides the foundation for subsequent layers Multiple thin coats are applied with specialised trowels and spatulas Each layer must dry completely before the next application Final burnishing or waxing creates the desired level of sheen Investment Analysis: Breaking Down the Costs When considering Venetian plaster, it’s essential to understand the investment versus value proposition. While the initial cost typically ranges from £80 to £150 per square metre in Kent, this premium finish offers exceptional longevity and durability. Compared to traditional painting, which requires refreshing every 3-5 years, Venetian plaster can maintain its beauty for decades with proper maintenance. Initial cost: £80-£150 per square metre Lifespan: 20+ years with proper maintenance Significantly more durable than paint or wallpaper Adds substantial value to property Lower long-term maintenance costs compared to alternatives Modern Applications and Design Possibilities Contemporary interior designers are increasingly turning to Venetian plaster for its versatility and timeless appeal. The finish adapts beautifully to both traditional and modern spaces, offering a range of effects from subtle matte to high-gloss surfaces. In Kent’s luxury homes, we’re seeing Venetian plaster used creatively in: Statement walls in living rooms and entrance halls Bathroom and kitchen feature walls Ceiling treatments and architectural details Commercial spaces seeking sophistication Modern minimalist interiors requiring texture The Practical Benefits Beyond Beauty Venetian plaster offers numerous practical advantages beyond its aesthetic appeal. The natural lime-based composition makes it inherently resistant to mould and mildew, while its mineral structure allows walls to ‘breathe,’ regulating humidity naturally. Studies show that lime-based plasters can reduce indoor air pollution by up to 25%, contributing to healthier living spaces. The durability of Venetian plaster is remarkable – it actually becomes harder over time through a process called carbonation. This characteristic, combined with its fire-resistant properties and low maintenance requirements, makes it an excellent long-term investment for both residential and commercial properties. Making the Right Choice for Your Space Selecting Venetian plaster for your property requires careful consideration of several factors. The finish works particularly well in areas where you want to create visual impact or require durability. Consider these key points when making your decision: Room function and traffic levels Desired aesthetic effect and level of sheen Available natural light and artificial lighting Budget constraints and long-term value Maintenance requirements and lifestyle factors Expert Guidance for Your Venetian Plaster Project As Kent’s leading plasterers, we recommend working with experienced craftsmen who understand the nuances of Venetian plaster application. The success of your project depends largely on proper preparation, skilled application, and appropriate finishing techniques. Our team of specialists can guide you through the entire process, from selecting the perfect finish to ensuring flawless execution. For the best results, consider these essential steps: Schedule a consultation to discuss your vision and requirements Request samples and view previous work Ensure proper surface preparation Allow adequate time for application and drying Follow recommended maintenance procedures Ready to transform your space with the timeless beauty of Venetian plaster? Contact Kent’s leading plasterers today for a consultation and discover how this luxury finish can elevate your property to new heights of sophistication. FAQ Does Venetian plaster add value to a home? A lot of people opt for Venetian plaster because it looks great and suits the style of home they are designing, but a recent study by online property marketplace Zillow suggests that it could increase the value of your home. Is Venetian plaster outdated? Centuries-old Venetian plaster wall finish has made a big comeback — and for good reason. In 2025, Venetian plaster remains a classic look for any future homeowner. Its unique texture and luxurious appearance will never go out of style; not to mention it is incredibly versatile. Does Venetian plaster have to be sealed? Venetian plaster finishes are a beautiful and luxurious addition to any home or space. However, in order to maintain their beauty and longevity, it is important to properly seal and protect them. Does Venetian plaster crack easily? Venetian plaster offers a luxurious, durable finish, but like all wall materials, it requires proper care to maintain its integrity over time. Cracks can develop from stress, temperature fluctuations, or improper application, particularly in older homes or high-traffic areas. What is the difference between diamond plaster and Venetian plaster? Diamond plaster is a decorative wall finish similar to venetian plaster but more subtle and understated. Whereas venetian appears like a polished marble, diamond is more like a honed marble– showing fewer trowel marks and more smooth to the touch. Sources [1] https://en.wikipedia.org/wiki/Polished_plaster [2] https://www.youtube.com/watch?v=jnyUcd7HDKY [3] https://www.youtube.com/watch?v=xHG5aua8Vo4

Venetian Plaster: Is This Luxury Finish Worth The Investment? Read More »