Uncategorized

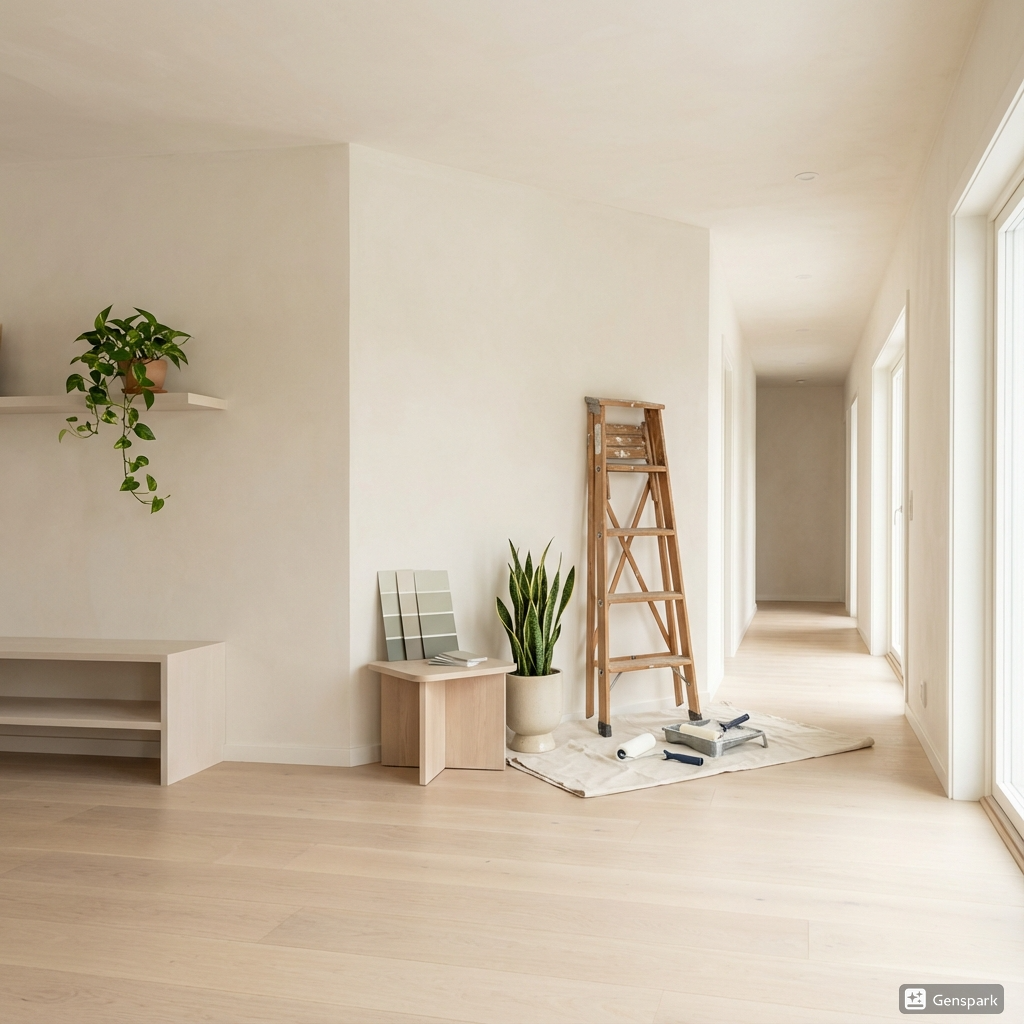
Newly plastered wall ready for painting with professional painting equipment and supplies

How many mist coats on new plaster should you apply for the perfect finish?

Getting the right number of mist coats on new plaster is crucial for a flawless paint finish that lasts. Apply too soon or skip essential steps, and you risk peeling paint, cracks, and a compromised surface that won’t stand the test of time. Whether you’re a homeowner tackling your first plastering project or a property developer overseeing multiple renovations, understanding the mist coat process is fundamental to achieving professional results. The question isn’t just about how many coats to apply, but when to apply them and why they’re so important. In this comprehensive guide, we’ll walk you through everything you need to know about mist coats on new plaster, from drying times to application techniques, so you can achieve that perfect finish every time. Understanding mist coats: What they are and why they matter Before diving into the specifics of application, it’s essential to understand what makes mist coats such a critical component of plastering projects. Many DIY enthusiasts and even some contractors underestimate the importance of this preparatory step, leading to disappointing results that require costly remediation down the line. A mist coat serves as the foundation for all subsequent decorative finishes, and getting it right from the start will save you time, money, and frustration in the long run. What exactly is a mist coat? A mist coat is essentially a heavily diluted emulsion paint that’s applied to fresh plaster as the first layer of decoration. Unlike standard paint application, which uses paint straight from the tin, a mist coat typically consists of 70% paint mixed with 30% water, though some professionals prefer ratios ranging from 60:40 to 80:20 depending on the specific conditions and plaster type. This thinned-down consistency allows the paint to penetrate deeply into the porous plaster surface, creating microscopic bonds that provide an excellent foundation for subsequent coats. The mixture should have a consistency similar to milk—thin enough to soak into the plaster but still containing sufficient pigment to provide coverage. It’s worth noting that you should always use a water-based emulsion for mist coats, never oil-based paints, as these won’t allow the plaster to continue breathing and curing properly. Why new plaster needs a mist coat Freshly applied plaster is incredibly porous and absorbent, almost like a sponge. When you apply standard, undiluted paint directly to this surface, the plaster rapidly absorbs the moisture from the paint, causing the binder and pigments to form an inadequate bond. This results in a weak surface layer that’s prone to flaking, peeling, and cracking—often within just a few months of application. The science behind this is straightforward: plaster must create a proper bond with paint at the molecular level, and this can only happen when the paint can penetrate sufficiently into the substrate. A mist coat achieves this by soaking into the plaster’s pores, essentially sealing the surface whilst maintaining breathability. The consequences of skipping this crucial step include premature paint failure, uneven coverage, patchy finishes, and the need for complete repainting far sooner than expected. Professional plasterers universally agree that failure to wait and apply proper mist coats can compromise surface integrity and paint adhesion, leading to problems that may not manifest immediately but will certainly appear within the first year. How long should you wait before applying a mist coat? Timing is perhaps the most critical factor in achieving a successful finish on new plaster. Rush the process, and you’ll trap moisture beneath the paint surface, leading to a host of problems. Wait too long, and whilst you won’t damage anything, you’ll simply be delaying your project unnecessarily. Understanding the variables that affect drying times will help you make informed decisions about when to proceed with mist coating. Understanding plaster drying times The drying time for new plaster varies considerably depending on several environmental and application factors. As a general guideline, you should expect anywhere from 3 days to 4 weeks for plaster to dry sufficiently for painting, with the exact timeframe dependent on plaster thickness, room temperature, humidity levels, and ventilation. Industry research shows that many professionals recommend 3 to 7 days as a minimum waiting period for standard skim coat applications in typical residential conditions. However, some experts suggest up to a month for full curing, particularly for thicker applications or in less-than-ideal environmental conditions. Key factors affecting drying speed include: Plaster thickness: A standard 2-3mm skim coat dries faster than thicker backing plaster applications Room temperature: Warmer rooms (around 20-22°C) facilitate faster evaporation and drying Humidity levels: High humidity significantly slows the drying process, whilst low humidity accelerates it Ventilation: Good air circulation helps moisture escape from the plaster surface Substrate condition: The backing material’s absorbency affects overall drying time Season and weather: Winter projects typically take longer to dry than summer applications How to tell when plaster is ready for painting Rather than relying solely on time-based guidelines, it’s essential to assess the plaster’s actual condition before proceeding. The most reliable indicator is the light pink color that appears uniformly across the entire plastered surface. Fresh plaster starts out darker, and as it dries, it gradually lightens to this characteristic pale pink shade. This colour change indicates that sufficient moisture has evaporated and the plaster is approaching readiness for decoration. However, visual inspection alone isn’t always sufficient—you should also perform a touch test by placing your palm flat against the wall. If the surface feels cool or damp, more drying time is needed. A properly dried plaster surface should feel barely warm or room temperature and completely dry to the touch across all areas, including corners and edges where moisture can linger. Some professionals use moisture meters to obtain precise readings, ensuring levels are below 1-2% before proceeding. The risks of ignoring these indicators are significant: painting too soon can cause peeling, cracking, and bubbling, as trapped moisture seeks to escape through the paint film. This creates pressure that compromises adhesion and can ruin your entire decorating effort. Speeding up the drying process safely Whilst patience is virtue when

How many mist coats on new plaster should you apply for the perfect finish? Read More »

Royal Facade thermopanels grey stone texture installed

Royal Facade Thermopanels: Advanced Insulated Facade Panels for Superior Energy Efficiency

Royal Facade Insulated Facade Panels represent a revolutionary approach to exterior wall insulation, combining cutting-edge thermal technology with stunning aesthetics. These innovative thermopanels offer property owners in Kent and beyond an exceptional solution for enhancing both energy efficiency and curb appeal. With their advanced clinker thermal insulation system, these panels deliver superior performance that traditional rendering simply cannot match. Understanding the Insulation Technology The core technology behind Royal Facade panels lies in their multi-layered construction. Each panel consists of high-density expanded polystyrene (EPS) or polyurethane foam insulation, bonded with authentic clinker tiles. This sophisticated combination creates an impermeable thermal barrier that significantly reduces heat transfer through external walls. The panels utilise a tongue-and-groove connection system, eliminating thermal bridges that typically compromise insulation effectiveness. This seamless integration ensures consistent thermal performance across the entire facade, achieving U-values as low as 0.20 W/m²K. Key Advantages of Clinker Thermal Insulation Panels Energy Efficiency Benefits Installing Royal Facade panels can reduce heating costs by up to 40%, making them an excellent investment for long-term savings. The superior insulation properties mean your property maintains comfortable temperatures year-round, requiring less energy for both heating and cooling. Weather Resistance and Durability These facade cladding solutions offer exceptional protection against the elements: Installation Efficiency Unlike traditional external insulation systems, Royal Facade panels can be installed quickly and cleanly. The lightweight panels are easy to handle, and the mechanical fixing system eliminates lengthy drying times associated with wet renders. Most projects can be completed 50% faster than conventional methods. Design Flexibility and Aesthetic Appeal Royal Facade offers extensive customisation options to complement any architectural style. Choose from various clinker tile colours, textures, and patterns to achieve your desired look. Whether you prefer traditional brick aesthetics or contemporary stone finishes, these panels deliver authentic appearance without the weight and cost of natural materials. Why Choose Royal Facade for Your Property? The combination of thermal performance, durability, and aesthetic versatility makes Royal Facade panels an ideal choice for both residential and commercial properties. The system’s compatibility with various substrates, including brick, concrete, and timber frame constructions, ensures broad application possibilities. Property owners benefit from: Professional Consultation and Support Every project is unique, and selecting the right insulation solution requires expert guidance. Royal Facade specialists are available for telephone consultations at +48666273099 to discuss your specific requirements and provide tailored recommendations. For comprehensive product information, technical specifications, and installation guidelines, visit https://royalfacade.eu/. Their website features detailed case studies, installation videos, and a gallery showcasing completed projects across Europe. Transform Your Property Today Royal Facade Insulated Facade Panels represent the future of external wall insulation. By combining exceptional thermal performance with stunning aesthetics and long-lasting durability, these innovative panels offer a complete facade solution that delivers real value. Contact the Royal Facade team today to discover how their advanced clinker thermal insulation panels can transform your property while significantly reducing energy costs and environmental impact.

Royal Facade Thermopanels: Advanced Insulated Facade Panels for Superior Energy Efficiency Read More »

A stunning modern kitchen renovation showcasing white cabinets, marble countertops, and bright natural lighting

How much does it cost to renovate a kitchen? A complete guide to budgeting your project

Understanding how much it costs to renovate a kitchen is essential before you start planning your dream space and avoid costly surprises. Whether you’re a homeowner in Bromley looking to enhance your property value or a developer working on multiple projects across Kent, having a clear picture of kitchen renovation costs helps you make informed decisions and prevents budget overruns. The average cost to renovate a kitchen in 2025 ranges from £12,000 to £35,000 for mid-range remodelling dependent on scope, materials and location, but the final figure can vary dramatically based on your specific requirements and choices. Kitchen renovations represent one of the most significant investments you’ll make in your property, yet they consistently deliver excellent returns both in terms of property value and quality of life. The kitchen has evolved from a purely functional space into the heart of the modern home, where families gather, entertain guests, and create lasting memories. This transformation has elevated expectations for kitchen design and functionality, making thoughtful budgeting more crucial than ever. For homeowners across Kent and Bromley, understanding the nuances of renovation costs enables you to plan effectively, prioritise spending where it matters most, and work with skilled tradespeople like Kent Plasterers who deliver exceptional results within your budget parameters. Understanding the scope of kitchen renovation costs Kitchen renovation costs vary enormously depending on the extent of work required, and understanding these different levels helps you determine what’s realistic for your budget and property goals. The scope of your project fundamentally shapes every other decision, from contractor selection to material choices, and establishes the framework within which all subsequent planning occurs. Many homeowners underestimate the complexity involved in kitchen renovations, viewing them as straightforward cosmetic updates when in reality they often involve multiple trades, careful sequencing of work, and coordination of numerous elements to achieve a cohesive result. Whether you’re planning a simple refresh to modernise dated finishes or a complete transformation involving structural changes, accurately assessing the scope prevents unrealistic expectations and ensures your budget aligns with your vision. The key distinction lies between cosmetic updates that work within existing layouts and more comprehensive remodels that fundamentally reconfigure spaces, with each approach delivering different results at vastly different price points. Minor kitchen updates and refreshes Minor updates like refinishing cabinets or replacing appliances may cost under £10,000 and can deliver significant aesthetic improvements without major structural work. These projects focus on refreshing existing elements rather than replacing them entirely, making them ideal for homeowners who appreciate their current layout but want to modernise appearances or improve specific functional aspects. Cabinet refacing ranges from £10,000 to £40,000 depending on materials and kitchen size, offering a cost-effective alternative to complete replacement whilst dramatically transforming the room’s appearance. This approach involves replacing cabinet doors and drawer fronts whilst retaining the existing cabinet boxes, significantly reducing both costs and disruption compared to full replacement. Minor renovations might also include updating worktops, installing new taps and fixtures, replacing flooring, or adding a fresh coat of paint to walls and ceilings. Professional plastering work by specialists like Kent Plasterers ensures walls provide the perfect canvas for your refreshed kitchen, with smooth, flawless surfaces that enhance the overall finish. For homeowners on tighter budgets or those planning to sell within a few years, these strategic updates deliver excellent value by modernising appearances without the expense and disruption of complete renovation. Mid-scale kitchen remodels Mid-scale remodels are typically £15,000 to £50,000 and represent the most common renovation level for homeowners in Kent and Bromley. These projects strike an excellent balance between investment and transformation, typically involving replacement of major elements whilst potentially retaining some existing features in good condition. A small kitchen remodel averages £10,000 to £20,000 or up to £41,407 for extensive work involving layout changes and quality finishes that significantly enhance both functionality and aesthetics. Mid-scale renovations generally include new cabinetry, updated appliances, replacement worktops, new flooring, improved lighting, and professional finishing work including plastering and tiling. These projects might involve minor layout adjustments such as relocating appliances or removing non-structural walls to improve flow, though they typically work within the existing footprint to control costs. Quality plastering becomes particularly important at this level, as homeowners invest in finishes that will last for years and significantly impact daily enjoyment of the space. Kent Plasterers regularly works on mid-scale kitchen renovations throughout Bromley and Kent, ensuring walls are perfectly prepared for painting or tiling, with attention to detail that elevates the entire project. This renovation level appeals to long-term homeowners seeking to create their ideal kitchen without excessive expenditure, as well as developers looking to add substantial value to properties before sale. Major and luxury kitchen renovations Major renovations with custom cabinets and high-end finishes can cost £50,000 to £150,000 or more, particularly in larger properties or where architectural changes are required. These comprehensive transformations often involve reconfiguring layouts, removing walls, relocating plumbing and electrical services, installing premium materials throughout, and incorporating cutting-edge appliances and technology. Large luxury renovations in major cities such as Los Angeles frequently cost £30,000 to £100,000, with most common projects falling between £50,000 and £75,000 for truly exceptional results. High-end renovations distinguish themselves through attention to detail, bespoke elements, superior materials, and flawless execution across all trades. Custom cabinetry designed specifically for your space maximises storage and functionality whilst reflecting your personal style, whilst premium worktops in materials like Carrara marble or exotic granite create stunning focal points. Luxury projects often include features like integrated appliances, underfloor heating, sophisticated lighting systems with multiple zones, and architectural details that elevate the space beyond mere functionality. Professional plastering and wall preparation become absolutely critical at this level, as any imperfections become glaringly obvious against premium finishes and careful lighting design. Kent Plasterers brings the expertise and precision required for luxury renovations, understanding that in high-end projects, perfection isn’t optional but essential to achieving results that justify substantial investment. Breaking down kitchen renovation costs by component Understanding where your money goes in a kitchen renovation

How much does it cost to renovate a kitchen? A complete guide to budgeting your project Read More »

Professional close-up showing realistic plaster cracks on an interior wall

Why does plaster crack and how can you prevent it?

Understanding why plaster crack occurs is essential for maintaining beautiful, long-lasting walls in your home. Cracks in plaster can diminish the aesthetic appeal of your interior spaces and potentially indicate more serious underlying issues. Whether you’re a homeowner in Bromley, a property developer in Kent, or managing a commercial project in Tunbridge Wells, knowing the causes of plaster cracking and how to prevent them will save you time, money, and frustration. Research indicates that up to 80% of plaster cracking issues are preventable with proper application techniques and environmental controls. In this comprehensive guide, we’ll explore the various reasons plaster develops cracks and provide expert advice on prevention strategies to ensure your plastered surfaces remain flawless for years to come. From moisture-related problems to structural movement and application errors, understanding these factors empowers you to make informed decisions about your property’s plastering needs. Understanding Why Plaster Cracks: The Main Culprits Before we can effectively prevent plaster cracks, we need to understand what causes them in the first place. Plaster cracking isn’t always straightforward, and multiple factors can contribute to this common problem. The average UK home experiences at least minor plaster cracking within the first five years, but understanding the underlying causes helps distinguish between cosmetic issues and signs of more serious problems. Environmental conditions, structural factors, and application techniques all play crucial roles in determining whether your plaster will develop cracks. Kent properties, in particular, face unique challenges due to the region’s clay-rich soil and variable weather patterns, which can affect both structural stability and moisture levels. By identifying which type of cracking you’re dealing with, you can implement the most effective prevention and repair strategies. Moisture-Related Cracking Moisture imbalance causing plaster to expand and contract is one of the most common reasons for cracking in UK homes. When plaster absorbs moisture, it expands, and when it dries, it contracts. This constant cycle creates stress within the material that eventually manifests as cracks. Plaster can expand by up to 0.5% when saturated, which may seem minimal but creates significant stress across large wall surfaces. Expansion of plaster from moisture absorption can be particularly problematic in bathrooms, kitchens, and areas with poor ventilation where humidity levels fluctuate significantly. Properties in Bromley and Tunbridge Wells often experience this issue during winter months when condensation increases due to heating systems and reduced ventilation. The problem intensifies when moisture penetrates from external sources such as leaking pipes, rising damp, or inadequate external weatherproofing. Understanding your property’s moisture dynamics is essential for preventing this type of cracking, as addressing the source of moisture is far more effective than repeatedly repairing surface cracks. Structural Movement and Foundation Issues Structural movement or settling of foundations creates stress on plastered surfaces that can lead to cracking. Buildings naturally settle over time, and this movement, while often minimal, can cause plaster to crack as it tries to accommodate the shifting substrate beneath it. This type of cracking is especially common in newer properties that haven’t fully settled or older properties where foundation issues may have developed. New builds can settle by up to 10mm in the first year, creating stress patterns that manifest as diagonal cracks emanating from corners or door frames. Kent’s geology, with its mixture of clay, chalk, and sand deposits, means different areas experience varying degrees of soil movement, particularly during periods of drought followed by heavy rainfall. Properties in areas with London Clay, which extends into parts of Kent, are particularly susceptible to seasonal movement as the clay shrinks and swells with moisture content changes. Chimney movement affecting plaster nearby represents a specific manifestation of this problem, as chimneys often settle independently from the main structure, creating stress at the junction points. Environmental and Temperature Factors Rapid temperature or humidity changes leading to expansion and contraction put significant stress on plaster. When rooms experience sudden temperature shifts or seasonal humidity variations, the plaster responds by expanding and contracting at different rates than the substrate it’s applied to, resulting in cracks. This is particularly relevant in Kent properties where weather conditions can be quite variable throughout the year. Temperature fluctuations of more than 10°C within 24 hours can create sufficient differential expansion to stress plaster, especially when combined with humidity changes. South-facing rooms in Tunbridge Wells properties experience particularly intense temperature cycling, with direct sunlight heating walls during the day and rapid cooling overnight. Modern heating systems, while efficient, can also contribute to this problem by creating rapid temperature changes when switching on and off. The interaction between external weather conditions and internal climate control creates a complex environment that plaster must withstand, and understanding these dynamics helps in implementing effective prevention strategies. Application and Material Issues That Lead to Cracking Not all plaster cracks are caused by environmental factors. Sometimes, the issue stems from how the plaster was applied or the quality of materials used. Industry research suggests that approximately 60% of premature plaster failure results from application errors or material quality issues rather than environmental factors. This is encouraging news because it means proper professional application can prevent the majority of cracking problems. The skill and experience of your plasterer, combined with appropriate material selection, fundamentally determines the longevity and crack resistance of plastered surfaces. Many homeowners in Bromley and Kent discover too late that choosing the cheapest quote often leads to expensive remedial work within months or years. Understanding the critical importance of proper application techniques, adequate drying times, and quality materials helps you make informed decisions when selecting plastering services. Improper Mixing and Application Techniques Incorrect water-to-plaster ratios: Adding too much water creates a weak mix prone to excessive shrinkage, while too little water prevents proper workability and adhesion Inconsistent mixing methods: Inadequate mixing leaves lumps and creates inconsistent density throughout the plaster, leading to differential drying rates Excessive thickness in single coats: Applying plaster too thickly in one pass increases shrinkage stress and prevents proper curing throughout the depth Rushing between coats: Applying subsequent coats before previous layers have

Why does plaster crack and how can you prevent it? Read More »

Plasterer smoothing artex textured ceiling

Can you plaster over artex? What are the pros and cons

Can you plaster over artex isn’t always straightforward. Here we explore when it’s a smart move and when you should avoid it, backed by professional plastering expertise. Can you plaster over artex is a question that homeowners frequently ask when planning renovations, and the straightforward answer is yes you can, but it’s not always advisable or simple. This seemingly simple question actually requires careful consideration of multiple factors before you commit to a decision that could affect both the appearance and safety of your home. There are situations where plastering over artex is the right choice for your project and equally there are scenarios where it could lead to problems down the line. Understanding when and how to plaster over artex correctly can save you time, money and potential headaches. If you’re dealing with artex that’s poorly bonded or contains hazardous materials, you could be facing costly mistakes. However, if your artex surface is in good condition and properly prepared, plastering over it can deliver excellent results that completely transform your rooms. But as with most plastering decisions, it’s rarely that straightforward, so we’re here to provide expert guidance and give you the definitive answers you need to make an informed choice about your plastering project. Whether you’re a DIY enthusiast or considering professional help, this comprehensive guide will walk you through everything you need to know about plastering over artex surfaces. Can you plaster over artex? The pros and cons explained The decision to plaster over artex involves weighing several important factors that will determine the success of your project. On the positive side, plastering over artex is often more cost-effective than complete removal, particularly when dealing with large ceiling areas or multiple rooms. It also creates less mess and disruption to your home compared to the dusty, time-consuming process of scraping away decades-old textured coatings. When done correctly on suitable surfaces, you can achieve a perfectly smooth, contemporary finish that completely conceals the dated artex beneath. However, the cons are equally significant and shouldn’t be overlooked. The primary concern is the potential presence of asbestos in older artex, which makes disturbance potentially hazardous. Additionally, plastering over artex adds weight to ceilings and walls, which can be problematic if the underlying substrate isn’t sufficiently strong or if the artex itself is poorly adhered. There’s also the risk of plaster failure if preparation isn’t thorough, leading to cracking, delamination or bubbling that will require costly remedial work. The thickness of the artex texture can also create challenges, with deeply stippled or swirled patterns requiring more extensive preparation and potentially multiple coats to achieve a flat surface. Here we examine the various situations and scenarios where plastering over artex makes practical sense and when alternative approaches might be better suited to your project. Understanding these distinctions is crucial for achieving results that are both aesthetically pleasing and structurally sound. When is it safe and advisable to plaster over artex? Determining whether your specific artex surface is suitable for overplastering requires careful assessment of several critical factors. The condition of the existing artex, its age, the substrate it’s applied to, and the thickness of the texture all play important roles in whether you can successfully plaster over it. Yes you can plaster over artex if it is in good condition and does not contain asbestos, but these conditions must be verified before any work begins. Checking the condition of your artex surface Before considering plastering over artex, you need to thoroughly assess its current condition. Good condition artex means the coating is firmly adhered to the substrate with no signs of delamination, cracking, flaking or bubbling. Test this by pressing firmly across different areas of the surface – it should feel solid with no movement or hollow sounds that might indicate separation from the wall or ceiling beneath. Pay particular attention to corners, edges and areas around light fittings where problems often first appear. The underlying surface is equally important. If you’re dealing with artex on plasterboard, check that the boards themselves are secure and haven’t suffered water damage or structural movement. For artex on traditional plaster, ensure the base coat hasn’t blown or become loose. Any structural issues with the substrate must be addressed before plastering over, as covering them will only lead to failure later. Additionally, check for dampness or water damage, as plastering over compromised surfaces will trap moisture and create bigger problems including mould growth and plaster failure. The critical asbestos question for pre-1999 artex Perhaps the most important consideration when dealing with artex is the potential presence of asbestos. You must check for asbestos especially in pre-1999 artex and avoid disturbing it if present. Artex manufactured before 1999 commonly contained chrysotile (white asbestos) as a strengthening agent, and while it was gradually phased out during the 1980s, it remained in use in some products until the ban came into effect. This means any artex applied before 2000 should be treated as potentially containing asbestos until proven otherwise. The safest approach is to arrange professional asbestos testing before undertaking any work. This involves taking a small sample which is analysed in a laboratory – a service that typically costs between £40 and £100 but provides crucial peace of mind. If asbestos is confirmed, you have three main options: leave it undisturbed and plaster over it (if conditions are suitable), have it professionally removed by licensed asbestos contractors, or encapsulate it with boarding. Never attempt DIY removal of asbestos-containing artex – this is illegal without proper licensing and training, and the health risks from asbestos exposure are severe and well-documented. Artex on solid substrates versus paper backing A crucial but often overlooked distinction is what surface the artex has been applied to. Artex on solid substrates such as plasterboard, plaster or masonry can generally be plastered over (provided other conditions are met), but there’s one critical exception: never skim over artex if it is applied on paper backing. This situation occasionally occurs where artex has been applied directly

Can you plaster over artex? What are the pros and cons Read More »

How much does it cost to completely renovate a house in the UK?

Thinking about a full house renovation? Understanding how much it costs to completely renovate a house is crucial before you start your project. Whether you’re planning to modernise your Bromley home or undertaking a comprehensive property transformation in Kent, getting a clear picture of renovation costs will help you budget effectively and avoid unexpected financial surprises. In this comprehensive guide, we’ll break down the costs associated with whole house renovations, from standard refurbishments to full gut renovations, so you can make informed decisions about your investment. The financial commitment for a complete house renovation can vary dramatically—from modest updates to luxury transformations—and knowing what to expect will empower you to plan successfully. With property values continually rising across Kent and the South East, investing in a quality renovation with skilled tradespeople, including experienced plasterers and tilers, can significantly enhance both your living experience and your property’s market value. Understanding the basics: What does a complete house renovation include? A complete house renovation is far more comprehensive than simply redecorating or replacing a few fixtures. It involves a systematic transformation of your property, addressing both aesthetic and functional elements throughout the entire home. When we talk about completely renovating a house, we’re referring to a project that touches every room and updates multiple systems simultaneously. This typically includes replacing or upgrading essential infrastructure such as electrical wiring, plumbing systems, and heating installations, alongside visible improvements like plastering, flooring, tiling, kitchen and bathroom fitting, and decorative finishes. For homeowners in Bromley and Kent, a complete renovation might also involve addressing period property features, improving insulation and energy efficiency, or reconfiguring layouts to suit modern living requirements. The scope extends from foundation to roof, ensuring your home meets current building regulations whilst creating spaces that reflect your lifestyle and design preferences. Unlike partial renovations that focus on individual rooms or specific improvements, a whole house renovation provides an opportunity to create a cohesive design throughout your property, with consistent quality finishes and modern standards applied everywhere. Scope of work in a full renovation The scope of a full renovation encompasses numerous trades and specialisms working in coordination. Structural work forms the foundation of many projects, potentially including underpinning, removing or adding walls, installing steel beams, or addressing subsidence issues common in some Kent properties. Plastering is essential throughout, whether you’re having entire rooms re-skimmed for smooth, flawless walls or requiring more extensive repairs where old plaster has deteriorated. Quality plastering creates the perfect canvas for decoration and is where Kent Plasterers excels, delivering impeccable finishes that transform spaces. Electrical work involves complete rewiring to meet current safety standards, installing new consumer units, adding sufficient socket outlets for modern life, and incorporating smart home technology. Plumbing encompasses updating pipes, installing new heating systems, fitting modern boilers, and ensuring proper water pressure throughout. Flooring might include everything from installing underfloor heating to laying hardwood, engineered wood, or luxury vinyl, with proper subfloor preparation being critical. Tiling features prominently in kitchens and bathrooms, with quality installation requiring skilled professionals who understand waterproofing, substrate preparation, and precision cutting. Finally, finishing work brings everything together—painting, fitting architraves and skirting boards, installing new doors, and adding those final touches that elevate a renovation from functional to exceptional. The difference between cosmetic updates and gut renovations Understanding the distinction between cosmetic updates and gut renovations is fundamental to budgeting accurately. Cosmetic updates involve surface-level improvements that refresh your home’s appearance without altering its fundamental structure or systems. This might include repainting walls, replacing kitchen cupboard doors, updating light fixtures, laying new carpets, or re-tiling a bathroom whilst keeping existing plumbing in place. These projects are considerably less expensive and disruptive, allowing you to continue living in your home throughout most of the work. Gut renovations, conversely, strip properties back to their bare bones—literally to the studs in many cases. A full gut to the studs and remodel can cost £100,000 to £200,000 or more, depending on property size and specification. This approach involves removing everything internal, exposing structural elements, and essentially rebuilding the interior from scratch. Whilst dramatically more expensive and time-consuming, gut renovations allow you to reconfigure layouts completely, upgrade all infrastructure simultaneously, address hidden problems like damp or structural issues, and create exactly the home you envision. For properties in Bromley with outdated systems or significant structural concerns, a gut renovation often represents the most sensible long-term investment, particularly when skilled tradespeople like professional plasterers can create stunning new interiors that will last for decades. Average costs for complete house renovations in the UK When planning your renovation budget, understanding typical price ranges provides a realistic foundation for financial planning. In the UK property market, particularly across Kent and the South East, renovation costs reflect both the quality of work expected and the higher living costs in these areas. Whole house renovations typically range from £20,000 to £100,000 for standard projects, though this spectrum encompasses significant variation in scope, specification, and property size. At the lower end, you might achieve a comprehensive cosmetic renovation of a smaller property, updating finishes throughout with mid-range materials and focusing on visible improvements rather than complete infrastructure replacement. Mid-range budgets allow for more substantial work, including some structural changes, full electrical and plumbing updates, quality plastering throughout, and good specification kitchens and bathrooms. At the higher end of standard renovations, you’re looking at comprehensive updates to larger properties with premium materials, extensive plastering and tiling work, and high-quality fixtures and fittings. However, for properties requiring extensive structural work, those in poor condition, or where homeowners desire luxury specifications, costs can escalate significantly beyond these figures. The key to accurate budgeting lies in obtaining detailed quotes from reputable contractors and specialists, including experienced plasterers who can assess your walls and ceilings properly, providing realistic costs for the essential finishing work that makes such a visible difference to your completed home. Cost per square foot: What to expect Breaking down renovation costs per square foot provides a useful framework for initial budget estimates,

How much does it cost to completely renovate a house in the UK? Read More »

Why 3-Sided Bioethanol Fireplace Inserts Are the Ultimate Modern Interior Upgrade

Looking for a design-forward way to bring warmth, light, and atmosphere into your home? 3‑sided bioethanol fireplace inserts are redefining what a fireplace can do. These elegant, vent‑free units combine a panoramic view of flame with eco‑friendly operation, letting you enjoy fire from three angles while keeping your space modern and clean. What Makes 3‑Sided Bioethanol Fireplace Inserts So Special? One of the most striking things about 3‑sided bioethanol fireplace inserts is their ability to showcase fire as a central design feature. With viewing angles from three sides, the flame becomes a living sculpture inside your room. This panoramic effect transforms walls, partitions or even standalone features into focal points of warmth and ambience. Beyond aesthetics, the three‑sided design adds functional versatility. You can install these inserts into dividing walls (so fire is visible from two rooms), into partially protruding wall elements, or in a central location where the fireplace becomes a sculptural object itself. Their adaptable format makes them perfect where a single‑face fireplace might feel limiting. Eco‑Friendly and Efficient Heating Bioethanol is a clean, renewable fuel derived from plant materials, generating minimal emissions. Because the combustion is clean, there’s no need for chimneys, flues, or ventilation systems. That means you can place a 3‑sided insert in spaces where traditional fireplaces simply can’t go. Moreover, these inserts offer efficient, controllable heat. While they are often considered a supplementary heat source (rather than the sole heating for a home), they deliver a comfortable, radiant warmth ideal for living rooms, lounge areas, or transitional spaces. The absence of smoke, ash or soot also means maintenance is minimal. Where to Use 3‑Sided Bioethanol Fireplaces at Home Because of their three‑sided visibility, these inserts shine in open plan living areas. Imagine placing one between a dining room and living room so both spaces enjoy the warmth and glow. Or install one in a long corridor or hallway that connects several rooms — the flame becomes a dynamic thread weaving through your home. They also work beautifully as room dividers or partition elements. A 3‑sided bioethanol unit can subtly separate a kitchen from a lounge, or define an entertainment zone within a large loft. With the fire visible from both sides, the divider becomes a visual and spatial anchor, not just a wall. How to Choose the Right Insert for Your Space Start with dimensions. Measure height, width, and depth carefully to ensure the insert fits the recess or partition without interfering with structural elements. Think about the scale of the flame — a too‑small insert will be lost in a large space, while an oversized one may dominate a more modest room. Also consider materials and finishes: black steel, brushed aluminium, glass panels, and contrasting frames can dramatically change the visual effect. Safety features like flame guards or tempered glass are crucial. Always verify manufacturer guidelines and clearances. Some models also allow smart or remote control for flame height and burn time—features that add convenience in daily use. Why Buy From RedLake Company When you select 3‑sided bioethanol fireplace inserts from RedLake Company, you’re accessing a curated range of high‑quality units designed to blend performance with design. Their catalog offers multiple sizes, finishes, and styles to suit different interior moods and architectural constraints. RedLake Company places strong emphasis on reliable support, clear specifications, and customer satisfaction. Their commitment to providing technical documentation, installation guidance, and responsive service ensures your journey from choosing a model to enjoying your fire is smooth and confident. Final Thoughts – Transform Your Living Space Today A 3‑sided bioethanol fireplace insert isn’t just a heater — it’s a design element, a sculptural flame centerpiece, and a way to elevate everyday living with ambiance. Whether you want to demarcate space, frame views, or simply bask in the glow of flame from multiple angles, this format delivers versatility, elegance, and eco‑sensitivity. If you’re ready to bring this combination of beauty and warmth into your home, exploring the collection at RedLake Company is a natural next step. That first flicker of flame could transform how you feel in your own space.

Why 3-Sided Bioethanol Fireplace Inserts Are the Ultimate Modern Interior Upgrade Read More »

Fiorentina Stadium Renovation: The Ultimate Guide to Florence’s Most Ambitious Makeover

As Florence’s iconic Fiorentina stadium undergoes its most dramatic transformation in 90 years, discover how this €70 million renovation is redefining Italian football architecture The Vision Behind Florence’s Grandest Stadium Transformation The Stadio Artemio Franchi, a cornerstone of Florence’s sporting heritage since 1931, is embarking on an ambitious €95 million renovation project that promises to revolutionise Italian football architecture. Led by the renowned Arup studio and architect David Hirsch, this transformative project aims to strike a delicate balance between preserving the stadium’s historic character and introducing modern amenities. The renovation represents not just a structural upgrade, but a reimagining of how historic sporting venues can evolve to meet contemporary demands while maintaining their cultural significance. Architectural Innovation Meets Historical Preservation The renovation masterplan showcases an ingenious blend of modern engineering and respectful preservation. At the heart of the design is the commitment to protect and enhance the stadium’s most iconic features, particularly the historic Marathon Tower. The new design introduces several groundbreaking elements: A state-of-the-art lightweight roof structure that will cover all seating areas while preserving the original architecture Enhanced spectator facilities including modernised seating arrangements and improved sightlines Integration of sustainable materials and energy-efficient systems Preservation of the distinctive concrete curves and structural elements that define the stadium’s character Breaking Down the €95 Million Investment The financial framework supporting this massive undertaking involves a complex mix of funding sources. The project has faced recent challenges due to partial government funding cancellations, but alternative solutions have been developed: Government grants through the Recovery Fund: €55 million Municipal contributions: €25 million Additional funding sources under negotiation: €15-20 million Potential club investments and commercial partnerships Construction Timeline and Phasing Strategy The renovation project has been carefully planned to minimise disruption to match operations while maintaining efficient construction progress. The timeline spans from 2024 to 2029, with several key phases: Phase 1 (2024-2026): Initial structural work and roof construction Phase 2 (2026-2027): Internal facilities upgrade and seating reconfiguration Phase 3 (2027-2029): Commercial areas development and final touches Throughout construction, the stadium will maintain a minimum capacity of 30,000 seats, ensuring continued match hosting capabilities. Enhanced Fan Experience and Community Impact The renovated Stadio Artemio Franchi will offer an unprecedented level of comfort and amenities for spectators and visitors. The new facilities include: Premium VIP lounges and hospitality areas Expanded retail and dining options Multi-purpose community spaces for year-round use Improved accessibility features and public transport connections Integrated smart technology systems for enhanced user experience Future-Proofing for Major Events The renovation project positions the Stadio Artemio Franchi as a prime venue for major international tournaments. With its upgraded facilities and increased capacity of 35,000-40,000 seats, the stadium is being prepared to potentially host matches during Euro 2028 or 2032. The modernised infrastructure will meet all UEFA and FIFA requirements, ensuring Florence’s place on the international football stage for decades to come. The Economic and Cultural Impact on Florence This transformative project extends far beyond football, promising significant economic and cultural benefits for Florence. The renovation is expected to generate: Increased tourism revenue through enhanced match-day experiences New employment opportunities in hospitality and event management Improved local infrastructure and public spaces Enhanced cultural significance as a modern architectural landmark Conclusion: A New Era for Florentine Football The Stadio Artemio Franchi renovation represents a bold step into the future while honoring Florence’s rich sporting heritage. As construction progresses towards the stadium’s centenary, this €95 million investment promises to deliver a venue that combines historical significance with modern excellence. The project sets new standards in sustainable stadium design and creates a multi-purpose facility that will serve both football fans and the broader community for generations to come. With its completion, Florence will possess a sporting venue that truly reflects its status as a city where tradition and innovation harmoniously coexist. FAQ Is AC Milan moving stadium? Milan’s iconic San Siro football stadium is set to be demolished after the city council approved its sale to AC Milan and Inter Milan on Tuesday after an overnight debate. The two clubs plan to tear down the 99-year-old stadium and jointly build a new 71,500-seat arena as part of a €1.2 billion project. Why can’t Chelsea build a new stadium? To protect the future of Chelsea and its home since 1905, CPO bought the freehold of the stadium in 1997 with the help of a £10m loan from the club. The result is that the ground cannot be sold or redeveloped without CPO approval. Sources [1] https://www.padmagazine.co.uk/construction/artemio-franchi-gets-a-massive-makeover-heres-what-to-expect/26943/ [2] https://www.nss-sports.com/en/lifestyle/29192/new-stadium-fiorentina [3] https://kentplasterers.co.uk/fiorentina-stadium-renovation-2/

Fiorentina Stadium Renovation: The Ultimate Guide to Florence’s Most Ambitious Makeover Read More »

How Much Does Plastering Cost? The Ultimate 2024 Price Guide for Kent Homeowners

Discover exactly how much plastering costs in Kent without the confusion or hidden fees – our comprehensive guide breaks down every expense you need to know. Understanding Basic Plastering Costs in Kent In Kent’s dynamic construction market, plastering costs have seen significant changes in 2024. As experienced plasterers serving the Kent region, we’ve observed that basic plastering costs typically range from £20 to £35 per square metre. This variation largely depends on factors such as the complexity of the job, wall condition, and specific location within Kent. For instance, properties in areas like Tunbridge Wells or Sevenoaks might command slightly higher rates than other parts of the county. A standard plastering project in Kent now includes preparation work, materials, and professional labour, with most jobs requiring 2-3 days to complete for optimal results. Square Footage Pricing Breakdown Basic wall plastering: £20-£25 per square metre for straightforward surfaces Ceiling plastering: £25-£35 per square metre due to increased difficulty Specialist finishes: £30-£40 per square metre for decorative or period work Skim coating: £15-£20 per square metre for surface improvement Material costs: £5-£8 per square metre for standard plaster Labour Costs Explained Labour typically accounts for approximately 70% of total plastering costs in Kent. Professional plasterers charge between £180 and £250 per day, with most experienced tradespeople commanding higher rates in affluent areas like Bromley or Canterbury. These rates reflect the skill level required and current market demands. A typical room might require 1-2 days of labour, though this can vary based on complexity and preparation requirements. Specific Plastering Project Costs Single Room Plastering Costs For a standard 12×12 foot room in Kent, expect to pay between £500 and £700 for professional plastering. This includes: Wall preparation: £100-£150 Materials: £150-£200 Labour: £250-£350 Additional finishing work: £50-£100 Whole House Plastering Plastering an entire 2000 square foot house in Kent typically costs between £7,000 and £12,000. This comprehensive service includes preparing all surfaces, applying multiple coats where necessary, and ensuring a perfect finish throughout. The wide price range reflects variables such as the property’s condition, accessibility, and chosen finish quality. Repair and Patch Work Pricing Small patches (under 1m²): £80-£120 Medium repairs (1-3m²): £150-£250 Large crack repairs: £200-£300 Ceiling repair work: £180-£300 Water damage restoration: £250-£400 Factors Affecting Your Plastering Costs Wall Condition and Preparation The condition of your walls significantly impacts the final cost of plastering. In Kent properties, especially period homes, we often encounter these cost-affecting factors: Removing old wallpaper: Additional £3-£5 per m² Treating damp issues: £200-£400 extra Levelling uneven surfaces: £10-£15 per m² additional Structural repairs: Quoted separately based on severity Plaster Types and Finishes Different plaster types and finishes available in Kent come with varying costs: Traditional lime plaster: £35-£45 per m² Modern gypsum plaster: £20-£30 per m² Venetian plaster: £60-£80 per m² Specialist acoustic plaster: £40-£50 per m² Property Location and Access Your location within Kent can significantly affect plastering costs. Properties in central locations like Maidstone or Rochester might incur standard rates, while remote locations could add 10-15% to the final cost. Access issues, such as working at height or restricted spaces, can also impact pricing. Getting the Best Value for Your Plastering Project Cost-Saving Tips Book during off-peak seasons (typically winter months) Prepare rooms before plasterers arrive Combine multiple rooms for better rates Consider basic finishes for non-primary spaces Get multiple quotes from Kent-based plasterers Choosing the Right Plasterer Selecting the right plasterer in Kent is crucial for ensuring quality work and value for money. Look for professionals who: Have extensive local experience and references Provide detailed, written quotes Hold appropriate insurance and qualifications Belong to recognized trade associations Offer guarantees on their work Final Cost Considerations and Next Steps When planning your plastering project in Kent, remember that the lowest quote isn’t always the best value. Consider the plasterer’s reputation, experience, and the quality of materials they use. Most homeowners in Kent spend between £2,000 and £5,000 on their plastering projects, achieving excellent results that last for years. To proceed with your project, start by getting at least three detailed quotes from reputable Kent plasterers, ensuring they visit your property to provide accurate estimates. Remember to discuss timeline, payment terms, and any specific requirements you have before committing to a contractor. FAQ Why is plastering so expensive? Complexity: ceilings or very high walls Hard or complex plastering jobs need additional labour, time and expertise, and this is more expensive. Ceilings take longer to plaster compared to walls, and it might be more expensive if scaffolding or expert equipment is needed to reach particularly high ceilings. Can I plaster a wall myself? Plastering is certainly a skill that takes some time to perfect. However, this doesn’t mean that it is not something that you can do yourself. Although most people prefer to leave this type of work to professionals, you can save yourself some money by learning how to plaster a wall yourself. Sources [1] https://homeguide.com/costs/cost-of-plastering-walls [2] https://www.checkatrade.com/blog/cost-guides/cost-plaster-room/ [3] https://www.fixr.com/costs/apply-paster

How Much Does Plastering Cost? The Ultimate 2024 Price Guide for Kent Homeowners Read More »

mortgage-funded luxury renovation transformation

Ultimate Guide: How Borrowing Extra On Your Mortgage Can Transform Your Home Renovation Dreams

Unlock the hidden potential of your property by borrowing extra on your mortgage – the smart way to fund those game-changing renovations without breaking the bank. Understanding Your Home Equity Borrowing Options In today’s dynamic UK property market, homeowners are increasingly turning to mortgage-based solutions to fund their renovation projects. With property values in regions like Kent showing steady growth – approximately 8.3% year-over-year in 2023 – many homeowners are sitting on significant equity that could be leveraged for home improvements. Understanding the various options available for borrowing against your property is crucial for making an informed decision that aligns with your renovation goals and financial circumstances. Home Equity Loans vs. HELOCs When considering additional borrowing on your mortgage for renovations, two primary options emerge: home equity loans and Home Equity Lines of Credit (HELOCs). Each offers distinct advantages depending on your specific needs: Home Equity Loans: These provide a lump sum with fixed interest rates, typically ranging from 4.5% to 6.5% in the current UK market. Ideal for single, well-defined renovation projects. HELOCs: Offer flexible access to funds with variable rates, currently starting from 5.5%. Perfect for phased renovation projects or when exact costs are uncertain. Loan-to-Value (LTV) Considerations: Most UK lenders allow borrowing up to 85% of your property’s value, though some may go higher for strong applications. Special Renovation Mortgage Programs Several specialised mortgage products cater specifically to renovation projects. In the UK market, these include: Further Advance: Additional borrowing from your existing lender Renovation Mortgages: Specific products designed for major home improvements Self-Build and Renovation Mortgages: Suitable for extensive renovation projects Green Home Improvement Loans: Special rates for energy-efficient upgrades Smart Ways to Finance Your Home Improvements Making the right choice about financing your renovations can significantly impact both your monthly outgoings and long-term financial health. Current market data shows that homeowners who carefully plan their renovation financing typically save 15-20% on interest costs compared to those who use alternative funding methods like personal loans or credit cards. Cash-Out Refinancing: Is It Right for You? Cash-out refinancing has gained popularity in the UK market, particularly with current property values at historic highs. This option allows you to: Replace your existing mortgage with a larger loan Access up to 90% of your property’s value (subject to lender criteria) Potentially secure better interest rates than your current mortgage Consolidate other debts alongside funding renovations Alternative Financing Options While mortgage-based borrowing often offers the most competitive rates, alternative options might be more suitable in certain circumstances: Personal loans: For smaller renovation projects (typically under £25,000) Credit cards with 0% interest periods: Suitable for short-term funding Specialist renovation loans: Offered by some UK lenders for specific improvements Maximising Your Renovation Investment Research shows that strategic home improvements can add up to 20% to your property’s value. Understanding which renovations offer the best return on investment is crucial when borrowing additional funds. Value-Adding Improvements Kitchen renovations: Average ROI of 50-70% in the UK market Bathroom upgrades: Typically adds 4-5% to property value Loft conversions: Can increase home value by up to 20% Energy efficiency improvements: Growing in importance with new EPC regulations Budget Planning and Project Management Effective budget management is crucial when using borrowed funds for renovations. Recent studies indicate that 35% of renovation projects exceed their initial budget by 10-20%. Consider these essential planning steps: Include a 10-15% contingency fund in your budget Obtain multiple quotes from reputable contractors Phase projects if necessary to manage costs Consider seasonal timing for better contractor availability and pricing Making the Right Choice for Your Situation The decision to borrow extra on your mortgage requires careful consideration of your current financial position and future plans. Factors to evaluate include your existing mortgage terms, current interest rates, and the potential impact on your monthly payments. Assessing Your Financial Position Before proceeding with additional borrowing, consider: Current mortgage balance and terms Available equity in your property Monthly income and existing commitments Long-term financial goals Working with Professional Advisors Professional guidance is invaluable when making significant financial decisions about property improvements. Seek advice from: Mortgage advisors for financing options Surveyors for property valuation Architects or designers for renovation planning Tax advisors for understanding implications Taking the Next Steps Ready to explore borrowing extra on your mortgage for renovations? Here’s your action plan: Review your current mortgage documentation Gather recent property valuations Consult with mortgage advisors about available options Obtain detailed renovation quotes from contractors Consider timing and phasing of works Compare different lender offerings Remember, successful renovation financing requires careful planning and consideration of all available options. With property values in Kent and surrounding areas continuing to rise, investing in your home through smart borrowing could be a strategic move for both immediate enjoyment and long-term value enhancement. FAQ How much is too much for a renovation? Consider the overall value of your home; a common rule of thumb suggests that homeowners should not spend more than 10-15% of their home’s value on renovations. What is illegal renovation? Unpermitted work refers to any construction, renovations, remodels, or additions made without the required local building permits. Examples include unpermitted additions or DIY electrical and plumbing upgrades. Sources [1] https://www.bankrate.com/home-equity/home-equity-for-improvement-renovation/ [2] https://listwithclever.com/real-estate-blog/can-you-get-a-home-loan-for-more-than-the-purchase-price/ [3] https://crosscountrymortgage.com/mortgage/loans/renovation/renovation-heloc/

Ultimate Guide: How Borrowing Extra On Your Mortgage Can Transform Your Home Renovation Dreams Read More »