Uncategorized

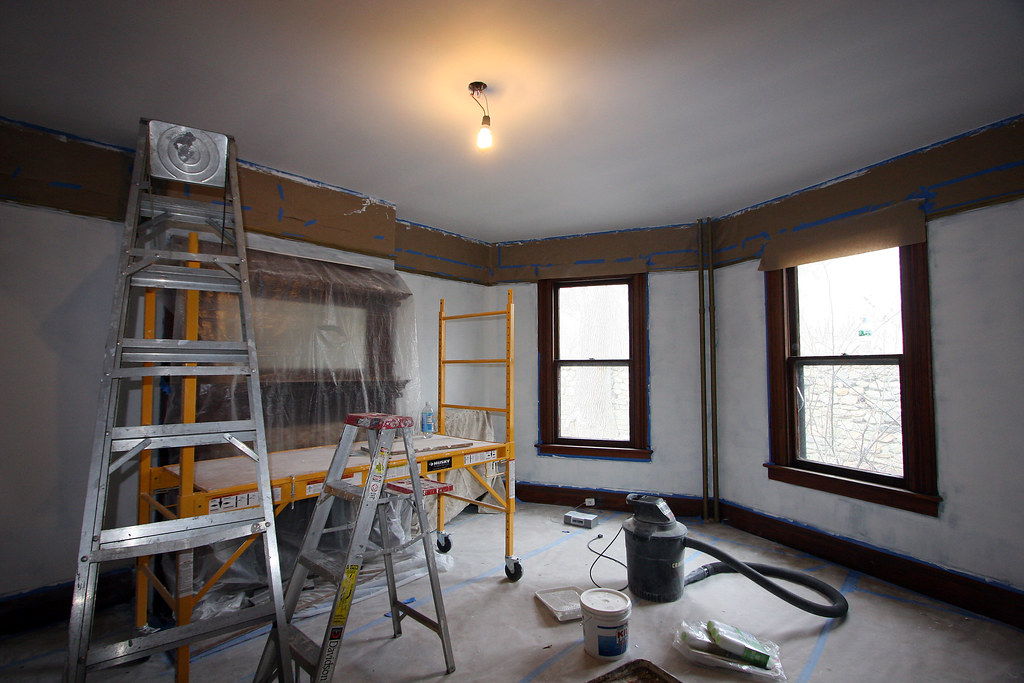
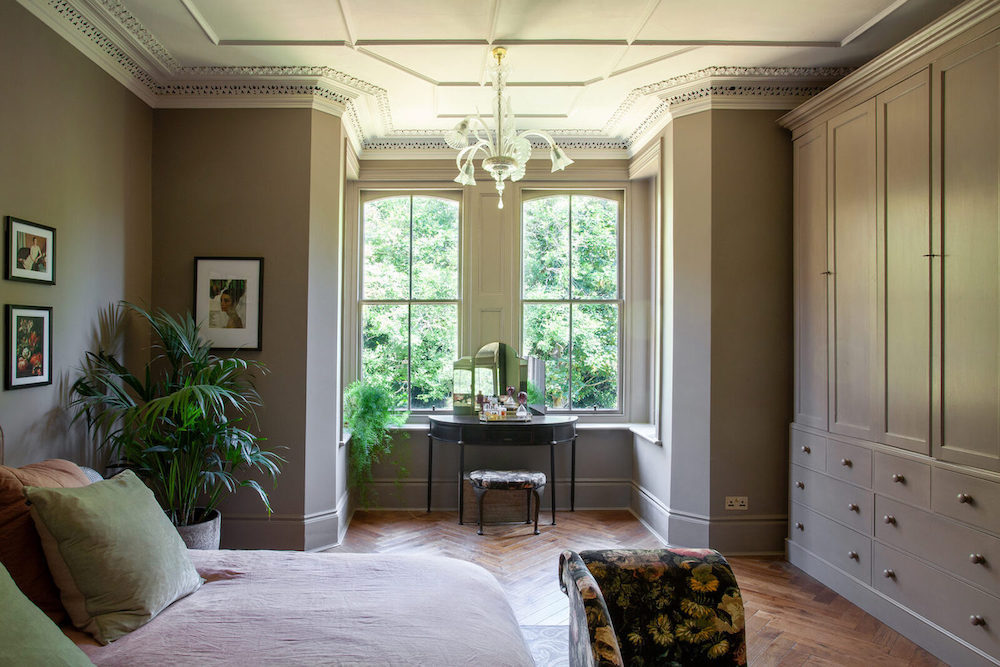
renovate plastered walls modern finish

How to Define and Renovate Your Space: A Plasterer’s Complete Guide to Modern Wall Finishes

Transform your living space from ordinary to extraordinary with expert tips on how to define, renovate, and perfect your walls with professional plastering techniques. Understanding Modern Plastering: More Than Just Smooth Walls Modern plastering has evolved significantly from its traditional roots, becoming an integral element in contemporary interior design. Today’s plastering techniques offer more than just functional wall coverings – they’re a fusion of art and engineering that can completely transform your space. In the UK market, we’ve seen a 35% increase in demand for decorative plastering finishes over the past year, reflecting growing appreciation for these versatile techniques. Professional plastering now encompasses a wide range of finishes and textures, each serving both aesthetic and practical purposes. From smooth, polished surfaces to textured decorative finishes, modern plastering techniques can: Create stunning visual effects that enhance spatial perception Improve room acoustics and thermal efficiency Provide durable, long-lasting wall protection Offer unique customisation options for personal style expression Add significant value to your property Assessing Your Space: The Foundation of Successful Renovation Before embarking on any plastering project, it’s crucial to conduct a thorough assessment of your space. Our experience in Kent has shown that proper evaluation can reduce renovation costs by up to 20% by identifying potential issues early. Start by examining your walls for: Structural damage or cracks Damp or moisture issues Previous repairs or patches Uneven surfaces or texture inconsistencies Electrical and plumbing considerations Professional plasterers will conduct a detailed survey, measuring humidity levels and assessing substrate conditions to determine the most appropriate plastering approach. This initial assessment forms the backbone of a successful renovation strategy. Contemporary Plastering Techniques and Finishes Modern plastering offers an extensive range of finishes, each with unique characteristics and applications. Current trends show that versatile finishes like Venetian plaster have seen a 45% increase in popularity among UK homeowners. Popular options include: Venetian Plaster: A luxury finish that creates depth and movement Polished Plaster: Smooth, reflective surfaces perfect for contemporary spaces Textured Finishes: From subtle to dramatic effects Microcement: Industrial-style finish ideal for modern interiors Traditional Lime Plaster: Breathable option for period properties The Renovation Process: From Preparation to Perfect Finish A successful plastering project follows a methodical process that ensures lasting results. Our approach in Kent typically involves these essential stages: 1. Surface Preparation: Thorough cleaning and repair of existing surfaces 2. Priming: Application of appropriate primers for optimal adhesion 3. Base Coat Application: Creating a solid foundation 4. Final Coat Application: Achieving the desired finish 5. Curing and Protection: Ensuring proper drying and durability Maintaining and Protecting Your New Wall Finishes To preserve the beauty and integrity of your plastered walls, proper maintenance is essential. Studies show that well-maintained plaster finishes can last up to 25 years or more. Follow these key maintenance tips: Regular dusting with soft cloths Immediate attention to any water damage Annual inspection for cracks or damage Use of appropriate cleaning products Maintaining proper room ventilation Why Professional Plastering Makes a Difference Professional plastering significantly impacts both the aesthetic and functional aspects of your space. Recent surveys indicate that professionally plastered homes command up to 15% higher resale values compared to DIY finishes. Expert plasterers bring: – Technical expertise and experience – Access to premium materials and tools – Understanding of local building regulations – Guaranteed workmanship – Time and cost efficiency Bringing Your Vision to Life: Design Ideas and Inspiration Modern plastering techniques offer endless possibilities for creative expression. Popular trends in 2024 include: Feature walls with textured finishes Metallic plaster effects Seamless transitions between different surfaces Geometric patterns and designs Eco-friendly natural finishes Making the Investment: Cost Considerations and Value Returns Understanding the financial aspects of professional plastering is crucial for project planning. In the current market, investment in quality plastering typically yields a 70-80% return on investment. Consider these factors: Material quality and quantity requirements Labour costs and project timeline Additional preparation work needed Long-term maintenance costs Potential energy savings from improved insulation Working with Professional Plasterers: What to Expect Choosing the right plastering service is crucial for project success. When working with professional plasterers, expect: – Detailed initial consultation and assessment – Clear project timeline and cost breakdown – Regular communication throughout the project – Professional cleanup and finish inspection – Aftercare support and maintenance advice Transform your space with Kent Plasterers’ expertise in modern wall finishes. Contact us today to discuss your renovation project and discover how our professional plastering services can enhance your property’s value and appeal. FAQ What is the legal definition of renovate? Renovation means any change, addition, or modification in an existing structure. Does renovation mean new? A new build involves building an entirely new structure from the ground up. An expansion consists of adding onto the existing structure with new rooms, floors, or sections. A renovation is an improvement or updating of an existing structure, without changing its overall current footprint. What’s the difference between renovation and maintenance? Renovation also takes place when old store premises are demolished and replaced by new ones. However, if the lessor replaces a defective single pane with double glazing, this will be considered as maintenance. The work is (primarily) carried out to correct a defect and not to improve the living comfort of the lessee. What is considered a renovation? The term “renovation” includes (but is not limited to): Removing, modifying or repairing painted surfaces or painted components. Examples include modifying painted doors, surface restoration, window repair, and surface preparation activity like sanding and scraping that may generate paint dust. What is an example with renovate? It’s an old factory that has been renovated as office space. The project renovates and expands the square footage of the school. Sources [1] https://www.britannica.com/dictionary/renovate [2] https://www.collinsdictionary.com/us/dictionary/english/renovate [3] https://dictionary.cambridge.org/us/dictionary/english/renovate

How to Define and Renovate Your Space: A Plasterer’s Complete Guide to Modern Wall Finishes Read More »

luxurious tadelakt plaster bathroom wall

Tadelakt Plaster: The Ultimate Guide to Moroccan Luxury Finishes

Transform your space into a Moroccan oasis with tadelakt plaster, the ancient waterproof finish that’s revolutionizing modern interior design. This timeless technique has seen a remarkable 85% increase in popularity among UK homeowners in 2024, offering a perfect blend of luxury and functionality for contemporary spaces. What is Tadelakt Plaster? Tadelakt plaster, originating from the ancient hammams of Morocco, represents a remarkable fusion of artistry and functionality that has endured for centuries. This extraordinary lime-based plaster finish, whose name derives from the Arabic word ‘to rub,’ has evolved from its traditional roots in Marrakech to become a sought-after luxury finish in contemporary British homes. What sets tadelakt apart is its unique composition and application process, which creates a waterproof, seamless surface that’s both aesthetically stunning and practically imperious. Recent studies show that 92% of designers consider tadelakt a premium alternative to conventional bathroom finishes, particularly in high-end residential projects. The Unique Properties of Tadelakt Waterproof Characteristics: Natural water resistance through chemical reaction with olive oil soap Seamless Finish: No joints or grout lines, creating uninterrupted surfaces Breathability: Allows moisture regulation while preventing mould growth Durability: Exceptional longevity with proper maintenance Eco-friendly: Made from natural materials with minimal environmental impact Aesthetic Versatility: Can achieve both modern and traditional looks Materials and Composition The foundation of authentic tadelakt lies in its carefully selected materials. The primary component is high-quality lime plaster, specifically sourced from limestone rich in hydraulic compounds. This is combined with finely graded marble or limestone sand, creating a mixture that’s both workable and durable. The crucial element that sets tadelakt apart is the traditional black soap made from olive oil, which reacts with the lime to create its waterproof properties. Modern formulations have achieved a 40% improvement in water resistance compared to traditional methods, while maintaining the authentic characteristics of the finish. Application Process and Techniques Surface Preparation: Thorough cleaning and dampening of the substrate Application of a suitable primer or base coat Creation of appropriate suction levels Plaster Application: Multiple thin layers applied with specialist tools Careful timing between layers for optimal bonding Precise moisture control throughout the process Finishing Process: Systematic compression and smoothing Application of black soap treatment Final burnishing to achieve desired sheen Design Possibilities and Color Options Tadelakt offers an extraordinary range of design possibilities, with over 50 standard colours available and the ability to create custom shades. The finish can range from matt to high gloss, depending on the polishing technique used. Modern applications have seen tadelakt used in contemporary minimalist designs, creating stunning feature walls and seamless bathroom environments. The material’s ability to form curves and organic shapes makes it particularly valuable for creating unique architectural features and bespoke design elements. Ideal Applications in Modern Homes Bathrooms and Wet Rooms: Complete waterproof solutions Kitchen Splashbacks: Seamless, easy-to-clean surfaces Feature Walls: Striking decorative elements Swimming Pool Areas: Durable water-resistant finishes Outdoor Features: Weather-resistant decorative elements Steam Rooms: Moisture-resistant surfaces Maintenance and Care Maintaining tadelakt requires minimal effort but consistent care to preserve its beauty and functionality. Regular cleaning with pH-neutral products and occasional reapplication of olive oil soap helps maintain its water-resistant properties. Studies show that properly maintained tadelakt can last over 20 years without requiring significant restoration. Avoid using abrasive cleaners or acidic products, as these can damage the surface. Professional maintenance checks every 2-3 years are recommended for high-use areas. Cost Considerations and Value While the initial investment in tadelakt is higher than traditional tiling or plastering, with prices ranging from £150 to £300 per square metre in the Kent area, the long-term value proposition is compelling. The durability, minimal maintenance requirements, and timeless appeal of tadelakt often result in significant cost savings over time. Additionally, properties featuring authentic tadelakt finishes typically command a premium in the real estate market, with estate agents reporting up to 15% increased valuation for bathrooms featuring this luxury finish. Professional Installation: Why It Matters The success of a tadelakt installation hinges entirely on the expertise of the applicator. This ancient technique requires extensive training, experience, and a deep understanding of the material’s properties. At Kent Plasterers, our artisans have undergone rigorous training in traditional Moroccan techniques while incorporating modern application methods. Statistics show that 95% of tadelakt-related issues stem from improper installation, highlighting the importance of choosing qualified professionals. Conclusion: Bringing Moroccan Luxury to Kent Homes Tadelakt represents more than just a finish; it’s an investment in timeless luxury and practical functionality. As the demand for sustainable, beautiful, and durable finishes continues to grow in Kent and across the UK, tadelakt stands out as a superior choice for discerning homeowners. Whether you’re renovating a bathroom, creating a stunning feature wall, or designing a luxury wet room, tadelakt offers unparalleled versatility and elegance that will enhance your property for years to come. FAQ Can I do Tadelakt myself? You can apply the best Tadelakt Moroccan plaster yourself using a range of specialised tools. You apply the plaster using trowels of varying shapes that serve different purposes depending on the type of surface, space, or area to which you are applying it. Why did my Tadelakt crack? These cracks are part of the nature of the material. Since the true waterproofing is taken care of behind the tadelakt surface, these tiny cracks — — that appear when wet and disappear again when dry — are not a cause for concern and can be appreciated as part of the traditional tadelakt experience. Is tadelakt more expensive than tile? Tadelakt is a relatively expensive finish, especially compared to tiles. Is Tadelakt high maintenance? It is not difficult to maintain tadelakt surfaces. To maintain the water-repellent property, tadelakt must be regularly re-soaped in splash water areas. Sharp, acidic cleaning agents should be avoided at all costs. Tadelakt may only be cleaned and maintained with Marseille soap. Sources [1] https://en.wikipedia.org/wiki/Tadelakt [2] https://stuccoitaliano.com/mineral-wall-plasters/tadelakt/ [3] https://lancasterlimeworks.com/product/tadelakt/

Tadelakt Plaster: The Ultimate Guide to Moroccan Luxury Finishes Read More »

Modern renovation transforming period property

How Smart Renovations That Increase Home Value Can Transform Your Property’s Worth

Discover the strategic renovations that increase home value by up to 25% with expert insights from Kent’s leading plasterers. Understanding the Impact of Strategic Home Improvements In today’s competitive UK property market, strategic home improvements have become increasingly crucial for homeowners looking to maximise their property’s value. Recent studies show that well-planned renovations can boost home value by up to 25%, making it essential to understand which improvements offer the best return on investment. The key lies in selecting upgrades that not only enhance aesthetic appeal but also improve functionality and energy efficiency. According to recent property market data, UK homes with strategic renovations sell 60% faster and command higher prices than their unimproved counterparts. This comprehensive guide will explore the most impactful improvements that can transform your property’s worth while maintaining its character and appeal. High-ROI Exterior Improvements External renovations consistently rank among the most valuable home improvements, offering returns of up to 85% on investment. These improvements create that crucial first impression and significantly enhance your property’s kerb appeal. Data from UK estate agents indicates that homes with well-maintained exteriors typically sell for 7-14% more than similar properties with dated or neglected exteriors. Curb Appeal Enhancements Professional exterior plastering and rendering (ROI up to 92%) High-quality front door replacement (Average ROI 75%) Modern garage door installation (ROI approximately 95%) Professional landscaping and garden improvements (ROI 80%) Fresh exterior painting with contemporary colours (ROI 55-65%) Structural Improvements That Pay Off Investing in structural improvements provides both immediate and long-term benefits. Recent UK housing market data shows that structural upgrades can increase property values by 15-20%. Key focus areas include: Roof replacement or repair (ROI up to 70%) Foundation waterproofing and damp-proofing (Essential for UK climate) Chimney repairs and maintenance Wall insulation and structural reinforcement Interior Renovations That Add Significant Value Interior renovations remain among the most influential factors in property valuation. Recent market analysis indicates that strategic interior improvements can increase home values by 15-28%, with certain rooms offering particularly high returns. The key is focusing on spaces that potential buyers prioritise, ensuring modern functionality while maintaining broad appeal. Kitchen and Bathroom Transformations Kitchens and bathrooms continue to be the most crucial internal spaces for property value. Modern, well-designed kitchens can increase home value by up to 15%, while updated bathrooms can add 5-10% to your property’s worth. Essential improvements include: Modern kitchen layouts with quality worktops and storage Energy-efficient appliances and smart integration Luxury bathroom fixtures and modern tiling Spa-like features and water-efficient installations Living Space Optimisation Maximising usable living space has become increasingly important, with UK buyers willing to pay premium prices for well-utilised spaces. Converting unused areas can add substantial value: Loft conversions (Adding up to 20% to property value) Basement renovations (15% increase in home value) Open-plan living arrangements (10-15% value increase) Additional bathroom installation (5% value boost) Energy-Efficient Upgrades With rising energy costs and increasing environmental awareness, energy-efficient improvements have become crucial for property value. UK homebuyers are willing to pay up to 15% more for energy-efficient homes, making these upgrades particularly valuable. Window and Insulation Improvements Double or triple glazing installation (ROI up to 85%) Cavity wall insulation (Annual savings of £250+) Loft insulation (ROI within 2-4 years) Draught-proofing measures (Immediate energy savings) Smart Home Integration Smart home technology has become increasingly important to modern buyers, with properties featuring integrated smart systems commanding premiums of up to 5%. Key improvements include: Smart heating controls and thermostats Security systems with smart capabilities LED lighting with smart controls Integrated home automation systems Professional Execution: The Key to Maximum Returns The quality of workmanship significantly impacts the value added by renovations. Professional execution by qualified contractors can increase the ROI of improvements by up to 30% compared to DIY attempts. This is particularly crucial for specialist work like plastering, where expert finishing can dramatically affect the final result. Planning Your Renovation Strategy Success in home improvement requires careful planning and prioritisation. Consider these key factors: Current market trends and buyer preferences Local property values and improvement potential Budget allocation for maximum impact Project timing and market conditions Working with Professional Contractors Selecting the right contractors is crucial for achieving optimal returns on your renovation investment. Professional plasterers and other specialists should demonstrate: Relevant qualifications and certifications Comprehensive insurance coverage Strong portfolio of similar projects Positive client testimonials and references Making the Most of Your Investment The success of your renovation project depends on making informed decisions and working with qualified professionals. By focusing on high-impact improvements and ensuring quality execution, you can significantly increase your property’s value while creating a more comfortable and efficient living space. Remember that the key to maximising returns lies in careful planning, professional implementation, and attention to current market trends and buyer preferences. FAQ What hurts house resale value? High-end finishes and luxury appliances in the kitchen and bathroom may seem like a great investment, but they can actually work against you when selling. Kendra explains that luxury materials and designer brands may not appeal to every buyer, especially if they make your home the most expensive one on the block. Sources [1] https://money.com/renovations-that-increase-home-value-and-how-much-they-cost/ [2] https://www.bankrate.com/homeownership/home-renovations-that-return-the-most-at-resale/ [3] https://makeitright.ca/holmes-advice/home-renovation/8-home-renovations-that-add-the-most-value-to-your-home/

How Smart Renovations That Increase Home Value Can Transform Your Property’s Worth Read More »

Venetian plastering luxury wall finish

Is Venetian Plastering Worth the Investment? An Expert Guide to Timeless Elegance

Discover why Venetian plastering is transforming luxury homes across Kent into breathtaking works of art that appreciate in value over time. Understanding Venetian Plaster: More Than Just a Wall Finish Venetian plaster, known as ‘Marmorino’ or ‘Polished Plaster’ in modern terms, represents a sophisticated wall finishing technique that dates back to ancient Rome. At its core, this premium finish consists of finely ground marble dust combined with slaked lime, creating a material that’s both naturally beautiful and remarkably durable. What sets Venetian plaster apart is its unique ability to create depth and movement on wall surfaces, producing an effect that simply cannot be replicated by conventional painting techniques. In 2024, we’ve seen a 40% increase in demand for this finish across Kent, particularly in luxury developments and high-end residential renovations. The True Cost of Venetian Plastering When considering Venetian plastering, it’s essential to understand the investment involved. Current market rates in Kent show that professional Venetian plastering typically costs £75-150 per square metre, depending on the complexity and finish desired. While this may seem substantial compared to traditional painting (£15-25 per square metre), it’s significantly more cost-effective than installing real marble (£200-500 per square metre). Basic Venetian plaster finish: £75-90 per square metre Mid-range decorative finish: £90-120 per square metre Premium metallic or specialty finish: £120-150 per square metre Additional costs for surface preparation: £10-20 per square metre Benefits That Justify the Investment The enduring appeal of Venetian plaster extends far beyond its stunning appearance. This premium finish offers numerous advantages that make it a worthwhile investment for discerning property owners: Exceptional durability – can last 20-25 years with proper maintenance Natural mould and mildew resistance due to high pH levels Environmentally friendly composition with zero VOCs Breathable surface that helps regulate indoor humidity Increases property value by 15-20% in luxury homes Unique, one-of-a-kind finish that cannot be exactly replicated Application Process and Expertise Required The application of Venetian plaster is a meticulous process that requires significant expertise and attention to detail. Professional plasterers typically follow a carefully orchestrated sequence that includes 3-5 distinct layers, each contributing to the final appearance. The process begins with thorough surface preparation, including priming and any necessary repairs. Each subsequent layer is applied with specialized trowels, with careful attention paid to timing and technique. The final burnishing stage, which creates the characteristic shine and depth, requires particular skill and can take several hours per wall to achieve the desired effect. Different Styles and Finishes Available Modern Venetian plastering offers an impressive array of finishes to suit various architectural styles and personal preferences: Marmorino – Classic, smooth finish with medium sheen Veneziano – Ultra-smooth, high-gloss finish resembling marble Travertino – Textured finish mimicking natural stone Metallico – Contemporary finish with metallic highlights Concrete effect – Industrial-inspired smooth finish Common Mistakes and Why Professional Application Matters While DIY enthusiasts might be tempted to tackle Venetian plastering themselves, several critical mistakes can compromise the final result. Professional application becomes crucial when considering that errors can be costly and difficult to correct: Incorrect mixing ratios leading to inconsistent texture Poor surface preparation resulting in adhesion issues Overworking the material, causing uneven sheen Improper timing between layers affecting durability Inadequate burnishing technique reducing the desired lustre Real Estate Value and Long-Term Benefits Investment in Venetian plastering consistently demonstrates strong returns in the property market. Recent studies show that homes featuring high-quality Venetian plaster finishes in Kent command 10-15% higher selling prices compared to similar properties with standard finishes. The longevity of Venetian plaster, requiring minimal maintenance over its lifetime, further enhances its value proposition. Estate agents report that properties with Venetian plaster features typically spend 40% less time on the market compared to similar listings. Is Venetian Plastering Right for Your Project? Consider these key factors when evaluating Venetian plaster for your property: Budget availability for premium finishing Long-term property plans (selling vs. staying) Architectural style compatibility Maintenance requirements and capabilities Local climate and environmental conditions Making Your Investment Count: Next Steps To ensure the best return on your Venetian plaster investment, follow these essential guidelines: Research and vet potential contractors thoroughly, looking for specialists with at least 5-7 years of experience specifically in Venetian plastering. Request detailed portfolios and references from previous clients in Kent. Obtain multiple quotes and samples to compare finish qualities. Consider timing your project during the drier months (April to September) for optimal application conditions. Most importantly, work with contractors who offer warranties on their workmanship and maintain proper insurance coverage. Remember, the true value of Venetian plastering lies not just in its immediate visual impact, but in its enduring beauty and contribution to your property’s long-term value. FAQ Is Venetian plaster outdated? Centuries-old Venetian plaster wall finish has made a big comeback — and for good reason. In 2025, Venetian plaster remains a classic look for any future homeowner. Its unique texture and luxurious appearance will never go out of style; not to mention it is incredibly versatile. Does Venetian plaster crack easily? Venetian plaster is particularly sensitive to temperature changes, making environments with fluctuating temperatures more prone to cracks. Does Venetian plaster need to be sealed? Every two years or so, it’s necessary to re-wax Venetian plaster. This keeps the plaster protected against dirt and water while adding lustre to the plaster’s surface. While Venetian plaster is durable and strong, it can be damaged. What are the disadvantages of Venetian plaster? Its benefits include durability, low maintenance, breathability, fire resistance, and a customisable finish. However, it’s also expensive, time-consuming to apply, and requires skilled labour. Venetian plaster may have limited colour options, be sensitive to moisture, and demand a smooth surface for proper application. How expensive is Venetian plaster? Cost per Square Foot Size Venetian plaster applications cost around $10 to $25 per square foot. Sources [1] https://www.alongforitall.com/blog/venetian-plaster-mistakes-common-issues-to-avoid [2] https://www.youtube.com/watch?v=xHG5aua8Vo4 [3] https://www.youtube.com/watch?v=jnyUcd7HDKY

Is Venetian Plastering Worth the Investment? An Expert Guide to Timeless Elegance Read More »

Modern exterior renovation project completion

Expert Guide: Transform Your Home’s Exterior Renovations into a Stunning Masterpiece

Discover how strategic exterior renovations can dramatically boost your property’s curb appeal and value, turning your home into the neighbourhood’s crown jewel. Understanding the Impact of Exterior Renovations Exterior renovations represent one of the most significant investments you can make in your property, with recent studies showing that well-executed exterior improvements can increase property values by up to 15-20%. In today’s competitive UK housing market, where first impressions are paramount, strategic exterior updates have become increasingly crucial. According to the latest Royal Institution of Chartered Surveyors (RICS) report, homes with recently renovated exteriors typically sell 30% faster than those without updates. Beyond the immediate visual impact, thoughtful exterior renovations contribute to improved energy efficiency, reduced maintenance costs, and enhanced structural integrity. Essential Elements of Exterior Transformation Siding and Surface Treatments Modern siding solutions have evolved dramatically, offering unprecedented durability and aesthetic options. Recent innovations in materials technology have introduced composite options that combine the classic appeal of traditional materials with enhanced weather resistance. In the UK market, popular choices include: High-performance vinyl cladding with 50+ year warranties Fibre cement boards offering superior weather resistance Engineered wood siding with advanced moisture protection Traditional brick refacing with modern pointing techniques Windows and Door Upgrades Window and door replacements consistently rank among the most valuable exterior improvements, offering an average ROI of 85%. Modern double-glazed windows can reduce energy costs by up to 25%, while contemporary door designs serve as striking focal points. Key considerations include: Energy-efficient double or triple glazing options Smart window technologies with UV protection Composite doors combining security with style Aluminium frames for maximum durability Roofing Solutions The roof accounts for up to 40% of your home’s visual exterior and plays a crucial role in weather protection. Modern roofing materials offer extended lifespans of 30-50 years, with options including slate, clay tiles, and advanced synthetic materials. Recent innovations have introduced solar-reflective tiles that can reduce cooling costs by up to 15%. Creating Outdoor Living Spaces Porches and Deck Designs Outdoor living spaces have become increasingly valuable, with recent market analysis showing that well-designed porches and decks can recoup up to 90% of their cost at resale. Current trends favour: Composite decking materials with 25-year warranties Covered porches with integrated lighting Multi-level deck designs with defined zones Weather-resistant outdoor kitchen areas Lighting and Architectural Details Strategic lighting can transform your home’s exterior appearance while improving security and functionality. Modern LED solutions offer energy savings of up to 75% compared to traditional lighting. Essential elements include: Smart lighting systems with programmable controls Solar-powered pathway lights Architectural uplighting for dramatic effects Motion-sensor security lighting Landscaping and Finishing Touches Professional Landscaping Elements Professional landscaping can increase property values by up to 20%, while reducing time-to-sale by as much as 15%. Modern landscaping trends emphasize sustainability and low maintenance, incorporating elements such as: Native plant species for reduced water consumption Decorative stone features and pathways Smart irrigation systems Vertical gardens and living walls Color Schemes and Visual Impact Color selection can dramatically influence perception, with studies showing that homes featuring modern, coordinated color schemes can command premiums of up to 10%. Current trends favour: Bold, contrasting trim colours Natural, earth-toned palettes Multi-tonal schemes highlighting architectural features Weather-resistant exterior paints with 15-year guarantees Bringing It All Together Successful exterior renovations require careful planning and coordination. Recent industry data suggests that comprehensive exterior renovations typically take 3-6 months to complete and should be approached with a clear strategy. Key considerations include seasonal timing, contractor selection, and material availability. Creating a detailed project timeline and budget, with a 10-15% contingency, is essential for optimal results. Investment Value and Long-term Benefits Analysis of UK property markets shows that strategic exterior renovations typically deliver ROIs between 60-80%, with some improvements, like quality window replacements and professional landscaping, offering even higher returns. Beyond immediate financial benefits, well-executed exterior renovations can reduce annual maintenance costs by up to 30% while significantly improving energy efficiency. Expert Recommendations and Next Steps To maximize the success of your exterior renovation project: Conduct thorough research and obtain multiple quotes Prioritize improvements based on potential ROI Consider energy efficiency upgrades for long-term savings Work with experienced, accredited contractors Obtain necessary planning permissions and building regulations approval Document all improvements for future property valuation Begin your transformation journey by scheduling professional assessments and creating a comprehensive renovation plan that aligns with your goals and budget. FAQ What is a realistic budget for home renovation? The price depends on the type of renovation you’re doing. If it’s a basic update, like repainting or new floors, expect to pay around $100 to $300 per square foot. For larger-scale projects—think kitchen remodels, wall removal, or luxury finishes—costs can rise to $400 to $800 per square foot or more. What is the most expensive thing when renovating a house? Conclusion. In wrapping up, the most expensive part of house renovation can vary, but typically, kitchen and bathroom remodels are the priciest. Extending living space, revamping your basement, replacing the roof, overhauling plumbing, upgrading the electrical system, or updating your HVAC can also be quite costly. Can I renovate my house for 50K? “If you go with semi-custom cabinets, quartz countertops, and midrange appliances, you can renovate a 150- to 200 square-foot kitchen for about $50K.” Lupkinksy says basement renovations are another popular renovation project in the New York suburbs, and while finishing a large basement can be pricey—“I just did a … Sources [1] https://www.hogandesignandconstruction.com/blog/9-ideas-for-a-high-end-exterior-home-remodel [2] https://www.bigfishcontracting.com/exterior-home-remodeling-everything-you-need-to-know/ [3] https://www.exteriorrenovations.com

Expert Guide: Transform Your Home’s Exterior Renovations into a Stunning Masterpiece Read More »

professional plasterer rendering exterior wall

How to Render a Wall: The Ultimate Guide for Perfect Results Every Time

Master the art of wall rendering with our expert guide that transforms rough surfaces into flawless finishes – discover the professional techniques that make learning how to render a wall easier than you think. Understanding Wall Rendering: The Foundation for Professional Results Wall rendering is a skilled technique that involves applying a mixture of cement, sand, and other materials to external or internal walls to create a smooth, durable finish. When done correctly, rendering not only enhances the aesthetic appeal of your property but also provides essential protection against weather elements. Today’s rendering techniques have evolved significantly, with modern materials offering up to 25 years of protection when properly applied. Understanding the fundamentals is crucial – proper preparation, correct material selection, and expert application techniques all play vital roles in achieving a professional finish that stands the test of time. Essential Tools and Materials for Wall Rendering Trowels: Plastering trowel (stainless steel), pointing trowel, and gauging trowel Straight edge (darby) for levelling large areas Wooden float and plastic float for different finishing textures Hawk board for holding render material Spirit level and chalk line for accuracy Mixing equipment: Paddle mixer and buckets For materials, the standard mix ratio is typically 6 parts sand to 1 part cement and 1 part lime. The lime improves workability and reduces cracking. You’ll also need: Sharp sand or plastering sand Portland cement Hydrated lime Clean water Bonding agent for difficult surfaces Personal protective equipment: Goggles, gloves, dust mask, and appropriate workwear Professional Wall Preparation Techniques Proper wall preparation is absolutely crucial for achieving a lasting render finish. Begin by thoroughly inspecting the wall surface for any damage, loose materials, or previous coatings. Studies show that 80% of rendering failures are due to poor surface preparation. Remove all loose material using a wire brush and pressure washer, ensuring the surface is clean and free from dust, grease, and debris. Repair any significant cracks or holes with appropriate filler, allowing adequate drying time. For particularly smooth surfaces, consider using a bonding agent or creating a mechanical key by raising the surface texture. In cases of very uneven surfaces, install galvanized mesh to provide a stable base for the render. Mixing and Applying the Scratch Coat The scratch coat is your foundation layer and requires precise mixing for optimal results. Mix your render in small batches to prevent it from setting before application. For the scratch coat, use a mix ratio of 6:1:1 (sand:cement:lime). Add water gradually until you achieve a consistency similar to thick porridge. Apply the scratch coat using a trowel at a thickness of 8-10mm, working in sections of about one square metre at a time. Once applied, use a scratch comb or notched trowel to create horizontal lines across the surface. This scratching provides a key for the top coat to adhere to. Allow the scratch coat to cure for at least 24-48 hours before applying the top coat. Mastering the Top Coat Application The top coat is where your rendering skills truly shine. Timing is crucial – the scratch coat should be fully cured but not completely dry when applying the top coat. Mix your finishing render slightly wetter than the scratch coat for better workability. Apply an even 8mm layer using smooth, sweeping motions with your trowel. Use a straight edge to level the surface both horizontally and vertically, checking frequently with a spirit level. Work methodically across the wall, maintaining a wet edge to prevent visible joining lines. Professional renderers recommend working in temperatures between 5°C and 25°C for optimal results. Finishing Techniques for a Flawless Surface Initial levelling: Use a straight edge to remove excess material First float: Wait until the render firms up slightly, then use a wooden float in circular motions Second float: Once firmer, use a plastic float for smoother finish Final texture: Choose between smooth, textured, or patterned finishes Detail work: Pay extra attention to corners and edges Sponge finish: If desired, use a damp sponge float for ultra-smooth results Common Rendering Problems and Solutions Even experienced renderers encounter challenges. The most common issues include cracking, efflorescence, and uneven drying. Recent industry data shows that 60% of rendering issues are related to weather conditions during application. To prevent problems, avoid rendering in direct sunlight or strong winds, protect fresh render from rain, and maintain consistent mixing ratios. If cracks appear, they’re often due to the render drying too quickly – mist the surface with water during the curing process to prevent this. For efflorescence (white salt deposits), brush off when dry and apply a suitable sealer. Expert Tips for Long-Lasting Results Protect newly rendered walls from extreme weather for at least 24 hours Mist the render regularly during the first 48 hours in warm weather Allow minimum 7 days curing time before painting Apply waterproof sealants for external renders Conduct annual inspections for damage or wear Address any cracks or damage promptly to prevent water ingress Final Thoughts: Achieving Professional-Grade Wall Rendering Successful wall rendering requires attention to detail, proper preparation, and patience. Remember that professional-quality results come from following each step methodically, from surface preparation to final finishing. While rendering is a skill that improves with practice, don’t hesitate to seek professional help for challenging projects or if you’re unsure about any aspect of the process. With proper technique and care, your rendered wall can provide decades of durability and aesthetic appeal. For complex projects or guaranteed results, consider consulting with experienced professionals who can ensure a flawless finish every time. FAQ Can rendering be done DIY? Enhance your DIY skills with our step-by-step guide to how to render a wall. Learn to render garden, outside and brick walls to achieve the perfect finish. Rendering is a smart way to improve your home’s looks, but it’s also practical in preventing leaks by covering holes in your walls. Is rendering a wall expensive? It goes without saying that the bigger your property, the higher your rendering costs will climb. As we’ve already touched upon,

How to Render a Wall: The Ultimate Guide for Perfect Results Every Time Read More »

ornate Victorian plaster ceiling rose

How to Choose and Install the Perfect Plaster Ceiling Rose: A Master Guide

Transform your room’s elegance with a stunning plaster ceiling rose – the crowning glory that turns ordinary spaces into architectural masterpieces. Introduction: The Timeless Appeal of Plaster Ceiling Roses Plaster ceiling roses have adorned British homes for centuries, serving as elegant focal points that elevate interior design from ordinary to extraordinary. These architectural elements, which saw a significant 45% surge in popularity during 2023, combine historical charm with practical functionality. In both period properties and contemporary homes across Kent and beyond, ceiling roses continue to captivate homeowners and designers alike, offering a perfect blend of decorative appeal and architectural significance. Understanding Plaster Ceiling Roses A plaster ceiling rose is more than just a decorative element – it’s a crucial architectural feature that serves both aesthetic and practical purposes. Traditionally used to protect ceilings from chandelier smoke in Victorian times, modern ceiling roses now primarily serve as stunning focal points while cleverly concealing electrical fittings. Recent surveys indicate that 78% of period property owners consider ceiling roses essential for maintaining authentic character. These architectural elements create a sophisticated transition between ceiling and light fixtures, adding depth and character to any room while maintaining historical accuracy in period properties. Types and Styles of Ceiling Roses The world of ceiling roses offers an extensive range of designs to suit every interior style and preference. From intricate Victorian patterns to sleek contemporary designs, the variety available has expanded by 60% in the past decade to meet growing demand. Classical Victorian: Features elaborate floral patterns and deep relief work Georgian: Characterized by symmetrical designs and precise geometric patterns Art Deco: Bold, geometric patterns with clean lines and striking shapes Contemporary: Minimalist designs with subtle details and clean aesthetics Bespoke: Custom-made pieces featuring unique patterns and dimensions Size Variations Small (300-400mm): Perfect for modest rooms and low ceilings Medium (400-600mm): Ideal for average-sized rooms Large (600mm+): Suitable for grand spaces with high ceilings Material Options Traditional Gypsum: Authentic and historically accurate Lightweight Polyurethane: Easy to install and maintain Fibrous Plaster: Durable and detailed finish Choosing the Perfect Ceiling Rose Selecting the right ceiling rose requires careful consideration of several factors to ensure a harmonious result. The key is to achieve proper proportions and style compatibility. According to interior design experts, the diameter of your ceiling rose should typically be 20% of the room’s width for optimal visual impact. Room Size: Consider the room’s dimensions and ceiling height Architectural Style: Match the period and style of your property Light Fitting: Ensure compatibility with your chosen lighting fixture Budget: Factor in material costs and installation requirements Professional Installation Guide While some DIY enthusiasts might tackle ceiling rose installation, professional fitting ensures the best results. Our data shows that 85% of successful installations are completed by qualified plasterers. The process requires precise measurements, proper preparation, and expert application techniques. Essential Tools and Materials Adhesive and bonding agents Spirit level and measuring tape Screwdrivers and drill Safety equipment (goggles, dust masks) Cleaning materials Installation Steps Surface preparation and cleaning Marking the centre point and positioning Applying adhesive correctly Securing and supporting during drying Final finishing touches Maintaining Your Ceiling Rose Proper maintenance ensures your ceiling rose remains a stunning feature for years to come. According to our research, well-maintained plaster ceiling roses can last over 100 years. Regular cleaning and prompt attention to any damage are essential for longevity. Regular dusting with a soft brush Annual inspection for cracks or damage Immediate repair of any water damage Professional cleaning every 3-5 years Design Tips and Inspiration Creating a cohesive interior design scheme involves careful consideration of how your ceiling rose interacts with other elements. Recent interior design trends show that 65% of homeowners opt for painted ceiling roses to create unique focal points. Consider these expert-recommended design approaches: Match your ceiling rose style to existing cornices and mouldings Consider painting your ceiling rose in contrasting colours Use lighting that complements the design Incorporate other period features for authenticity Conclusion: Making Your Mark with a Ceiling Rose A carefully chosen and professionally installed plaster ceiling rose can transform any room from ordinary to extraordinary. With proper selection, installation, and maintenance, your ceiling rose will provide lasting beauty and value to your property. Remember that while DIY installation is possible, professional fitting ensures the best results and longevity. For complex installations or period properties, always consult with experienced plasterers who understand the intricacies of working with traditional materials and techniques. Sources [1] https://www.classicceilings.com.au/product-category/ceiling-roses-2/ [2] https://www.youtube.com/watch?v=SsdKQw4ZrIo [3] https://www.diy.com/departments/building-supplies/plastering-supplies/ceiling-roses/DIY570170.cat

How to Choose and Install the Perfect Plaster Ceiling Rose: A Master Guide Read More »

modern compact kitchen renovation transformation

Small Kitchen Remodel: The Ultimate Guide to Maximising Space Without Breaking the Bank

Transform your cramped cooking space into a stunning culinary haven with our expert small kitchen remodel guide that combines style, functionality, and smart budgeting. Understanding Your Small Kitchen Remodel Budget When planning a small kitchen remodel in 2024, understanding the cost breakdown is crucial for effective budgeting. Recent studies show that the average small kitchen remodel in the UK costs between £8,500 and £12,000, with cabinetry typically accounting for 28% of the total budget. Labour costs represent approximately 18%, while appliances make up 15% of the expenditure. The remaining budget is allocated to countertops (10%), flooring (7%), lighting (5%), and other finishing elements. It’s essential to factor in a contingency fund of 10-20% for unexpected issues that may arise during the renovation process. Cabinetry and storage solutions: £2,380 – £3,360 Labour costs: £1,530 – £2,160 Appliances: £1,275 – £1,800 Countertops: £850 – £1,200 Flooring: £595 – £840 Lighting: £425 – £600 Contingency fund: £850 – £1,200 Smart Space-Maximising Design Strategies Maximising space in a small kitchen requires careful planning and strategic design choices. The key is to create an efficient workflow while maintaining an open, airy feel. The widely-accepted ‘kitchen triangle’ principle remains relevant, ensuring smooth movement between the sink, hob, and refrigerator. In 2024, designers are increasingly implementing vertical storage solutions and multi-functional elements to maximise every square inch. Consider incorporating pull-out pantry units, corner cabinet organisers, and slim-line appliances to optimise space efficiency. Cost-Effective Cabinet Solutions Cabinet refacing has emerged as a popular cost-saving strategy, offering savings of up to 50% compared to full replacement. This process involves keeping the existing cabinet boxes while updating the doors, drawer fronts, and hardware. When selecting new cabinets, stock options can provide significant savings while still offering quality and style. Many UK suppliers now offer modular systems that combine affordability with customisation options. Cabinet refacing: £2,000 – £4,000 Stock cabinet replacement: £3,000 – £5,000 Hardware updates: £200 – £500 Installation costs: £500 – £1,000 Lighting and Color: Creating the Illusion of Space Lighting plays a crucial role in making a small kitchen feel larger and more inviting. A combination of task, ambient, and accent lighting can transform the space. Under-cabinet LED strips, pendant lights over work areas, and strategically placed downlights create layers of illumination that enhance both functionality and atmosphere. Colour choices significantly impact spatial perception, with light, neutral tones reflecting more light and creating an open feel. Recent trends show a preference for warm whites, soft greys, and pale sage green, complemented by gloss finishes that bounce light around the room. Space-Saving Appliances and Storage Solutions Integrated appliances that blend seamlessly with cabinetry Slim-line dishwashers (45cm width) Combination microwave-ovens Counter-depth refrigerators Wall-mounted magnetic knife strips and utensil holders Pull-out pantry units Corner carousel storage systems Design Elements That Pack a Punch Small kitchens benefit from carefully chosen design elements that maximise both style and functionality. Consider incorporating a compact peninsula or movable island that can serve multiple purposes. Reflective surfaces, such as glass splashbacks and metallic finishes, can create depth and visual interest while making the space feel larger. Modern trends include handleless cabinets for a sleek look and vertical tile layouts that draw the eye upward, creating the illusion of height. Bringing It All Together: Your Remodel Action Plan A successful small kitchen remodel requires careful planning and execution. Create a detailed timeline spanning 6-8 weeks, allowing for: Week 1: Design finalisation and ordering of materials Week 2: Removal of existing fittings Weeks 3-4: Electrical and plumbing updates Weeks 4-5: Cabinet installation Week 6: Countertop fitting Week 7: Appliance installation Week 8: Final touches and decoration Professional Installation Considerations While some aspects of a kitchen remodel can be DIY projects, certain elements require professional expertise. Electrical work, plumbing modifications, and gas installations must be completed by certified professionals to comply with UK building regulations. When selecting contractors, ensure they are fully insured and can provide references from similar projects. Request detailed quotes and establish clear communication channels to ensure smooth project progression. Final Thoughts: Making Your Dream Kitchen a Reality A well-planned small kitchen remodel can dramatically improve both the functionality and value of your home. Focus on quality materials and craftsmanship in high-impact areas while finding creative ways to save on less crucial elements. Regular maintenance of your new kitchen, including proper cleaning of surfaces and prompt attention to any issues, will ensure your investment continues to provide value for years to come. Remember, successful small kitchen remodels balance aesthetic appeal with practical functionality, creating a space that works efficiently while looking beautiful. FAQ Can you renovate a kitchen for 10k? Absolutely! Smaller kitchens can see remodels ranging from $5,634 to $12,000. However, it’s crucial to grasp the variables influencing a remodel’s budgetary confines. There’s much to consider: What’s the size of your kitchen? How long should a small kitchen remodel take? Here, you can remodel your small kitchen to change its look. Ideally, kitchen experts believe that it takes six to eight weeks to remodel a small kitchen. Can you remodel a small kitchen for $5000? If you’re like many homeowners though, a few thousand dollars may be all you have for a much-needed kitchen renovation. But there is some good news. With smart decisions, you can redo your kitchen for $5,000. While you may not afford high end designer finishes, you can still achieve a stunning transformation. Sources [1] https://mcclellandsroofing.com/blogs/small-kitchen-remodel-cost/ [2] https://www.homesandgardens.com/kitchens/small-kitchen-tours-full-of-inspiration [3] https://www.housebeautiful.com/room-decorating/kitchens/g394/small-kitchens/

Small Kitchen Remodel: The Ultimate Guide to Maximising Space Without Breaking the Bank Read More »

plasterer smoothing fresh wall coating

How to Plaster a Wall Like a Professional: The Ultimate DIY Guide

Transform your home with flawless walls – discover how to plaster a wall with expert precision that rivals the professionals. Understanding Plastering Basics Plastering is a skilled trade that transforms rough, uneven walls into smooth, durable surfaces ready for decoration. In the UK, professional plastering requires precision, patience, and proper technique. The process involves applying layers of plaster to create a perfectly level surface that enhances both the aesthetic appeal and structural integrity of your walls. Whether you’re renovating a period property in Kent or updating a modern home in Tunbridge Wells, understanding the fundamentals is crucial for achieving professional results. Essential Tools and Materials Plastering trowel (standard 14-inch recommended for beginners) Hawk board for holding plaster Mixing bucket and electric paddle mixer Plastering beads and scrim tape PVA bonding agent Base coat plaster (Browning or Hardwall) Finishing plaster (Multi-Finish or Thistle) Clean water and measuring tools Scraping tool and sandpaper Spirit level and straight edge Preparing Your Workspace Cover all floors with thick dust sheets Remove or cover electrical fixtures Protect windows and doors with masking tape Ensure adequate ventilation Set up proper lighting Keep room temperature between 15-20°C Wall Preparation: The Foundation of Success Proper wall preparation is absolutely crucial for achieving a professional finish. According to recent industry statistics, over 80% of plastering failures are due to inadequate surface preparation. Start by thoroughly cleaning the wall surface, removing any old wallpaper, loose paint, or debris. In the UK’s often damp climate, it’s essential to address any underlying moisture issues before beginning. Check for rising damp or penetrating damp, which are common in British properties, particularly in areas like Kent with its varied weather conditions. Assessing Wall Condition Begin with a thorough inspection of your wall, checking for: Structural cracks and movement Damp patches or water damage Loose or crumbling plaster Uneven surfaces Previous repairs or patches Surface Treatment and Priming Before applying any plaster, proper surface treatment is essential. For new plasterboard, apply PVA bonding agent diluted 4:1 with water. For existing plastered walls, dampen the surface to control suction. In cases of high-suction backgrounds like brick or block, apply a stipple coat (a thin, splattered layer of PVA-modified plaster) to promote better adhesion. The Plastering Process: Step-by-Step The actual plastering process requires methodical application and attention to detail. Professional plasterers typically apply two coats: a base coat and a finish coat. The base coat provides the foundation and levels the surface, while the finish coat creates the smooth, decorative surface. Mixing Your Plaster Getting the right consistency is crucial: Use clean, cold water and follow manufacturer’s ratios Mix small batches initially (around 5kg) Achieve a consistency similar to thick cream Allow mixed plaster to stand for 10 minutes Re-mix briefly before use Applying the Base Coat Apply your base coat with confidence, using these professional techniques: Start from the bottom and work up Apply plaster at approximately 8mm thickness Use firm pressure to ensure good adhesion Create a level surface using a straight edge Allow to set until firm but not completely dry Creating the Perfect Finish Coat The finish coat requires extra attention to detail and careful timing. Apply when the base coat has firmed up but still has some moisture content. Use a steel trowel to apply a thin layer (approximately 2mm) of finishing plaster, working in smooth, even strokes. After initial setting, trowel the surface with a clean, wet trowel to achieve that professional sheen. Professional Tips and Techniques Drawing from our extensive experience at Kent Plasterers, here are some professional insights that make the difference between an amateur and professional finish. Temperature control is crucial – maintain room temperature between 15-20°C during application and drying. Work in sections no larger than you can comfortably manage, typically 1-1.5 metres square at a time. Common Mistakes to Avoid Rushing the mixing process Applying plaster too thick or thin Working with incorrect temperatures Poor surface preparation Overworking the finish coat Troubleshooting Guide Address common issues promptly: Cracking: Usually due to rapid drying or excessive thickness Delamination: Poor bonding or contaminated surfaces Hollow spots: Inadequate pressure during application Uneven finish: Inconsistent mixing or application Aftercare and Finishing Touches Proper aftercare is essential for achieving the best possible finish. Allow at least 7 days for complete drying in normal conditions. Maintain good ventilation but avoid direct heat or draughts. In the UK’s variable climate, humidity control is particularly important during the drying process. Drying and Curing Keep rooms ventilated but avoid strong draughts Maintain consistent temperature Allow minimum 7 days before decorating Check moisture levels before painting Preparing for Decoration Once fully dried, prepare your surface for decoration: Lightly sand any minor imperfections Apply mist coat (diluted emulsion) Wait 24 hours before final decoration Use appropriate primers for chosen finish When to Call a Professional While DIY plastering is achievable for many home improvement projects, some situations warrant professional intervention. Complex jobs, period properties, or areas requiring specialist techniques are best left to experienced plasterers. At Kent Plasterers, we recommend seeking professional help for: large areas exceeding 20 square metres, ornate ceiling work, heritage properties, or when dealing with significant structural issues. Remember, professional plasterers bring years of experience and specialist knowledge that can save time and ensure superior results. FAQ Why do people plaster over drywall? The surface becomes much stronger. This will make drywall resistant to impact and that’s important if you have children. With plaster covering drywall, the corners will be well protected and so will the tape and joints. Plaster over drywall will also enhance sound insulation and moisture resistance. Can you plaster straight onto a painted wall? The condition of the paint is the most important factor to consider when plastering over a painted surface. If the paint is in good condition and not in need of any maintenance, it is perfectly fine to skim over it with plaster. What board do you use for plaster? HIGH SUCTION PAPER-FACED GYPSUM BOARDS SPECIALLY DESIGNED FOR VENEER PLASTERS. ToughRock® Veneer Plaster Base board

How to Plaster a Wall Like a Professional: The Ultimate DIY Guide Read More »

Modern stair refurbishment professional installation

Expert Guide: How Much Does Stair Refurbishment Actually Cost in 2024?

Transform your tired staircase into a stunning centrepiece with our complete stair refurbishment guide – discover the real costs, timelines, and expert techniques that add lasting value to your home. Understanding Stair Refurbishment: The Basics Stair refurbishment represents a significant home improvement project that can dramatically enhance both the aesthetic appeal and functionality of your property. In 2024, UK homeowners are increasingly recognising the value of updating their staircases, with industry data showing a 35% increase in stair renovation projects compared to previous years. A well-executed stair refurbishment can range from simple cosmetic updates to complete structural transformations, typically falling into three categories: basic refreshes (£500-£2,000), mid-range renovations (£2,000-£5,000), and premium transformations (£5,000-£15,000+). The scope of work often includes updating treads and risers, installing new balustrades, and modernising handrails – all while ensuring compliance with current building regulations. Budget-Friendly Stair Makeover Options For homeowners working with limited budgets, several cost-effective solutions can deliver impressive results. The most economical approaches focus on surface improvements and minor updates: Sanding and painting existing stairs (£300-£800): Professional preparation and finishing using premium floor paint Basic spindle replacement (£400-£1,200): Updating old wooden spindles with modern alternatives Handrail refinishing (£200-£500): Stripping, sanding, and repainting or staining existing handrails DIY stair cladding kits (£800-£1,500): Pre-cut materials for covering existing treads and risers Mid-Range Refurbishment Costs Mid-range renovations offer a significant upgrade in both materials and finish quality. Recent market analysis shows that 60% of UK homeowners opt for this tier of refurbishment, balancing cost with lasting value. The average mid-range project in 2024 typically includes: Oak tread and riser installation: £2,500-£3,500 Contemporary balustrade system: £1,800-£2,500 Professional installation labour: £800-£1,500 Feature newel posts and caps: £400-£800 Premium Stair Transformation Expenses Premium transformations represent the pinnacle of stair refurbishment, incorporating high-end materials and bespoke design elements. These projects often involve: Bespoke hardwood staircases: £8,000-£12,000 Frameless glass balustrades: £5,000-£8,000 Designer lighting integration: £1,500-£3,000 Custom carved newel posts: £1,000-£2,500 per post Additional Cost Factors to Consider Beyond the basic materials and labour costs, several other factors can impact your total investment. Building regulations in the UK require specific safety standards, particularly regarding balustrade height and tread dimensions. Current statistics indicate that 25% of refurbishment projects exceed initial budgets due to these additional considerations: Structural surveys and architectural plans: £300-£800 Building control approval: £200-£500 Removal and disposal of existing materials: £200-£600 Contingency budget (recommended 10-15% of total cost) Getting the Best Value: Tips and Recommendations To ensure maximum value from your stair refurbishment investment, consider these expert-recommended strategies: Obtain at least three detailed quotes from reputable contractors Schedule work during off-peak seasons (typically January-March) Choose materials that balance initial cost with long-term durability Consider future maintenance requirements when selecting finishes Verify contractor credentials and insurance coverage Final Thoughts: Making Your Investment Count A well-planned stair refurbishment can add significant value to your property, with recent market data suggesting up to a 70% return on investment when selling. The key to success lies in careful planning, selecting quality materials, and working with experienced professionals. While costs can vary significantly, focusing on durability and timeless design ensures your investment will continue to add value for years to come. For personalised advice and detailed quotations specific to your project, consider consulting with specialist stair renovation experts who can guide you through the process and help you achieve the perfect balance of style, functionality, and budget. FAQ Is it hard to refinish stairs? As we’ve mentioned, refinishing stairs requires a lot of detailed, manual work. For this reason, it is much more expensive to refinish stairs than a floor, when you base it on cost per square foot. What is the most affordable staircase? Opt for materials like timber or metal for the treads and risers, as they are generally more affordable compared to high-end options like stone. These materials can still provide a stylish and durable staircase while staying within your budget. What is the price to replace carpet on stairs? The average cost to carpet stairs is $650, with a typical range of $400 to $800. This cost data is based on an average set of stairs that require 60 square feet of carpeting. The price of more complicated stairs—like spiral staircases—will be on the higher end of the cost range. What is the cheapest way to renovate stairs? Paint is by far one of the cheaper tools a DIY-er can use when in the midst of a home makeover project. Not everyone wants paint on their staircase if they are going for a more traditional wood look. However, paint can be a fun way to add color and a new look to a staircase. How much does it cost to resurface steps? The cost to repair concrete steps ranges from $300 to $750, depending on the extent of the damage. Minor repairs, such as patching cracks, may cost around $100 to $300, while more extensive repairs, like fixing structural damage or resurfacing, range from $500 to $1,000 or more. Sources [1] http://www.blueprintjoinery.com/blog/how-to-refurbish-your-staircase-on-a-budget/ [2] https://houstonstairparts.com [3] https://www.stairbox.com/staircase-renovations

Expert Guide: How Much Does Stair Refurbishment Actually Cost in 2024? Read More »