Home Improvement & Extensions

Practical Home Upgrades That Improve Everyday Living

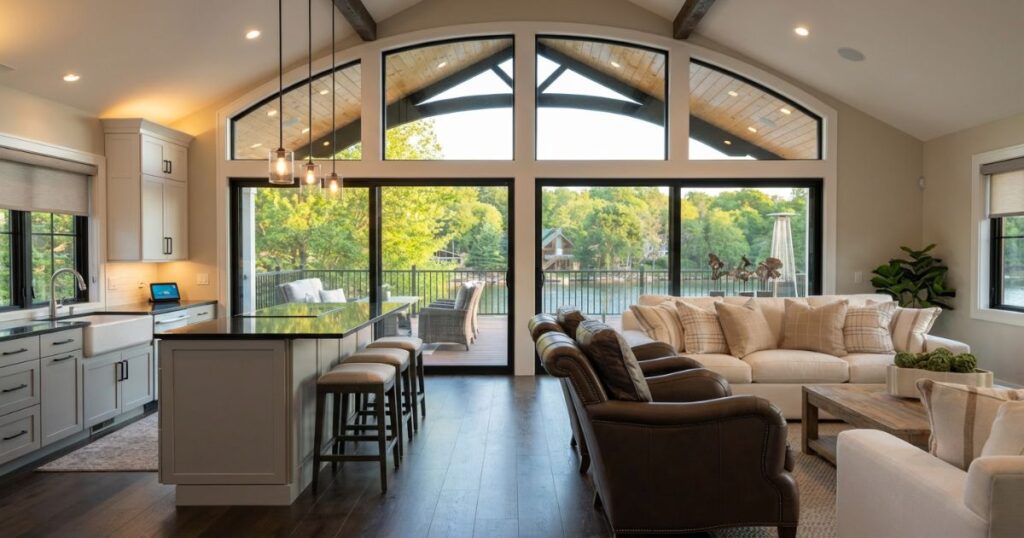
Upgrading your home means renovating kitchens, making patios more chilled, and improving the lighting. It’s not just about the aesthetics; it’s about making daily life easier, healthier, and more comfortable. Working with the right custom glass company can also play a big role in how functional and bright your living spaces feel. Instead of chasing trends, practical upgrades focus on comfort, functionality, and long-term use. When done right, practical home upgrades improve how your home works for you every single day. They help you move through your space with ease. They reduce small frustrations. And over time, they also add value to your property. Understanding What Makes Home Upgrades Practical Many homeowners think upgrades have to be expensive or disruptive. That is not always true. Simple changes in key areas can have a big impact. From better airflow to smarter layouts, small upgrades can completely change how your home feels. Practical upgrades are all about how a space functions. They should make daily tasks easier and more comfortable, with function at the heart of every choice. Doors should open smoothly, spaces should flow naturally, and storage should always be easy to access; when a home works well, it reduces stress without you even noticing. Better layouts mean fewer steps when doing chores, and even the lighting plays a role in how well you can use your spaces. Comfort is just as important. For example, good ventilation keeps indoor air fresh. Likewise, natural light improves mood instantly. When a home feels comfortable, it supports better rest and less stress. These upgrades can also affect the long-term value of your home—smart choices make a home more attractive, so even if you’re not planning to sell, these choices protect your investment. Places Where Practical Home Upgrades Make the Most Impact Not all areas of the home need the same level of attention, because some spaces affect daily life more than others. Entryways, kitchens, bathrooms, and indoor-outdoor areas are where practical upgrades deliver the best returns, because they experience the most traffic. Entryway Upgrades Entryways are more important than many people realize. They’re the first and last spaces people experience when entering and leaving your home. A practical entryway sets the vibe for your home. Good ventilation in entryways makes a big difference. It allows fresh air to circulate instead of trapping heat and moisture. Upgrading doors is another smart move, because it improves security and helps with noise control. Adding custom glass elements helps your entryways feel more welcoming and open, as when light flows freely, the entire home feels more spacious. Indoor-Outdoor Upgrades Retractable screen doors are one of the easiest ways to improve indoor-outdoor living without major construction. These upgrades help connect your interior spaces to patios, balconies, or gardens while keeping air inside and bugs out. Patios are just as important because they can serve as an extension of your living space and give you somewhere to relax and entertain. Kitchen Upgrades One of the most used spaces in any home is the kitchen. You should design the layouts so that it is easy to work in, cook, and clean. Clear pathways between cooking, cleaning, and storage areas help you cook easily. When everything is within easy reach, cooking becomes less tiring and more enjoyable. Another smart upgrade is surfaces that are easy to clean, along with ventilation and exhaust systems that remove smoke and odors. Lighting upgrades, such as task lighting over work areas improves safety and visibility while making the kitchen feel more inviting and open. Bathroom Upgrades Practical upgrades in the bathroom help prevent long-term damage. Moisture-resistant walls are essential, as they protect against mold and peeling, which keeps the bathroom cleaner and healthier. Improved lighting makes bathrooms safer and more functional. Small layout changes can also make bathrooms easier to use. These upgrades support comfort for users of all ages. Choosing the Right Professionals Even the best upgrade ideas need proper planning and execution. That is why choosing the right professionals makes a big difference. Experienced professionals understand how materials behave over time, which solutions will last or fail, and how to avoid costly mistakes. They also bring their experience to each job, which improves performance and durability. With specialists, you’re gaining balance, function, clear communication, and long-term value. Conclusion Practical home upgrades shape how your home feels on a daily basis. They make spaces more comfortable without trying too hard, and make everyday tasks much simpler. The right upgrades meet your needs as they change, whether you plan to stay in your home for years or eventually move. Practical upgrades may not grab attention at first glance, but they make a lasting difference where it matters the most.

Practical Home Upgrades That Improve Everyday Living Read More »

The South London Guide to Moving Houses

Moving across the capital is often described as one of life’s most stressful events, but there is something particularly unique about heading south of the river. Whether you are migrating from the North London heights or relocating from further afield, South London offers a distinct blend of village-like pockets and urban energy. From the leafy commons of Clapham to the bustling markets of Brixton, each neighbourhood carries its own personality and logistical quirks. Success in a London move usually comes down to preparation and local knowledge. You have to consider everything from parking permits on narrow Victorian streets to the timing of your removal van. It is helpful to view the move as a journey rather than a single day of chaos. If you take the time to get to know your new borough, you will find the process much smoother. Here is what you need to know to settle into your new South London life without the usual headaches. Finding Your Feet in the South South London is famous for its green spaces and lack of Tube coverage in certain areas. While the Overground and National Rail networks are incredibly efficient, your daily commute might look very different depending on which side of the South Circular you land. Areas like Wandsworth and Balham are particularly popular for their proximity to open spaces like Tooting Bec Common. When you are choosing your specific street, pay attention to the local amenities. Many residents choose this part of the city because of the independent boutiques and farmers’ markets that define the community. You should spend a weekend walking around your prospective postcode to get a feel for the weekend footfall and the proximity of the nearest supermarket. Take Your Time Getting Settled One of the biggest mistakes people make when moving is trying to unpack everything in forty-eight hours. It is often better to live in a space for a few weeks before deciding where every piece of furniture should go. If you are downsizing or moving into a temporary rental while waiting for a completion date, you can use Wandsworth storage to keep your belongings safe without cluttering your new hallway. Using a local facility means you can drop off and pick up items as you need them instead of living among towers of cardboard boxes. This approach gives you the freedom to decorate or renovate your new home before the heavy wardrobes and sofas are in the way. It’s a practical solution for those moving into the Victorian conversions that are so common in South West London, where staircases are often narrow and space is at a premium. Navigating Local Logistics Every South London council has its own set of rules regarding parking and skip permits. If you are moving to Wandsworth, you will need to check the specific regulations for your new street. You might need to suspend a parking bay to ensure the removal lorry has enough space to park outside your house. It is also worth considering the timing of your move. Avoid Friday afternoons if you can, as the traffic around major arteries like the A3 or the South Circular can become very congested. Mid-week moves are often quieter and can sometimes be cheaper when booking professional help. Key Takeaways Once the boxes are finally emptied and the furniture is in place, you can start enjoying the benefits of living south of the Thames. Whether it is a walk through Battersea Park or a coffee in a quiet Wandsworth cafe, you will soon see why people rarely want to leave once they arrive. Moving house will always be a big task, but with a bit of local insight and a relaxed pace, it can be a positive experience. Take the opportunity to explore your new surroundings and meet your neighbours early on. Before you know it, you’ll be a seasoned South Londoner who knows exactly which bus route is the fastest.

The South London Guide to Moving Houses Read More »

Loft Conversions: Plastering, Drylining and Finishing

Quick Answer: Loft conversion plastering costs £1,200-£3,500 depending on size and complexity. Most loft conversions use 12.5mm tapered-edge plasterboard on 400mm centres, insulated to meet Building Regulations Part L (minimum 270mm insulation). Expect 2-3 weeks from first fix to final skim, with drylining taking 3-5 days and plastering requiring 5-7 days drying time before decoration. Professional plastering is recommended for loft conversions due to awkward angles, fire regulations, and the need for perfect finishes in habitable spaces. Understanding Loft Conversion Plastering Requirements Loft conversions represent one of the most cost-effective ways to add living space to your home, but the plastering and drylining work requires significantly more expertise than standard room plastering. Unlike ground-floor rooms with straight walls and easy access, loft spaces present unique challenges that demand careful planning. Building Regulations Part L mandates that all loft conversions meet current thermal efficiency standards. This means you’ll need substantial insulation between rafters (typically 270mm of mineral wool or equivalent) before any plasterboard goes up. The government’s Building Regulations Approved Document L sets these standards, and failure to comply will result in your building control officer rejecting the work. Most loft conversions also require fire-rated plasterboard — usually 12.5mm Gyproc FireLine or British Gypsum Fireline board — to provide 30 minutes’ fire resistance between the conversion and the floor below. This isn’t optional; it’s a legal requirement under Part B of the Building Regulations. Drylining vs Wet Plastering in Loft Conversions You have two main options for finishing loft walls and ceilings: drylining (plasterboard with taped joints) or drylining followed by a skim coat. The choice affects both cost and timeline, and most professional plasterers recommend the latter for habitable loft spaces. Method Cost (25m² loft) Timeline Finish Quality Best For Drylining only (taped joints) £800-£1,200 3-4 days Good (visible joints possible) Storage rooms, utility spaces Drylining + 2mm skim coat £1,200-£1,800 7-10 days (inc. drying) Excellent (seamless finish) Bedrooms, home offices Drylining + full 6mm skim £1,500-£2,200 10-14 days (inc. drying) Premium (perfect for feature walls) Master bedrooms, bathrooms For a standard 25m² loft bedroom conversion, most homeowners opt for the middle option: drylining with a 2mm skim coat using British Gypsum Thistle Board Finish. This provides a smooth, paint-ready surface that hides any minor imperfections in the boarding while keeping costs reasonable. If you’re planning an en-suite bathroom in your loft conversion, you’ll need moisture-resistant plasterboard in wet areas. Our guide to bathroom plastering and which plaster to use in wet areas covers this in detail. Pro Tip: Always use tapered-edge plasterboard for loft conversions, not square-edge. The tapered edges create shallow recesses at joints that make taping and jointing far easier. Gyproc WallBoard TE or British Gypsum SoundBloc are excellent choices, with the latter providing enhanced acoustic performance — useful if you’re converting to a bedroom above a living room. Step-by-Step: The Loft Conversion Plastering Process Professional loft conversion plastering follows a strict sequence. Rushing any stage or working out of order will compromise the final result and potentially fail building control inspection. Stage 1: Insulation and Vapour Control (Days 1-2) Before any plasterboard goes up, your loft needs proper insulation. This typically involves: Between-rafter insulation: 100-150mm rigid PIR boards (Celotex, Kingspan, or Recticel) or mineral wool batts friction-fitted between rafters Under-rafter insulation: Additional 50-100mm PIR boards on battens to achieve total U-value of 0.16 W/m²K or better Vapour control layer (VCL): Continuous polythene sheeting (minimum 250 micron) on the warm side of insulation to prevent interstitial condensation Service routing: Electrical cables and any plumbing installed before boarding begins The Kingspan technical team recommends overlapping VCL joints by at least 150mm and sealing with waterproof tape. Any penetrations for downlights or pipes must be carefully sealed to maintain the vapour barrier’s integrity. Stage 2: First Fix Drylining (Days 3-5) Once insulation is signed off by building control, drylining begins. This involves: Ceiling boarding first: 12.5mm plasterboard fixed to ceiling joists at 400mm centres using 38mm drywall screws Wall boarding: Plasterboard fixed to stud walls or battened masonry walls, working from top to bottom Eaves details: Careful cutting and fitting around the eaves junction where roof meets floor Window reveals: Velux or dormer window reveals squared and boarded with returns Experienced plasterers fix boards with screws at 150mm centres around perimeters and 230mm centres in the field. Screws should sit just below the surface (about 1mm) without breaking the paper face. Over-driven screws create weak points that will crack through the skim coat. ⚠️ Warning: Never fix plasterboard directly to the underside of sloping rafters without battens. You need a minimum 25mm air gap between insulation and the underside of roof tiles/slates to allow ventilation. Most building control officers will fail loft conversions that lack this critical ventilation gap, as it leads to condensation and timber rot. Stage 3: Jointing and Taping (Days 6-7) Before skim plastering can begin, all board joints need taping and filling. This creates a stable base and prevents cracks appearing at joints. The process involves: First coat: Gyproc Easi-Fill 60 or similar joint compound applied along all tapered edges with a 150mm taping knife Tape embedding: Paper joint tape pressed into wet compound, smoothed flat with no bubbles or wrinkles Second coat: Wider application (200-250mm) of joint compound feathered out beyond the tape edges Screw spotting: All screw heads filled flush with joint compound Internal angles: Metal corner bead on all external angles; paper tape on internal angles Drying time: Minimum 24 hours between coats; 48 hours before skim coating Some plasterers skip the taping stage when they’re skim coating, but this is poor practice. Proper taping prevents movement cracks and provides a much more stable substrate for the finishing plaster. Stage 4: Skim Coating (Days 8-10) This is where professional skill really matters. Loft conversions present awkward angles and tight working conditions that make skimming challenging. A typical 25m² loft conversion requires: Material Quantity for 25m² Cost (2026 prices) British Gypsum Thistle Board Finish 5-6 bags (25kg each) £45-£55 PVA bonding agent

Loft Conversions: Plastering, Drylining and Finishing Read More »

Home Extensions in the UK: Planning, Costs and Regulations 2026

Quick Answer: A single-storey extension in the UK costs between £1,200-£2,000 per square metre in 2026, with typical projects ranging from £20,000-£60,000. Most single-storey rear extensions under 4m deep (3m for terraced/semi-detached) qualify for permitted development rights and don’t need planning permission. Two-storey extensions cost £1,800-£2,500 per m² and typically require full planning permission. Always check local planning portal and Building Regulations Part L (energy efficiency) requirements before starting. Understanding Home Extensions: What’s Right for Your Property Home extensions remain one of the most popular ways to add space and value to UK properties in 2026. Rather than facing the stress and expense of moving, homeowners are choosing to extend — and it’s easy to see why. According to government planning guidance, the right extension can add 15-20% to your property’s value whilst giving you the extra space your family needs. But get it wrong, and you’ll face planning headaches, cost overruns, and structural issues that’ll haunt you for years. Let’s cut through the confusion and give you the real-world knowledge you need to plan, budget, and execute a successful home extension. Types of Home Extensions: Comparing Your Options The type of extension you choose depends on your property layout, budget, and planning constraints. Here’s what most homeowners consider: Single-Storey Extensions Single-storey rear extensions are by far the most common. They’re ideal for creating open-plan kitchen-diners or extending living spaces into the garden. Most qualify for permitted development rights, meaning no planning permission needed. Typical size: 3m-6m depth, full width of property Cost: £1,200-£2,000 per m² (£24,000-£50,000 for typical 25m² extension) Build time: 2-4 months from groundworks to final plastering ROI: 10-15% property value increase The plastering work on a single-storey extension involves both internal walls and ceilings. You’ll typically need multi-finish plaster over plasterboard for walls, with particular attention to thermal efficiency where the extension meets the existing building. Two-Storey Extensions Adding a second floor gives you double the space but comes with higher costs and usually requires full planning permission. These work well for side returns or where you need both ground floor living space and additional bedrooms. Cost: £1,800-£2,500 per m² (£90,000-£150,000+ typical) Build time: 4-7 months ROI: 15-25% property value increase Planning: Almost always requires permission Side Return Extensions Popular in Victorian terraced houses, side return extensions fill in that narrow alley space between your house and the boundary. They’re perfect for enlarging kitchens without extending too far into your garden. Typical dimensions: 1.2m-2m wide, extending 3-5m back. Costs run £25,000-£50,000 for single-storey, significantly more if combining with rear extension. Wrap-Around Extensions Combining side and rear extensions creates an L-shaped wrap-around that dramatically transforms ground floor space. These are substantial projects requiring experienced builders and careful coordination between trades. Extension Type Typical Size Cost per m² Total Cost Range Planning Required? Single-storey rear 20-30m² £1,200-£2,000 £24,000-£60,000 Usually no (PD) Two-storey rear 40-60m² £1,800-£2,500 £72,000-£150,000 Yes Side return 8-15m² £1,500-£2,200 £12,000-£33,000 Often no (PD) Wrap-around 35-50m² £1,400-£2,100 £49,000-£105,000 Usually yes Loft conversion 25-40m² £1,600-£2,800 £40,000-£112,000 Depends on dormer Planning Permission vs Permitted Development: What You Actually Need This is where most homeowners get confused. The good news? Many extensions don’t require planning permission thanks to permitted development (PD) rights. Permitted Development Rules 2026 Under current Planning Portal guidelines, you can build without permission if your extension meets these criteria: Detached houses: Single-storey rear extensions up to 4m deep Semi-detached/terraced: Single-storey rear extensions up to 3m deep Height limits: Maximum 4m for flat roof, 4m to eaves for pitched roof Side extensions: No more than half the width of original house, single-storey only Materials: Should match existing building appearance Pro Tip: Even if your extension qualifies for PD, you still need Building Regulations approval. Many homeowners confuse these two separate requirements. Planning deals with visual impact and land use; Building Regs ensure structural safety, fire protection, and energy efficiency. When You Definitely Need Planning Permission You’ll need to submit a full planning application (£258 fee in 2026) for: Two-storey extensions of any size Extensions exceeding permitted development limits Properties in conservation areas or listed buildings Flats or maisonettes (PD doesn’t apply) Extensions that would result in over 50% ground coverage Any extension with balconies, verandas, or raised platforms Planning applications take 8-13 weeks typically. Budget an extra £1,500-£3,500 for architect drawings and £500-£1,200 for structural engineer input. Building Regulations: The Non-Negotiable Requirements Every extension requires Building Regulations approval — no exceptions. This ensures your extension is structurally sound, thermally efficient, and safe. The Building Control approval process costs £800-£1,500 for typical extensions and involves inspections at key stages: Foundation inspection: Before concrete pour Damp-proof course: Checking DPC levels and membrane placement Drainage: Before backfilling trenches Pre-plaster inspection: Insulation, electrical, heating roughed-in Final inspection: Completed work with all finishes Part L Energy Efficiency Requirements Part L regulations in 2026 are stringent. Your extension must achieve U-values of: Walls: 0.18 W/m²K or better Roof: 0.15 W/m²K Floor: 0.18 W/m²K Windows/doors: 1.4 W/m²K This typically means 100mm PIR insulation in walls, 150mm+ in roofs. The insulated plasterboard we install usually has 50-75mm insulation bonded to 12.5mm board. ⚠️ Warning: Don’t skip Building Control inspections. If you sell your property without a completion certificate, buyers’ solicitors will require retrospective approval (expensive) or indemnity insurance (which doesn’t actually confirm the work is safe). We’ve seen sales fall through over missing certificates. Real-World Extension Costs: The Complete Breakdown Let’s talk actual money. These are realistic 2026 costs based on current Kent and Southeast England pricing. Expect 10-15% less in Northern England, 15-25% more in London. Budget Breakdown for 25m² Single-Storey Extension Item Cost Range Notes Groundworks & foundations £4,000-£6,500 Strip foundations, 1m deep typically Brickwork & blockwork £5,500-£8,000 Includes DPC, lintels, airbricks Roof structure & covering £4,000-£7,000 Flat roof with warm deck insulation Windows & doors £2,500-£4,500 Bi-fold doors cost £2,000+ alone Electrics (first fix & second) £2,000-£3,500 New consumer unit if required: +£800 Plumbing & heating £2,500-£4,000 Underfloor heating adds £1,200-£2,000 Plastering (walls & ceiling) £1,800-£2,800 £35-£45/m² for board and skim Flooring

Home Extensions in the UK: Planning, Costs and Regulations 2026 Read More »

PAT Testing for Facilities Management Explained

Quick Answer: PAT testing (Portable Appliance Testing) is essential for facilities management in the UK, ensuring electrical appliances are safe and compliant. While not legally mandatory, it’s the most effective way to meet UK safety regulations. Testing frequency depends on equipment type and risk level—from every 3 months for construction tools to every 2-4 years for office equipment. Portable Appliance Testing (PAT) is a critical component of facilities management, ensuring the safety and functionality of electrical appliances in the workplace. For facilities managers in the UK, PAT testing is more than a routine task—it’s an essential practice for maintaining compliance, reducing hazards, and protecting both employees and assets. What is PAT Testing? PAT testing involves the inspection and testing of electrical appliances to ensure they are safe to use. The process includes two key components: Visual Inspection: Checking the appliance for visible signs of damage, such as frayed cords, cracked casings, or loose wires. Electrical Testing: Using specialised equipment to measure aspects like insulation resistance, earth continuity, and polarity. While PAT testing doesn’t guarantee future safety, it identifies existing faults that could lead to electrical hazards. Why is PAT Testing Important? Electrical appliances are an integral part of modern workplaces, but they can pose significant risks if not properly maintained. PAT testing provides multiple safety benefits: Reduces Fire Risk: Faulty appliances are a leading cause of electrical fires. Ensures Employee Safety: Regular testing prevents accidents like electric shocks or burns. Minimises Downtime: Identifying issues early reduces the likelihood of unexpected equipment failure. Maintains Compliance: Adhering to safety standards and regulations protects businesses from legal consequences. What Are the Legal Requirements for PAT Testing in the UK? While PAT testing itself is not legally mandatory, UK regulations place a strong emphasis on maintaining the safety of electrical appliances. Key legislation includes: The Electricity at Work Regulations 1989 – Employers are required to ensure that electrical equipment is maintained in a condition that prevents danger. Health and Safety at Work Act 1974 – Imposes a general duty on employers to provide a safe working environment, including safe electrical appliances. Provision and Use of Work Equipment Regulations (PUWER) 1998 – Requires that work equipment is suitable, safe, and maintained in good condition. Although the law doesn’t specify PAT testing, it is widely regarded as an effective way to demonstrate compliance with these regulations. Which Appliances Require PAT Testing? Not all appliances need PAT testing, but the focus should be on items most likely to pose a risk. Common examples include: Portable Appliances: Kettles, toasters, fans, and desk lamps. Hand-Held Devices: Drills, sanders, and other tools. IT Equipment: Computers, monitors, and printers. Extension Leads and Power Strips: High-usage accessories prone to overloading. Note: Fixed installations like light fittings and switches are not typically included in PAT testing. How Often Should PAT Testing Be Carried Out? The frequency of PAT testing depends on the type of equipment, its use, and the environment in which it operates. Factors to consider include: Risk Level: Appliances in high-risk environments (e.g., construction sites) may require more frequent testing than those in offices. Manufacturer Recommendations: Guidelines from equipment manufacturers can provide insights into appropriate testing intervals. Usage Patterns: Frequently used or moved items may need more regular inspections. Recommended Testing Intervals: Equipment Type Testing Frequency Office equipment Every 2–4 years High-risk equipment Every 6–12 months Construction site tools Every 3 months Pro Tip: Create a colour-coded labelling system for tested appliances showing the next test due date. This makes it easy for staff to identify when equipment needs retesting at a glance. Best Practices for PAT Testing in your Facility To ensure effective PAT testing, you should implement these key practices: Create an Inventory – Maintain a list of all electrical appliances within the facility, including their locations, ages, and usage levels. This would be created by one of our SEFM team members or by our trusted suppliers. Set a Schedule – Establish a regular testing schedule tailored to the risk levels and usage patterns of your equipment. Qualified Professionals – While some simple tests can be done in-house, complex inspections should be conducted by certified PAT testers. At SEFM we have a diverse preferred suppliers list that are are able to help with any issues. Invest in Training – Train staff to perform basic visual checks to identify potential hazards between scheduled PAT tests and before equipment use. Technology – Use software to maintain records, and track appliance performance. While professionals are essential for electrical testing, trained staff can perform visual inspections. The Benefits of Regular PAT Testing A proactive approach to PAT testing offers multiple advantages for your facility: Peace of Mind: Knowing your workplace is safe and compliant reduces stress for both employees and management. Cost Savings: Identifying and addressing small issues prevents costly repairs or replacements. Increased Productivity: Reliable equipment supports smooth and efficient operations. Conclusion PAT testing is a vital part of facilities management that safeguards employees, reduces risks, and ensures compliance with UK regulations. By implementing a well-structured PAT testing plan, you can protect your business, assets, and workforce while maintaining a safe and efficient workplace. At SEFM Ltd, we provide expert PAT testing services tailored to the needs of UK businesses. If you need any help with your facility, fill out our form by clicking here and a member of our team will be happy to assist you!

PAT Testing for Facilities Management Explained Read More »

Renovating for Calm: Stress-Free Home Tips

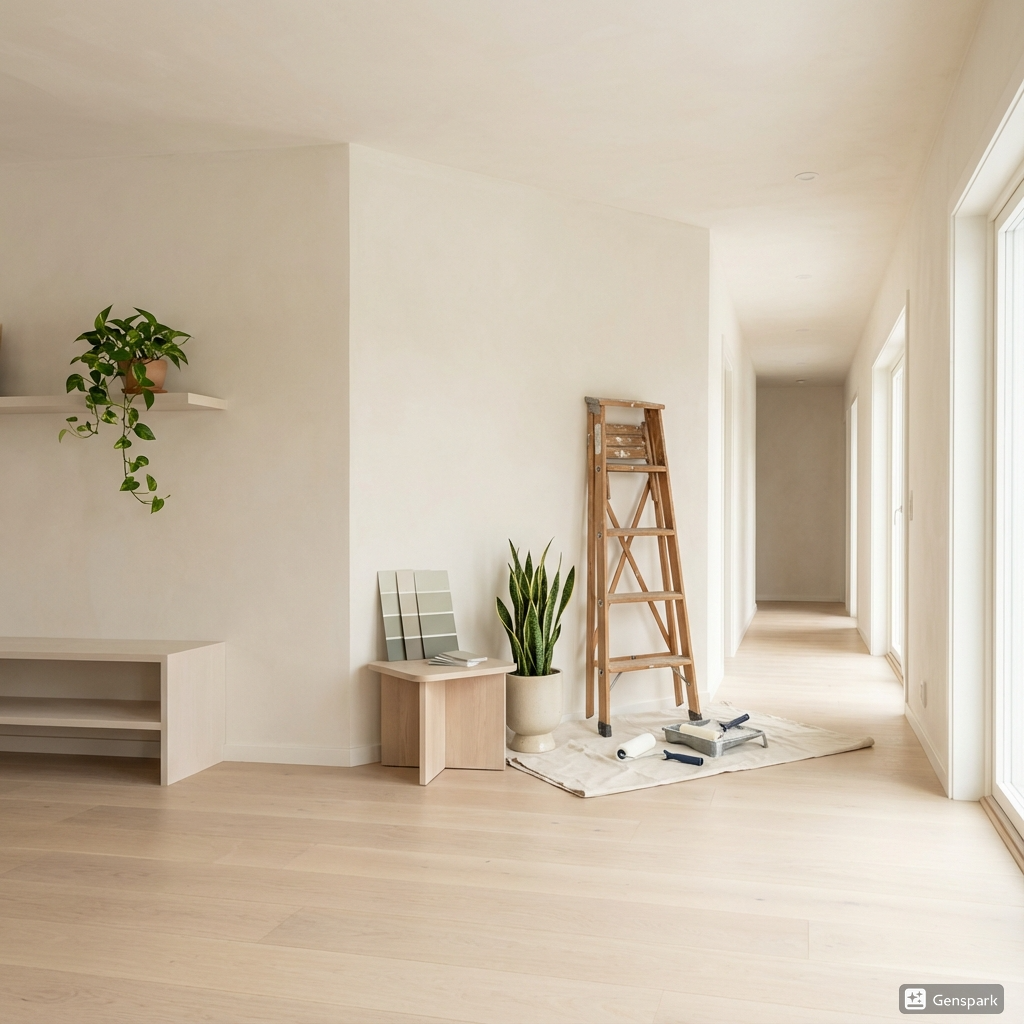
At a Glance: Creating a calm, stress-free home environment starts with thoughtful renovations that reduce visual clutter and improve the quality of your living spaces. Focus on smooth wall finishes, calming colour palettes, natural light, and better room flow. Simple changes like decluttering, replastering walls, and adding plants can significantly reduce daily stress levels and help you feel more balanced at home. Home is meant to be the place where the day slows down. It’s where people unwind, spend time with family, and recharge for what the next day holds in store for them. However, when a home feels noisy, cluttered, or visually busy, that sense of ease can gradually disappear. If this happens, little details within your living spaces can start to matter more to you than they should. This, in turn, makes it harder to relax. Many homeowners look to counter this by creating a calmer living space. And the most successful transformations happen when they focus on how a home is put together rather than what is added to it. Making thoughtful renovation choices, introducing clean finishes, and implementing well-considered layouts can go a long way towards helping your everyday life feel more balanced. Primarily, that is because renovating for calm is about creating a home that has a stress-free environment. Here is how you can do so. How Does Your Home Environment Impact on Your Stress Levels? Throughout the day, the spaces we spend our time in can affect our mood more than we realise. Exposure to busy layouts, damaged walls, harsh lighting, and visual clutter can quietly increase our stress levels over time. That is why it is vital to maintain a calm home that enables you to rest, focus, and improve your emotional balance. The best way to do this is to remove unnecessary distractions. Some of the savviest renovation choices that improve comfort around the home often revolve around clean surfaces, simple layouts, and materials that feel stable and grounding. This is where wall finishes, lighting, and furniture choices come together, along with therapeutic sensory furnitures to create a relaxing environment through texture, movement, and visual softness. Tips To Create a Stress-Free Home Environment So how do you go about renovating your home to make it as calm and stress-free as possible? Here are six tips you can follow. 1. Declutter and Simplify Your Space For any renovation, especially one aimed at creating calmer spaces, it is always a good idea to declutter thoroughly first. By doing this, you will reduce the visual noise and instantly make the room feel more open. It is worth going through each room of your home individually and removing everything you don’t use, that is broken, or has seen better days. To make things easier, sort what you no longer want into separate piles: Items you will sell Items to give to charity Items to recycle Items to dispose of at the local tip For the items you want to sell, you can do so on sites like Facebook Marketplace, eBay, or Gumtree. There are also plenty of charities that would be willing to accept your donations, and Recycle Now gives you lots of advice on the best way to recycle your possessions. 2. Improve The Condition of Your Walls and Surfaces In most homes, walls and surfaces are the largest visual elements. While they can be very calming if they have certain colours and features (more on that later), even the tiniest defects, such as cracks or uneven joins, can be unsettling. At the same time, surfaces influence how light moves across a room and how polished the space feels overall. For these reasons, it is advisable to replaster your walls and surfaces to make them as unblemished as possible. The smoother and cleaner they are, the more relaxed an impression they will make. Pro Tip: Investing in professional plastering creates a smooth, seamless finish that not only looks better but also reflects light more evenly throughout the room, enhancing the calm atmosphere you’re trying to achieve. 3. Choose Calm Colours and Finishes The colours you choose in your home have a strong influence on how calming it feels. As a general rule, soft neutrals, warm whites, and muted earth tones can all create a sense of balance without demanding your attention. One reason, as mentioned, is that these colours reflect light more evenly. Therefore, it tends to make spaces feel larger and calmer. Similarly, finishes are just as important as colour. Heavy textures and patchy surfaces can interrupt the flow of a room. By contrast, smooth wall finishes provide a level of consistency that helps rooms feel more complete. 4. Using Light and Space Better Increasing natural light is often a major motivation for a home renovation. Indeed, rooms that get plenty of it often feel easier to spend time in. Conversely, when light is blocked or uneven, living spaces can often feel smaller and more closed in (even if they are well-sized). One popular way to create a sense of space and introduce more light into your home is to knock down a wall. Another is to add a skylight or new windows. However, you don’t have to take as drastic an action as that because even simple fixes like decorating rooms minimally and opening up sightlines can make a massive difference. If that isn’t feasible, you could always try adding artificial lighting. 5. Create a Better Flow Between Rooms There is no question that your home will feel calmer if you can effortlessly move from one room to the next. When spaces connect naturally, there is less visual interruption. You also have to make fewer mental adjustments as you go about your day. Creating a sense of flow helps the home feel settled rather than broken up into separate, competing areas. One good way to do this is to maintain a consistent wall finish throughout your home, using similar colours across shared spaces. This can work particularly well when complemented with flooring

Renovating for Calm: Stress-Free Home Tips Read More »

Flooring Trends UK 2026: Seamless Low-Maintenance

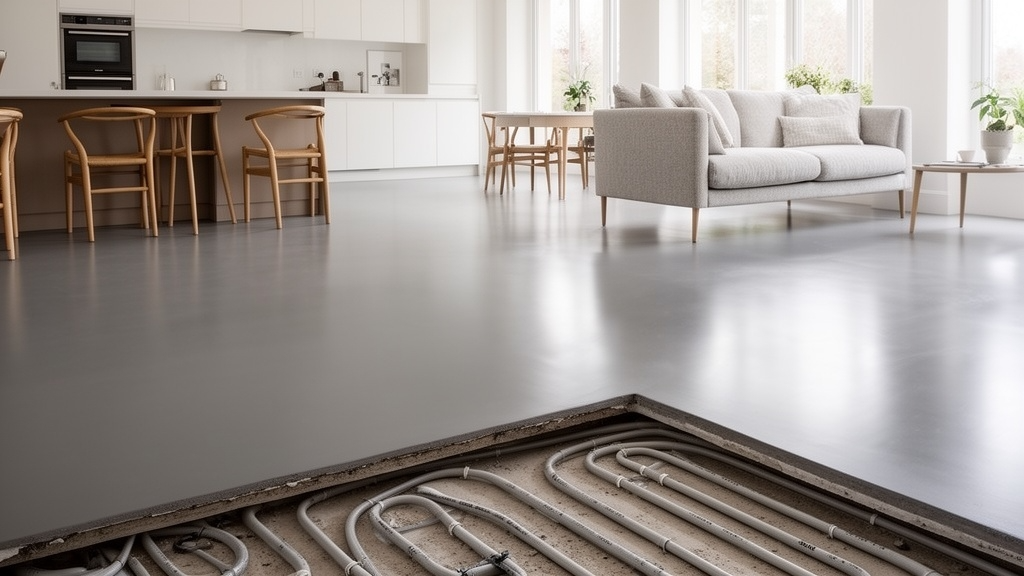
Quick Answer: UK flooring trends in 2026 prioritise seamless, low-maintenance surfaces over decorative finishes. Homeowners favour durable, easy-to-clean options like resin flooring for modern open-plan spaces, driven by hybrid working lifestyles, hygiene concerns, and long-term value over upfront cost. “Homeowners are becoming far more considered about flooring than they were even a few years ago. We’re seeing less focus on purely decorative finishes and much more interest in durability, hygiene and long-term maintenance — particularly in kitchens, utility rooms and open-plan living spaces,” says a spokesperson at Beams Renovation. Flooring choices in UK homes are changing in 2026. While traditional options such as tiles, engineered wood and carpet remain popular, there is growing interest in seamless, low-maintenance surfaces that suit modern lifestyles. This reflects broader changes in how homes are used: more hybrid working, more open-plan layouts, and greater attention to cleaning, allergens and long-term running costs. Key Drivers Behind Flooring Trends Several factors are shaping flooring choices in residential renovation: Increased use of open-plan layouts, where a single flooring type is used across large areas Greater focus on hygiene and ease of cleaning Rising awareness of lifecycle cost rather than just upfront price Compatibility with underfloor heating and energy-efficient homes Preference for neutral, minimal interior aesthetics These drivers favour flooring types that are durable, seamless and simple to maintain. The Rise of Seamless Flooring One of the most notable trends is the increased use of seamless flooring systems. Unlike tiles or planks, seamless floors have no joints or grout lines. This makes them easier to clean, visually calmer, and less prone to trapping dirt or moisture. Resin flooring is the most common seamless system being adopted in residential settings, particularly in functional spaces such as kitchens, bathrooms, hallways, home gyms and garages. How Resin Flooring Fits Into the Trend Resin flooring offers multiple benefits that align with modern homeowner priorities: Feature Benefit Continuous, joint-free surface No grout lines to trap dirt or moisture High resistance to stains, moisture and impact Long-lasting performance in high-use areas Easy cleaning and hygiene Wipe-clean surface ideal for kitchens and bathrooms Modern, understated aesthetic Suits neutral, minimal interior design trends Compatible with underfloor heating Works with energy-efficient heating systems These characteristics align closely with current homeowner priorities, which is why resin flooring is increasingly considered alongside tiles and wood during renovation planning. Pro Tip: When choosing seamless flooring, consider how the room will be used — foot traffic levels, moisture exposure, and temperature fluctuations all affect which resin system performs best. Professional substrate testing before installation prevents costly issues down the line. The Importance of Specification and Installation Although resin flooring is becoming more common in homes, it remains a specialist system that requires proper specification and installation. Evo Resin Flooring explains: “Resin floors perform extremely well in residential environments, but they’re not a one-size-fits-all solution. The system needs to match how the room is used — whether that’s foot traffic, moisture exposure or temperature changes — and preparation is critical to long-term performance.” This highlights the importance of selecting the correct resin type. Ensuring the substrate is properly tested and prepared before installation is equally critical. Summary In 2026, UK flooring trends are increasingly shaped by function rather than fashion. Homeowners are prioritising: Ease of maintenance Durability Hygiene Longevity Visual simplicity Seamless systems such as resin flooring fit well within this shift, particularly in modern and high-use spaces. While traditional flooring materials remain relevant, the growing adoption of performance-led flooring reflects a broader move towards homes that are easier to live in, easier to maintain, and better suited to modern lifestyles.

Flooring Trends UK 2026: Seamless Low-Maintenance Read More »

Enhance Your Projects with Modern Glass Balustrades

Quick Answer: Glass balustrades are sleek, safety-compliant barriers made from toughened or laminated glass that enhance modern architecture. They maximise natural light, complement plastered finishes beautifully, and add property value while offering easy maintenance and versatile design options for staircases, balconies, and terraces. In today’s building and renovation projects, the details truly make a difference. One feature that continues to grow in popularity is the glass balustrade. Renowned for their sleek design and practicality, glass balustrades provide a perfect finishing touch in both residential and commercial settings. If you’re a plastering company seeking to broaden your service offerings or deliver high-end results, understanding the benefits and applications of glass balustrades could be a valuable addition. Here’s everything you need to know about incorporating this stylish feature into your projects. Why a Glass Balustrade Is a Must-Have in Modern Architecture Aesthetic Appeal A glass balustrade offers a minimalist, contemporary look that works seamlessly with smooth plastered walls and ceilings. Its transparent quality allows natural light to flow deeply into spaces, making rooms feel more open, bright, and inviting. Whether installed along staircases, balconies, or terraces, a glass balustrade elevates the overall aesthetic, adding sophistication and elegance. Safety and Strength High-quality glass balustrades are made from toughened or laminated safety glass, designed to meet stringent safety standards. These sturdy barriers are strong enough to withstand impacts, ensuring safety for public and private spaces alike. Versatile Design Options Available in various configurations — such as frameless, post-and-rail, or channel-supported systems — glass balustrades can be customised with tinted, frosted, or etched glass finishes. This flexibility allows for privacy, visual contrast, or decorative effects, perfectly tailored to your client’s interior or exterior design. Pro Tip: Pair frameless glass balustrades with smooth plastered walls for a truly seamless, high-end finish that maximises light flow throughout the space. Perfectly Complementing Plastered Walls and Floors Once plastering is completed, a glass balustrade creates a seamless transition that enhances your overall finish. Their transparency draws attention to architectural features, such as staircases or mezzanines, and works especially well when paired with smooth plastered surfaces to create a clean, modern aesthetic. Adding a glass balustrade helps your project stand out by providing a high-end, polished appearance that increases both visual appeal and perceived value. The Benefits of Using a Glass Balustrade in Your Projects Benefit Description Maximise Light and Space Transparent glass allows light to penetrate, making interiors appear larger and more welcoming Boost Property Value Modern glass balustrades are highly desirable and can add value to any property Maintenance-Friendly Smooth glass surfaces ensure easy cleaning and durability over time Design Flexibility Finishes like tinted or frosted glass enable custom aesthetic solutions to suit any decor Partnering with the Right Supplier For plastering companies, selecting top-quality glass balustrades is essential to ensure easy installation and an impressive final result. Working with trusted suppliers ensures product reliability, safety compliance, and professional support. To explore your glass balustrade options, styles and finishes, or learn more at Fusion Glass Ltd. Conclusion Glass balustrades are a smart, stylish choice to elevate any project. Their clean, modern appearance complements plastered walls beautifully, creating spaces that feel open, bright, and sophisticated. Whether you’re designing a staircase, balcony, or terrace, incorporating a glass balustrade enhances the overall aesthetic and adds safety with minimal visual impact. By partnering with reliable suppliers and staying informed about the latest designs, your business can deliver standout results that clients will love. Embrace the possibilities of glass balustrades and bring a contemporary touch to your next project.

Enhance Your Projects with Modern Glass Balustrades Read More »

luxurious complete renovations modern interior

Complete Renovations: Professional Home Makeover

Quick Answer: A complete home renovation is a transformative project that can increase your property’s value by up to 25% when done professionally. The process involves careful planning, structural improvements, modern systems installation, expert plastering and finishing, all typically costing 15-20% of your property’s value. In Kent, professional renovations combine traditional craftsmanship with contemporary methods to create modern, efficient, and beautiful homes. Discover how complete renovations can turn your dated space into a masterpiece of modern design, with expert insights from Kent’s leading plasterers. In today’s rapidly evolving property market, complete renovations have become increasingly popular. Recent studies show a 35% rise in major home transformation projects across the UK in 2024. Whether you’re looking to modernise your living space or increase your property’s value, a comprehensive renovation project could be the perfect solution. Understanding the Complete Renovation Process A complete home renovation is more than just a simple makeover. It’s a transformative journey that requires careful planning and expert execution. Recent data indicates that well-planned renovations can increase property values by up to 25% when done professionally. The key to success lies in understanding each phase of the renovation process and working with experienced professionals who can bring your vision to life. Planning and Design Phase Planning Element Key Considerations Budget Typically 15-20% of your property’s value for complete renovations Permissions Secure necessary planning permissions and building regulations approval Design Create detailed architectural drawings and 3D visualisations Timeline Develop a comprehensive timeline with key milestones Team Select primary contractors and specialists Initial Assessment and Demolition Before any transformation can begin, a thorough assessment of your property’s current condition is essential. Our expert team conducts comprehensive structural surveys, identifying potential challenges and opportunities. The demolition phase must be carefully managed to protect the building’s integrity while removing outdated elements. Statistics show that proper initial assessment can reduce unexpected costs by up to 40%. Pro Tip: Invest time in a comprehensive initial assessment. A detailed structural survey before starting demolition can identify hidden issues early, potentially saving you thousands in unexpected costs and delays later in the project. Core Renovation Elements Structural Improvements and Framing The foundation of any successful renovation lies in its structural integrity. Modern building techniques and materials have revolutionised how we approach structural improvements. Our team specialises in combining traditional craftsmanship with contemporary methods, ensuring your home’s framework is built to last. This includes load-bearing wall modifications, beam installations, and structural reinforcements where necessary. Essential Systems Installation Modern HVAC systems with smart climate control capabilities Energy-efficient plumbing systems with water-saving features Updated electrical systems meeting current safety standards Smart home integration preparation, supported by reliable connectivity solutions from esim service providers Improved insulation and ventilation systems Creating Your Dream Space Wall Finishing and Surface Preparations As Kent’s leading plasterers, we understand that perfect wall finishes are crucial to achieving a premium look. Our expert team utilises advanced plastering techniques and premium materials to create flawless surfaces. Modern plastering methods can improve your home’s energy efficiency by up to 15% while providing the perfect canvas for your desired aesthetic. Flooring and Cabinet Installation Selection of premium flooring materials suitable for each room’s purpose Professional installation of bespoke cabinetry and storage solutions Integration of modern storage systems and space-saving solutions Installation of luxury finishing touches and architectural details Finishing Touches Interior Design and Material Selection The success of your renovation largely depends on selecting the right materials and finishes. Our team works closely with leading suppliers to offer the latest in design trends and Venetian plastering and sustainable materials. Current trends show a 45% increase in demand for eco-friendly finishing materials among UK homeowners. We help you navigate these choices while ensuring durability and style align with your vision. Quality Assurance and Final Inspections Comprehensive quality control checks throughout the project Detailed documentation of all installations and modifications Professional snagging and issue resolution Final building control inspections and certification Thorough testing of all installed systems and features Making Your Renovation Dreams Reality Complete renovations represent a significant investment in your property’s future. With property values in Kent showing consistent growth of 8% annually, a professional renovation can significantly enhance your home’s market position. Our team’s expertise in plastering and comprehensive renovation services ensures your project is completed to the highest standards. We transform your space into a modern, efficient, and beautiful home that meets all your needs. Remember, successful renovations require careful planning, expert execution, and attention to detail — elements that are at the core of our service offering at Kent Plasterers. FAQ How much money should you spend on renovations? You don’t want to spend more than 10 to 15 percent of your home’s value on a single room. If you spend more, the value of the renovation will not proportionally add to the value of your home. For example, if your home is worth £100,000, the maximum you should spend on a kitchen or bathroom renovation is £15,000. What is illegal renovation? Unpermitted work refers to any construction, renovations, remodels, or additions made without the required local building permits. Examples include unpermitted additions or DIY electrical and plumbing upgrades. Sources [1] https://www.davefox.com/resource-center/whole-home-remodeling-steps-checklist[2] https://www.myhomeus.com/services/complete-remodeling/[3] https://matterport.com/blog/home-renovation-checklist

Complete Renovations: Professional Home Makeover Read More »

modern office renovation design transformation

Office Renovation Design: Transform Your Space

Quick Answer: Office renovation costs in the UK typically range from £90-£500 per square foot or £300-£1600 per square metre. Well-designed office spaces can increase productivity by up to 20% and significantly improve employee satisfaction. The key is creating flexible, collaborative environments that support both in-person and hybrid work while prioritizing employee wellbeing and brand identity. Discover how strategic office renovation design can revolutionize your workspace, boost productivity, and create an environment that inspires success. The Evolution of Modern Office Design The landscape of office design has undergone a remarkable transformation in recent years, particularly accelerated by the events of 2020. Modern workspaces have evolved from traditional cubicle-filled environments to dynamic, flexible spaces that prioritise both functionality and employee wellbeing. Recent studies show that well-designed office spaces can increase productivity by up to 20% and significantly impact employee satisfaction and retention rates. The shift towards hybrid working models has further emphasised the need for thoughtful office renovation design that accommodates both in-person and remote collaboration. Planning Your Office Transformation Successful office renovation begins with thorough planning and budgeting. Current market data indicates that office renovation costs in the UK typically range from £90-£500 per square foot, depending on the scope and complexity of the project. Professional design services generally account for 8-12% of the total budget, proving to be a worthy investment for optimal results. Planning Phase Key Actions Assessment Conduct thorough assessment of current space utilisation Objectives Define clear objectives and priorities for the renovation Budget Establish realistic budget including contingency funds Timeline Create detailed timeline for implementation Phasing Consider phased renovation to minimise disruption Creating Collaborative Environments The heart of modern office design lies in fostering collaboration while maintaining space for focused work. Research indicates that employees spend up to 50% of their time collaborating, making it crucial to design spaces that support this need. Creating a mix of open areas and private spaces allows for both spontaneous interaction and concentrated work. Pro Tip: Balance your collaborative spaces with quiet zones. Provide at least one quiet area for every three open collaborative spaces to ensure employees can focus when needed without sacrificing team interaction opportunities. Key collaborative space elements include: Open plan areas with flexible seating arrangements Dedicated meeting pods and breakout spaces Acoustic solutions for noise management Multi-purpose areas that can be reconfigured as needed Designing for Flexibility and Future Growth Future-proofing your office space through flexible design elements is essential in today’s rapidly evolving workplace. Studies show that 73% of UK businesses now prioritise adaptable office layouts that can accommodate changing team sizes and working patterns. Incorporating modular furniture and movable partitions allows for easy reconfiguration as your organisation’s needs evolve. Enhancing Employee Wellbeing Employee wellness has become a central focus in modern office design. 87% of workers state that their office environment impacts their mental health, making wellbeing a critical consideration. A well-designed office should incorporate elements that promote both physical and mental wellbeing: Ergonomic furniture and adjustable workstations Biophilic design elements including natural light and plants Dedicated wellness rooms and relaxation spaces Proper ventilation and air quality control systems Technology Integration and Hybrid Work Solutions Modern office spaces must seamlessly integrate technology to support hybrid working models. Recent data shows that 65% of UK companies are investing in advanced conferencing systems as part of their office renovations. Creating tech-enabled spaces that support both in-person and remote collaboration is crucial for future success. Bringing Your Brand to Life Your office design should reflect and reinforce your company’s brand identity. Research indicates that branded office spaces can increase employee engagement by up to 30%. From colour schemes to architectural elements, every design choice should align with your brand values and culture. Effective brand integration strategies: Custom wall graphics and company artwork Brand-aligned colour schemes and materials Interactive spaces that showcase company achievements Creative zones with writable surfaces for innovation Lighting and Atmosphere Proper lighting design is crucial for both productivity and wellbeing. Studies show that well-designed lighting can reduce eye strain by 51% and increase productivity by 23%. Modern office lighting should be adaptable to different tasks and times of day to maximize employee comfort and performance. The Implementation Process A successful office renovation requires careful coordination and project management. Creating a detailed implementation plan helps minimise disruption and ensure smooth execution. Research shows that well-planned renovations can reduce project timelines by up to 25%. Implementation best practices: Phase the renovation to maintain business continuity Communicate regularly with all stakeholders Establish clear milestones and deadlines Plan for temporary workspace solutions if needed Regular quality checks and progress reviews Measuring Success and Making Adjustments Post-renovation evaluation is crucial for ensuring the new space meets its intended objectives. Gather feedback through surveys and observation, and be prepared to make adjustments based on actual usage patterns. Companies that conduct post-renovation assessments report 40% higher satisfaction rates with their office transformations. Professional Support and Next Steps Engaging professional expertise is crucial for successful office renovation. From architects to contractors, having the right team ensures quality results. Statistics show that professionally managed renovations are 60% more likely to be completed on time and within budget. When selecting partners, look for experience in commercial renovations and a proven track record of successful projects. Cost Factor Range Per Square Foot £90-£500 Per Square Metre £300-£1600 Design Services 8-12% of total budget FAQ How much to refurbish an office? The cost of an office fit out or office refurbishment can range between £300 to £1600 per square metre. A more specific breakdown of costs are listed below, though these will vary between types of project. Which funding avenue you choose can also influence costs. Sources [1] https://www.bigrentz.com/blog/how-to-design-millennial-friendly-workplace [2] https://www.meyerinc.com/resource-center/office-renovation-ideas/ [3] https://www.dgicommunications.com/office-renovations/

Office Renovation Design: Transform Your Space Read More »