Construction News

Spray Plaster: Why It’s the Go-To Choice for Homes

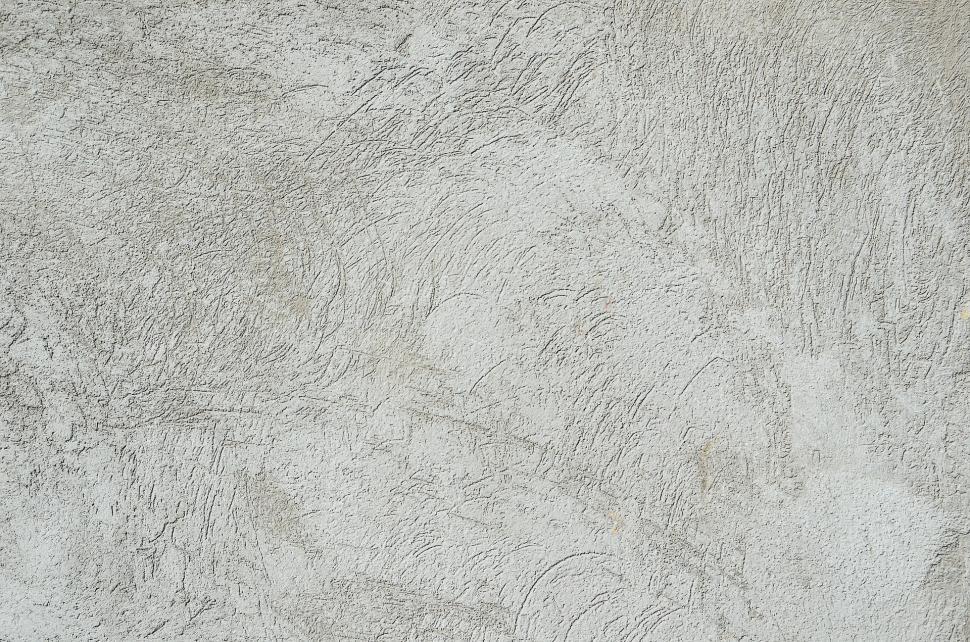
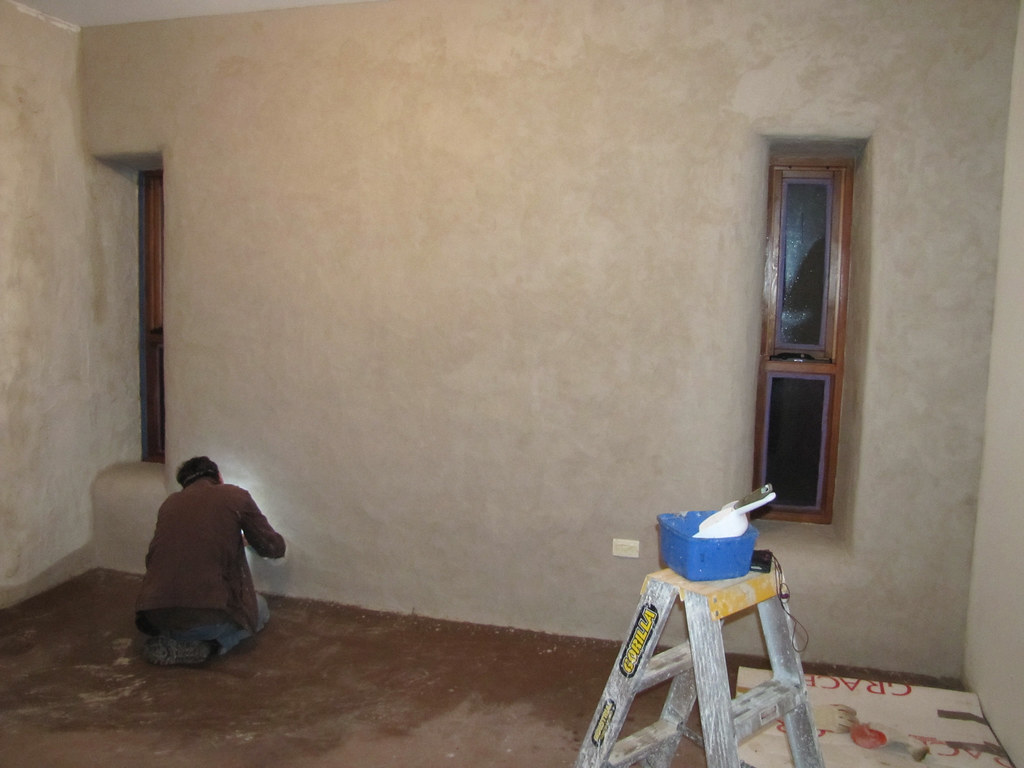
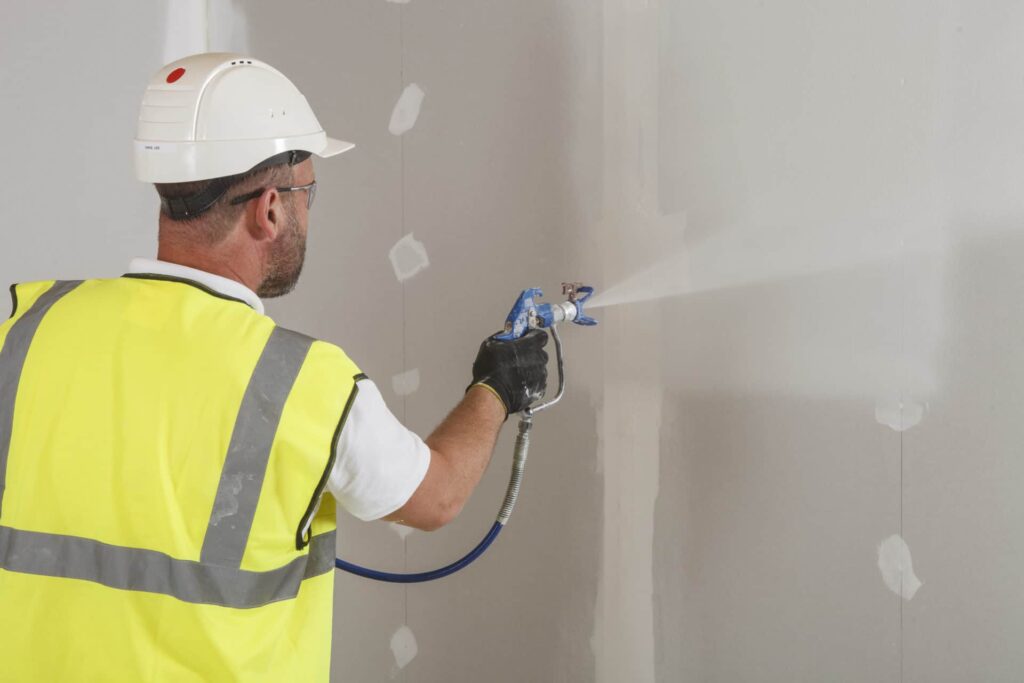
Discover why professional decorators are switching to spray plaster for flawless, time-saving wall finishes that transform spaces in half the time. The Evolution of Plastering: From Traditional to Spray Technology The art of plastering has undergone a remarkable transformation since its ancient origins. Traditional plastering, with its labour-intensive hand-trowelling techniques, has served the construction industry well for centuries. However, the advent of spray plaster technology in the late 20th century marked a pivotal shift in how we approach wall finishing. This evolution wasn’t merely about changing tools; it represented a fundamental rethinking of the entire plastering process. Today’s spray plaster systems combine advanced polymer technology with precision application methods, offering up to 70% faster application times compared to traditional techniques. The Science Behind Spray Plaster Technology Spray plaster’s effectiveness lies in its carefully engineered composition. These modern formulations typically contain a precise blend of gypsum, polymers, and specialty additives that create a unique sprayable consistency. The science is particularly impressive in how these components work together: Advanced polymer binding agents ensure superior adhesion to various surfaces Carefully calibrated drying agents allow for optimal curing times of 24-48 hours Self-levelling properties that activate upon spraying Enhanced durability through cross-linking polymer networks Time and Cost Efficiency: The Numbers Don’t Lie The economic advantages of spray plaster are compelling. Recent industry studies indicate that spray plastering can reduce project completion times by 40-60% compared to traditional methods. This efficiency translates directly to cost savings: Labour costs reduced by up to 50% on large-scale projects Material wastage decreased to just 5-10% compared to 25-30% with traditional plastering Project timelines shortened by weeks on major developments Reduced scaffolding hire periods and associated costs Superior Finish and Consistency The hallmark of spray plaster technology is its ability to achieve a Level 5 finish consistently. This premium finish quality is attributed to the uniform application process and the material’s self-levelling properties. Modern spray plasters dry to a brilliant white finish, eliminating the need for additional mist coats and reducing the overall decoration timeline. The surface texture is remarkably smooth and uniform, with microscopic surface variations of less than 1mm across entire wall spans. Environmental Impact and Waste Reduction In an era where sustainability is paramount, spray plaster stands out for its eco-friendly credentials. The technology has revolutionised waste management in plastering: Reduced water usage by up to 30% compared to traditional methods Lower carbon footprint due to fewer site deliveries Minimal dust production during application Recyclable packaging and containers 95% material utilisation rate compared to traditional plastering’s 70-75% Equipment and Application Expertise Success with spray plaster hinges on using the right equipment and developing proper expertise. Professional applicators typically rely on high-performance sprayers like the Graco Mark V or specialized plaster spray machines. Essential equipment and skills include: Professional-grade airless sprayers with adjustable pressure settings Specialized spray tips designed for different plaster viscosities Proper surface preparation techniques Understanding of environmental conditions and their impact on application Adaptability and Versatility in Modern Construction Spray plaster’s versatility makes it suitable for various construction scenarios. Whether working on new builds or renovation projects, the technology adapts to different surface types and architectural features. It excels in challenging applications such as: High-ceiling areas and stairwells Curved surfaces and architectural features Large commercial spaces requiring rapid completion Heritage building renovations requiring minimal disruption Maintenance and Longevity The durability of spray plaster finishes is remarkable, with many installations showing minimal wear after 10+ years. The advanced polymer composition creates a surface that’s resistant to cracking and chipping, while remaining breathable. Regular maintenance is minimal, typically requiring only routine cleaning with mild detergents. The smooth finish resists dust accumulation and makes future redecorating projects simpler and more cost-effective. Making the Switch: What Professionals Need to Know For contractors considering the transition to spray plaster technology, several key factors require consideration: Initial investment in equipment (typically £5,000-£15,000) Training requirements for staff (usually 1-2 weeks intensive training) Understanding of different product specifications and applications Quality control measures and best practices Health and safety considerations specific to spray application The Future of Wall Finishing The trajectory of spray plaster technology points toward even more innovative developments. Industry experts predict several emerging trends: Integration of smart materials for enhanced performance Development of eco-friendly formulations with lower environmental impact Advanced application systems with automated thickness control Increased adoption in prefabricated construction Enhanced durability and performance characteristics As construction methods continue to evolve, spray plaster technology stands at the forefront of innovation in wall finishing. Its combination of efficiency, quality, and sustainability makes it an increasingly attractive choice for modern construction projects, setting new standards for the industry’s future. FAQ Can you spray plaster on walls? Spray plastering is an automated method for applying filler ‘plaster’ as a wall covering. Can you buy waterproof plaster? Boots Waterproof Plasters provide long lasting protection to wounds from water, dirt and germs. These plasters are durable and flexible for comfort. All Boots plasters are hypoallergenic so they are kind to sensitive skin. How long does wet plaster last? Newly plaster skimmed walls take approximately 4 days to dry out before you should attempt to decorate them. It is crucial to wait until the plaster has dried, and its colour has changed to a pale pink. There should be no brown patches as a guide. In some instances, you may need to wait up to 4 weeks. Is Liquid plaster waterproof? It’s also waterproof, dries quickly, and leaves no residue. Effective & Economical – Unlike adhesive dressings for wounds that require replacement or ointments that need to be applied 3 times a day, our liquid plaster only needs to be applied every 3 to 5 days. How long does plastering last? Plaster doesn’t come with an expiration date. You might hear “15-20 years” thrown around as a lifespan, but that’s a very broad estimate. In reality, how long your plaster lasts will depend on a number of factors: The original quality of the plastering job – A poorly done job won’t last as

Spray Plaster: Why It’s the Go-To Choice for Homes Read More »

hardwall plaster application smooth wall

How to Apply Hardwall Plaster: A Complete Beginner’s Guide

Master the time-tested art of hardwall plaster application and achieve that perfect, durable finish that professionals swear by Understanding Hardwall Plaster Basics Hardwall plaster is a robust basecoat gypsum plaster specifically designed for medium to high suction backgrounds. It’s particularly favoured in the UK construction industry for its exceptional durability and versatility. This traditional plastering material creates a solid foundation that’s essential for achieving a professional finish on interior walls. Unlike standard plasters, hardwall plaster contains special aggregates that enhance its strength and impact resistance, making it up to 60% harder than traditional backing plasters. The material’s unique composition allows it to bond exceptionally well with most masonry surfaces, including bricks, blocks, and concrete, while providing excellent fire protection properties. Essential Tools and Materials Plastering trowel (stainless steel, 11-13 inch) Hawk board Mixing bucket (25L minimum) Electric paddle mixer Straight edge/darby Spirit level Scratching tool Clean water supply Hardwall plaster (approximately 11kg per square metre) Scrim tape for joints PVA bonding agent Personal protective equipment (gloves, goggles, dust mask) Surface Preparation Proper surface preparation is crucial for achieving a lasting finish with hardwall plaster. Begin by thoroughly cleaning the substrate, removing any dust, grease, or loose material. For new masonry, ensure the surface has fully cured – typically 4-6 weeks for brick and blockwork. Apply a PVA bonding agent diluted at a ratio of 5:1 (water:PVA) to control suction and improve adhesion. For areas with different background materials, apply scrim tape across joints to prevent cracking. Check wall plumbness using a spirit level and install angle beads where necessary to ensure straight corners and consistent thickness. Mixing Hardwall Plaster Achieving the correct mixing consistency is vital for successful application. Start with clean, fresh water in your mixing bucket – approximately 11-13 litres per 25kg bag of plaster. Add the plaster gradually to the water while mixing with an electric paddle mixer at medium speed. Continue mixing until you achieve a smooth, lump-free consistency similar to thick cream. The mixed plaster should be workable for approximately 45-60 minutes, so only prepare what you can use within this timeframe. Avoid remixing or adding more water to partially set plaster as this will significantly weaken the final result. Application Techniques First Coat Application The first coat, known as the scratch coat, should be applied at approximately 8mm thickness. Using your trowel and hawk, apply the plaster with firm, upward strokes, ensuring even coverage. Once the plaster begins to firm up (but before it sets), create horizontal lines across the surface using your scratching tool. These lines provide a key for the second coat to grip onto. Allow this first coat to set for approximately 2 hours before proceeding with the second coat. Second Coat Application Apply the second coat at approximately 3mm thickness while the first coat is still green (set but not fully dry). Use your trowel to achieve a flat, even surface, working in systematic sections. Once the plaster has firmed up slightly, use your straight edge to level any high spots and ensure an even surface. Finally, float the surface using a plastic float to close up any small holes and achieve a smooth finish ready for the topcoat. Common Mistakes and Troubleshooting Mixing too wet – results in weak plaster and shrinkage cracks Insufficient surface preparation – leads to poor adhesion and delamination Applying too thickly – causes slumping and extended drying times Working material that’s started to set – weakens the plaster Inadequate scratching between coats – results in poor bonding Rushing the application – leads to uneven finish and potential failures Drying and Curing Proper drying conditions are essential for achieving optimal strength and durability. Maintain good ventilation throughout the drying process but avoid direct heat or drafts which can cause rapid drying and cracking. The complete curing process typically takes 3-7 days, depending on environmental conditions. Maintain room temperature between 5-30°C during this period. In winter months, use background heating to maintain consistent temperatures rather than intense direct heat. Finishing Touches Once the hardwall plaster has fully cured, it’s ready for the application of a finish coat. Before applying the topcoat, check the surface for any imperfections and repair if necessary. Lightly dampen the surface to control suction and ensure proper bonding of the finish coat. Most commonly, a finish plaster like Multi-Finish or Thistle ProFinish is applied at approximately 2mm thickness to achieve that perfect, smooth final surface. Maintenance and Aftercare Well-applied hardwall plaster requires minimal maintenance but benefits from proper care. Allow the plaster to fully cure before decorating – typically 7-10 days minimum. Use appropriate primers before painting or wallpapering to ensure good adhesion. Address any minor damage promptly to prevent moisture ingress and deterioration. When hanging heavy items, use appropriate fixings and always locate studs or solid backing where possible. Professional Tips and Best Practices Always use clean tools and fresh water for mixing Maintain consistent room temperature during application and curing Plan your work sequence to maintain a wet edge while plastering Keep a spray bottle handy to control suction on hot days Use angle beads for perfect corners and reveals Consider using bonding agents on challenging substrates Always wear appropriate PPE, especially when mixing dry plaster Clean tools immediately after use to maintain their condition FAQ Is there a waterproof plaster for walls? Tadelakt – a natural, water repellent plaster used as a beautiful, tactile alternative to tiling in wet rooms and bathrooms. Kreidezeit Tadelakt is a polished plaster based on the original Moroccan plaster meaning ‘to rub’ or ‘knead’ in Arabic. What kind of plaster is used in bathrooms? Traditional gypsum plaster can be prone to moisture damage, and we do not recommend this product for wet areas like bathrooms. However, modern bathroom plasters, such as our Rock and Hydro plaster systems, can withstand the unique challenges of a bathroom environment. What are the three types of plaster? The most common types of plaster mainly contain either gypsum, lime, or cement, but all work in a similar way.

How to Apply Hardwall Plaster: A Complete Beginner’s Guide Read More »

bonding plaster application smooth wall

Bonding Plaster Application: How to Get Perfect Results

Transform your walls with bonding plaster – discover the professional secrets to achieving that flawless, durable finish you’ve always wanted. Understanding Bonding Plaster and Its Benefits Bonding plaster is a versatile undercoat plaster designed specifically for surfaces where standard backing plaster might not adhere effectively. With average bond strength of 385 PSI after 28 days, it’s particularly valuable for challenging surfaces like concrete and ceramic tiles. This specialised material has revolutionised modern plastering techniques, offering superior adhesion and durability compared to traditional methods. The primary advantage of bonding plaster lies in its exceptional versatility and adhesive properties. It creates a robust mechanical key that covers 300-400 square feet per gallon, ensuring excellent adhesion to virtually any structurally sound surface. Moreover, its non-toxic, low VOC formulation makes it an environmentally conscious choice for contemporary construction projects. Essential Tools and Materials Quality bonding plaster (ensure it meets ASTM C-631 standards) Plastering trowel and hawk Mixing bucket and paddle mixer Scraping tool and wire brush Spirit level and straight edge Clean water supply Safety Equipment Dust mask or respirator Safety goggles Heavy-duty gloves Protective clothing Preparing Your Surface Proper surface preparation is crucial for achieving optimal results with bonding plaster. Begin by thoroughly assessing the wall condition, looking for any structural issues, damp problems, or loose material. Clean the surface meticulously, removing all dust, grease, and loose particles. For painted surfaces, ensure they’re non-water-based, as bonding plaster is suitable for most non-water-based paints. Different surfaces require specific preparation techniques. Concrete surfaces should be roughened to provide a better key, while ceramic tiles need thorough degreasing. Check moisture levels carefully – excessive dampness can compromise the plaster’s adhesion and final finish. Mixing and Application Techniques Achieving the perfect mix consistency is crucial for successful application. Add the plaster to clean water gradually, following manufacturer’s recommended ratios strictly. Mix thoroughly until you achieve a smooth, lump-free consistency similar to thick cream. Remember that bonding plaster can be applied by brush, roller, or spray, though trowel application remains most common for professional results. Application Steps Apply first coat at approximately 8mm thickness Allow to set slightly before scratching surface Build up additional layers for depths exceeding 11mm Maintain consistent pressure during application Work in manageable sections to ensure even coverage Working with Different Surfaces Bonding plaster excels on various surfaces, each requiring specific techniques. For concrete and brick, ensure surfaces are dampened but not wet. When covering ceramic tiles, create a thorough key by scoring or roughening the surface. For electric heating cables, maintain recommended minimum coverage depths and avoid direct contact with heating elements. When joining old and new plasterwork, create a graduated transition to ensure seamless integration. Common Challenges and Solutions Even experienced plasterers encounter challenges, but understanding common issues helps prevent problems. Temperature fluctuations can affect drying times – maintain room temperature between 10-25°C during application and curing. Avoid applying in freezing conditions, though the product itself is freeze-thaw stable. If bubbling occurs, check for contamination or improper mixing. For corners and awkward areas, use smaller tools and take extra care with preparation. Finishing Touches and Aftercare Allow the bonding plaster to dry completely before applying finishing coats. Typically ready for finishing plaster within a few hours, but environmental conditions can affect drying times. Maintain good ventilation but avoid direct heat or draughts. Once dried, the surface should feel firm and exhibit a consistent colour. Test readiness by pressing firmly – no indentation should remain. Professional Tips and Expert Advice Always mix fresh batches rather than trying to rejuvenate partially-set material Work systematically from top to bottom, maintaining a wet edge Use appropriate lighting to spot imperfections during application Consider weather conditions and timing for optimal results For large areas or critical applications, consider hiring a professional Remember, while bonding plaster is more forgiving than skim plaster for novices, achieving truly professional results requires patience and practice. Don’t hesitate to seek professional help for challenging projects or when perfect results are crucial. FAQ How long does bonding plaster take to dry? How Long Does Bonding Take to Dry? Your bonding plaster will be dry and ready for a finishing coat after 24 hours. What happens if you apply plaster too thick? A thicker layer will retain more moisture, leading to a prolonged drying time. To ensure timely project completion, it’s crucial to avoid applying plaster too thick, which can lead to frustrating delays in the drying process. Can I use bonding plaster for dot and dab? Drywall Adhesive (otherwise known as Bonding Compound) is an essential component in the installation of both standard and insulated plasterboard. It serves to bond boards directly to the wall in a process known as “dot and dab”. The dot and dab method serves as an efficient alternative to studs. How thick can you apply bonding plaster? Applying the plaster Using your hawk and trowel, liberally apply the bonding plaster between the beaded areas. This can be up to one inch thick to ensure a good clean underlay, ready for the finishing plaster. What can I use instead of bonding plaster? Browning plaster is a decorative plaster that’s used as a base for paint and other decorative endeavours. It’s very similar to bonding plaster, but more absorbent, and thus most useful with more absorbent surfaces. They are used by professional plasterers as an undercoat for paint and adornments. Sources [1] https://conspecmaterials.com/product/larsen-products-plaster-weld-plaster-bonding-agent-1-gal/ [2] https://paintandplasters.com/plaster-weld/ [3] https://www.youtube.com/watch?v=S6i5VxKQ-i8

Bonding Plaster Application: How to Get Perfect Results Read More »

plaster of paris workshop tools

How to Use Plaster of Paris: DIY Guide

Master the art of working with plaster of paris and unlock a world of creative possibilities with our expert guide to achieving flawless, professional-grade finishes every time. Understanding Plaster of Paris Plaster of Paris, a versatile building material with a rich history dating back to ancient civilizations, is essentially a fine white powder composed primarily of calcium sulfate hemihydrate. When mixed with water, it undergoes a fascinating chemical reaction, transforming into a workable paste that sets and hardens into a durable solid form. This remarkable material derives its name from the abundant gypsum deposits near Paris, France, where it was extensively quarried and processed. What makes plaster of paris particularly valuable for DIY enthusiasts and professionals alike is its unique setting properties. The material typically begins to set within 10 minutes of mixing and achieves full hardness in approximately 45 minutes. During this process, it undergoes a slight expansion before contracting, which helps it capture intricate details in moulds and ensures a tight, secure fit in various applications. Essential Tools and Safety Equipment Mixing Tools: Large mixing bucket, measuring cups, mixing stick or electric mixer Application Tools: Trowels (various sizes), spatulas, smoothing tools Safety Gear: Dust mask or respirator, protective goggles, rubber gloves Workspace Protection: Drop cloths, masking tape, plastic sheeting Additional Equipment: Clean water supply, timer, sandpaper (various grits) Mixing Plaster of Paris Perfectly Achieving the perfect mix is crucial for successful plaster work. The ideal water-to-plaster ratio is typically 2:3 (two parts water to three parts plaster), though this may vary slightly depending on your specific application. Begin by pouring the measured water into your mixing container first, then gradually add the plaster while stirring continuously. This method helps prevent lumps and ensures even distribution. Mix until you achieve a smooth, creamy consistency similar to thick cream. Remember, once the mixing begins, work quickly as you typically have just 10 minutes before the mixture starts to set. Application Techniques and Tips Successful application of plaster of paris requires both skill and timing. Start by thoroughly preparing your surface – it should be clean, dry, and free from dust or debris. For best results, slightly dampen the surface before application, as this helps with adhesion. Apply the plaster using smooth, consistent strokes, working in small sections to ensure even coverage. Maintain a thickness of approximately 1/2 inch for optimal strength and durability. For detailed work or mouldings, ensure all crevices are filled completely to avoid air pockets. Common Projects and Applications Decorative Mouldings: Create custom cornices, ceiling roses, and architectural details Repair Work: Fix holes, cracks, and damage in walls and ceilings Artistic Projects: Craft sculptures, decorative pieces, and craft items Surface Finishing: Create smooth surfaces for painting and decoration Casting: Make detailed moulds and replicas of objects Troubleshooting and Problem Solving Common issues when working with plaster of paris include bubbles, cracks, and uneven setting. To prevent bubbles, tap your mould gently during pouring and avoid overworking the mixture. Cracks typically occur due to rapid drying – control this by maintaining moderate room temperature and humidity levels during setting. If you experience uneven setting, check your mixing ratio and ensure thorough mixing before application. Remember that room temperature should be between 13-21°C (55-70°F) for optimal results. Advanced Techniques and Special Effects Once you’ve mastered the basics, explore advanced techniques to create unique finishes. Consider adding mineral pigments for coloured plaster, or experiment with textured finishes using specialised tools. For increased strength in structural applications, you can mix plaster of paris with Portland cement in a 1:5 ratio. Create marbling effects by adding different coloured plasters, or achieve antiqued finishes by applying tinted washes after the plaster has fully cured. Maintenance and Care Allow plaster to fully cure for at least 72 hours before painting or sealing Use appropriate sealers for areas exposed to moisture Clean surfaces regularly with a soft, dry cloth Avoid harsh cleaning chemicals that may damage the finish Address any damage promptly to prevent deterioration Environment and Safety Considerations Working with plaster of paris requires proper ventilation and safety precautions. The material can reach temperatures exceeding 60°C while setting, and dust inhalation can pose health risks. Always work in a well-ventilated area and wear appropriate protective gear. Dispose of unused plaster properly – never pour it down drains as it can harden and cause blockages. Ensure your workspace maintains humidity levels between 40-60% for optimal results. Professional Tips and Best Practices Always mix fresh batches rather than trying to reuse partially set plaster Keep tools clean and wash them immediately after use Work in manageable sections appropriate to setting time Store plaster in an airtight container in a dry place Practice on small projects before attempting larger ones Document your mixing ratios and techniques for consistency FAQ Is plaster of Paris as strong as concrete? Plaster of Paris is less durable than cement. It is not the ideal choice for load-bearing or exterior works. It is best used for interior projects where it won’t be exposed to moisture or heavy wear. It gives a smooth and pretty finish. What is better than plaster of Paris? UCAST is more breathable and lighter than fiberglass and Plaster of Paris casts, which makes it more comfortable for the patient. Another important component of a comfortable cast is the fit: Plaster of Paris might win here but loses on overall wearability. How long does plaster of paris take to harden? The plaster will take anywhere between 3 hours and 3 days to fully cure, but it’s typically dry enough to remove from the mould in 30min-1hr. It’s a good idea to let it finish setting outside of the mould to speed up the process. Sources [1] https://en.wikipedia.org/wiki/Plaster [2] https://www.britannica.com/technology/plaster-of-paris [3] https://www.dap.com/products-projects/product-categories/patch-repair/plaster-stucco/plaster-of-paris/

How to Use Plaster of Paris: DIY Guide Read More »