FC Barcelona Stadium Return in 2024? Analysis
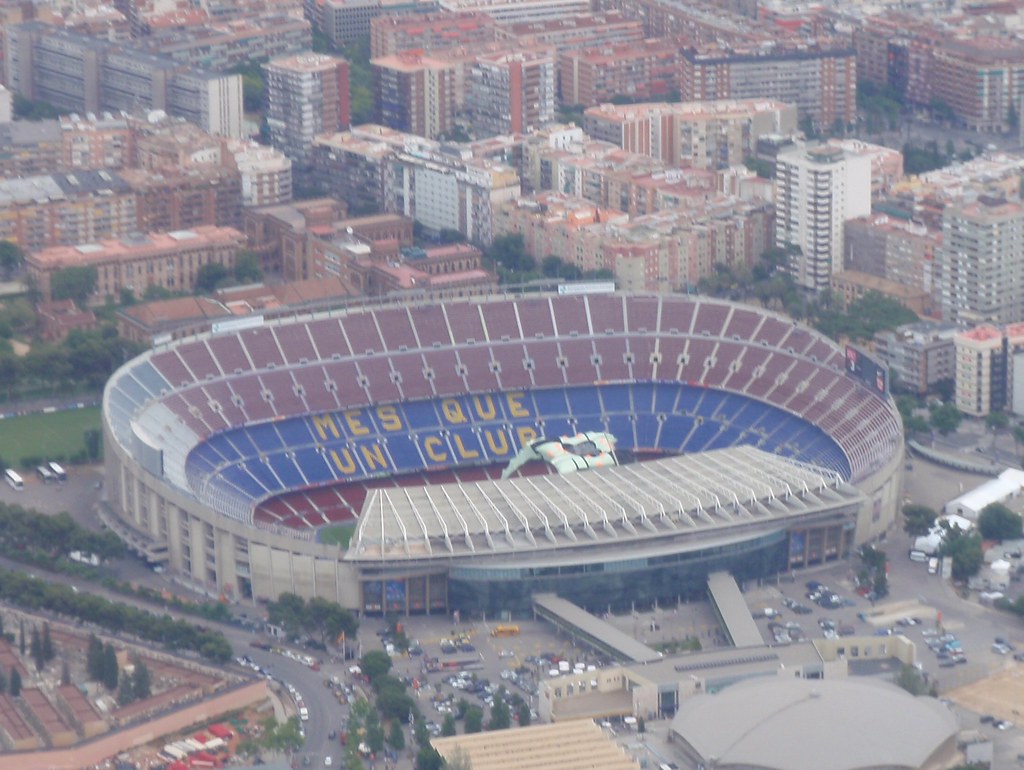
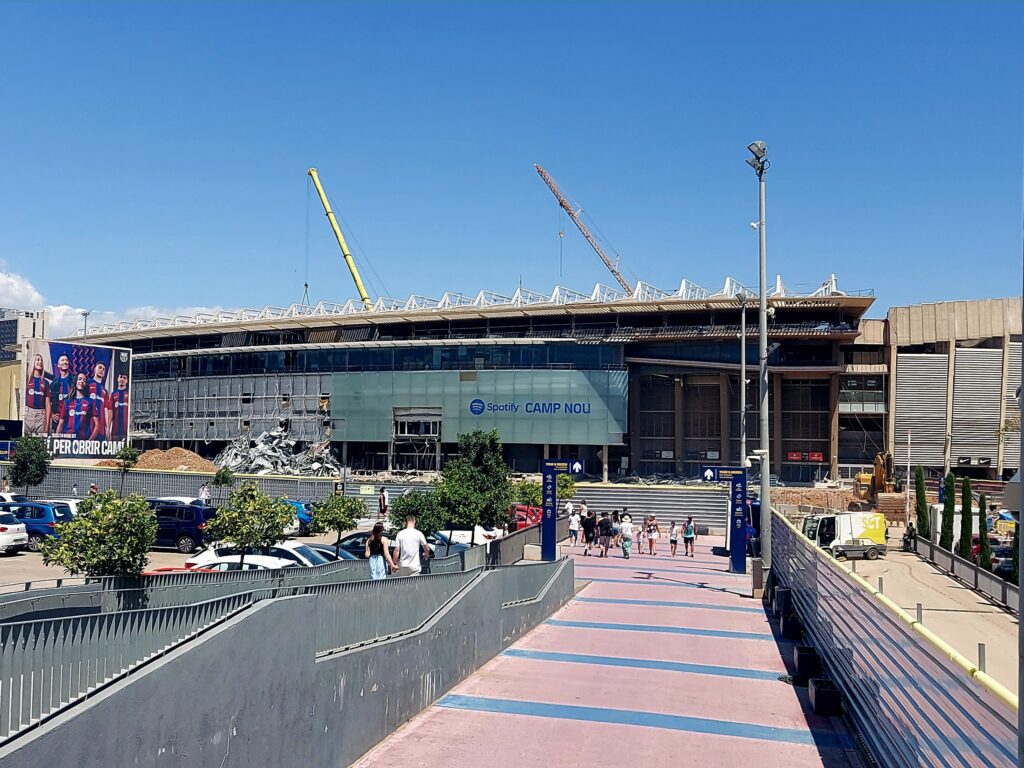
As FC Barcelona prepares for their iconic stadium’s grand return in late 2024, discover the stunning transformation that awaits this legendary venue. Barcelona’s Original Return Timeline When FC Barcelona initially unveiled their ambitious renovation plans for the Spotify Camp Nou, the club set an optimistic target for completion by the end of 2024. This timeline was established as part of a comprehensive modernisation project aimed at transforming their historic home into one of the world’s most advanced sporting venues. The original schedule was meticulously planned around the club’s competitive calendar, with construction work strategically phased to minimise disruption to match days. The €1.5 billion project represented one of the most significant stadium renovations in football history, promising to blend the venue’s iconic heritage with cutting-edge facilities and technology. Current Status: Construction Reality Check Material Shortages: Global supply chain disruptions have significantly impacted the availability of crucial construction materials, particularly specialised steel components and advanced electronic systems. Labour Challenges: A shortage of qualified workers, especially those with expertise in modern stadium construction, has slowed progress in key areas. Structural Complexities: Engineers discovered additional structural requirements during the renovation process, necessitating extensive redesigns and additional work. Weather Delays: Adverse weather conditions during crucial construction phases have contributed to the timeline extension. The New Timeline: September 2025 Return The revised completion date has been set for early September 2025, marking a significant shift from the original plans. This new timeline reflects a more realistic assessment of the project’s complexities and challenges. Recent progress has been encouraging, with the pitch installation completed in April 2025, representing a crucial milestone in the stadium’s transformation. The club has adopted a phased approach to the opening, ensuring that essential facilities and safety measures are fully operational before welcoming fans back to their beloved home ground. The construction team is now working at maximum capacity, with round-the-clock operations to meet the new deadline. What to Expect at the New Spotify Camp Nou Initial Capacity: Stadium attendance will be limited to 60,000 spectators during the first phase of reopening Modern Amenities: State-of-the-art facilities including enhanced hospitality areas and premium seating options Sustainable Features: Solar panels, water recycling systems, and energy-efficient lighting throughout the venue Digital Integration: Advanced WiFi infrastructure and mobile app integration for an enhanced matchday experience Improved Access: New entrance points and circulation areas to reduce congestion and improve crowd flow Impact on Barcelona’s 2024/25 Season The extended construction period has forced Barcelona to continue playing their home matches at the Olympic Stadium throughout the 2024/25 season. This temporary arrangement, while necessary, has had significant implications for both the club and its supporters. The reduced capacity at the Olympic Stadium has impacted matchday revenues, with estimates suggesting a €50 million reduction in annual income compared to normal operations at Camp Nou. However, the club has implemented various initiatives to maintain the atmosphere and supporter experience during this transitional period. Looking Ahead: The Complete Vision The full completion of the Spotify Camp Nou, scheduled for summer 2026, promises to deliver a venue that sets new standards in football stadium design and functionality. The finished project will feature a capacity of over 105,000 spectators, making it Europe’s largest football stadium. The comprehensive renovation includes significant improvements to the surrounding area, creating a sports and entertainment district that will benefit both the club and the local community. The project represents a €1.5 billion investment in Barcelona’s future, ensuring the club remains at the forefront of world football for generations to come. Expert Verdict: Was the Delay Inevitable? Industry Perspective: Construction experts suggest that the initial timeline was optimistic given the project’s scale and complexity Comparative Analysis: Similar stadium renovations in Europe typically require 3-4 years for completion Risk Assessment: The combination of global supply chain issues and local construction challenges made delays virtually unavoidable Future Planning: The experience has provided valuable lessons for other clubs planning major stadium renovations While the delay in returning to the Spotify Camp Nou may disappoint supporters, the extended timeline ensures that the finished venue will meet the highest standards of quality and safety. The wait will be worthwhile, delivering a stadium that honours Barcelona’s illustrious history while embracing the future of football. Sources [1] https://www.fcbarcelona.com/en/card/4213940/the-spotify-camp-nou-is-progressing-in-its-construction-with-new-challenges-and-milestones-achieved [2] https://www.espn.com/soccer/story/_/id/43452924/barcelona-confirm-camp-nou-return-not-may [3] https://www.90min.com/barcelona-final-camp-nou-return-decision
FC Barcelona Stadium Return in 2024? Analysis Read More »