
Learn to Paint Plaster Walls Like a Pro
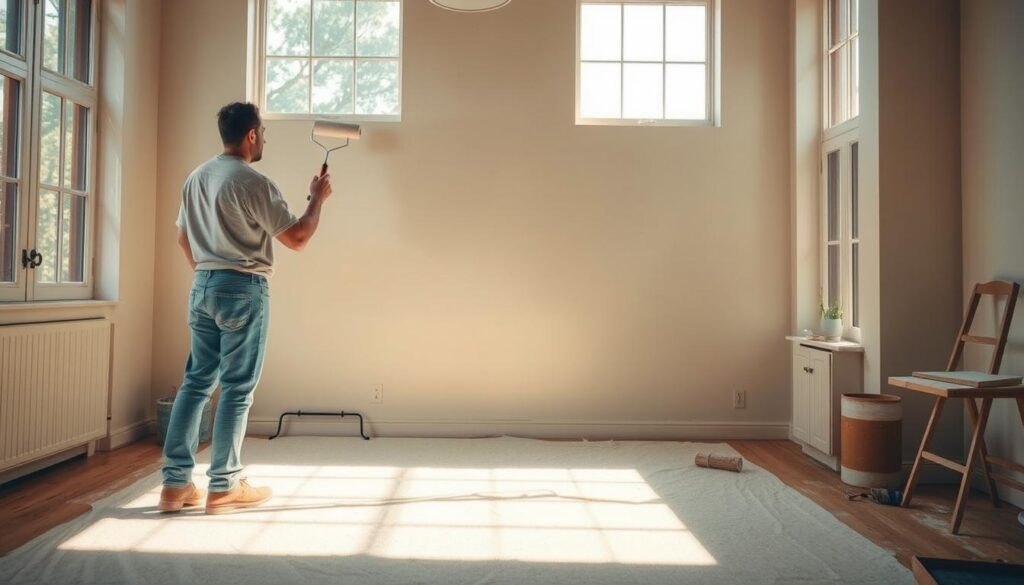
Transforming your home with a fresh coat of colour can be incredibly rewarding. However, when it comes to plaster walls, the process requires careful preparation and the right techniques to achieve a flawless finish. Many homeowners overlook the importance of understanding the unique needs of new plaster, which can lead to peeling, cracking, or uneven results. We’ve all been there—excited to refresh a room, only to realise that the wall isn’t ready for the final coat. For instance, applying a mist coat is essential to ensure the plaster absorbs the paint properly. This step, often skipped, can make all the difference in achieving a durable and professional look. Wet plaster can take up to four weeks to dry completely, so patience is key1. Our guide will walk you through the safest and most effective methods for painting plaster walls and ceilings. From selecting the right materials to mastering the techniques, we’ll ensure your project is a success. If you have any questions, feel free to reach out to Kent Plasterers for expert advice. Key Takeaways New plaster requires a mist coat to ensure proper paint absorption. Allow plaster to dry completely, which can take up to four weeks1. Use water-based emulsion to let the plaster ‘breathe’ and release moisture. Proper preparation prevents common issues like peeling and cracking. Follow a detailed guide for a smooth and durable finish. Understanding the Basics of Painting Plaster Achieving a flawless finish on plaster walls starts with understanding the basics. New plaster is porous and requires special treatment to ensure paint adheres properly. Skipping essential steps can lead to peeling, cracking, or uneven results. Why New Plaster Requires Special Treatment New plaster is highly absorbent, which means it can soak up paint quickly, leading to an uneven finish. To prevent this, a mist coat is essential. This diluted mixture of emulsion and water seals the surface, allowing subsequent layers to adhere smoothly. Without it, the paint may peel or require additional coats2. As plaster dries, it changes from a darker shade to a pale pink tone, indicating it’s ready for painting. This process can take up to four weeks, depending on environmental conditions3. Patience is key to ensuring the surface is fully prepared. Essential Tools and Materials To achieve professional results, you’ll need the right tools and materials. Here’s a list of essentials: Water-based emulsion paint: This allows the plaster to ‘breathe’ and release moisture effectively. Paintbrush or roller: A brush provides precision, while a roller covers larger areas quickly3. Fine grit sandpaper: Use this to smooth the surface before applying the mist coat4. “A mist coat is the foundation of a durable and even finish. Skipping this step can lead to costly mistakes.” Mixing the correct ratio of water and emulsion is crucial. Typically, a mist coat consists of three parts emulsion to one part water3. This ensures the mixture is thin enough to penetrate the plaster without compromising adhesion. If you have any questions or need further guidance, feel free to contact us at Kent Plasterers. We’re here to help you achieve the best results for your project. Preparing New Plaster Surfaces for Painting Proper preparation of new plaster surfaces ensures a smooth and lasting finish. Rushing this stage can lead to common issues like peeling or uneven coverage. We’ll guide you through the essential steps to get your walls ready for a flawless result. Allowing Adequate Drying Time New plaster requires sufficient time to dry before any work begins. Rushing this process can cause moisture to become trapped, leading to adhesion problems later. We recommend waiting at least one week, though thicker plaster may need up to four weeks to dry completely5. Visual signs of readiness include a uniform light colour and the absence of damp patches. These indicators ensure the surface is fully prepared for the next steps. Patience here is key to avoiding costly mistakes6. Setting Up with Dust Sheets and Masking Tape Protecting your work area is crucial for a hassle-free process. Lay down dust sheets to shield floors and furniture from spills or debris. Carefully apply masking tape to fixtures like skirting boards and window frames to ensure clean edges. This preparation not only keeps the area tidy but also reduces the risk of accidental damage. A well-organised workspace ensures the process flows smoothly in subsequent stages. Step Details Drying Time Wait at least one week, up to four weeks for thicker plaster5. Visual Check Look for a uniform light colour and no damp patches6. Protection Use dust sheets and masking tape to safeguard the area. By following these steps, you’ll create a solid foundation for a professional finish. If you have any further questions, feel free to contact us at Kent Plasterers for expert advice. Mixing and Applying a Mist Coat Effectively Creating a flawless finish on plaster walls begins with mastering the mist coat application. This crucial step ensures the plaster absorbs the paint properly, preventing issues like peeling or uneven coverage. A well-mixed mist coat acts as the foundation for a durable and professional finish. Mixing the Right Mist Coat Ratio To achieve the correct consistency, mix two parts emulsion with one part water7. This ratio ensures the mist coat is thin enough to penetrate the plaster without compromising adhesion. A properly mixed mist coat should have a consistency similar to thin cream8. If the mixture is too thin, it may drip and run; if too thick, the plaster won’t absorb it effectively7. Always follow the manufacturer’s guidance to ensure the best results. Using a primer can be an alternative for those who prefer to skip the mixing process9. Choosing Between Roller and Paintbrush When applying the mist coat, you can use either a roller or a paintbrush. A roller speeds up the process, especially for larger areas, but it may cause splatter. A brush, on the other hand, offers precision, particularly along edges and corners9. For even coverage, use smooth, continuous strokes. This technique helps avoid drips and ensures the mist coat
Learn to Paint Plaster Walls Like a Pro Read More »