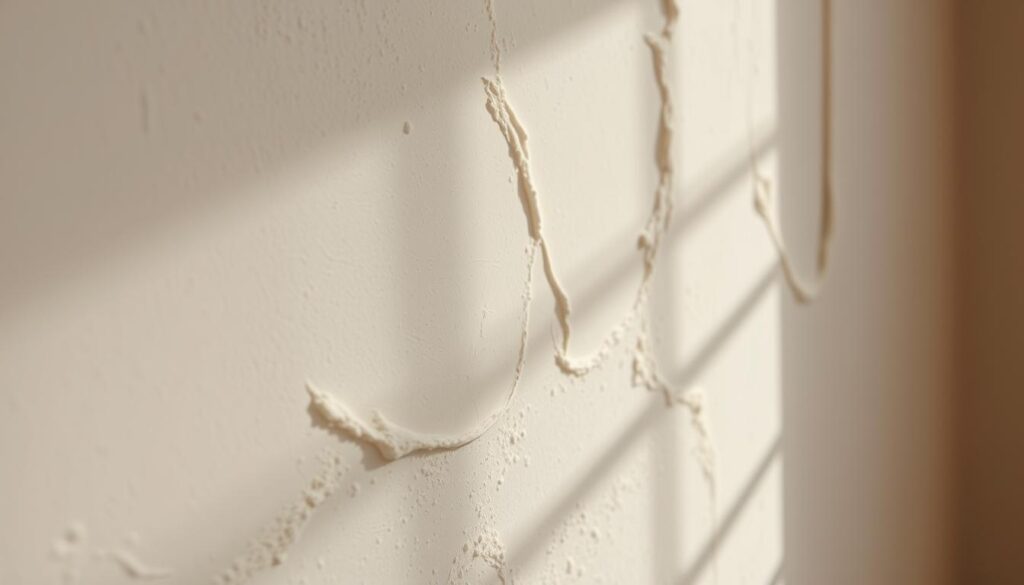
Plaster drying time

Plaster Not Drying? Common Causes and What to Do

Plaster Not Drying? Common Causes and What to Do

Quick Answer: Plaster typically takes 2-7 days to dry completely, but excessive moisture, poor ventilation, cold temperatures, or underlying damp issues can significantly extend drying times. If your plaster isn’t drying after a week, you likely have condensation buildup, inadequate airflow, or hidden moisture problems. The solution involves improving ventilation, using dehumidifiers, and addressing any damp sources before the plaster develops mould or structural issues. Walking into a newly plastered room expecting to see the characteristic darker patches fading to a uniform pale pink, only to find the walls still dark and damp after several days, is frustrating for homeowners and professionals alike. Slow-drying plaster isn’t just an inconvenience—it can lead to mould growth, paint adhesion problems, and even structural damage if left unchecked. Having worked on hundreds of plastering projects across Kent, I’ve seen every variation of drying problems imaginable. From Victorian terraces with hidden damp to modern new builds with inadequate ventilation, the causes are varied but the solutions follow predictable patterns. This guide explains exactly why your plaster isn’t drying and what you need to do about it. Understanding Normal Plaster Drying Times Before diagnosing problems, you need to understand what “normal” looks like. Different plaster types dry at different rates, and environmental factors play a massive role. Plaster Type Touch Dry Complete Dry Ready to Paint Multi-finish/Board finish 2-4 hours 2-3 days 4-6 days Bonding/Browning 3-6 hours 5-7 days 7-14 days One-coat plaster 4-8 hours 3-5 days 5-7 days Lime plaster 12-24 hours 14-28 days 4-8 weeks Clay plaster 8-12 hours 7-14 days 14-21 days These timings assume ideal conditions: room temperature 15-20°C, relative humidity 40-60%, and adequate ventilation. In reality, UK homes rarely provide these conditions, especially during winter months. For more detail on standard drying expectations, see our comprehensive guide on how long plaster takes to dry. Common Causes of Slow-Drying Plaster 1. Poor Ventilation and Air Circulation This is the number one cause I encounter on jobs. Plaster releases approximately 1 litre of water per square metre as it dries—that moisture needs somewhere to go. Closed windows and doors trap moisture-laden air in the room No cross-ventilation prevents air circulation that carries moisture away Sealed modern homes with triple glazing and draught-proofing create near-airtight conditions Rooms without windows (bathrooms, hallways) struggle without mechanical ventilation Modern building regulations focus heavily on airtightness for energy efficiency, but this works against plaster drying. The Building Regulations Approved Document F specifies minimum ventilation rates, but these aren’t always sufficient during the high-moisture phase immediately after plastering. 2. High Humidity and Condensation When relative humidity exceeds 70%, plaster drying slows dramatically. Above 80%, it can virtually stop. Seasonal factors: Autumn and winter in the UK regularly see humidity above 80% Condensation on surfaces indicates the air cannot hold more moisture Other wet trades happening simultaneously (screeding, rendering) add moisture Nearby bathrooms or kitchens generating steam without proper extraction I’ve seen jobs in November where plaster took three times longer to dry than the same work done in July, purely due to ambient humidity levels. 3. Low Temperatures Cold temperatures drastically reduce the evaporation rate. The relationship isn’t linear—at 5°C, plaster dries at roughly one-third the rate it would at 20°C. Room Temperature Effect on Drying Typical Drying Time (2mm skim) Below 5°C Severely impaired 7-10+ days 5-10°C Significantly slowed 4-6 days 10-15°C Moderately slowed 3-4 days 15-20°C Normal/optimal 2-3 days Above 25°C Too fast (cracking risk) 1-2 days Working in unheated new builds during winter is particularly challenging. Without central heating installed, temperatures can drop below 5°C overnight, effectively halting the drying process. ⚠️ Warning: Never use direct heat sources like blow heaters aimed at fresh plaster. This causes rapid surface drying while the interior remains wet, leading to cracking, crazing, and delamination. Gentle, ambient heating is far more effective. 4. Underlying Damp Issues If plaster isn’t drying after 7-10 days in normal conditions, suspect a moisture source behind the plaster: Rising damp from failed or absent damp-proof courses (DPC) Penetrating damp from external wall defects, missing pointing, or damaged render Condensation damp from inadequate ventilation over extended periods Leaking pipes or radiator valves within walls Roof leaks allowing water ingress from above Wet substrates that weren’t allowed to dry before plastering British Gypsum’s technical guidance specifies that substrates should have moisture content below 5% before plastering. Testing with a moisture meter prevents these problems, but it’s often skipped on rushed jobs. The Property Care Association provides excellent resources on identifying and treating different damp types in UK properties. 5. Thick Application or Multiple Coats Plaster thickness dramatically affects drying time. A 2mm skim coat might dry in 48 hours, while a 15mm bonding coat can take two weeks. Excessive thickness applied to correct badly out-of-plumb walls Multiple coat systems where base coats haven’t fully dried Dubbing out deep holes or chases with thick patches Uneven application creating thick and thin areas that dry at different rates Professional plasterers aim for consistent 2-3mm skim coats and no more than 12-15mm on backing coats. For detailed techniques on achieving proper thickness, see our guide on skimming plaster. 6. Poor Suction Control Paradoxically, substrates that are too absorbent or not absorbent enough both cause problems: High-suction backgrounds (old plaster, concrete blocks) suck moisture from the plaster too quickly, causing premature drying at the surface while the interior stays wet Low-suction backgrounds (painted surfaces, engineering bricks) don’t allow proper mechanical key, trapping moisture Inconsistent suction across patched areas creates differential drying patterns This is why PVA bonding agents (Blue Grit, Unibond) are used—they normalise suction rates. However, overly thick PVA coats can actually seal the surface and prevent drying. 7. Wrong Plaster Type for Substrate Using plaster formulations incompatible with the background creates drying issues: Gypsum plasters on lime-based backgrounds suffer from sulphate attack Standard plasters on waterproof boards (aquaboard, cement board) don’t key properly Sand/cement renders under gypsum finishing plasters without proper bonding Board finish on solid walls or browning on plasterboard The British Gypsum technical department provides substrate-specific

Plaster Not Drying? Common Causes and What to Do Read More »
How Long Does It Take for Plaster to Dry? Complete Drying Times Guide

How Long Does It Take for Plaster to Dry? Complete Drying Times Guide

Quick Answer: Gypsum plaster (skim coat) typically takes 2-3 days to dry enough for painting, with full cure in 7-14 days. Bonding coat requires 24-48 hours before skimming. However, drying times vary significantly based on plaster type, thickness, temperature, humidity and ventilation. Rushing the process can lead to cracking, poor paint adhesion and moisture problems. Understanding Plaster Drying vs Curing Before we dive into specific timings, it’s crucial to understand that plaster goes through two distinct phases: drying and curing. Drying is when the water evaporates from the plaster mix, transforming it from a workable paste to a solid surface. This is the phase most people refer to when asking “how long does plaster take to dry?” Curing is a chemical process where the plaster continues to harden and reach its full strength. According to British Gypsum’s technical literature, gypsum plasters continue curing for weeks after initial drying, though the surface becomes decorable much sooner. The visible sign of drying is the colour change. Wet plaster appears dark and sometimes patchy. As it dries, it lightens to a uniform pale pink or off-white, depending on the product. When the entire surface has turned light with no dark patches remaining, it’s surface dry—but not necessarily ready for decoration. Plaster Drying Times by Type Different plaster types have dramatically different drying characteristics. Here’s what professional plasterers work with daily: Plaster Type Initial Drying Ready for Next Coat Ready to Paint Full Cure Multi-finish (skim) 1-2 hours N/A (final coat) 2-3 days 7-14 days Bonding coat 2-3 hours 24-48 hours N/A (needs skim) 3-7 days Hardwall/Browning 3-4 hours 48-72 hours N/A (needs skim) 5-10 days Thistle Unicoat 4-6 hours N/A (one coat) 3-5 days 7-14 days Lime plaster 8-12 hours 3-7 days 4-6 weeks 6-12 months Plaster of Paris 20-30 minutes N/A 24 hours 2-3 days These timings assume standard conditions: room temperature around 15-20°C, moderate humidity (40-60%), and reasonable ventilation. Real-world conditions often differ significantly. Factors That Affect Plaster Drying Time Professional plasterers know that published drying times are guidelines, not guarantees. Multiple environmental and application factors influence actual drying: Temperature Optimal temperature for plaster drying is 15-20°C. Below 10°C, drying slows considerably, and frost can damage wet plaster irreparably. Above 25°C, plaster can dry too quickly, leading to surface crazing and weak spots. In winter months, we often see jobs take 50-100% longer than summer applications. A skim coat that would dry in 48 hours in July might need 4-5 days in January, especially in unheated properties. Humidity and Moisture Content High humidity is plaster’s enemy. When relative humidity exceeds 70%, evaporation slows dramatically. In poorly ventilated bathrooms or kitchens, we’ve seen plaster take twice as long to dry. The Building Regulations Approved Document F sets minimum ventilation standards partly to prevent prolonged moisture problems that affect finishes like plaster. Substrate moisture: Plasterboard typically contains minimal moisture, allowing faster drying than brick or blockwork New builds: Construction moisture from concrete, screeds and blockwork can extend drying times by days or weeks Water damage: If you’re replastering after water damage, ensure walls are fully dried first External walls: Ground-floor walls can draw moisture from the ground if DPC is compromised Ventilation and Air Movement Good airflow is essential for efficient drying. Opening windows (avoiding direct draughts on wet plaster) and using dehumidifiers can halve drying times in many cases. However, forced-air heating or fans blowing directly onto fresh plaster causes rapid surface drying whilst the interior remains wet—a recipe for cracking and delamination. Pro Tip: Use a dehumidifier set to 50-55% humidity rather than opening windows in cold weather. This removes moisture without dropping temperature, maintaining optimal drying conditions. Position it centrally in the room, not aimed at the walls. Plaster Thickness Thickness has a nonlinear relationship with drying time. A 2mm skim coat dries in 2-3 days, but a 10mm coat doesn’t take five times longer—it can take 7-10 days because moisture from deeper layers must migrate through the surface. This is why proper skimming technique emphasises thin, even coats of 2-3mm rather than single thick applications. Number of Coats Each coat adds cumulative drying time: Bonding + skim: Bonding needs 24-48 hours before applying the skim coat, then add 2-3 days for the skim = 3-5 days minimum Browning + skim: Browning requires 48-72 hours, plus skim time = 4-6 days minimum Two-coat lime work: First coat 7-10 days, second coat 3-4 weeks = 5-6 weeks total before painting How to Tell When Plaster Is Dry Visual inspection is the primary method, but it’s not foolproof. Here’s what professional plasterers look for: Colour Change Method The most reliable indicator for gypsum plasters. Wet plaster appears darker, often with a slightly glossy surface. As it dries, it lightens progressively from the thinnest areas and edges. Full surface dryness occurs when the entire wall shows uniform light colour with no dark patches. Even small dark spots indicate trapped moisture that needs more time. Touch Test Dry plaster feels cool to the touch but not cold or damp. Press your palm against the surface for 10 seconds—if moisture appears on your hand or the wall feels noticeably cold, it’s still drying. However, plaster can feel dry to touch whilst still containing significant moisture below the surface, particularly in thick applications. Moisture Meter Testing Professional decorators and plasterers use capacitance moisture meters for accurate readings. British Gypsum recommends plaster should be below 1% moisture content before decoration. Meters designed for timber won’t give accurate readings on plaster—you need a meter calibrated for gypsum or masonry materials. Expect to pay £80-£200 for a reliable model from Protimeter, Tramex or similar manufacturers. ⚠️ Warning: Never apply mist coat or paint to plaster that shows any dark patches or feels cool/damp. Trapped moisture will cause paint failure, efflorescence, and potential mould growth. In cold weather, allow an extra 24-48 hours beyond visual dryness. Drying Times for Common Plastering Jobs Here’s what to expect for typical domestic projects in 2026: Single Room Re-skim A standard 4m x

How Long Does It Take for Plaster to Dry? Complete Drying Times Guide Read More »

how long does plaster take to dry

How Long Does Plaster Take to Dry? Get the Answer Here

Quick Answer: Plaster typically takes 24-48 hours to become touch-dry, but requires 5-7 days minimum before painting (with a mist coat), and 14-21 days to fully cure. The exact timing depends on temperature (ideal: 18-25°C), humidity (aim for 40-60%), plaster thickness, and substrate type. Never rush—painting too early causes blistering, cracking, and paint failure. Ever wondered why your freshly plastered wall seems dry to the touch but still feels damp underneath? Understanding the drying process of plaster is crucial for achieving a flawless finish. While it may appear dry within hours, the reality is more nuanced. Plaster drying involves two key stages: touch-dry and fully cured. Each stage requires patience to avoid issues like cracking or paint flaking later on. Factors such as thickness, temperature, and humidity play a significant role in drying times. For instance, thinner layers dry faster than thicker ones, and higher temperatures can speed up the process according to industry drying studies. However, rushing the process can lead to problems like shrinkage or brittleness, especially in hot weather according to professional plastering guidance. On the other hand, cold weather may extend drying times but allows for better curing. In 2026, advanced plastering materials and application techniques have refined the drying process, but the fundamental principles remain unchanged. Modern gypsum-based plasters now incorporate improved bonding agents that enhance moisture management while maintaining traditional drying timelines. According to the Construction Products Association, understanding these properties is essential for both DIY enthusiasts and professional tradespeople working in the UK construction sector. If you’re unsure about the drying stages or need advice, don’t hesitate to contact Kent Plasterers. We’re here to help you achieve the best results for your project. Key Takeaways Touch-dry in 24-48 hours, decoration-ready in 5-7 days, fully cured in 14-21 days Thinner applications dry faster than thick basecoats (2-3mm vs 10-15mm) Ideal conditions: 18-25°C temperature, 40-60% humidity, good ventilation Different plaster types have varying drying times—gypsum faster than lime Never rush drying—causes cracking, shrinkage, paint adhesion failures Visual check: Uniform pale pink colour indicates readiness 2026 best practice: Confirm dryness with moisture meter readings below 0.5% For expert advice, contact Kent Plasterers Understanding the Plaster Drying Process Plastering a wall involves more than just applying a smooth finish—it’s a meticulous process that requires attention to detail and technical understanding. Whether you’re working on a small repair or a large project, understanding the stages from application to drying is essential for achieving a professional result. The chemical reaction between gypsum and water during plaster application, known as hydration, determines how the material sets and subsequently dries. This process involves three distinct phases: setting, drying, and curing. Overview of Plaster Application The plastering process typically begins with an undercoat, which provides a solid base for the finishing layer. Modern practice often involves applying a first coat of plaster that bonds properly to the substrate, whether it’s masonry, blockwork, or plasterboard. Each layer has distinct setting and curing times, influenced by factors like material type and environmental conditions according to construction equipment suppliers. Standard application thicknesses in 2026: Basecoats: 10-15mm thickness on masonry/blockwork Finishing coats: 2-3mm thickness for smooth surfaces Patch repairs: Match existing plaster depth Plasterboard skim: 2mm minimum coverage For instance, thicker applications may take longer to dry compared to thinner ones according to home improvement cost guides. The Building Research Establishment confirms that proper application techniques significantly reduce the risk of future defects such as cracking or delamination. Once the undercoat is applied, a finishing plaster is added to create a smooth, even surface. This stage is crucial for achieving the desired aesthetic and ensuring the wall is ready for paint or other decorative finishes. Pro Tip: The British Gypsum technical guidance, updated for 2026, recommends specific application thicknesses based on substrate type to optimize both drying time and structural performance. Always consult manufacturer data sheets before starting work. Stages from Application to Drying From the moment plaster is applied, it undergoes several distinct stages before it’s considered fully dry. The three phases of plaster drying: Phase Timeframe What Happens Key Indicators Setting 1-2 hours Chemical reaction between gypsum and water creates solid crystals Plaster firms up, becomes unworkable Drying 24-48 hours Excess water evaporates from plaster surface Touch-dry, colour lightens from dark to pale pink Curing 5-21 days Deep moisture release, plaster reaches full mechanical strength Uniform pale pink colour, cool sensation gone Initially, the surface may appear ready for decorating, but this is often just the touch-dry stage. Curing, which ensures the plaster reaches its full strength, continues beneath the surface according to indoor air quality specialists. During this period, the plaster releases moisture through evaporation, a process that must occur gradually for optimal results. Ambient temperature and humidity levels play a significant role in this process. For example, ideal conditions include a temperature range of 18 to 25 degrees Celsius and humidity levels around 40-60% according to construction drying standards. These factors help ensure even drying and prevent issues like cracking or brittleness. In the UK climate, seasonal variations significantly impact drying times: Summer applications: 5-7 days typical drying time Winter applications: 10-21 days or longer Spring/Autumn: 7-14 days depending on conditions Coastal areas: Add 2-5 days due to higher humidity Research from the UCL Bartlett School of Architecture indicates that moisture meters can provide accurate readings to determine when plaster has reached acceptable moisture content levels for decoration. Professional plasterers in 2026 increasingly use digital moisture meters that provide percentage readings, with levels below 0.5% moisture content generally considered suitable for painting. If you’re unsure about any stage of the plastering process, our team at Kent Plasterers is here to provide expert advice. We’ll guide you through each step to ensure your project is a success. Factors Influencing Drying Time The drying process of plaster is influenced by several key factors that interact in complex ways. Understanding these elements can help ensure a smooth and durable finish. From environmental conditions to material choices, each factor plays a crucial role in determining

How Long Does Plaster Take to Dry? Get the Answer Here Read More »