
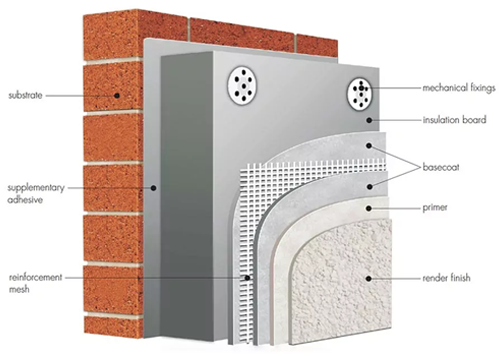
To render a brick wall, clean and repair the brickwork, dampen it, then trowel on a scratch coat mixed at 4 parts sand to 1 part cement with plasticiser to about 10mm. Score it, leave it 24 to 48 hours, then apply a weaker 5:1 top coat at about 8mm and float it flat. Most house walls take two to three days including curing time.
Key facts
- Scratch coat mix: 4:1 sand to cement with plasticiser, applied at about 10mm
- Top coat mix: 5:1, applied at about 8mm once the scratch coat has set for 24 to 48 hours
- Total render thickness: 15 to 20mm over two coats
- Never use PVA outside; dampen the wall or use an SBR slurry instead
- A well-applied sand and cement render lasts 20 to 30 years
What does rendering brickwork involve?
Rendering brickwork means covering the face of the wall with a sand and cement mix, sometimes with lime added, to give it a protective and weatherproof skin. It shields the brick from rain and frost, adds a small amount of insulation, and tidies up tired or mismatched brickwork with a surface you can paint.
This guide covers brick specifically. For blockwork or previously rendered surfaces, see our guide on how to render a wall. If you are pricing the job up first, our breakdown of rendering costs in the UK covers what plasterers charge per square metre.
What render mix ratio should you use for a brick wall?
Mix the scratch coat at 4 parts plastering sand to 1 part cement, with plasticiser added to the mixing water. The top coat should be slightly weaker, at 5:1, so it cannot crack the coat beneath it as it dries. On older, softer brick, use a 6:1:1 sand, cement and lime mix instead, which breathes and moves better.
| Coat | Mix ratio | Thickness | Notes |
|---|---|---|---|
| Scratch coat | 4:1 sand to cement, plus plasticiser | About 10mm | Score with a scratch comb; add waterproofer on exposed walls |
| Top coat | 5:1 sand to cement, plus plasticiser | About 8mm | Rule flat, then float once firmed up |
| Older or period brick | 6:1:1 sand, cement and lime | As above | Softer, more breathable mix for both coats |
Essential tools and materials for rendering
- Rendering materials: Portland cement, plastering sand, hydrated lime, plasticiser
- Mixing equipment: Paddle mixer, mixing buckets, wheelbarrow
- Application tools: Hawk, steel trowel, plastic float, wooden float
- Preparation supplies: Wire brush, pressure washer, masking tape
- Safety equipment: Protective goggles, dust mask, gloves
- Miscellaneous: Spirit level, straight edge, scratch comb
Can you render over old brick?
Yes, you can render over old brick as long as the wall is sound, clean and dry. Most rendering failures come down to poor surface preparation, so proper preparation is crucial for achieving a lasting render finish.
Inspect the wall for structural movement or damp and fix the cause before you start. Remove any loose bricks, repair damaged mortar joints, and make sure the wall is free from dust, dirt and organic growth. On older walls, apply a fungicidal wash and let it dry completely. If the surface is particularly smooth or non-porous, brush on an SBR bonding slurry to improve adhesion.
Step 1: Prepare and dampen the wall
Dampen the wall with clean water so the bricks do not suck too much moisture out of the render. Apply masking tape to protect adjacent surfaces and fix stop beads or corner beads where you need crisp edges. Check that any repairs have fully cured before you carry on.
Step 2: Apply the scratch coat
Mix the scratch coat at 4:1 sand to cement with plasticiser. Trowel it on to a thickness of about 10mm, using firm pressure so it grips the brick. Score the surface horizontally with a scratch comb to create a key for the next coat, then leave it to set for 24 to 48 hours.
Step 3: Apply the top coat
Mix the top coat slightly weaker at 5:1 and apply it evenly at about 8mm thick. Rule it flat with a straight edge and check for any hollows or high spots, filling and ruling again where needed.
Step 4: Float and finish
Once the top coat has firmed up slightly, work over it with a plastic float in circular motions to close the surface and achieve a smooth finish. For textured finishes, use specific techniques or tools depending on your desired effect.
Expert tips for perfect rendering results
- Mix render in small batches to prevent it setting before application
- Keep suction consistent by dampening dry patches as you work
- Work in sections so you always join to a wet edge
- Avoid rendering in direct sun, strong wind, rain or frost
- Use corner beads for crisp, straight edges
- Consider adding fibres to the mix for extra strength
Common rendering mistakes and how to avoid them
The most frequent errors are wrong mix ratios, applying render too thick in one pass, and bad weather timing. Keep the top coat weaker than the scratch coat, hold each coat to its target thickness, and let every coat cure properly before the next. Never render when frost is forecast within 48 hours.
Alternative rendering techniques and finishes
Modern rendering offers various options beyond traditional sand and cement:
- Acrylic renders: Flexible and weather-resistant
- Monocouche renders: Single-coat application, coloured through
- Lime renders: Ideal for period properties
- Polymer-modified renders: Enhanced durability
Aftercare and maintenance
Mist new render with water for the first couple of days in warm weather so it cures slowly rather than drying out. After that, regular inspections, gentle cleaning and prompt repair of any cracks are all it needs. A well-maintained render can last up to 30 years. Consider a masonry paint system designed specifically for rendered surfaces.
When to call in the professionals
A single garden wall is a realistic DIY job. Whole elevations, heritage properties and walls needing significant repair are best handled by experienced plasterers, and we render homes right across Kent.
At Kent Plasterers we bring over two decades of rendering experience to every project. Contact our plasterers in Kent for a free quote if you are unsure about tackling the job yourself.
Frequently asked questions
Do you need to PVA a wall before rendering?
No, do not use PVA on an outside wall before rendering. PVA re-wets when it gets damp and can cause the render to come away from the brick. Control suction by dampening the brickwork with clean water just before the scratch coat goes on. On smooth, painted or low-suction surfaces, use an SBR bonding slurry instead.
How thick should render be?
Render should be 15 to 20mm thick in total, built up over two coats. The scratch coat goes on at about 10mm and the top coat at about 8mm. Anything much thicker in one pass will slump and crack. If you need extra depth to straighten a bowed wall, add another thin coat rather than one heavy pass.
What is the difference between a scratch coat and top coat?
The scratch coat is the first, stronger layer, mixed at 4:1 with plasticiser, applied at about 10mm and scored to give the next coat a key. The top coat is a slightly weaker 5:1 mix, applied at about 8mm and floated to the finished surface. The weaker top coat stops the render cracking as it cures.
Can you render with just sand and cement?
Yes, a plain sand and cement render works well on most brick walls and is the cheapest option. Add plasticiser to the mixing water for workability, and swap to a 6:1:1 sand, cement and lime mix on older brick that needs a softer, more breathable coating. Monocouche and acrylic renders cost more but resist cracking better.
Why is my sand and cement render not sticking?
The usual cause is dust, dirt or high suction on the wall. Brush the wall down, wash off any grime and let it dry, then dampen the brickwork just before you render. If the bricks are very smooth, dense or painted, apply an SBR slurry coat first so the render has something to grip.
Is rendering brick a good idea?
Yes, on the right wall. Render protects soft or weathered brick from rain and frost, tidies up mismatched brickwork and gives you a surface you can paint. Avoid cement render on sound period brickwork with lime mortar joints, as it can trap moisture. A well-applied render lasts 20 to 30 years.
Sources
[1] https://www.youtube.com/watch?v=-O5r4NhIwSI
[2] https://www.youtube.com/watch?v=oUf15aMzH3g
[3] https://www.youtube.com/watch?v=ThcIIDGN08Q