
Understanding Plasterboard Damage: Types and Causes
Plasterboard (also called drywall or gypsum board) is the standard internal wall material in UK homes built after 1945. It’s lightweight, cost-effective, and easy to install — but it’s also vulnerable to impact damage.
Before you start any repair, you need to identify what type of damage you’re dealing with. The repair method changes dramatically based on the hole size and the condition of the surrounding board.
Common Types of Plasterboard Damage
- Small dents and dings: Under 20mm diameter, often from doorknobs, furniture impacts, or picture hooks
- Medium holes: 20-100mm across, typically from accidentally putting something through the wall
- Large holes: Over 100mm, from major impacts, removing old fixtures, or renovations
- Water damage: Soft, discoloured areas that require different treatment (see our guide on damp patches on plastered walls)
- Cracks: Usually from settlement or poor installation, covered in our article on why plaster cracks
| Hole Size | Best Repair Method | Difficulty Level | Materials Cost | Time Required |
|---|---|---|---|---|
| Under 20mm | Filler only | Easy | £3-5 | 30 minutes + drying |
| 20-100mm | Metal patch or offcut backing | Moderate | £8-15 | 1-2 hours + drying |
| Over 100mm | Full board section replacement | Advanced | £15-30 | 2-4 hours + drying |
| Water damaged | Cut out and replace with moisture-resistant board | Advanced | £20-50 | 3-5 hours + drying |
Essential Tools and Materials for Plasterboard Repairs
Having the right kit makes the difference between a professional-looking repair and an obvious patch job. Here’s what you’ll need based on the repair size.
Basic Repair Kit (Small Holes)
- All-purpose filler: Polyfilla, Toupret, or similar ready-mixed compound (£3-6 per tub at Screwfix)
- Filling knife: 75mm or 100mm flexible blade (£4-8)
- Fine-grit sandpaper: 120-180 grit for finishing (£2-4 per pack)
- Sanding block or sponge: For flat, even surfaces (£3-5)
- Dust sheet: To protect flooring (£2-6)
- Damp cloth: For cleaning excess filler
Intermediate Repair Kit (Medium Holes)
In addition to the basic kit, you’ll need:
- Metal repair patch: Self-adhesive mesh patches from B&Q or Wickes (£4-8 each)
- Jointing compound: Gyproc Easi-Fill or British Gypsum Board Finish (£7-12 per 5kg bag)
- Wider filling knife: 150-200mm for feathering edges (£8-15)
- Utility knife: For trimming damaged edges (£5-10)
Advanced Repair Kit (Large Holes)
For holes over 100mm, you’ll need proper backing support:
- Plasterboard offcut: Same thickness as existing (typically 9.5mm or 12.5mm) — ask at Travis Perkins for offcuts (£5-15)
- Timber battens: 50mm x 25mm treated softwood for backing (£3-8)
- Plasterboard screws: 25-32mm drywall screws (see our guide on plasterboard screws) (£3-6 per box)
- PVA adhesive: For sealing dusty edges (£4-8)
- Joint tape: Scrim or paper tape for joints (£3-6 per roll)
- Cordless drill: For driving screws (£40-120 if you don’t own one)
- Jab saw or padsaw: For cutting clean edges (£6-12)
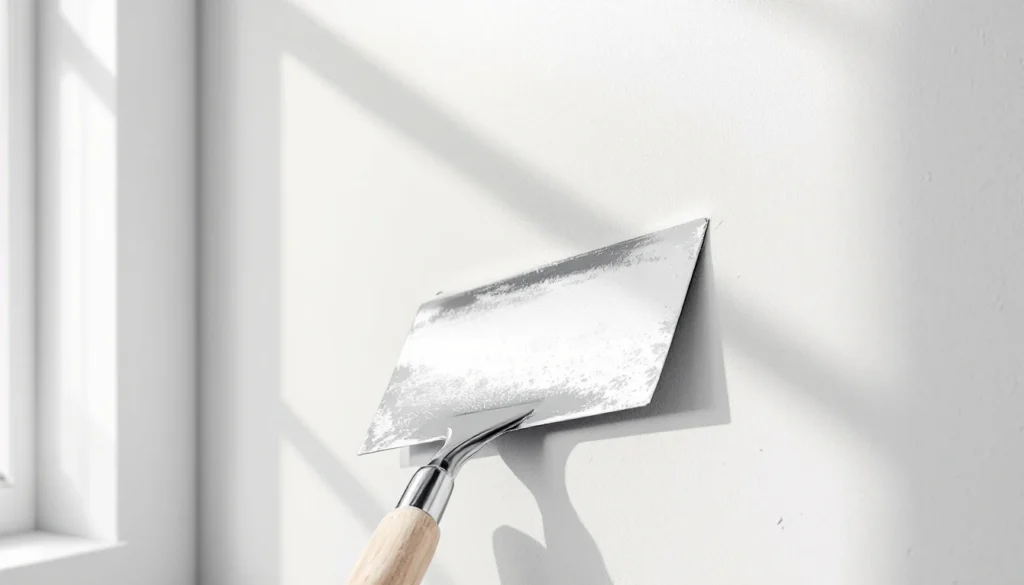
Method 1: Repairing Small Holes (Under 20mm)
This is the simplest repair and perfect for picture hook holes, small dents, or minor damage. Even complete beginners can achieve invisible results with patience.
Step-by-Step Process
1. Prepare the area: Remove any loose paper or gypsum from around the hole. Use your filling knife to scrape away anything that isn’t firmly attached. The edges should be clean and solid.
2. Wipe clean: Use a slightly damp cloth to remove dust from the hole and surrounding area. This helps the filler bond properly. Let it dry for 5-10 minutes.
3. Apply filler: Load your filling knife with ready-mixed filler. Press it firmly into the hole, working from different angles to ensure you’re filling from the back forward. Overfill slightly — it will shrink as it dries.
4. Smooth off: Draw your knife across the repair in one smooth motion, applying firm pressure. The goal is to leave the surface flush with the wall, with minimal excess filler.
5. Let it dry: Most fillers take 2-4 hours to dry for small repairs. Don’t rush this — sanding wet filler creates a mess and poor results.
6. Sand smooth: Once completely dry (the filler will turn from pink to white, or dark to light depending on brand), sand with 120-grit paper wrapped around a sanding block. Use circular motions, gradually widening your area to feather the edges into the surrounding wall.
7. Second coat if needed: Small repairs often need a second thin coat to fill any shrinkage. Apply, dry, and sand again with 180-grit for a perfect finish.
| Filler Type | Drying Time (Small Hole) | Sandability | Best For | Price |
|---|---|---|---|---|
| Polyfilla Ready Mixed | 2-4 hours | Excellent | Interior holes under 25mm | £3.50-5 |
| Toupret Interior Filler | 1-2 hours | Very good | Quick repairs, minimal shrinkage | £5-7 |
| Ronseal Smooth Finish | 3-5 hours | Good | Deeper holes, very low shrink | £4-6 |
| Gyproc Easi-Fill (mixed) | 60-90 minutes | Excellent | Professional repairs, precise control | £7-12 (5kg) |
Method 2: Medium Holes Using a Metal Patch (20-100mm)
For holes too large for filler alone but not big enough to warrant cutting out a section, self-adhesive metal patches are your best option. They provide a solid backing without needing access behind the plasterboard.
The Repair Process
1. Clean the damaged area: Use your utility knife to cut away any loose or damaged plasterboard around the hole. Create clean, firm edges — don’t worry about making the hole slightly larger, it’s better to remove all compromised material.
2. Remove surface dust: Brush or vacuum the area, then wipe with a damp cloth. The metal patch needs clean plasterboard to stick properly.
3. Choose the right patch size: Your patch should extend at least 50mm beyond the hole in all directions. For a 60mm hole, you’d want a patch at least 160mm across.
4. Apply the patch: Peel off the backing from the self-adhesive mesh patch. Centre it over the hole and press firmly, working from the centre outward to avoid trapping air bubbles. The mesh should be completely flat against the wall.
5. First coat of jointing compound: Mix your Gyproc Easi-Fill to a thick cream consistency (like double cream). Using a 150mm filling knife, spread compound over the entire patch, pressing firmly to force it through the mesh. This first coat bonds the patch to the wall and fills the mesh.
6. Let it dry: Allow 24 hours for complete drying. Don’t rush — if you apply the second coat too soon, you’ll drag the first coat and create a mess.
7. Second coat: Apply a wider second coat, extending 50-75mm beyond the patch edges. Use long, smooth strokes and keep your knife at a low angle to feather the edges thin. This coat should bring the repair flush with the wall surface.
8. Final sanding: After another 24 hours, sand the repair with 120-grit paper, then 180-grit for a smooth finish. A sanding pole with a swivel head helps achieve a flat surface.
Method 3: Large Holes Using Backing Boards (Over 100mm)
For substantial damage, you need to install a proper plasterboard patch with solid backing. This is the professional method that creates a permanent, strong repair.
Detailed Repair Steps
1. Mark out a rectangle: Using a spirit level and pencil, draw a rectangle around the damaged area. Make it slightly larger than the damage, with straight edges. Rectangles or squares are easier to patch than irregular shapes.
2. Cut out the damaged section: Use a jab saw or padsaw to cut along your marked lines. Cut carefully — you’re cutting through plasterboard only, not into studs or services behind. If you hit a stud, adjust your rectangle to the centre of that stud so you have something to fix to.
3. Check for obstructions: Look inside the hole for any electrical cables or pipes. If present, turn off the relevant services and consider calling a professional. Never patch over live cables or water pipes.
4. Install backing battens: Cut two pieces of 50mm x 25mm timber, each about 100mm longer than your hole is tall. Slide them vertically into the hole, one on each side, positioned so half the batten is behind the existing plasterboard and half is visible in the hole opening.
5. Secure the battens: Drive plasterboard screws through the existing plasterboard into the battens at 150mm intervals. The screws should sit just below the surface (dimpled, not breaking the paper). These battens now provide solid fixing points for your patch.
6. Cut your patch: Measure the hole dimensions and cut a piece of plasterboard 2-3mm smaller in each direction. This gives you wiggle room for positioning. Use a sharp utility knife and a straight edge — score deeply, snap, then cut the paper backing.
7. Test fit the patch: The patch should drop into the hole with about 1-2mm gap all around. If it’s tight, trim the edges slightly with your knife. A perfect friction fit makes the next steps easier.
8. Apply PVA to edges: Brush diluted PVA (1 part PVA to 5 parts water) onto the edges of both the patch and the surrounding plasterboard. This seals the cut gypsum and provides better adhesion for jointing compound.
9. Fix the patch: Once the PVA is tacky (10-15 minutes), position your patch and drive screws through it into the backing battens. Space screws 150mm apart, about 12mm from the edges. Dimple each screw head just below the surface without breaking the paper facing.
10. Tape the joints: Apply scrim tape (self-adhesive alkali-resistant fibreglass mesh) over all four joints where your patch meets the existing board. Press it flat and ensure good contact.
11. First coat of jointing compound: Using a 200mm filling knife, apply jointing compound over the tape and screws, pressing firmly to fill all gaps and cover the tape completely. Feather the edges out about 100mm beyond the patch.
12. Dry and sand: Allow 24 hours drying, then sand smooth with 120-grit paper. You’ll likely see the joints and screw heads still visible — this is normal.
13. Second and third coats: Apply progressively wider coats, feathering each further out. Most repairs need three coats total for an invisible finish. Sand between each coat after full drying (24 hours).
14. Prime before decorating: Once your final coat is sanded smooth, apply a mist coat (diluted emulsion, roughly 70% paint to 30% water) to seal the new plaster. This prevents the fresh compound from sucking moisture from your topcoats and showing as a dull patch.
Finishing Your Repair: Decorating and Blending
The repair work is only half the job — proper finishing is what makes a patch invisible. Here’s how to ensure your repair blends seamlessly with the surrounding wall.
Surface Preparation
- Final sanding: Use 180-grit or 220-grit paper for the last sand. Work in circular motions under bright light (a work light held at an angle shows imperfections clearly)
- Dust removal: Vacuum the area, then wipe with a barely damp cloth. Let it dry completely before priming
- Check for hollows: Run your hand over the repair — you should feel no ridges or dips. If you can feel it, you’ll definitely see it when painted
Priming and Painting
Fresh jointing compound is highly absorbent. If you paint directly over it with standard emulsion, it will show as a dull, flat patch even after multiple coats.
The solution is a mist coat — thinned emulsion that seals the surface without sitting on top. Mix your chosen topcoat colour 70:30 with clean water. Apply one coat and let it dry overnight. The surface should now have uniform absorption.
Then apply two coats of full-strength emulsion. For the best colour match, paint the entire wall rather than just feathering around the repair. Trying to blend a patch into an existing wall rarely works well — different age paint has different sheen levels.
If your wall has texture or pattern, you’ll need to replicate it before painting. For guidance on creating textured finishes, see our article on textured walls and decorative finishes.
Common Mistakes and How to Avoid Them
Even experienced DIYers can struggle with plasterboard repairs. Here are the pitfalls we see most often as professional plasterers:
1. Using the Wrong Filler Type
The mistake: Using exterior filler indoors, or cement-based products on plasterboard.
Why it matters: Exterior fillers are harder to sand and can crack when used on flexible plasterboard. Cement products don’t bond well to gypsum and add unnecessary weight and moisture.
The fix: Use gypsum-based products designed for plasterboard — Gyproc Easi-Fill, Toupret TX110, or similar jointing compounds.
2. Rushing the Drying Process
The mistake: Applying second coats before the first is fully dry, or painting over damp compound.
Why it matters: Wet jointing compound is soft and draggy. Adding more compound on top pulls the first layer off. Painting over damp filler causes adhesion failure and eventual flaking.
The fix: Always allow full drying time — 24 hours between coats in normal conditions. In cold or humid weather, allow 48 hours. The compound will visibly change colour when dry (usually from grey to white, or dark to light).
3. Inadequate Backing Support
The mistake: Patching larger holes with just filler or mesh, without solid backing.
Why it matters: Without backing, patches over 100mm will eventually crack or flex when knocked. The repair fails within months.
The fix: For holes over 100mm, always install backing battens or use the existing studs for support. The patch needs something solid to screw into.
4. Not Feathering the Edges
The mistake: Stopping jointing compound abruptly at the edge of the repair area.
Why it matters: Sharp edges create visible ridges that show through paint. The repair looks like a patch rather than blending invisibly.
The fix: Feather each coat progressively wider, keeping your filling knife at a low angle (nearly flat to the wall). The final coat should extend 200-300mm beyond the patch in all directions, tapering to nothing at the edges.
5. Over-Sanding
The mistake: Aggressive sanding that breaks through the paper facing or creates hollows.
Why it matters: The paper facing is crucial to plasterboard’s strength. Breaking through it creates a fuzzy area that won’t paint well. Over-sanding also creates dips that show in raking light.
The fix: Use gentle pressure and a sanding block to keep surfaces flat. Sand just enough to smooth the compound — you’re not trying to sand the whole wall, just blend the edges.
When to Call a Professional Plasterer
Many plasterboard repairs are well within DIY capability, but some situations warrant professional help. Here’s when to pick up the phone rather than the filling knife:
- Multiple large holes: If you’re looking at several repairs over 150mm, it may be more cost-effective to have the entire wall re-skimmed
- Water damage: If plasterboard is soft, discoloured, or crumbling due to water ingress, you need to find and fix the leak first, then replace affected sections (see our guide on damp patches on plastered walls)
- Structural concerns: Cracks wider than 3mm or cracks that keep reappearing suggest structural movement — consult a surveyor before patching
- Ceiling repairs: Working overhead is awkward, messy, and potentially dangerous. Ceiling repairs often justify professional help
- Matching decorative finishes: If your walls have Venetian plaster, textured finishes, or other specialist coatings, matching them requires professional skills
- Time constraints: Each repair needs multiple coats with 24-hour gaps. If you need the room finished quickly, a plasterer can often complete and finish repairs in 2-3 days
For more guidance on whether to DIY or hire a professional, see our article comparing plasterer vs DIY approaches.
| Repair Scenario | DIY Feasibility | Professional Cost | Recommended Approach |
|---|---|---|---|
| Single small hole (<20mm) | Very high | £40-60 (minimum callout) | DIY — simple and cost-effective |
| 2-3 medium holes (20-100mm) | High | £80-150 | DIY if confident, professional if time-limited |
| Large hole (>100mm) | Moderate | £100-180 | Professional unless you have experience |
| Multiple large holes | Low | £200-400 | Professional — likely needs full wall skim |
| Water-damaged section | Low | £150-350 | Professional — requires leak diagnosis |
| Ceiling damage | Low to moderate | £120-250 | Professional — safety and access issues |
Cost Breakdown: DIY vs Professional Repair
Understanding the full costs helps you make an informed decision. Here’s what you can expect to pay in 2026:
DIY Material Costs
- Basic small hole kit: £12-20 (filler, sandpaper, filling knife if you don’t own one)
- Medium hole repair kit: £25-40 (metal patches, jointing compound, wider knives)
- Large hole repair kit: £40-70 (plasterboard offcut, battens, screws, compound, tape, tools)
- Additional decorating: £15-30 (primer, paint, rollers, brushes)
Professional Repair Costs (Kent, 2026)
- Small holes (1-3): £40-80 (often minimum callout charge)
- Medium holes: £30-50 per hole
- Large holes: £60-100 per hole depending on size
- Full wall re-skim: £200-400 depending on wall size
- Emergency/same-day service: Add 30-50% premium
These figures include labour and materials but not decorating. Most plasterers will leave repairs at the “ready to paint” stage.
Preventing Future Plasterboard Damage
Prevention is always better (and cheaper) than repair. Here’s how to protect your plasterboard from common damage:
- Use proper wall fixings: Never screw directly into plasterboard for heavy items. Use appropriate wall plugs rated for the load
- Install door stops: £2 rubber or spring door stops prevent doorknob damage
- Protect during moves: When moving furniture, use cardboard or moving blankets to prevent knocks
- Address moisture issues: Fix leaks immediately and ensure adequate ventilation to prevent water damage
- Consider impact-resistant board: In high-traffic areas like hallways, 12.5mm board is more durable than 9.5mm
- Maintain even temperature: Rapid temperature changes can cause movement cracks — avoid leaving windows open with heating on full
Frequently Asked Questions
Can I use Polyfilla for all plasterboard repairs?
Ready-mixed filler like Polyfilla works well for holes under 20mm, but it’s not suitable for larger repairs. For holes over 20mm, you need proper jointing compound (like Gyproc Easi-Fill) which is designed for plasterboard, has better adhesion, and less shrinkage. Polyfilla also isn’t gap-filling — you can’t use it to bridge open holes without backing support. For small nail holes and minor surface damage, it’s perfect. For anything structural or over 50mm, switch to specialist jointing compound.
How long should I wait between coats when repairing plasterboard?
Always allow 24 hours minimum between coats in normal conditions (18-20°C, moderate humidity). Jointing compound needs to dry completely before you can sand it or apply additional coats. In cold weather (below 15°C) or high humidity, extend this to 48 hours. You’ll know it’s ready when the compound has changed colour from grey to white (or dark to light depending on product) and feels completely dry to touch. Rushing this step is the most common cause of DIY repair failures — wet compound drags and creates a mess.
What’s the largest hole I can repair without replacing the entire plasterboard sheet?
With proper technique and backing support, you can repair holes up to 300-400mm across successfully. Beyond this size, you’re often better off replacing the entire sheet — the labour involved in a large patch approaches the time needed for full replacement, and you’ll get better results. For holes over 200mm, the repair needs solid backing battens fixed to adjacent studs or noggings, multiple coats of jointing compound, and careful feathering. At Kent Plasterers, we typically recommend full sheet replacement for damage covering more than 30% of a wall section, or any ceiling damage over 150mm.
Can I repair holes in moisture-resistant plasterboard (the green/pink board)?
Yes, but you must use moisture-resistant materials for the repair. If you’re patching standard white board into a moisture-resistant installation (like a bathroom), you compromise the whole wall’s moisture protection. Always patch with the same type of board — green for moisture areas, pink for enhanced moisture and fire resistance. Use moisture-resistant jointing compound (British Gypsum Gyproc Dri-Wall Adhesive or similar) rather than standard Easi-Fill. The repair process is identical to standard board, but material choice matters for long-term performance in wet areas.
Why does my repaired area look different after painting, even though it feels smooth?
This is usually caused by differential absorption — fresh jointing compound is more porous than aged plasterboard and sucks in more paint. The repaired area appears dull or flat compared to the surrounding wall, creating a visible patch. The solution is proper priming: apply a mist coat (70% paint to 30% water) as a sealer first, let it dry overnight, then apply two full-strength coats. For persistent issues, use a specialist primer like Zinsser Gardz which equalises porosity. Alternatively, paint the entire wall rather than just the repair — this ensures uniform finish and sheen.
Is it safe to patch over old artex or textured coatings?
Only if you’re certain the artex doesn’t contain asbestos. Artex manufactured before 1985 may contain asbestos fibres, which are hazardous when disturbed. Never sand, scrape, or drill into artex in pre-1985 properties without professional asbestos testing. If testing confirms it’s asbestos-free, you can repair through textured coatings, but you’ll need to replicate the texture after repair — standard smooth jointing compound will show as a flat patch. For asbestos-containing artex, either leave it undisturbed and repair around it, or hire a licensed asbestos removal contractor. The HSE provides detailed guidance on asbestos in homes.