
The Revival of Textured Walls in Contemporary Design
Textured walls have experienced a remarkable transformation since the days of heavy Artex ceilings and dated woodchip wallpaper. Today’s decorative wall finishes combine architectural interest with practical benefits, from improved acoustics to enhanced light reflection.
The Design Council reports that textured finishes have increased in specification by 43% in residential projects since 2023, driven by homeowners seeking alternatives to flat painted walls.
Modern textured plaster isn’t just about aesthetics. These finishes can:
- Hide imperfections in older walls without extensive preparation
- Add depth and dimension that flat paint cannot achieve
- Improve acoustic performance by breaking up sound waves
- Create focal points without additional furniture or artwork
- Increase property value through distinctive design features
Types of Textured Wall Finishes Available in 2026
Venetian Plaster and Polished Finishes
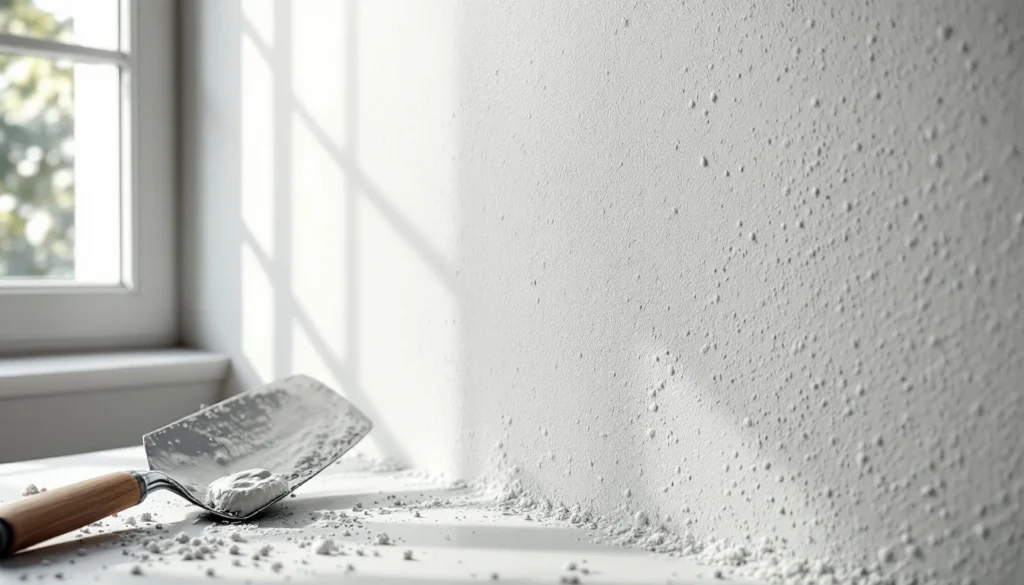
Venetian plaster remains the premium choice for decorative finishes, offering a lustrous, marble-like appearance. This centuries-old technique uses slaked lime mixed with marble dust, applied in multiple thin coats.
The process involves burnishing each layer with a steel trowel, creating depth through translucent layers. Authentic Venetian plaster requires 5-7 coats, with each application taking 4-6 hours to cure sufficiently for the next layer.
| Venetian Plaster Type | Coats Required | Drying Time | Cost per sqm |
|---|---|---|---|
| Traditional lime-based | 5-7 coats | 4-6 hours per coat | £60-£120 |
| Acrylic Venetian | 3-4 coats | 2-4 hours per coat | £40-£80 |
| Marmorino | 4-6 coats | 6-8 hours per coat | £70-£140 |
| Tadelakt (bathroom grade) | 3-5 coats | 12-24 hours per coat | £80-£150 |
Microcement and Contemporary Concrete Effects
Microcement has exploded in popularity for creating industrial-chic interiors. This polymer-modified cement coating applies in 2-3mm thickness, creating a seamless, waterproof surface suitable for walls, floors, and even shower enclosures.
Unlike traditional render, microcement bonds directly to existing surfaces including tiles, plasterboard, and painted walls. The application process requires meticulous technique — any trowel marks become permanent features.
Relief Textures and Geometric Patterns
Modern relief patterns move far beyond random stippling. Contemporary applications include:
- Linear combing — parallel grooves created with notched trowels
- Circular swirls — organic patterns applied with specialised tools
- Geometric pressed patterns — using rubber stamps or rollers
- Stenciled relief — raised patterns following templates
- Randomised aggregate — small stones or glass particles embedded in finish coat
Traditional Lime Wash and Mineral Finishes
Lime-based finishes have regained favour, particularly in period properties and eco-conscious renovations. These breathable finishes allow moisture vapour transmission, preventing damp issues common with modern acrylic paints.
Lime wash creates subtle texture through brush application, with colour variations developing naturally as it carbonates. The finish continues to harden over months, reaching full strength after 6-12 months of curing.
Cost Breakdown: Professional vs DIY Application
Understanding the true cost of textured finishes requires factoring both materials and labour. Professional application typically accounts for 60-70% of total project cost.
| Finish Type | Materials Cost (per sqm) | Professional Labour | Total Professional Cost | DIY Materials Only |
|---|---|---|---|---|
| Basic stipple/knockdown | £8-£12 | £25-£35 | £33-£47 | £8-£12 |
| Skip trowel texture | £10-£15 | £30-£40 | £40-£55 | £10-£15 |
| Venetian plaster (acrylic) | £15-£25 | £40-£70 | £55-£95 | £15-£25 |
| Venetian plaster (lime) | £25-£40 | £60-£100 | £85-£140 | £25-£40 |
| Microcement | £30-£45 | £50-£85 | £80-£130 | £30-£45 |
| Lime wash (multiple coats) | £6-£10 | £20-£30 | £26-£40 | £6-£10 |
These figures represent typical UK pricing in 2026 for average-sized rooms (12-15 sqm wall area). Minimum call-out charges of £200-£400 often apply for small jobs.
Essential Tools and Materials for Textured Finishes
Achieving professional results requires specific equipment beyond standard plastering tools. The investment in proper tools often justifies hiring a professional for one-off projects.
Core Tool Requirements
- Japanese steel trowels (280mm-400mm) — essential for Venetian plaster, £35-£85 each
- Flexible spatulas in various widths — for microcement application, £15-£30 per set
- Texture rollers — patterns range from £8 to £45 depending on design
- Stippling brushes — natural bristle preferred, £12-£35
- Hawk or mortarboard — stainless steel models last decades, £25-£50
- Mixing paddle and drill — essential for consistent texture compounds, £40-£120
Material Specifications
Quality materials make the difference between a finish that lasts decades and one that fails within months. Most decorative plaster systems available from British Gypsum, Travis Perkins, or specialist suppliers like Vasari Lime Plaster come in 20-25kg bags covering 8-12 sqm per coat.
Substrate Preparation: The Foundation of Success
Decorative finishes magnify rather than hide substrate imperfections. Proper preparation accounts for 40-50% of project success, yet it’s the step most DIYers shortcut.
The substrate must meet specific criteria before any decorative finish:
- Structural integrity — no loose areas, hollow spots, or active movement
- Cleanliness — free from dust, grease, old wallpaper paste, or release agents
- Porosity control — sealed to prevent differential suction across the surface
- Planeness — within 3mm over 2 metres for most finishes (tighter for polished effects)
- Dryness — moisture content below 4% for cement-based substrates
Step-by-Step Preparation Process
Step 1: Surface Assessment and Repair
Tap the entire wall surface with knuckles, listening for hollow sounds indicating debonding. Mark problem areas with chalk and hack off any loose material. Fill significant holes and cracks with appropriate filler — bonding coat for deep repairs, finishing plaster for shallow ones.
Step 2: Cleaning and Degreasing
Wash walls with sugar soap solution, paying particular attention to kitchens where airborne grease accumulates. Rinse thoroughly and allow 24-48 hours drying time.
Step 3: Priming
Apply appropriate primer for your chosen finish. Acrylic primers suit most modern plaster systems, while lime finishes require lime-compatible primers to maintain breathability. Products like Zinsser Gardz seal problematic surfaces whilst maintaining tooth for mechanical bonding.
Step 4: Base Coat Application
Many decorative systems require a uniform base coat to establish consistent colour and texture. This coat typically applies at 1-2mm thickness, troweled smooth. Allow full curing — typically 24-48 hours — before proceeding.
Application Techniques for Popular Textured Finishes
Skip Trowel Technique
The skip trowel creates organic, Mediterranean-style texture through partial trowel contact. Load a 300mm steel trowel with ready-mixed texture compound, holding it at 30-45° to the wall surface.
Rather than continuous contact, “skip” the trowel across the surface in curved, overlapping strokes. The technique requires light pressure — you’re depositing material in irregular patterns, not smoothing it flat. Work quickly before material sets; most texture compounds remain workable for 15-20 minutes after application.
Knockdown Texture
Knockdown texture begins with heavy stippling or spraying, followed by partial flattening. Apply base texture liberally with a texture roller or spray gun, creating peaks 3-5mm high across the entire surface.
Wait 10-15 minutes for initial set — the material should no longer be wet but shouldn’t resist light pressure. Using a clean, wide trowel (400mm+), make long sweeping passes at minimal angle to “knock down” the peaks, leaving varied texture height. The key is consistency of pressure and timing across the entire wall.
Venetian Plaster Multi-Coat Application
Authentic Venetian plaster demands patience and technique refinement. Each coat applies in small, overlapping strokes using a flexible Japanese steel trowel. The material thickness rarely exceeds 0.5mm per coat.
Load minimal material onto your trowel — roughly the size of a golf ball for each square metre. Apply in random directions, overlapping each stroke by 30-40%. Hold the trowel at 15-30° for application, increasing to 60-70° for the final burnishing pass that creates lustre.
Between coats, lightly sand any proud ridges with 400-grit paper. The final coat receives intensive burnishing with a clean trowel or specialised burnishing tool, creating the characteristic polish through compression and heat generation from friction.
Colour Options and Tinting Systems
Modern textured finishes offer unprecedented colour flexibility. Most systems accept universal colourants, allowing custom colour matching to any specification.
Tinting considerations for textured walls:
- Build up gradually — add colourant in small increments, mixing thoroughly between additions
- Make sufficient quantity — remixing exact colours proves nearly impossible
- Test on sample boards — texture dramatically affects colour perception
- Account for drying shifts — most finishes dry 1-2 shades lighter than wet application
- Consider lighting conditions — textured surfaces react differently to natural vs artificial light
| Colour Category | Effect on Texture | Best Applications | Considerations |
|---|---|---|---|
| Pure white/off-white | Maximises shadow depth | Feature walls, high ceilings | Shows imperfections clearly |
| Warm neutrals (beige, cream) | Softens texture appearance | Living areas, bedrooms | Forgiving of minor flaws |
| Cool greys | Contemporary, architectural | Modern interiors, offices | Can appear cold in north-facing rooms |
| Earth tones (terracotta, ochre) | Enhances Mediterranean feel | Kitchens, dining areas | Strong colours require precision |
| Deep colours (navy, charcoal) | Dramatic contrast and depth | Accent walls, feature areas | Requires excellent base preparation |
Maintenance and Longevity of Decorative Finishes
Properly applied textured finishes outlast standard paint by significant margins. Lime-based Venetian plaster hardens continuously over decades, actually improving with age.
Expected lifespan under normal residential conditions:
- Venetian plaster (lime-based) — 20-30+ years without maintenance
- Venetian plaster (acrylic) — 15-20 years before refresh needed
- Microcement — 10-15 years in high-traffic areas, 20+ years on walls
- Standard texture finishes — 10-15 years depending on quality
- Lime wash — 5-8 years, but easily refreshed with additional coats
Cleaning and Care Guidelines
Most textured finishes require only periodic dusting with soft brushes or vacuum attachments. Sealed surfaces like Venetian plaster tolerate damp wiping, while unsealed lime wash requires dry cleaning methods only.
For sealed finishes, clean with pH-neutral cleaners diluted to manufacturer specifications. Avoid abrasive cleaning pads or harsh chemicals that compromise protective sealers.
Common Problems and How to Avoid Them
Even experienced plasterers encounter challenges with decorative finishes. Understanding common failures helps prevent them:
Delamination and Bubbling
Cause: Insufficient bonding between coats or to substrate, often from contamination or inadequate drying time.
Prevention: Clean surfaces meticulously, prime appropriately, and respect minimum drying times between coats. Temperature affects curing — maintain 15-20°C throughout application and for 48 hours afterward.
Cracking and Crazing
Cause: Excessive material thickness, rapid drying, substrate movement, or incompatible base/finish combinations.
Prevention: Apply thin coats (maximum 2mm for most systems), control room temperature and ventilation to prevent rapid drying, and ensure substrate stability. For detailed guidance on crack causes, see our article on why plaster cracks.
Colour Variation and Patching
Cause: Inconsistent application technique, varying base porosity, or attempting to blend new material into partially cured sections.
Prevention: Maintain consistent trowel angle and pressure throughout application. Work complete walls in single sessions where possible. When stopping mid-wall, feather edges and plan stopping points at corners or architectural features.
Surface Burning
Specific to polished finishes like Venetian plaster. Excessive burnishing pressure or prolonged trowel contact generates too much heat, creating dark marks or shine variations.
Prevention: Use light-to-medium pressure during burnishing passes, keeping the trowel moving continuously. Clean trowel faces frequently to remove built-up material that increases friction.
Building Regulations and Standards Compliance
Most decorative finishes don’t require Building Control notification as they constitute redecoration rather than structural work. However, specific situations demand attention to Building Regulations compliance:
Fire Safety (Approved Document B): Materials in escape routes must meet Class 0 or Class 1 surface spread of flame. Most lime and gypsum-based plasters inherently meet these requirements, but check certificates for proprietary systems.
Thermal Performance (Approved Document L): When applying thick decorative renders to external walls internally, consider thermal bridging effects. Consult with a thermal engineer if applying more than 5mm thickness to external walls.
Moisture Control (Approved Document C): In bathrooms and kitchens, ensure decorative finishes maintain or improve water resistance compared to previous finishes. Tadelakt and sealed microcement suit wet areas; unsealed lime wash does not.
When to Hire a Professional vs DIY
The decision between professional installation and DIY depends on several factors beyond simple cost comparison. For comprehensive guidance on this decision, read our article on hiring a plasterer versus DIY.
Consider professional installation when:
- Applying premium finishes like authentic Venetian plaster (£60-£120 per sqm) where mistakes prove costly
- Working on large areas (20+ sqm) requiring consistent technique throughout
- Creating focal walls in prominent locations where quality significantly impacts home value
- Using specialized materials like microcement requiring specific mixing and application techniques
- Time constraints demand completion within tight deadlines
DIY becomes viable when:
- Applying forgiving textures like basic stipple or knockdown patterns
- Working on small areas (single walls, alcoves) where learning curve doesn’t waste excessive material
- Creating intentionally rustic finishes where variation adds character
- Budget constraints make professional rates (£40-£120 per sqm labour) prohibitive
- You possess good general DIY skills and patience for technique development
Textured Walls in Different Room Applications
Living Rooms and Feature Walls
Living areas offer the ideal canvas for decorative plaster techniques. Feature walls behind televisions or sofas benefit from subtle texture that reduces glare whilst adding architectural interest.
Popular choices include Venetian plaster in neutral tones, geometric relief patterns, or microcement for contemporary schemes. These finishes integrate well with modern surface upgrades that transform interiors without extensive renovation.
Bedrooms and Calm Spaces
Bedroom walls benefit from softer textures that diffuse light and create relaxing atmospheres. Lime wash provides subtle variation whilst maintaining breathability, helping regulate room humidity naturally.
Avoid aggressive textures or high-contrast colours that create visual stimulation contrary to rest. Soft stipple finishes in warm neutrals or cool greys work effectively behind beds or in alcoves.
Bathrooms and Wet Areas
Bathrooms demand water-resistant decorative finishes. Tadelakt, the Moroccan lime plaster technique, creates waterproof surfaces suitable for shower enclosures when properly applied and sealed.
Microcement also performs excellently in wet areas, offering seamless surfaces from floor to ceiling. Both materials require professional application to ensure waterproofing integrity.
Hallways and High-Traffic Areas
Corridors and entrance halls experience more contact than other areas. Durable finishes like sealed Venetian plaster or microcement withstand occasional impacts and cleaning better than standard textured coatings.
Consider darker colours or warm neutrals that disguise minor marking. The increased durability justifies higher initial investment in these spaces.
Combining Textures with Other Finishes
Modern interior design often combines textured walls with complementary finishes for layered visual interest:
- Textured plaster with timber paneling — creates warm, natural contrast
- Smooth painted sections adjacent to textured areas — defines zones without walls
- Metallic accents on textured backgrounds — gold or copper wax highlights on Venetian plaster
- Textured walls with smooth ceilings — grounds spaces without overwhelming
- Decorative plaster with modern lighting — enhances shadow play and depth
Cost-Effective Alternatives to Premium Finishes
Budget constraints needn’t eliminate textured wall options entirely. Several approaches deliver visual impact at reduced cost:
Acrylic Venetian Systems: Modern acrylic-based alternatives to traditional lime plaster cost 30-40% less whilst offering easier application. Brands like Marmorino Tools and Stucco Veneziano provide quality results at £40-£65 per sqm installed.
Partial Applications: Apply premium finishes to single feature walls rather than entire rooms. A 3-4 sqm feature wall in genuine Venetian plaster costs £240-£480 installed, creating impact without whole-room expense.
Textured Paint Systems: Products like Dulux Texture or Johnstone’s Supatex provide subtle texture at £15-£25 per sqm including labour. While less dramatic than true plastering techniques, they offer improvement over flat paint at modest cost.
DIY with Professional Finishing: Complete preparation and base coats yourself, hiring professionals only for final decorative coats. This approach saves 40-50% on labour whilst ensuring quality where it matters most.
Environmental Considerations and Sustainable Options
Textured wall finishes vary significantly in environmental impact. Growing awareness drives demand for sustainable alternatives to petroleum-based products.
Eco-Friendly Finish Options
- Traditional lime plaster — carbon-negative material that reabsorbs CO2 during curing
- Clay plasters — minimal processing, fully recyclable, excellent humidity regulation
- Natural pigments — earth-based colourants instead of synthetic dyes
- Hemp fiber reinforcement — renewable alternative to synthetic mesh
- Cork-based textures — sustainable, insulating, naturally antimicrobial
These materials typically cost 10-25% more than conventional alternatives but offer superior indoor air quality and reduced carbon footprint. The Building Research Establishment notes that lime-based finishes contribute to healthier indoor environments through moisture buffering and alkalinity that discourages mould growth.
Future-Proofing: Trends Shaping Decorative Finishes
The decorative plaster market continues evolving, with several trends gaining momentum through 2026:
Biophilic Textures: Organic, nature-inspired patterns that bring exterior aesthetics indoors. Stone effects, bark textures, and flowing water patterns appeal to increasing desire for natural connections in built environments.
Smart Integration: Textured finishes designed to accommodate embedded technology — LED accent lighting, wireless charging zones, or smart home sensors integrated seamlessly into wall surfaces.
Antimicrobial Finishes: Lime-based plasters naturally inhibit bacterial growth, but new formulations enhance this property specifically. Particularly relevant for healthcare environments and homes with vulnerable occupants.
Ultra-Thin Applications: Advanced polymer chemistry enables decorative effects at reduced thickness (1mm vs traditional 3-5mm), saving material and reducing weight loads on substrates.
Colour-Changing Technologies: Experimental finishes incorporating thermochromic or photochromic pigments that respond to temperature or light, creating dynamic surfaces that shift throughout the day.
Frequently Asked Questions
How long does textured plaster take to apply and cure?
Application time varies dramatically by finish type. Simple stipple textures can be applied to a 12-15 sqm room in 4-6 hours, with 24-hour curing before painting. Venetian plaster requires 3-5 days for multiple coat application, with each coat needing 4-6 hours drying time. Microcement applies over 2-3 days including base coats and sealers. Factor additional time for preparation — proper substrate prep often takes longer than finish application itself. Most finishes reach handling strength within 24-48 hours but continue curing for weeks. Venetian plaster reaches full hardness after 28 days, though it’s decoratable after 7-10 days.
Can I apply textured finishes over existing wallpaper or paint?
This depends on substrate condition and finish type. Never apply decorative plaster over wallpaper — it must be completely removed and walls prepared to bare plaster. For guidance on this specific issue, see our article on plastering over wallpaper. Over existing paint, test adhesion first: score an X through the paint, apply strong tape, and pull sharply. If paint releases, it must be removed. Sound, well-adhered paint accepts most texture finishes after thorough cleaning and appropriate priming. Oil-based paints require special primers to create mechanical bond. When in doubt, remove existing finishes to bare substrate for guaranteed adhesion.
Do textured walls make rooms look smaller?
This common concern oversimplifies how texture affects space perception. Heavy, dark textures can reduce apparent room size, but light-coloured, subtle textures often enhance space by creating depth and interest. The key factors are colour value (lighter is better for small spaces), texture scale (finer patterns suit smaller rooms), and strategic placement (textured feature walls with smooth surrounding surfaces). Polished finishes like Venetian plaster actually enhance light reflection, potentially making spaces feel larger than flat paint. In rooms under 12 sqm, limit texture to single feature walls rather than all surfaces.
How much does it cost to remove textured walls if I change my mind?
Removal costs vary by finish type and substrate underneath. Basic stipple textures skim-coat over at £15-£25 per sqm, essentially covering rather than removing. Venetian plaster and microcement require more aggressive removal — grinding or careful chipping — costing £25-£45 per sqm plus new skim coating. Heavily textured Artex containing asbestos (pre-1985 applications) requires licensed removal at £40-£80 per sqm. Most professional decorative finishes last 15-25 years, long enough that changing tastes justify the investment. Consider this longevity when selecting finishes — choose timeless colours and moderate texture depths that transcend short-term trends.
Are textured finishes suitable for ceilings as well as walls?
Ceiling applications present additional challenges from gravity and access difficulties. Simple textures like stipple or light knockdown work on ceilings, though most professionals recommend against heavy texture overhead — it collects dust, creates cleaning challenges, and can appear overwhelming. Venetian plaster rarely applies to ceilings due to application complexity while working overhead. If considering textured ceilings, keep texture subtle and lighter in colour than walls. Many homeowners who texture walls choose smooth ceilings for contrast. For ceiling-specific guidance, see our article on kitchen ceiling options.
Can textured plaster finishes help with soundproofing or insulation?
Textured finishes provide modest acoustic improvement through surface irregularity that diffuses sound waves, but don’t constitute true soundproofing. Dense materials like thick lime plaster or microcement offer some mass-based sound dampening — approximately 2-4 dB reduction compared to standard paint. For genuine soundproofing, install dedicated acoustic insulation behind finishes or consider acoustic panels. Some specialist textured systems incorporate sound-absorbing aggregates (cork, pumice) offering enhanced performance, though at premium cost (£45-£70 per sqm). Thermal insulation impact is similarly modest — perhaps R-0.1 to R-0.3 added value depending on thickness and material. Don’t select decorative finishes primarily for acoustic or thermal performance; these remain aesthetic choices with minor functional benefits.