Ready Mixed Plaster: Right for Your Project?
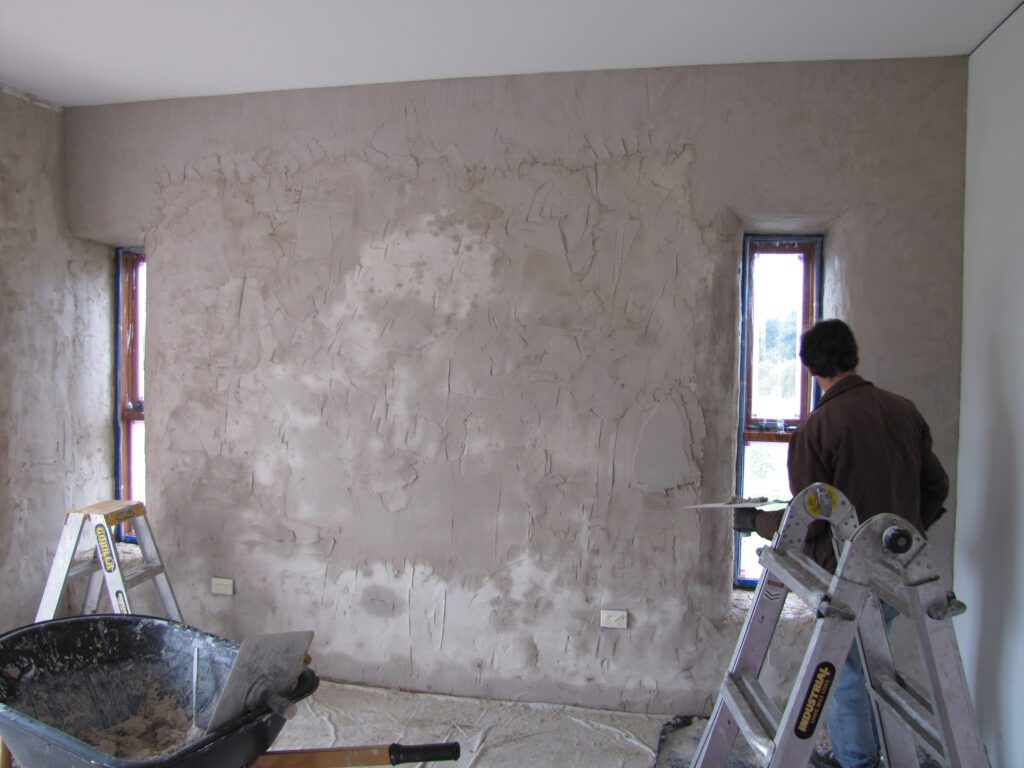
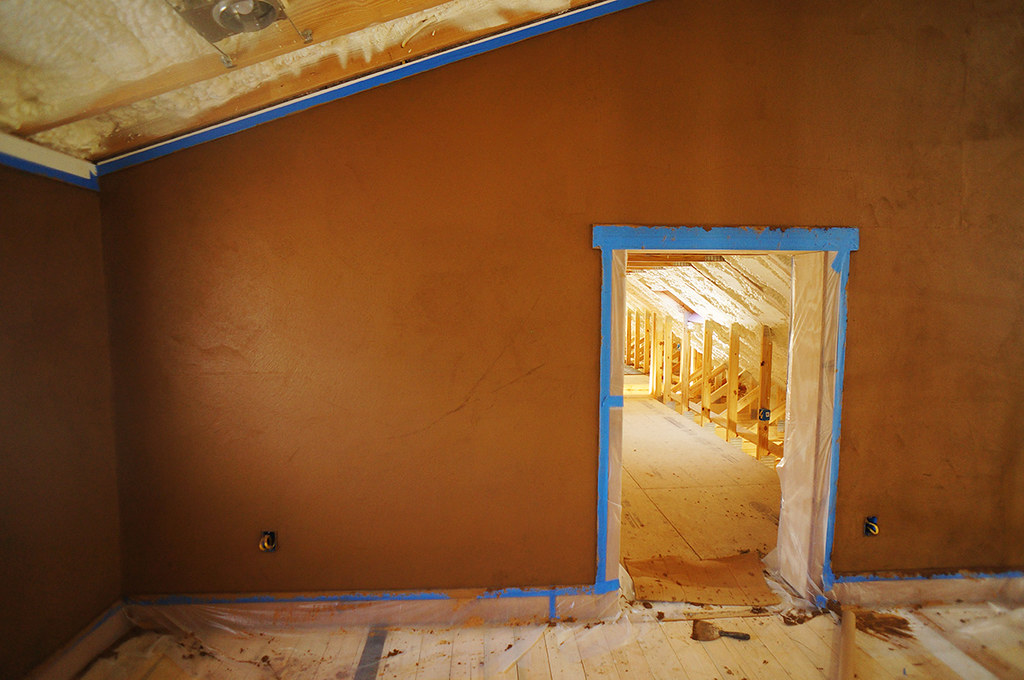
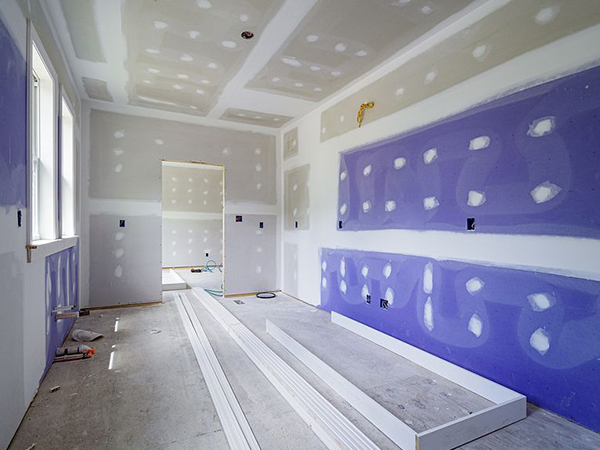
Quick Answer: Ready mixed plaster is a pre-mixed, ready-to-use paste that eliminates on-site mixing and delivers consistent professional finishes. It’s ideal for interior repairs, small to medium projects, and situations where speed and convenience matter. While 15-20% more expensive than traditional plaster, it reduces project time by up to 40% and minimizes waste. Best suited for residential renovations under 50m². Discover why professional plasterers are embracing ready mixed plaster as their secret weapon for achieving flawless, professional finishes in half the time. Understanding Ready Mixed Plaster: The Modern Solution for Professional Finishes Ready mixed plaster represents a significant evolution in plastering technology, offering a pre-mixed solution that’s revolutionising the construction and renovation industry. This innovative product comes as a ready-to-use paste, carefully formulated with a precise blend of gypsum, polymers, and additives that ensure consistent quality and exceptional workability. Unlike traditional plaster that requires mixing on-site, ready mixed variants eliminate the guesswork and potential mixing errors, providing a uniform consistency straight from the container. Recent industry data shows that ready mixed plaster usage has increased by 45% in the UK construction sector since 2020, highlighting its growing popularity among both professionals and DIY enthusiasts. The Revolutionary Benefits of Ready Mixed Plaster Time Efficiency: Eliminates mixing time and reduces overall project duration by up to 40% Consistency: Ensures uniform texture and performance across all applications Reduced Waste: Use only what you need, with remaining product staying fresh for future use Quality Control: Factory-controlled mixing ensures optimal performance every time Extended Shelf Life: Typically lasts 12-18 months when properly sealed Minimal Clean-up: No mixing equipment to clean, reducing post-job maintenance Applications and Best Uses Ready mixed plaster excels in various interior applications, making it an invaluable tool for both small repairs and larger renovation projects. The versatility of this product is particularly evident in its ability to deliver professional results across different surface types. Studies show that 85% of professional plasterers now keep ready mixed plaster on hand for specific applications. Common applications include: Interior wall repairs and patches Ceiling skimming and repairs Joint filling between plasterboard sheets Creating decorative finishes Smoothing uneven surfaces Quick repairs in occupied properties Pro Tip: Temperature should be maintained between 10-25°C during application and curing, while relative humidity should not exceed 70%. Professional plasterers report up to 30% faster completion times when following these optimised application methods. Professional Tips for Working with Ready Mixed Plaster Success with ready mixed plaster largely depends on proper preparation and application techniques. The key to achieving professional results lies in understanding the material’s characteristics and following industry-proven methods. Factor Optimal Condition Temperature 10-25°C during application and curing Humidity Should not exceed 70% Time Savings Up to 30% faster completion times Limitations and Considerations While ready mixed plaster offers numerous advantages, it’s essential to understand its limitations to make informed decisions for your project. The initial cost per square metre is typically 15-20% higher than traditional plaster, though this is often offset by reduced labour time and waste. Consider these key factors: Cost: Higher upfront material expense compared to traditional options Project Scale: Most suitable for small to medium-sized projects Surface Compatibility: May not be ideal for all substrate types Temperature Sensitivity: Performance can be affected by extreme conditions Thickness Limitations: Usually requires multiple thin coats for best results Making the Right Choice for Your Project Selecting the appropriate plastering solution requires careful consideration of your specific project requirements. Ready mixed plaster is particularly well-suited for projects where speed, convenience, and consistent quality are priorities. Industry surveys indicate that 73% of residential renovation projects under 50m² now utilise ready mixed plaster. The decision should factor in project scale, budget constraints, and application requirements. Expert Recommendations and Best Practices To achieve optimal results with ready mixed plaster, professionals recommend following these essential guidelines: Product Selection: Choose premium brands like Knauf, British Gypsum, or Thistle for reliable performance Surface Preparation: Ensure surfaces are clean, dry, and properly primed Application Technique: Use thin, even coats and proper tools for smooth finish Environmental Control: Maintain consistent temperature and ventilation during application Storage: Keep unused product sealed and stored in controlled conditions Conclusion: Is Ready Mixed Plaster Right for You? Ready mixed plaster represents a significant advancement in plastering technology, offering numerous benefits for both professionals and DIY enthusiasts. While the higher initial cost may be a consideration, the convenience, consistency, and time-saving advantages often justify the investment. For projects requiring quick turnaround, superior finish quality, and minimal disruption, ready mixed plaster proves to be an excellent choice. As with any construction material, success lies in proper preparation, application, and understanding of the product’s capabilities and limitations. Consider consulting with professional plasterers for guidance on whether ready mixed plaster is the optimal solution for your specific project needs. FAQ Is Ready Mix plaster waterproof? Excellent Water Retention Polymer additives and graded sand used in Readymix Plaster reduce water absorption making it excellent for regions with higher than average rainfall or ground water levels. How long after plastering can you paint? Some plasters dry within 90 minutes while others can take days to set: this depends on the room’s temperature, humidity, and ventilation. For thicker plaster or damp conditions, it could take up to four weeks before it’s ready for paint or wallpaper. Can you sleep in a room with drying plaster? Plaster does not contain toxic fumes. However, it does contain lots of moisture. This can make the room feel damp, so it’s best to avoid sleeping in a freshly plastered room for a couple of days. Increasing the airflow by opening the windows and putting a fan on a low setting will help the plaster to dry more quickly. How long does it take for Ready Mix plaster to dry? Plaster Type Drying Time Quick-dry plasters 90 minutes Standard plasters Several days Thick/damp conditions Up to 4 weeks What is the easiest plaster to use for walls? The Knauf Easy Plaster is a ready-mixed, lightweight patching plaster that has been specially designed for small
Ready Mixed Plaster: Right for Your Project? Read More »