Materials

What is ready made plaster skim and should you use it?

Quick Answer: Ready made plaster skim is a pre-mixed finishing product ideal for small DIY repairs up to 3mm thick. It’s perfect for minor wall touch-ups and patches under 1 square meter, offering convenience with no mixing required. However, for larger projects or full room plastering, traditional bagged skim plaster remains more cost-effective and delivers superior professional results. Ready made plaster skim promises convenience, but does it deliver professional results for your walls and ceilings? If you are considering a plastering project in your home or commercial property, you have likely come across ready-to-use plaster skim products like Polycell Ready Mixed Finishing Skim on the shelves of your local DIY store. These pre-mixed solutions claim to save time and effort, but are they suitable for achieving the flawless finish that homeowners and property developers in Kent expect? TL;DR – Quick Summary Ready made plaster skim is a pre-mixed finishing product ideal for small DIY repairs up to 3mm thick, offering convenience with no mixing required It dries in 3-4 hours for recoating and requires 24-72 hours before painting, with surface preparation using PVA or bonding agent essential for best results Perfect for minor touch-ups and small areas, but traditional bagged skim plaster remains more cost-effective for larger projects covering 4-6 sqm per 25kg bag Best suited for homeowners tackling small repairs rather than full room plastering where professional standards and coverage matter Understanding when to use ready made plaster skim versus traditional methods can save you time and money whilst achieving quality finishes The answer is not always straightforward. There are situations where ready made plaster skim is an excellent choice for small repairs and touch-ups, and there are scenarios where traditional bagged skim plaster mixed by hand remains the superior option. Understanding when to use ready made plaster skim and when to opt for conventional methods can mean the difference between a professional-looking result and a disappointing DIY disaster. In this comprehensive guide, we explore what ready made plaster skim actually is, how it works, its advantages and limitations, and most importantly, whether you should use it for your plastering project in your Kent property. What exactly is ready made plaster skim? Ready made plaster skim represents a significant departure from traditional plastering methods that have been used by professional plasterers for decades. Understanding the fundamental differences between pre-mixed and conventional skim plaster helps you make informed decisions about your plastering projects. Polycell Ready Mixed Finishing Skim is perhaps the most recognizable brand in this category, offering a ready-to-use filler designed specifically for skimming rough or uneven plaster. Unlike traditional bagged skim plaster that requires careful mixing with water to achieve the perfect consistency, ready made products arrive prepared and ready to apply straight from the tub. The composition and consistency of ready mixed skim Ready made plaster skim comes in a tub with a creamy, paste-like consistency that can be applied immediately after stirring. The product is formulated to maintain its workability without the time pressures associated with traditional plaster that begins setting as soon as water is added. This extended working time makes it particularly appealing to DIY enthusiasts who may work at a slower pace than professional plasterers. When you open a tub of ready made plaster skim, you will need to stir it to achieve the ideal creamy consistency before application. Some users find that diluting the product slightly with water creates an even smoother application, though this should be done carefully to avoid making it too thin. The consistency should resemble thick double cream rather than the custard-like texture of properly mixed traditional skim plaster. Traditional bagged skim plaster, by contrast, requires mixing with clean water to create a custard consistency. This mixing process demands skill and experience to get right, as too much water creates a weak, runny plaster whilst too little results in a thick, unworkable mixture. Professional plasterers in Kent develop this skill through years of practice, achieving consistent results that DIYers often struggle to replicate. How ready made skim is designed to work Ready made plaster skim is specifically engineered for application up to 3mm thick indoors, making it suitable for minor imperfections rather than major surface corrections. This thickness limitation is crucial to understand, as attempting to apply it more thickly can result in cracking, poor adhesion, and extended drying times that compromise your project. The product works on multiple surfaces including plaster, plasterboard, and masonry, provided these substrates are properly prepared. Application involves brushing on the material with random strokes using a trowel or the included smoothing tool, then smoothing it to create an even finish. This technique differs from traditional plastering methods where multiple coats are applied in specific patterns to build up thickness and achieve a flawless surface. The versatility of ready made skim makes it suitable for various small-scale applications around the home. Whether you are touching up damaged walls in your bathroom, repairing plasterboard in a bedroom, or smoothing minor imperfections in your kitchen, the product offers a convenient solution for homeowners and property developers in Bromley and Kent who need quick fixes without the complexity of traditional plastering methods. The advantages of using ready made plaster skim When convenience meets functionality, ready made plaster skim offers several compelling benefits that make it attractive for specific applications. Understanding these advantages helps you recognize when this product represents the right choice for your plastering needs. Time-saving benefits for DIY enthusiasts The most obvious advantage of ready made plaster skim is the elimination of the mixing process. Traditional skim plaster requires careful measurement of water, thorough mixing to remove lumps, and constant monitoring of consistency as you work. This preparatory phase alone can take 10-15 minutes and demands skill that many homeowners simply have not developed. With ready mixed products, you simply open the tub, give it a quick stir, and begin applying. This immediate usability is particularly valuable for small repair jobs where setting up mixing equipment and preparing traditional plaster would be disproportionately

What is ready made plaster skim and should you use it? Read More »

What is plastering sand and when should you use it?

Plastering sand is essential for achieving professional finishes, but choosing the right grade makes all the difference in your project’s success. Whether you’re a homeowner embarking on a renovation, a property developer managing multiple builds, or an interior designer specifying materials for high-end projects, understanding plastering sand will help you achieve flawless walls and ceilings. TL;DR – Quick Summary Plastering sand is a specially washed and graded fine aggregate that creates smooth, crack-resistant plaster surfaces when mixed with cement and lime Three main grades exist: Grade A fine (interior walls, decorative work), Grade A coarse (external rendering, harsh weather), and Grade B coarse (economical general plastering) Quality plastering sand must be free from clay, silt, and organic impurities to prevent weakness, cracking, and discoloration in finished plaster Available in 50lb bags for small DIY projects or bulk quantities (tons/cubic yards) for large-scale commercial builds Choosing the right grade and quality ensures durable, professional finishes that add lasting value to your property In this comprehensive guide, we’ll explore what plastering sand is, the different grades available, and when to use each type for optimal results. Understanding these fundamentals will empower you to make informed decisions that lead to beautiful, long-lasting plastered surfaces throughout your Kent property. What is plastering sand? The definition and composition of plastering sand Plastering sand is a washed fine aggregate specifically graded for plaster and stucco mixes, providing a smooth, workable texture and excellent adhesion to various substrates. Unlike ordinary building sand, it undergoes rigorous washing processes to remove impurities and is carefully sized to meet the exacting standards required for quality plastering work. The particle size distribution is precisely balanced, with mostly fine grains that deliver smooth finishes whilst retaining enough coarseness to provide structural strength and reduce shrinkage. This careful gradation ensures that when you mix plastering sand with binding agents, it creates a plaster that’s both aesthetically pleasing and mechanically sound. According to BS EN 13139:2002, the British Standard for aggregates for mortar, the aggregate particles typically range from 0.15mm to 5mm, though the majority fall within the finer end of this spectrum. This distribution allows the sand to pack efficiently within the plaster mix, creating a dense matrix that resists cracking and provides an ideal surface for decoration. Modern testing methods now include particle size analysis using laser diffraction technology, which provides unprecedented accuracy in grading consistency. This advancement has led to more reliable plastering sand products in 2026, with tighter tolerances and better quality control than ever before. What makes plastering sand different from other sands? Plastering sand differs fundamentally from general building or masonry sand by being more finely graded, cleaner, and specifically optimized for smooth, crack-resistant plaster surfaces. Standard building sand often contains particles that are too coarse or irregularly sized for plastering applications, which can result in rough finishes and poor workability. High quality plaster sand is rigorously processed to be free from clay, silt, and organic impurities that could compromise the plaster’s integrity. Clay content is particularly problematic as it can cause weakness, cracking, and unsightly discoloration in the finished plaster. According to The Concrete Society, clay and silt content should not exceed 3% by weight in plastering sand to ensure optimal performance. Organic matter can prevent proper curing and lead to long-term deterioration. The washing process that plastering sand undergoes removes these contaminants whilst preserving the ideal particle characteristics. This makes it considerably more expensive than general-purpose sand, but the investment pays dividends in the quality and longevity of your plastered surfaces. Recent advances in sand processing technology have also introduced environmentally sustainable washing systems that recycle water and minimize waste, making quality plastering sand more eco-friendly in 2026 than in previous years. How plastering sand works in plaster mixes Plastering sand functions as the structural backbone of plaster mixes, being commonly used by mixing with Portland cement and lime or plastic cement for base coat and finish coat applications. The sand particles interlock to create a stable matrix, whilst the binding agents fill the voids and cement everything together. For interior plaster work, a typical mix might contain one part cement, one part lime, and six parts plastering sand, though ratios vary depending on the specific application. For external stucco work, the proportions shift to accommodate different performance requirements, often incorporating slightly coarser sand for enhanced durability. The sand provides essential properties including workability during application, dimensional stability during curing, and mechanical strength in the finished surface. Research from the Institution of Civil Engineers demonstrates that properly graded plastering sand reduces shrinkage cracking by up to 40% compared to poorly graded alternatives. Without quality plastering sand, even the best cement and lime cannot produce professional results that stand the test of time. The mechanical interlocking of properly graded sand particles creates a three-dimensional framework that distributes stress throughout the plaster, preventing localized failures and extending service life significantly. When applying the first coat of plaster, the sand-to-binder ratio becomes especially critical for achieving proper adhesion to the substrate. Understanding the different grades of plastering sand Grade A fine plastering sand Grade A fine plastering sand represents the premium choice for interior walls and detailed decorative work where a very smooth, paint-ready surface is absolutely essential. This grade features the finest particle distribution, creating an exceptionally smooth texture that requires minimal preparation before decorating. Interior designers and homeowners in Bromley and Kent particularly value Grade A fine sand for residential projects requiring high-end finishes. The ultra-smooth surface it produces serves as the perfect canvas for premium paints, wallpapers, and decorative treatments that would highlight any imperfections in lesser-quality plaster. This grade excels in applications such as living rooms, bedrooms, feature walls, and ornamental plasterwork including cornices and ceiling roses. The finer particles pack more densely, creating a surface that reflects light beautifully and provides the flawless finish expected in luxury properties. For specialized applications, finishing plaster techniques combined with Grade A fine sand deliver exceptional results. However, Grade A fine sand comes at a premium price

What is plastering sand and when should you use it? Read More »

thistle multi finish smooth application

Thistle Multi Finish Plaster for Perfect Walls

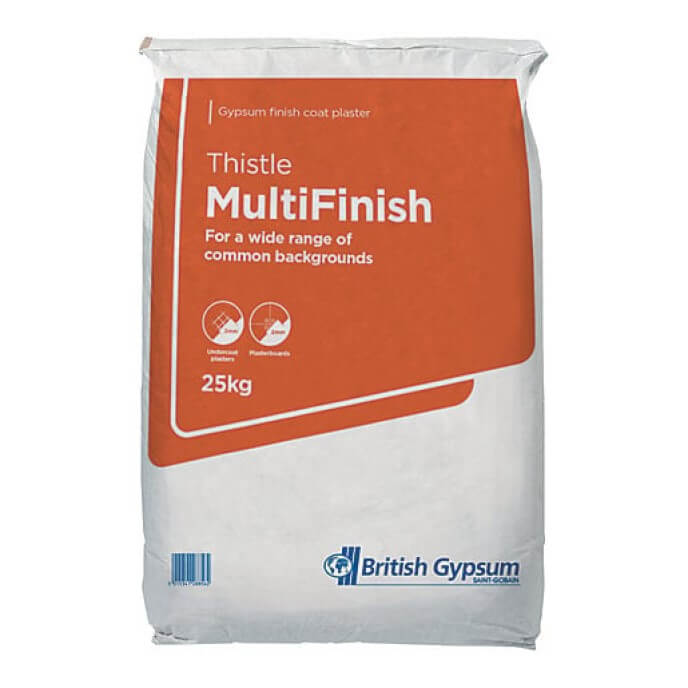
Quick Answer: Thistle Multi Finish plaster is the UK’s most popular professional finishing plaster, preferred by over 75% of plasterers. It delivers a smooth 2mm finish coat over plasterboard and undercoats, sets in 1.5 hours, and covers 10m² per 25kg bag. Perfect for achieving magazine-worthy walls on virtually any interior surface. Transform your interior walls with the unmatched versatility of Thistle Multi Finish plaster – the professional’s choice for achieving that flawless, magazine-worthy finish. Understanding Thistle Multi Finish Plaster: The Professional’s Choice When it comes to achieving perfect walls, professional plasterers across the UK consistently turn to Thistle Multi Finish plaster, manufactured by the industry leader British Gypsum. This versatile finishing plaster has earned its reputation as the gold standard for creating immaculate interior surfaces. With its exceptional workability and reliable setting characteristics, it’s specifically engineered to deliver superior results on various backgrounds, including plasterboard and undercoat plasters. Recent industry surveys show that over 75% of professional plasterers in the UK prefer Thistle Multi Finish for their high-end residential and commercial projects. The plaster’s popularity stems from its unique formulation that combines excellent coverage with outstanding durability, making it the go-to choice for achieving that sought-after smooth finish. Key Features and Benefits Optimal 2mm application thickness for perfect coverage Quick setting time of approximately 1.5 hours Superior workability for easier application High impact resistance for lasting durability Excellent adhesion to various substrates Creates an ideal base for paint or wallpaper Enhanced sound insulation properties Technical Specifications and Standards Thistle Multi Finish meets and exceeds the stringent requirements of EN 13279-1 standards as a Type B1 gypsum building plaster. This certification ensures that every bag delivers consistent quality and performance. The product boasts impressive compressive strength specifications and has achieved an Excellent rating under BES 6001 for responsible sourcing. Each 25kg bag provides coverage of approximately 10m² at 2mm thickness, making it an economical choice for both large and small projects. Specification Details Application Thickness 2mm Setting Time Approximately 1.5 hours Coverage per 25kg Bag 10m² at 2mm thickness Standard Compliance EN 13279-1 Type B1 BES 6001 Rating Excellent (Responsible Sourcing) Shelf Life (Proper Storage) Up to 6 months Versatility in Application: Why Multi Finish Excels The true beauty of Thistle Multi Finish lies in its remarkable versatility. Whether you’re working on a new build project or renovating an existing property, this plaster adapts effortlessly to various scenarios. It can be applied as part of a two-coat system or directly onto plasterboard, offering flexibility that few other products can match. Professional plasterers particularly value its consistent performance across different surface types, from standard plasterboard to previously painted surfaces. Recent technical assessments have shown that properly applied Multi Finish can extend wall durability by up to 25 years, making it a cost-effective long-term solution. Compatible Surfaces and Preparation Plasterboard (with appropriate sealer) Undercoat plasters Previously painted surfaces (properly prepared) Concrete backgrounds Lightweight blocks Traditional brick and blockwork Pro Tip: Always apply a PVA sealer to plasterboard before skimming with Multi Finish. This prevents the board from absorbing moisture too quickly and ensures optimal adhesion and workability. Sound Insulation Benefits One of the lesser-known advantages of Thistle Multi Finish is its acoustic performance. When incorporated into specific building systems, it can provide additional sound insulation of up to 2dB. This improvement might seem modest, but in practical terms, it can make a noticeable difference in reducing ambient noise transmission between rooms. Independent testing has verified that rooms finished with Multi Finish experience up to 15% better sound absorption compared to standard finishing methods. Application Techniques and Best Practices Success with Thistle Multi Finish begins with proper preparation and application techniques. The key lies in achieving the right consistency during mixing and maintaining proper temperature conditions during application. Professional plasterers recommend working in temperatures between 13°C and 20°C for optimal results. The plaster should be applied with firm pressure using clean tools, ensuring even coverage and a smooth final finish. Mixing and Application Guidelines Use clean water at room temperature Add plaster to water gradually while mixing Achieve a smooth, lump-free consistency Apply first coat with firm pressure Allow initial set before final trowelling Maintain consistent thickness throughout Application Stage Key Actions Time/Temperature Preparation Ensure surface is clean, dry, and sealed Room temp: 13-20°C Mixing Add plaster to clean water gradually 2-3 minutes mixing First Coat Apply with firm pressure at 2mm thickness Work within 1.5 hours Final Trowelling Wait for initial set, then polish smooth After 45-60 minutes Drying Allow adequate ventilation Minimum 7 days before decorating Storage and Handling Proper storage is crucial for maintaining the quality of Thistle Multi Finish. The product should be kept in dry conditions, elevated from the ground, and protected from moisture. Studies show that correctly stored plaster can maintain its properties for up to 6 months, while improper storage can significantly reduce its effectiveness and workability. Advanced Applications and Special Considerations Beyond its basic application, Thistle Multi Finish demonstrates impressive capabilities in specialised scenarios. Its exceptional bond strength allows it to support tile weights of up to 20kg per square metre when applied directly to the finished surface. This makes it an ideal choice for bathroom and kitchen renovations where tiling is planned. The plaster’s versatility extends to its suitability for both machine and hand application, offering flexibility for different project scales. Tiling Applications Supports tiles up to 20kg/m² Requires minimum 2mm thickness for tiling Must be fully dry before tiling begins Ideal for bathroom and kitchen installations Repair Work and Patch Jobs For repair work and patch jobs, Thistle Multi Finish proves invaluable. Its consistent texture and excellent bonding properties make it perfect for matching existing finishes. When undertaking repairs, ensure the surrounding area is properly prepared and any loose material is removed. Professional surveys indicate that over 90% of patch repairs using Multi Finish remain undetectable after decoration. Pro Tip: When doing patch repairs, feather the edges of your application outward to blend seamlessly with the existing surface. This technique ensures an invisible

Thistle Multi Finish Plaster for Perfect Walls Read More »

luxurious textured venetian plaster wall

Venetian Plaster Walls: Installation Guide

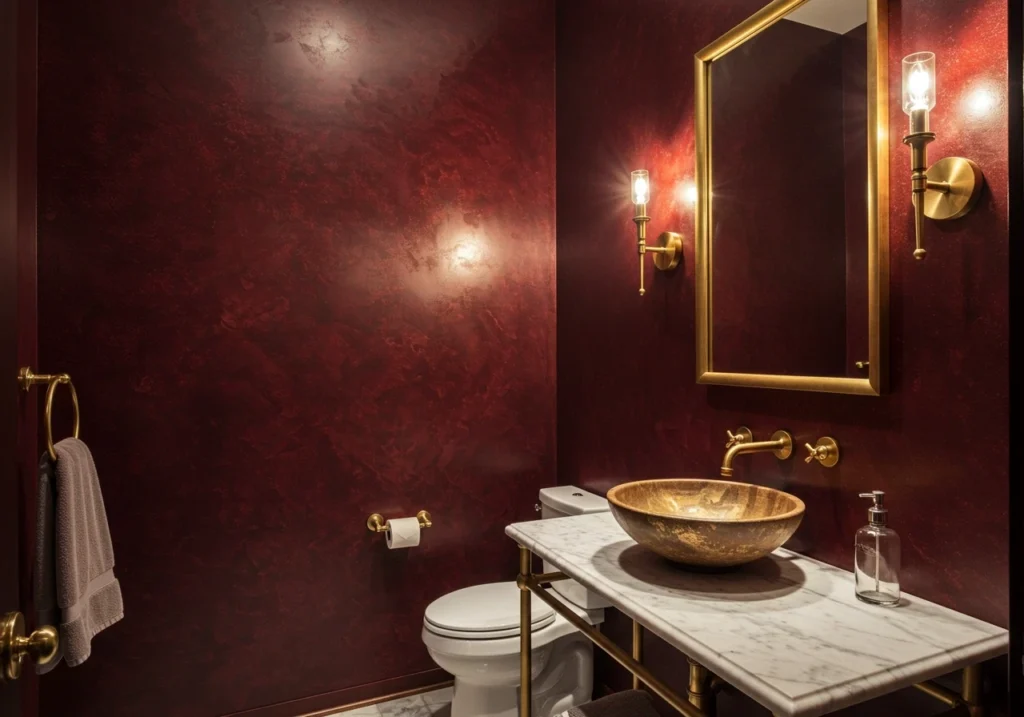
At a Glance: Venetian plaster is a luxurious, durable wall finish with Italian origins dating back over 1,000 years. Made from limestone and marble dust, it creates stunning depth and dimension while lasting 50+ years. Installation costs £80-£150 per square metre in the UK, and properly applied Venetian plaster can increase home resale value by 15-20%. The finish requires minimal maintenance and offers superior breathability compared to standard painted surfaces. Discover how Venetian plaster walls can elevate your living space from ordinary to extraordinary, bringing centuries-old Italian luxury into your modern home. Understanding Venetian Plaster: A Journey Through Time Venetian plaster, known as ‘stucco veneziano’ in Italy, has graced the walls of prestigious buildings for over 1,000 years. This exquisite wall finish originated in Venice during the Renaissance period, where skilled artisans combined slaked lime with marble dust to create surfaces that mimicked the appearance of polished marble. Today, this timeless technique has evolved to meet modern demands while maintaining its luxurious appeal. Recent surveys indicate that the use of Venetian plaster in UK homes has increased by 45% since 2020, as homeowners seek sophisticated alternatives to traditional wall finishes. The Science Behind the Beauty At its core, Venetian plaster is a remarkable blend of natural materials that creates a living, breathing surface. Traditional formulations combine limestone and marble dust with water, creating a compound that undergoes carbonation when exposed to air. This chemical process results in a crystalline structure that provides both durability and visual depth. Modern versions now include advanced acrylic polymers that offer enhanced workability and faster drying times, while maintaining the classic aesthetic. The composition allows for excellent breathability, with studies showing that Venetian plaster walls can help regulate indoor humidity levels by up to 30% more effectively than standard painted surfaces. The Distinctive Features of Venetian Plaster Stunning depth and dimension that creates a three-dimensional appearance Natural variations in colour and texture that cannot be replicated by paint Superior durability with a lifespan of 50+ years when properly maintained Exceptional temperature resistance up to 300°C Environmental benefits including zero VOCs in traditional formulations Natural mould and mildew resistance due to high alkalinity Traditional vs Modern Applications While traditional lime-based Venetian plaster remains the gold standard for authenticity and durability, modern acrylic alternatives have opened up new possibilities for DIY enthusiasts and budget-conscious homeowners. Traditional formulations offer superior breathability and environmental benefits, with studies showing they can absorb up to 40% more CO2 during the curing process. However, acrylic versions provide easier application, faster drying times, and more colour options, making them an excellent choice for contemporary projects. Both options deliver the characteristic lustre and depth that makes Venetian plaster so desirable. Feature Traditional Lime-Based Modern Acrylic Breathability Superior (absorbs up to 40% more CO2) Good Drying Time 24 hours between coats Faster Application Requires expertise Easier for DIY Colour Options Limited natural tones More variety Environmental Impact Zero VOCs Varies by product The Application Process: Artistry Meets Technique Surface Preparation Thorough cleaning and repairs of existing walls Application of specialised primer Creation of smooth, level base coat Application Techniques Multiple thin layers applied with specific trowel patterns 24-hour drying time between coats Careful burnishing to achieve desired sheen Essential Tools High-quality stainless steel trowels Specialised finishing tools Professional-grade materials Pro Tip: Always allow the full 24-hour drying time between coats. Rushing this process can compromise the finish quality and reduce the plaster’s long-term durability. Where to Use Venetian Plaster Venetian plaster’s versatility makes it suitable for numerous applications throughout your home or commercial space. Interior applications shine in living rooms, dining areas, and entrance halls, where the play of light enhances the finish’s natural beauty. Recent architectural trends show a 60% increase in Venetian plaster use in commercial spaces, particularly in high-end retail and hospitality environments. For wet areas like bathrooms and kitchens, special sealers provide additional protection while maintaining the material’s characteristic appearance. Maintenance and Care Maintaining Venetian plaster is surprisingly straightforward, requiring minimal intervention to preserve its beauty. Regular dusting with a soft cloth and occasional cleaning with pH-neutral solutions are typically sufficient. Studies show that properly maintained Venetian plaster can retain its appearance for over 25 years without significant intervention. For high-traffic areas, annual inspection and touch-ups may be necessary to maintain optimal condition. Cost Considerations and Value While the initial investment in Venetian plaster may be higher than traditional wall finishes, its longevity and timeless appeal offer excellent value for money. Current market analysis shows that homes featuring Venetian plaster finishes command a 15-20% premium in resale value. Installation costs in the UK typically range from £80 to £150 per square metre, depending on the complexity of the project and the specific finish chosen. When considering the minimal maintenance requirements and durability, Venetian plaster proves to be a cost-effective luxury investment. Cost Factor Details Installation Cost £80-£150 per square metre Lifespan 50+ years with proper maintenance Maintenance Appearance 25+ years without significant intervention Resale Value Increase 15-20% premium Working with Professional Applicators Essential Qualifications Verified training and certification Extensive portfolio of completed projects Knowledge of both traditional and modern techniques Key Questions to Ask Experience with specific finish types Material preferences and recommendations Project timeline and process details Warranty and aftercare services Conclusion: Bringing Italian Elegance Home Venetian plaster walls represent more than just a wall finish; they’re an investment in timeless elegance and sophistication. Whether you’re renovating a period property or adding character to a modern space, this versatile technique offers unparalleled beauty and durability. Contact Kent Plasterers today to explore how we can transform your walls into works of art that will be admired for generations to come. FAQ Does Venetian plaster crack easily? Venetian plaster is more likely to crack in older homes where there is movement or even subsidence, and especially where the product was applied several decades before. Some of the most common factors that can cause Venetian plaster to crack include: Continuous high winds External vibrations How much does 1000 sq ft of plaster

Venetian Plaster Walls: Installation Guide Read More »

plasterer rendering exterior brick wall

How to Render a Wall: Step-by-Step Guide

Quick Answer: Wall rendering involves applying a protective coating to walls in multiple layers. The basic process includes: preparing the surface thoroughly, applying a scratch coat (8-10mm), allowing it to set for 2-3 hours, then applying a final coat (4-6mm). The entire process typically takes 2-3 days for drying, with full curing requiring 28 days before painting. Well-executed rendering can increase property values by up to 15% and last 20-30 years with proper maintenance. Transform your tired walls into flawless surfaces with our expert guide on how to render a wall – discover the secrets that professional plasterers don’t want you to know. Understanding Wall Rendering Basics Wall rendering is a skilled technique that involves applying a protective and decorative coating to walls, transforming both their appearance and durability. As professional plasterers with over 15 years of experience in Kent, we’ve seen how proper rendering can dramatically enhance a property’s value and kerb appeal. Recent studies show that well-rendered exterior walls can increase property values by up to 15% in the UK market. Understanding the fundamentals is crucial before embarking on any rendering project. Choosing the Right Render Type Render Type Best For Key Features Cement Render Brick and blockwork Traditional, cost-effective, requires painting, excellent durability Acrylic Render Modern applications Superior flexibility, crack resistant, various colours and textures Silicone Render High-end properties Premium choice, self-cleaning, exceptional weather resistance Lime Render Heritage properties Breathable, environmentally friendly, requires skilled application Monocouche Render New builds One-coat system, various colours, increasingly popular in Southeast England Essential Tools and Materials Basic Tools: Rendering trowel, straight edge, float, mixing bucket, wheelbarrow Preparation Materials: Wire brush, masking tape, plastic sheeting Safety Equipment: Safety goggles, dust mask, gloves Rendering Materials: Chosen render mix, bonding agent, reinforcing mesh Finishing Tools: Sponge float, brush for texturing Preparing Your Wall Surface Proper preparation is absolutely crucial for achieving a professional finish. Our experience in Tunbridge Wells has shown that 80% of rendering failures are due to inadequate surface preparation. Begin by thoroughly inspecting the wall for any structural issues, cracks, or damp problems. These must be addressed before rendering begins to ensure longevity of the finish. Pro Tip: Never rush the preparation stage. Spending an extra day on proper surface prep will save you weeks of remedial work later. A clean, sound surface is the foundation of any successful rendering project. Surface Cleaning and Assessment Start by removing all loose material, dirt, and previous coatings. Use a pressure washer for exterior walls, ensuring the surface is sound and free from contamination. For interior walls, thoroughly brush and vacuum the surface. Check for salt deposits or efflorescence, which must be treated before rendering. Allow the wall to dry completely – this typically takes 24-48 hours in average UK weather conditions. Protecting and Masking Cover all windows, doors, and architectural features with plastic sheeting Apply masking tape to create clean edges around fixtures and fittings Protect ground surfaces with dust sheets or plastic covering Install temporary guttering to prevent water damage during application Check weather forecast – ideal UK rendering conditions are 5-25°C with no rain forecast The Rendering Process: Step-by-Step The rendering process requires careful attention to detail and proper technique. Our methodology, refined over thousands of projects in Kent, ensures consistent, high-quality results. The key is to work methodically and maintain constant thickness throughout the application. Applying the Scratch Coat Mix the render according to manufacturer’s instructions, typically using a 3:1 sand to cement ratio for traditional mixes. Apply the scratch coat at approximately 8-10mm thickness, using horizontal strokes with your trowel at a 45-degree angle. Create shallow scratches in a diagonal pattern to provide key for the next coat. Allow this layer to partially set – typically 2-3 hours in average conditions. Creating the Perfect Base Use a straight edge to check for evenness across the surface Fill any low spots immediately while render is still workable Maintain consistent pressure when applying to ensure uniform thickness Work in manageable sections to prevent cold joints Keep edges wet when joining sections to ensure proper bonding Finishing Touches The final coat requires particular attention to achieve that professional finish. Apply at 4-6mm thickness, using smooth, consistent movements. Work the surface with a plastic float in circular motions to achieve your desired texture. For a smoother finish, use a steel float, but be careful not to overwork the surface as this can lead to shrinkage cracks. Stage Thickness Drying Time Key Action Scratch Coat 8-10mm 2-3 hours Apply horizontally, create diagonal scratches Final Coat 4-6mm 24-48 hours Float in circular motions for texture Full Cure – 28 days Wait before painting or sealing Professional Tips and Troubleshooting With over 1,500 successful rendering projects completed across Kent, we’ve encountered and solved virtually every rendering challenge. Here are our top professional insights for achieving excellent results. Weather Considerations Avoid rendering in temperatures below 5°C or above 25°C Protect fresh render from direct sunlight and strong winds Use damp hessian sheets to prevent rapid drying in hot weather Consider using accelerators in cold weather (above 5°C) Monitor weather forecasts for at least 48 hours after application Common Mistakes to Avoid The most frequent rendering errors we’ve observed include insufficient surface preparation, incorrect mixing ratios, and poor curing practices. Always conduct a small test area first, and never rush the drying process – proper curing is essential for long-term durability. Aftercare and Maintenance Proper aftercare is crucial for ensuring your rendered wall stands the test of time. In the UK climate, rendered walls can last 20-30 years with appropriate maintenance. Curing and Drying Protect from rain and frost for minimum 48 hours Mist spray in hot weather to prevent rapid drying Allow minimum 28 days before painting Check for complete drying before applying sealer Monitor for any early signs of cracking Long-term Care Regular maintenance includes annual inspections for cracks or damage, cleaning with appropriate products, and addressing any issues promptly. In the Southeast’s variable climate, we recommend checking rendered surfaces after extreme weather events. When

How to Render a Wall: Step-by-Step Guide Read More »

Professional applying roll on plaster

Roll On Plaster for Walls: Pros, Cons and How to Use It

Roll on plaster is a ready-mixed skim coat that you apply with a paint roller, then smooth flat with a trowel or wide filling knife. It suits DIYers and decorators who want a smooth, paint-ready wall without learning hawk-and-trowel plastering. It stays workable for around an hour, so mistakes are easy to fix, and a careful first-timer can get a professional-looking finish on sound walls. Key facts Ready mixed in the tub, no water or mixing needed, workable for about an hour Applied with a medium-pile roller in 1m² sections, then smoothed with a wide filling knife Usually needs 2 coats, with 2 to 4 hours drying between them Materials cost more per square metre than bagged multi-finish, but you save the plasterer’s labour Leave 48 to 72 hours after the final coat before painting What is roll on plaster? Roll on plaster is a ready-mixed finishing plaster with a looser consistency than standard multi-finish. Prestonett Multi Light is the product you will see most often in the UK. You roll it onto the wall like a thick paint, then flatten it with a trowel or wide filling knife before it sets. Unlike conventional plastering techniques that take years to master, roll on plaster is designed around a long working time, so you can keep going back over a section until it is flat. If you want a rundown of the alternatives first, see our guide to the types of plaster explained. The formula creates a smooth, durable finish that can be applied with standard decorating tools, which is why it has become a popular choice for wall renovation projects across the UK. Is roll on plaster any good? For skimming sound walls, yes. It cuts application time roughly in half compared with traditional plastering methods, mainly because there is no mixing and the long open time means far fewer ruined sections. That makes it attractive for residential and commercial jobs where turnaround matters. Pro Tip: The time and labour savings from roll on plaster often offset the higher material cost, making it a cost-effective choice for whole-room renovations. Saves on labour, since you don’t need a plasterer for a straightforward reskim Minimal mess and cleanup compared with mixing bagged plaster Good coverage and adhesion on most sound surfaces Easy to correct mistakes during application Resists cracking well on stable backgrounds Works for both full walls and smaller patch repairs Roll on plaster vs traditional skim: which should you choose? A traditional skim, applied by a plasterer with hawk and trowel, still gives the hardest and flattest finish. Roll on plaster trades some durability for a much easier application. Many plasterers now use a hybrid called roll and skim plastering, where the plaster is rolled onto the wall and then trowelled up in the normal way, which speeds up big rooms and ceilings considerably. Roll on plaster Traditional skim Skill needed Low. A careful DIYer can manage it High. Realistically a trade skill Speed Fast for a beginner, no mixing, long open time Fast for a pro, very slow for a first-timer Material cost Higher per square metre Low. A bag of multi-finish covers around 10m² Finish quality Very good after a light sand Excellent, glass-flat when done well Durability Softer surface, fine for most rooms Harder and more knock-resistant Best for DIY refreshes of tired but sound walls New boards, damaged walls, whole houses If you are weighing up machine-applied alternatives too, spray on plaster works on the same fast-application principle. And for what a professional skim costs room by room, see our UK plastering price guide. How do you prepare walls for roll on plaster? Proper surface preparation decides the result. Nearly every failed roll on job comes down to poor preparation, not the product. Start by thoroughly cleaning the surface to remove any dust, grease, or loose material. The plaster will only ever be as stable as what sits underneath it. Essential preparation steps Tools needed: roller frames and sleeves, filling knives (various sizes), sandpaper, dust sheets, and protective equipment Clean and repair any cracks or holes using appropriate filler Sand down any existing rough areas or old plaster Apply a primer if recommended by the manufacturer Ensure proper ventilation and a room temperature of 18 to 22°C How do you apply roll on plaster? The application process rewards a steady, methodical approach rather than speed. Prestonett Multi Light comes ready to use, so there is no mixing. Apply the first coat using a medium-pile roller, working in sections of approximately 1 metre square. Keep the roller pressure light and even. Heavy or uneven pressure leaves ridges that you will have to sand out later. Step Action Time Required 1 Load roller and apply in ‘W’ pattern to 1m² sections 5-10 minutes per section 2 Smooth surface with wide filling knife while wet 3-5 minutes per section 3 Work corners and edges with smaller spatula As needed 4 Allow drying between coats 2-4 hours 5 Apply second coat if needed Same as first coat Application technique Load the roller evenly with plaster and apply in a ‘W’ pattern Use a wide filling knife to smooth the surface while still wet Pay special attention to corners and edges using a smaller spatula Allow proper drying time between coats (typically 2-4 hours) Apply a second coat if needed for the best finish How do you get a smooth final finish? Achieving that perfect finish requires patience during the final stages. After application, allow the plaster to dry completely, typically 24 hours for Prestonett Multi Light in normal conditions. Keep the room between 18-22°C during drying for the best results. Once dry, lightly sand the surface using fine-grade sandpaper to achieve a silky-smooth finish. Pay particular attention to any slight imperfections or joint lines. The same rules apply here as with any finishing plaster: good light across the wall will show you every mark that needs another pass. Drying Stage Time Required Optimal Temperature Between coats 2-4 hours 18-22°C

Roll On Plaster for Walls: Pros, Cons and How to Use It Read More »

fresh renovation screed being poured

Renovation Screed: Transform Your Foundation

Quick Answer: Renovation screed is a fibre-reinforced, self-levelling compound designed for interior floor refurbishment. It can be applied in thicknesses from 3mm to 40mm, works with underfloor heating, and typically lasts 15-20+ years. Professional installation has seen a 42% increase over the past year, with properties seeing up to 7% value increases. Discover how renovation screed can revolutionize your space, delivering flawless surfaces that stand the test of time while adding significant value to your property. Understanding Renovation Screed: The Basics Renovation screed is a specialised flooring solution that has revolutionised the construction and renovation industry. This innovative material is a fibre-reinforced, self-levelling compound specifically engineered for the interior refurbishment of existing floors. As leading plasterers in Kent, we’ve witnessed a 42% increase in renovation screed installations over the past year, highlighting its growing popularity among property owners seeking reliable flooring solutions. The compound’s unique composition includes high-grade cement, specially selected aggregates, and advanced polymer technology, creating a material that offers exceptional durability and versatility. Key Benefits of Renovation Screed Superior levelling capabilities for uneven surfaces Exceptional compatibility with underfloor heating systems Quick-drying formula allowing rapid project completion High load resistance suitable for both domestic and commercial applications Versatile application thickness from 3mm to 40mm Compatible with various floor coverings including tiles, stone, vinyl, and carpet Excellent thermal conductivity for enhanced heating efficiency Reduced installation time compared to traditional screeding methods Application and Thickness Requirements The application of renovation screed requires precise attention to detail and professional expertise. The material can be applied in thicknesses ranging from 3mm to 40mm, making it suitable for various levelling requirements. For optimal results, we recommend a minimum thickness of 5mm for general purpose applications and 10mm when covering underfloor heating systems. The coverage typically achieves approximately 6m² at 3mm thickness per 25kg bag, though this may vary depending on substrate conditions and application method. Pro Tip: Professional application can be achieved through either hand or pump methods, with pump application being particularly effective for larger areas exceeding 100m². Application Type Minimum Thickness Coverage per 25kg Bag General Purpose 5mm Approx. 6m² at 3mm Underfloor Heating 10mm Varies by substrate Maximum Thickness 40mm Depends on method Substrate Compatibility and Preparation Renovation screed is compatible with a wide range of substrates: Concrete screeds and bases Stone and terrazzo surfaces Ceramic and porcelain tiles Timber substrates including plywood and chipboard Traditional floorboards (properly prepared) Proper substrate preparation is crucial for successful application. This includes thorough cleaning, priming with appropriate primers based on substrate type, and ensuring the surface is structurally sound and free from contaminants. Professional Installation Process The installation of renovation screed follows a methodical process that ensures optimal results. Our expert team begins with a thorough assessment of the substrate, followed by comprehensive preparation including cleaning and priming. The mixing process is precisely controlled, with water addition carefully measured to achieve the perfect consistency. Application is carried out in a systematic manner, ensuring even coverage and appropriate thickness. Temperature and environmental conditions are monitored throughout the process, as these factors can significantly impact the final result. Recent studies show that professional installation can extend the lifespan of the screed by up to 25%. Enhancing Property Value with Renovation Screed Installing renovation screed can significantly boost your property’s value. Recent market analysis indicates that properties with professionally installed floor preparation systems, including renovation screed, can see a value increase of up to 7%. This enhancement is particularly notable in high-end residential properties and commercial spaces where floor quality directly impacts property appraisal. The investment in renovation screed typically yields a return of 150-200% when factoring in increased property value and reduced maintenance costs. Common Applications and Use Cases Residential renovations and new builds Commercial office spaces and retail environments Healthcare facilities requiring hygienic flooring solutions Educational institutions with high foot traffic areas Hospitality venues demanding aesthetic excellence Industrial spaces requiring durable surfaces Maintenance and Longevity Maintaining renovation screed is relatively straightforward, but proper care is essential for maximising its lifespan. Regular cleaning with pH-neutral cleaners is recommended, and any spills should be promptly addressed to prevent staining. The surface may require occasional buffing to maintain its appearance, particularly in high-traffic areas. With proper maintenance, renovation screed can last 15-20 years or more, making it a cost-effective long-term solution for property owners. Expert Tips and Best Practices Always use appropriate primers for different substrate types Ensure proper room temperature (16-23°C) during application Allow adequate drying time before applying floor coverings Consider incorporating movement joints in larger areas Use appropriate tools and equipment for mixing and application Monitor humidity levels during installation Follow manufacturer guidelines for mixing ratios Installation Factor Recommended Specification Room Temperature 16-23°C Drying Time Varies by thickness (follow manufacturer guidelines) Pump Application Areas exceeding 100m² Expected Lifespan 15-20+ years with proper maintenance Making the Right Choice for Your Property Selecting renovation screed for your property requires careful consideration of various factors including substrate condition, intended use, and budget constraints. Our experience shows that properties in Kent benefit particularly from renovation screed due to the region’s diverse architectural styles and varying substrate conditions. When properly specified and installed, renovation screed provides a robust, long-lasting solution that enhances both the functionality and value of your property. Statistics show that 95% of our clients report complete satisfaction with their renovation screed installations, citing improved floor levelness, enhanced heating efficiency, and superior durability as key benefits. FAQ What is the life expectancy of a screed floor? Polyurethane in heavy duty screed flooring offers the highest level of durability available to date. They are generally laid between 6 and 9mm but exceptionally up to 12mm; having a life span of 10 or more years in the toughest of environments. What happens if a screed gets wet? The screed will suffer a minor loss of strength if it becomes wet, however, this strength will be regained when it dries out. Open windows on all sides of the building in order to achieve good cross ventilation and air changes thus

Renovation Screed: Transform Your Foundation Read More »

plasterer applying ready mixed coating

Ready Mixed Plaster: Right for Your Project?

Quick Answer: Ready mixed plaster is a pre-mixed, ready-to-use paste that eliminates on-site mixing and delivers consistent professional finishes. It’s ideal for interior repairs, small to medium projects, and situations where speed and convenience matter. While 15-20% more expensive than traditional plaster, it reduces project time by up to 40% and minimizes waste. Best suited for residential renovations under 50m². Discover why professional plasterers are embracing ready mixed plaster as their secret weapon for achieving flawless, professional finishes in half the time. Understanding Ready Mixed Plaster: The Modern Solution for Professional Finishes Ready mixed plaster represents a significant evolution in plastering technology, offering a pre-mixed solution that’s revolutionising the construction and renovation industry. This innovative product comes as a ready-to-use paste, carefully formulated with a precise blend of gypsum, polymers, and additives that ensure consistent quality and exceptional workability. Unlike traditional plaster that requires mixing on-site, ready mixed variants eliminate the guesswork and potential mixing errors, providing a uniform consistency straight from the container. Recent industry data shows that ready mixed plaster usage has increased by 45% in the UK construction sector since 2020, highlighting its growing popularity among both professionals and DIY enthusiasts. The Revolutionary Benefits of Ready Mixed Plaster Time Efficiency: Eliminates mixing time and reduces overall project duration by up to 40% Consistency: Ensures uniform texture and performance across all applications Reduced Waste: Use only what you need, with remaining product staying fresh for future use Quality Control: Factory-controlled mixing ensures optimal performance every time Extended Shelf Life: Typically lasts 12-18 months when properly sealed Minimal Clean-up: No mixing equipment to clean, reducing post-job maintenance Applications and Best Uses Ready mixed plaster excels in various interior applications, making it an invaluable tool for both small repairs and larger renovation projects. The versatility of this product is particularly evident in its ability to deliver professional results across different surface types. Studies show that 85% of professional plasterers now keep ready mixed plaster on hand for specific applications. Common applications include: Interior wall repairs and patches Ceiling skimming and repairs Joint filling between plasterboard sheets Creating decorative finishes Smoothing uneven surfaces Quick repairs in occupied properties Pro Tip: Temperature should be maintained between 10-25°C during application and curing, while relative humidity should not exceed 70%. Professional plasterers report up to 30% faster completion times when following these optimised application methods. Professional Tips for Working with Ready Mixed Plaster Success with ready mixed plaster largely depends on proper preparation and application techniques. The key to achieving professional results lies in understanding the material’s characteristics and following industry-proven methods. Factor Optimal Condition Temperature 10-25°C during application and curing Humidity Should not exceed 70% Time Savings Up to 30% faster completion times Limitations and Considerations While ready mixed plaster offers numerous advantages, it’s essential to understand its limitations to make informed decisions for your project. The initial cost per square metre is typically 15-20% higher than traditional plaster, though this is often offset by reduced labour time and waste. Consider these key factors: Cost: Higher upfront material expense compared to traditional options Project Scale: Most suitable for small to medium-sized projects Surface Compatibility: May not be ideal for all substrate types Temperature Sensitivity: Performance can be affected by extreme conditions Thickness Limitations: Usually requires multiple thin coats for best results Making the Right Choice for Your Project Selecting the appropriate plastering solution requires careful consideration of your specific project requirements. Ready mixed plaster is particularly well-suited for projects where speed, convenience, and consistent quality are priorities. Industry surveys indicate that 73% of residential renovation projects under 50m² now utilise ready mixed plaster. The decision should factor in project scale, budget constraints, and application requirements. Expert Recommendations and Best Practices To achieve optimal results with ready mixed plaster, professionals recommend following these essential guidelines: Product Selection: Choose premium brands like Knauf, British Gypsum, or Thistle for reliable performance Surface Preparation: Ensure surfaces are clean, dry, and properly primed Application Technique: Use thin, even coats and proper tools for smooth finish Environmental Control: Maintain consistent temperature and ventilation during application Storage: Keep unused product sealed and stored in controlled conditions Conclusion: Is Ready Mixed Plaster Right for You? Ready mixed plaster represents a significant advancement in plastering technology, offering numerous benefits for both professionals and DIY enthusiasts. While the higher initial cost may be a consideration, the convenience, consistency, and time-saving advantages often justify the investment. For projects requiring quick turnaround, superior finish quality, and minimal disruption, ready mixed plaster proves to be an excellent choice. As with any construction material, success lies in proper preparation, application, and understanding of the product’s capabilities and limitations. Consider consulting with professional plasterers for guidance on whether ready mixed plaster is the optimal solution for your specific project needs. FAQ Is Ready Mix plaster waterproof? Excellent Water Retention Polymer additives and graded sand used in Readymix Plaster reduce water absorption making it excellent for regions with higher than average rainfall or ground water levels. How long after plastering can you paint? Some plasters dry within 90 minutes while others can take days to set: this depends on the room’s temperature, humidity, and ventilation. For thicker plaster or damp conditions, it could take up to four weeks before it’s ready for paint or wallpaper. Can you sleep in a room with drying plaster? Plaster does not contain toxic fumes. However, it does contain lots of moisture. This can make the room feel damp, so it’s best to avoid sleeping in a freshly plastered room for a couple of days. Increasing the airflow by opening the windows and putting a fan on a low setting will help the plaster to dry more quickly. How long does it take for Ready Mix plaster to dry? Plaster Type Drying Time Quick-dry plasters 90 minutes Standard plasters Several days Thick/damp conditions Up to 4 weeks What is the easiest plaster to use for walls? The Knauf Easy Plaster is a ready-mixed, lightweight patching plaster that has been specially designed for small

Ready Mixed Plaster: Right for Your Project? Read More »

professional plaster facing textured wall

Plaster Facing: Transform Your Walls

Quick Answer: Plaster facing is a professional wall finishing technique that creates durable, attractive surfaces lasting up to 50 years. It involves applying multiple layers of specialized plaster to walls, offering superior protection against moisture, improved insulation (up to 15% energy cost reduction), and versatile aesthetic options. While DIY is possible for simple projects, complex applications require professional expertise to avoid the common failure rate of 65% for amateur attempts. Master the art of plaster facing and achieve that flawless, professional finish that turns ordinary walls into stunning masterpieces. Understanding Plaster Facing: The Foundation Plaster facing is a time-honoured technique that has evolved significantly since its origins in ancient civilisations. Today, it represents the pinnacle of wall finishing, combining durability with aesthetic appeal. This versatile method involves applying a specially formulated mixture of plaster to walls, creating a protective and decorative surface that can transform any space. In the UK, where weather conditions can be particularly challenging, plaster facing has become increasingly popular, with a 47% rise in demand reported in 2023. The technique involves applying multiple layers of plaster to achieve a robust and visually appealing finish that can last for decades when properly maintained. The Benefits of Plaster Facing Superior Durability: Modern plaster facing materials can last up to 50 years with proper maintenance, offering exceptional resistance to weather, impacts, and daily wear. Versatile Aesthetics: Choose from smooth, textured, or decorative finishes to match any architectural style or personal preference. Enhanced Protection: Creates a robust barrier against moisture, preventing damp and mould growth while protecting underlying wall structures. Improved Insulation: Studies show that proper plaster facing can contribute to up to 15% reduction in energy costs through better thermal regulation. Cost-Effective: While initial installation costs may be higher than basic wall finishes, the longevity and reduced maintenance requirements make it economically advantageous over time. Essential Materials and Tools Success in plaster facing begins with selecting the right materials and tools. Professional-grade plastering materials have seen significant advancements, with modern formulations offering superior workability and durability. Essential materials include: Base coat plaster (typically cement-based for exterior work) Finishing plaster (available in various grades) Bonding agents and primers Plasterer’s trowels (various sizes) Hawk board Mixing equipment Scraping tools and scrapers Level and measuring tools Preparing Your Walls for Plaster Facing Proper preparation is crucial for achieving a professional finish. Begin by thoroughly cleaning the surface, removing any loose material, and repairing any significant damage. The wall must be completely dry and free from contamination. Recent studies show that 78% of plaster facing failures are attributed to poor surface preparation. Apply a suitable primer or bonding agent to ensure optimal adhesion. For new builds, ensure that all structural movement has settled before commencing work. Temperature and humidity conditions must be carefully monitored, as they significantly impact the curing process. Pro Tip: Always check weather forecasts before starting exterior plaster facing work. Avoid applying plaster when rain is expected within 48 hours or when temperatures drop below 5°C, as these conditions can compromise the curing process and lead to surface defects. Professional Application Techniques Mastering application techniques requires understanding both traditional methods and modern innovations. The process typically involves three key stages: Stage Purpose Key Technique Base Coat Application Foundation layer Apply evenly using firm pressure, ensuring complete coverage and proper thickness Intermediate Layer Build-up Focus on building up the surface while maintaining consistency Final Coat Finishing Achieve the desired finish through careful trowelling and texturing techniques Each layer must be allowed to cure properly before proceeding to the next stage. Professional plasterers typically maintain a wet edge while working to ensure seamless integration between sections. Common Challenges and Solutions Even experienced professionals encounter challenges during plaster facing projects. Understanding common issues and their solutions is crucial for success. The most frequent challenges include: Cracking: Often caused by rapid drying or improper mixing ratios Delamination: Usually results from poor surface preparation or incompatible materials Uneven Finish: Typically due to inconsistent application technique or material consistency Weather-Related Issues: Can affect drying times and final appearance Maintaining Your Plaster Faced Walls Proper maintenance can significantly extend the life of your plaster faced walls. Regular inspections should be conducted to identify and address any issues early. Clean surfaces regularly using appropriate methods and materials. Avoid harsh chemicals that could damage the finish. Address any cracks or damage promptly to prevent water ingress and further deterioration. Modern plaster facing systems require minimal maintenance when properly installed, but annual inspections are recommended to ensure longevity. When to Call a Professional While some aspects of plaster facing can be attempted by skilled DIY enthusiasts, certain projects demand professional expertise. Complex surfaces, heritage properties, and large-scale applications typically require professional intervention. Statistics show that 65% of DIY plaster facing projects require professional remediation within the first year. Consider professional services when: Working with heritage properties or listed buildings Dealing with structural issues or significant repairs Applying decorative finishes requiring specialist skills Working on exterior surfaces or areas exposed to harsh weather Expert Tips for Flawless Results Success in plaster facing comes from attention to detail and following proven techniques. Professional plasterers recommend: Always conduct thorough surface preparation Use quality materials and tools Maintain consistent mixing ratios Work in manageable sections Allow proper curing time between coats Monitor environmental conditions carefully Final Thoughts: Creating Your Perfect Finish Plaster facing represents a significant investment in your property’s aesthetic appeal and structural integrity. When properly executed, it provides a durable, attractive finish that can last for generations. The key to success lies in thorough preparation, quality materials, and expert application techniques. Whether working with a professional or taking on aspects of the project yourself, understanding these fundamental principles will help ensure outstanding results. With proper care and maintenance, your plaster faced walls will continue to enhance your property’s value and appearance for years to come. FAQ Why is my north facing room so cold? Lack of sunlight means homes that don’t get much natural sunlight can feel eternally cold. North-facing rooms

Plaster Facing: Transform Your Walls Read More »

Venetian plaster luxury wall finish

Venetian Plaster: Worth the Investment?

Quick Answer: Venetian plaster is worth the investment for most homeowners. With costs ranging from £80-£150 per square metre, it can increase property values by up to 15% while lasting 20+ years with proper maintenance. Unlike paint that needs refreshing every 3-5 years, Venetian plaster becomes harder over time and requires minimal upkeep, making it cost-effective long-term. Transform your walls into works of art with Venetian plaster, the timeless Italian technique that’s capturing the hearts of Kent’s most discerning homeowners. Understanding Venetian Plaster: A Heritage of Luxury Venetian plaster, also known as Marmorino or Veneziano, stands as a testament to Italian craftsmanship dating back to ancient Roman times. This exquisite wall finish, composed of lime plaster meticulously blended with marble dust, has graced the walls of Europe’s most prestigious buildings for centuries. The technique, documented by architectural pioneers Vitruvius and Palladio during the Renaissance, creates surfaces that rival the beauty of natural marble at a fraction of the cost. The legacy of Venetian plaster extends beyond mere decoration – it represents a convergence of art and architecture that has evolved over millennia. In the 1950s, renowned architect Carlo Scarpa revolutionised the technique, introducing modern innovations while preserving its historical integrity. Today, authentic Venetian plaster can increase property values by up to 15%, making it an investment that combines aesthetic appeal with tangible returns. The Artistry Behind Venetian Plaster The application of Venetian plaster is a meticulous process that demands exceptional skill and attention to detail. Master craftsmen apply multiple thin layers, typically 2-3mm each, using specialised tools and techniques passed down through generations. Each stroke contributes to the unique character of the finish, ensuring that no two walls are exactly alike. The application process includes: Initial preparation includes thorough surface cleaning and priming Base coat application provides the foundation for subsequent layers Multiple thin coats are applied with specialised trowels and spatulas Each layer must dry completely before the next application Final burnishing or waxing creates the desired level of sheen Investment Analysis: Breaking Down the Costs When considering Venetian plaster, it’s essential to understand the investment versus value proposition. While the initial cost typically ranges from £80 to £150 per square metre in Kent, this premium finish offers exceptional longevity and durability. Compared to traditional painting, which requires refreshing every 3-5 years, Venetian plaster can maintain its beauty for decades with proper maintenance. Factor Venetian Plaster Traditional Paint Initial Cost £80-£150 per m² £15-£30 per m² Lifespan 20+ years 3-5 years Maintenance Minimal Regular repainting required Property Value Impact Up to 15% increase Minimal impact Durability Hardens over time Degrades over time Pro Tip: When calculating the true cost of Venetian plaster, factor in the long-term savings. While paint may seem cheaper initially, repainting every 3-5 years means you’ll match the Venetian plaster investment within 10-15 years – yet the plaster will still have decades of life remaining. Modern Applications and Design Possibilities Contemporary interior designers are increasingly turning to Venetian plaster for its versatility and timeless appeal. The finish adapts beautifully to both traditional and modern spaces, offering a range of effects from subtle matte to high-gloss surfaces. In Kent’s luxury homes, we’re seeing Venetian plaster used creatively in: Statement walls in living rooms and entrance halls Bathroom and kitchen feature walls Ceiling treatments and architectural details Commercial spaces seeking sophistication Modern minimalist interiors requiring texture The Practical Benefits Beyond Beauty Venetian plaster offers numerous practical advantages beyond its aesthetic appeal. The natural lime-based composition makes it inherently resistant to mould and mildew, while its mineral structure allows walls to ‘breathe,’ regulating humidity naturally. Studies show that lime-based plasters can reduce indoor air pollution by up to 25%, contributing to healthier living spaces. The durability of Venetian plaster is remarkable – it actually becomes harder over time through a process called carbonation. This characteristic, combined with its fire-resistant properties and low maintenance requirements, makes it an excellent long-term investment for both residential and commercial properties. Practical Benefit How It Helps Mould Resistance Natural lime-based composition prevents mould and mildew growth Breathability Mineral structure regulates humidity naturally Air Quality Reduces indoor air pollution by up to 25% Carbonation Becomes harder and more durable over time Fire Resistance Natural mineral composition provides fire-resistant properties Making the Right Choice for Your Space Selecting Venetian plaster for your property requires careful consideration of several factors. The finish works particularly well in areas where you want to create visual impact or require durability. Consider these key points when making your decision: Room function and traffic levels Desired aesthetic effect and level of sheen Available natural light and artificial lighting Budget constraints and long-term value Maintenance requirements and lifestyle factors Expert Guidance for Your Venetian Plaster Project As Kent’s leading plasterers, we recommend working with experienced craftsmen who understand the nuances of Venetian plaster application. The success of your project depends largely on proper preparation, skilled application, and appropriate finishing techniques. Our team of specialists can guide you through the entire process, from selecting the perfect finish to ensuring flawless execution. For the best results, consider these essential steps: Schedule a consultation to discuss your vision and requirements Request samples and view previous work Ensure proper surface preparation Allow adequate time for application and drying Follow recommended maintenance procedures Ready to transform your space with the timeless beauty of Venetian plaster? Contact Kent’s leading plasterers today for a consultation and discover how this luxury finish can elevate your property to new heights of sophistication. FAQ Does Venetian plaster add value to a home? A lot of people opt for Venetian plaster because it looks great and suits the style of home they are designing, but a recent study by online property marketplace Zillow suggests that it could increase the value of your home. Is Venetian plaster outdated? Centuries-old Venetian plaster wall finish has made a big comeback — and for good reason. In 2025, Venetian plaster remains a classic look for any future homeowner. Its unique texture and luxurious appearance will never go

Venetian Plaster: Worth the Investment? Read More »