Damp & Insulation

Black Mould Removal: How to Get Rid of Mould on Walls

Black Mould Removal: How to Get Rid of Mould on Walls

Quick Answer: Black mould on walls requires immediate attention. Remove surface mould using a 3:1 water-to-bleach solution or specialist fungicidal wash, address the underlying moisture source (ventilation, damp, condensation), then treat with anti-mould paint. For mould penetrating deep into plaster (1-2mm+), you’ll need to hack off affected areas and replaster. Always wear PPE including FFP3 mask, gloves and eye protection. Cost: DIY treatment £20-60, professional mould removal £200-800 depending on severity. Understanding Black Mould on Walls Black mould (Stachybotrys chartarum) is more than just unsightly — it’s a serious health hazard and a symptom of underlying damp problems. In UK homes, it’s particularly common in bathrooms, kitchens, north-facing bedrooms, and poorly ventilated spaces. The Health and Safety Executive identifies mould as a respiratory irritant that can trigger asthma, allergic reactions, and other health issues, particularly in vulnerable individuals including children, elderly people, and those with existing respiratory conditions. Why it matters for plasterers: When we’re called to re-skim walls, we often find mould hiding beneath wallpaper or old paint layers. If the underlying moisture issue isn’t addressed, the mould will return within months, regardless of how good the plastering job is. What Causes Mould on Plastered Walls? Before you can effectively remove mould, you need to understand what’s feeding it. Mould requires three things: moisture, warmth (10-30°C), and organic matter (plaster, wallpaper paste, paint). Remove any one of these elements and mould can’t survive. Common Moisture Sources in UK Homes Condensation: The most common cause in modern UK homes. Poor ventilation combined with high humidity from cooking, bathing, and drying clothes creates perfect conditions. Rising damp: Groundwater rising through walls due to failed or absent damp-proof course (DPC). Typically affects ground floor walls up to 1 metre high. Penetrating damp: Water entering through external walls via damaged pointing, cracked render, missing roof tiles, or blocked gutters. Leaking plumbing: Hidden pipe leaks, particularly behind bathroom tiles or kitchen units. Poor thermal performance: Cold spots on walls (thermal bridges) where warm moist air condenses, especially around window reveals and external corners. The Housing Health and Safety Rating System (HHSRS) classifies damp and mould as Category 1 hazards requiring immediate remedial action by landlords. Identifying the Type and Extent of Mould Damage Not all mould situations are created equal. Before starting removal, assess the damage properly: Severity Level Characteristics Treatment Approach Surface Mould Black/green spots on paint or wallpaper surface, hasn’t penetrated plaster Wash with fungicidal solution, improve ventilation, repaint with anti-mould paint Moderate Penetration Mould visible on plaster surface, slight musty smell, small patches (under 1m²) Scrape off loose material, treat with biocide, seal with Zinsser BIN, repaint Deep Penetration Plaster soft/crumbling, dark staining deep into substrate, large affected areas (1m²+) Hack off contaminated plaster to bare substrate, treat masonry, replaster with backing and finish coat Severe Structural Rot in timber, efflorescence on masonry, extensive damage, ongoing water ingress Professional damp survey, structural repairs, DPC installation, full replastering Testing depth of penetration: Use a moisture meter (available from Screwfix or B&Q for £25-80) to check readings. Healthy plaster reads 10-15% moisture content. Readings above 20% indicate a problem requiring investigation. Safety Equipment and Preparation ⚠️ Warning: Black mould spores become airborne during removal and can cause severe respiratory reactions. Never attempt removal without proper PPE. Pregnant women, those with compromised immune systems, and people with respiratory conditions should not undertake mould removal. Essential Safety Kit FFP3 respirator mask: Not a paper dust mask — you need proper filtration (3M 8835 or similar, £8-12 per mask) Nitrile gloves: Chemical-resistant, not thin latex (Marigold Industrial, £4-6 per box) Safety goggles: Sealed edges to prevent splash contamination Disposable coveralls: Prevents spore transfer to other rooms (£3-5 per suit from Screwfix) Plastic sheeting: Seal off the work area with 500-gauge polythene and decorator’s tape Preparation Steps Isolate the area: Remove furniture, seal doorways with plastic sheeting, open windows for ventilation but close internal doors to prevent spore spread. Turn off HVAC systems: Prevents spores circulating through the house. Prepare waste disposal: Double-bag contaminated materials in heavy-duty refuse sacks. Council tips accept mould-contaminated waste but inform staff upon disposal. Mix cleaning solutions: Do this before donning PPE so you’re not fumbling with bottles wearing gloves. Step-by-Step Black Mould Removal Process Method 1: Surface Mould Treatment (DIY Approach) For surface-level mould that hasn’t penetrated the plaster substrate, follow this process: Materials needed: Fungicidal wash (Ronseal Anti-Mould Wash, £8-12 per litre) or bleach solution (1 part bleach to 3 parts water) Stiff nylon brush or sponge Spray bottle for application Bucket and clean water for rinsing Anti-mould paint (Dulux Bathroom+ or Johnstone’s Anti-Mould Paint, £18-25 per 2.5L) Process: Don full PPE before starting work. Spray the solution: Saturate the affected area thoroughly. Don’t scrub immediately — let the solution sit for 15-20 minutes to kill spores. Scrub gently: Use circular motions with a stiff brush. Too aggressive and you’ll damage the plaster surface. Rinse thoroughly: Use clean water and a fresh sponge. Remove all cleaning solution residue. Dry completely: Use dehumidifiers and fans. The wall must be bone-dry before painting (typically 24-48 hours in winter, 12-24 hours in summer). Prime with anti-mould primer: Zinsser Mould Killer Primer (£24-28 per litre) seals the surface and provides extra protection. Paint with anti-mould topcoat: Apply two coats, allowing proper drying time between coats (usually 4 hours). Pro Tip: Professional plasterers often use Zinsser Gardz as a penetrating sealer before anti-mould primer. It hardens any slightly friable plaster surface and prevents future moisture penetration. Apply liberally and allow 2-4 hours drying time. Method 2: Treating Moderate Mould Penetration When mould has penetrated into the plaster but hasn’t compromised structural integrity: Remove loose material: Use a scraper or filling knife to remove any flaking paint, wallpaper, or friable plaster. Vacuum debris immediately with a HEPA-filter vacuum. Apply biocidal treatment: Use a professional-grade fungicide like Wykamol Concentrated Fungicidal Wash (£28-35 per litre, dilutes 1:4). This penetrates deeper than bleach. Allow full penetration: Let the biocide soak in for 30 minutes before scrubbing. Neutralise if

Black Mould Removal: How to Get Rid of Mould on Walls Read More »

Internal Wall Insulation: Drylining for Energy Efficiency

Quick Answer: Internal wall insulation (IWI) involves fixing insulated plasterboard to internal walls to reduce heat loss in solid-walled properties. In 2026, expect to pay £65-£110 per square metre installed, with typical payback periods of 10-15 years through reduced heating bills. IWI can improve U-values from 2.0 W/m²K (uninsulated solid wall) to 0.30 W/m²K or better, potentially cutting wall heat loss by 85% and saving £300-£450 annually on energy costs in an average semi-detached home. Understanding Internal Wall Insulation and Why It Matters Approximately 7 million UK homes have solid walls with no cavity to insulate, making them expensive to heat and uncomfortable to live in. Internal wall insulation (IWI) offers a practical solution for improving thermal performance without altering external appearance — particularly important for listed buildings, conservation areas, or properties where external wall insulation isn’t permitted. IWI involves fixing insulation boards to the internal face of external walls, then finishing with plasterboard and skim coat. This approach typically reduces floor area by 100-150mm per wall, but delivers significant energy savings when done properly. What IWI Can Achieve U-value improvements: From 2.0 W/m²K (solid brick) down to 0.30 W/m²K with 100mm PIR insulation Energy bill reductions: £300-£450 per year for typical semi-detached properties (based on 2026 energy prices) Carbon savings: 1-1.5 tonnes of CO₂ annually Improved comfort: Warmer wall surfaces reduce cold spots and draughts Condensation reduction: Warmer internal surfaces mean less risk of mould growth The key to successful IWI is proper specification and installation that addresses thermal bridging, air tightness, and moisture management — areas where we see many DIY attempts fail. Internal Wall Insulation Systems Explained Three main approaches dominate the UK market in 2026, each suited to different situations and budgets. Insulated Plasterboard (Thermal Laminate) Insulated plasterboard combines a layer of rigid insulation (typically PIR, phenolic foam, or expanded polystyrene) factory-bonded to 12.5mm plasterboard. This is the most common IWI solution for straightforward installations. Popular products include: Kingspan K118: PIR insulation with standard plasterboard, available in 50mm-100mm thicknesses Celotex PL4000: Similar specification, widely stocked at Travis Perkins and Jewson Knauf Earthwool: Mineral wool alternative for better acoustic performance and breathability British Gypsum ThermaLine: Range covering PIR, phenolic and mineral wool options These boards are typically fixed using proprietary adhesive dabs or mechanical fixings, then joints are taped and filled before a 2-3mm skim coat provides the final finish. Insulation Boards with Separate Plasterboard This approach uses rigid insulation boards fixed independently, with standard plasterboard mechanically fixed over the top. It offers more flexibility in insulation thickness and is often preferred for uneven walls. Common insulation materials: PIR (Polyisocyanurate): Best thermal performance at 0.022 W/mK, thinnest solution Phenolic foam: Similar performance to PIR but better fire characteristics EPS (Expanded Polystyrene): Cheaper but requires greater thickness (0.033-0.038 W/mK) Mineral wool: Breathable and acoustic benefits, but lower thermal performance (0.034-0.044 W/mK) The separate approach allows services to be run between the insulation and plasterboard layers, though this must be carefully detailed to avoid thermal bridging. Stud Wall Systems with Insulation For very uneven walls or where maximum insulation thickness is needed, a timber or metal stud framework can be constructed independently of the external wall, with insulation filling the cavity. This method provides: Freedom to achieve any insulation thickness without wall adhesion concerns Easy routing of electrical services within the stud cavity Better performance on damp or damaged walls Space for additional moisture barriers and ventilation gaps where needed The trade-off is greater floor space loss (typically 125-175mm) and higher material and labour costs. Pro Tip: Never use standard plasterboard adhesive (pink bonding) to fix insulated boards. The adhesive dabs should be specifically designed for IWI work — products like British Gypsum Gyproc Dri-Wall Adhesive or Siniat Nida Gypframe GB44 maintain their performance and don’t compromise the insulation layer. Comparing IWI Performance and Costs Understanding the thermal performance and cost implications helps you choose the right system for your project. System Type Typical Thickness U-Value Achieved Cost per m² (materials) Cost per m² (installed) 50mm PIR laminate 62.5mm total 0.45 W/m²K £18-£24 £65-£85 75mm PIR laminate 87.5mm total 0.32 W/m²K £24-£32 £75-£95 100mm PIR laminate 112.5mm total 0.25 W/m²K £32-£40 £85-£110 100mm mineral wool + board 112.5mm total 0.35 W/m²K £22-£30 £70-£90 Stud wall with 100mm PIR 150mm total 0.22 W/m²K £35-£48 £95-£125 Installation costs typically include: surface preparation, fixing the insulation system, taping and filling joints, skim coating, and making good around openings. They don’t include moving radiators, electrical work, or skirting board replacement — add £150-£300 per room for these extras. Critical Details That Make or Break IWI Performance The difference between effective IWI and a problematic installation comes down to proper detailing in vulnerable areas. Dealing with Thermal Bridging Thermal bridges occur wherever the insulation layer is interrupted or bypassed. Common problem areas include: Window and door reveals: Insulation must return into reveals by at least 100mm, or these become cold spots Party walls: Insulation should continue 300-450mm along party walls to prevent flanking losses Floor junctions: Suspended timber floors create a significant thermal bridge — consider insulating below floorboards too Ceiling junctions: Insulation must overlap with loft insulation, or warm air escapes through the gap Service penetrations: Every socket, switch and pipe penetration needs careful sealing We use thermal imaging cameras (Flir E8 or similar) on completed jobs to verify there are no bridging issues before final decoration — something worth requesting from any contractor. Managing Moisture and Condensation Risk IWI changes how moisture moves through walls, and improper specification causes interstitial condensation — moisture trapped within the wall structure that leads to timber decay, mould growth, and system failure. Key moisture management principles: Vapour control layers (VCLs): Required on the warm side when using vapour-permeable insulation (mineral wool, wood fibre) Avoid VCLs with vapour-closed insulation: PIR and phenolic boards act as their own vapour barriers Pre-existing damp must be resolved: Rising damp, penetrating damp, or leaks will trap moisture behind the insulation Improved ventilation often needed: IWI makes homes more airtight, requiring

Internal Wall Insulation: Drylining for Energy Efficiency Read More »

Condensation on Walls: Why It Happens and How to Stop It

Quick Answer: Condensation on walls occurs when warm, moisture-laden air meets cold surfaces, causing water vapour to turn into liquid droplets. This typically happens during winter months in poorly ventilated or inadequately insulated homes. The key to stopping condensation is improving ventilation (opening windows, installing extractors), increasing surface temperatures (proper insulation), and reducing moisture production (using dehumidifiers, covering pans). Left untreated, condensation leads to black mould growth, damaged plasterwork, and potential health issues. Understanding Why Condensation Forms on Your Walls If you’ve ever woken up to find your bedroom walls streaming with water, or noticed dark patches spreading across your kitchen ceiling, you’re dealing with condensation. It’s one of the most common damp problems in UK homes, and it’s getting worse as we seal our properties tighter for energy efficiency without adequate ventilation. Condensation happens when warm air carrying moisture hits a cold surface — typically external walls, single-glazed windows, or uninsulated corners. The dew point is reached, and the water vapour transforms into liquid water that runs down your walls, soaks into plaster, and creates the perfect breeding ground for black mould. The average UK household produces 10-15 litres of moisture every single day through normal activities like breathing, cooking, showering, and drying clothes. When this moisture can’t escape because of poor ventilation, it condenses on the coldest surfaces in your home. How Condensation Differs from Other Damp Problems Before you start tearing off plaster or calling in damp specialists, it’s crucial to identify whether you’re dealing with condensation or other forms of damp. Here’s how to tell the difference: Issue Where It Appears Characteristics Common Causes Condensation Cold surfaces, external walls, corners, windows Water droplets, appears in cold weather, wipes off easily, black mould in corners Poor ventilation, inadequate heating, moisture production Rising Damp Ground floor walls up to 1m high Tide marks, salt deposits, peeling paint/plaster at skirting level Failed damp proof course (DPC), bridged DPC Penetrating Damp Specific areas, often after rain Damp patches that worsen with rain, often near roofs, gutters, or external walls Roof leaks, faulty guttering, cracked render, failed pointing We’ve written a detailed guide on rising damp signs and causes if you suspect your issue might be more structural than condensation-related. The Science Behind Condensation (and Why Your Plaster Matters) As professional plasterers, we see the aftermath of condensation damage constantly. Modern gypsum plaster is hygroscopic — it absorbs and releases moisture depending on humidity levels. While this property helps regulate indoor humidity to some extent, prolonged exposure to condensation causes serious problems. When plasterwork repeatedly gets soaked and dries out, you’ll notice: Blown plaster — the skim coat separates from the backing, creating hollow-sounding bubbles Staining and discolouration — brown nicotine-like marks from dissolved salts Mould penetration — black mould doesn’t just sit on the surface; it grows into the plaster substrate Friable surfaces — the plaster becomes crumbly and loses structural integrity Paint failure — even the best anti-mould paints will fail if condensation continues According to government housing health and safety guidelines, persistent condensation and mould growth constitute a Category 1 hazard that landlords must address. The health implications are serious — respiratory issues, allergies, and asthma exacerbation are all linked to mould exposure. ⚠️ Warning: Never plaster over existing mould or damp walls without addressing the root cause. We’ve seen this countless times — homeowners spend £400-600 having a room re-plastered, only for the mould to return within weeks because the condensation problem wasn’t solved. Check our guide on what happens when you plaster over water damage to understand why this approach always fails. Common Areas Where Condensation Causes Problems Some spots in your home are condensation magnets. Understanding these vulnerable areas helps you target your prevention efforts: Thermal Bridges and Cold Spots Thermal bridges are areas where cold penetrates through the building fabric more easily than surrounding areas. These create localised cold spots where condensation forms first: External wall corners (especially northeast-facing rooms) Areas behind furniture placed against external walls Window reveals and sills Ceiling-to-wall junctions in top-floor rooms Areas around steel lintels or concrete ring beams Poorly insulated loft conversions where insulation is inadequate High Moisture Production Rooms Kitchens and bathrooms generate enormous amounts of moisture. A single shower releases approximately 1-1.5 litres of water vapour into the air, while cooking a meal can add another 3 litres. In these rooms, you need mechanical extraction — not just opening windows occasionally. Building Regulations Approved Document F specifies minimum extract rates: 60 litres/second for kitchens during cooking, and 15 litres/second for bathrooms with an overrun timer. For specialist bathroom plastering in wet areas, see our guide to bathroom plastering materials that resist moisture better than standard gypsum. How to Stop Condensation on Walls: The Three-Pillar Approach Solving condensation requires attacking the problem from three angles simultaneously. Miss one, and you’ll only partially solve the issue. Pillar 1: Improve Ventilation Ventilation is non-negotiable. You need to move moisture-laden air out and bring fresh, drier air in. Here’s what actually works: Immediate Actions (£0-50): Open windows for 15-20 minutes morning and evening, even in winter Leave bedroom windows on trickle vents overnight (the small vent position on UPVC windows) Keep internal doors open to improve air circulation Pull furniture at least 50mm away from external walls Open bathroom windows during and after showers for 20+ minutes Use lids on pans when cooking and open kitchen windows Medium-Term Solutions (£50-500): Install trickle vents in window frames (£8-15 per vent from Screwfix) Fit bathroom extractor fans with humidistat control (£30-120 for unit + £80-150 installation) Upgrade to more powerful kitchen extractors — 60L/s minimum (£100-300) Add wall-mounted passive ventilators in problem rooms (£15-40 each) Long-Term Solutions (£500-3,000+): Mechanical ventilation with heat recovery (MVHR) systems for whole-house ventilation (£2,000-5,000 installed) Positive input ventilation (PIV) systems that gently pressurise your home (£400-800 + installation) Pro Tip: We often see extractor fans that are clogged with dust and lint, reducing efficiency by 60% or more. Clean your bathroom extractor grilles every 3 months

Condensation on Walls: Why It Happens and How to Stop It Read More »

Rising Damp: Signs, Causes and How to Fix It

Quick Answer: Rising damp occurs when groundwater travels upward through porous building materials via capillary action, typically reaching heights of 1-1.5 metres above ground level. The most common signs include tide marks on walls, peeling paint or wallpaper, crumbling plaster, and a distinctive musty smell. In the UK, treatment costs range from £600-£2,800 depending on wall length and method chosen. The primary fix involves installing or repairing your damp proof course (DPC), either through chemical injection (£40-£60 per metre) or physical membrane installation. Left untreated, rising damp can cause structural damage, health issues, and significantly reduce your property value. What Is Rising Damp and Why Does It Happen? Rising damp is exactly what it sounds like — moisture from the ground travelling upward through your walls. Unlike other forms of damp such as penetrating damp (which comes through walls horizontally) or condensation (which forms on surfaces), rising damp specifically affects the lower sections of external and internal walls. This phenomenon occurs through a process called capillary action. Building materials like brick, stone, and mortar contain thousands of microscopic tubes or pores. When these materials come into contact with groundwater, the liquid is drawn upward against gravity, much like water travelling up a paper towel when you dip one end in a glass. According to the Building Research Establishment (BRE), rising damp rarely exceeds heights of 1.5 metres above ground level because the rate of evaporation from the wall surface eventually matches the rate of capillary rise. However, the damage in that first metre can be extensive and costly to repair. The Role of Damp Proof Courses Modern UK homes built after 1875 should have a damp proof course (DPC) — a waterproof barrier installed in the wall structure, typically 150mm above ground level. This physical or chemical barrier prevents moisture from rising further up the wall. DPCs can be made from various materials: Slate or engineering brick: Common in Victorian and Edwardian properties Bitumen felt: Standard in homes built between 1920-1965 Modern polymeric membranes: Used in post-1965 construction, offering 20+ year guarantees Chemical DPC injection: Retrofit solution for properties lacking or with failed DPCs The problem arises when DPCs become damaged, bridged (covered by external ground levels or internal render), or simply weren’t installed in older properties. That’s when you’ll start seeing the telltale signs of rising damp. Identifying Rising Damp: The Warning Signs Recognising rising damp early can save you thousands in repair costs. As plasterers, we see the aftermath of ignored damp problems regularly — walls that need complete re-rendering, failed skim coats, and structural timber that’s gone soft. Visual Indicators The most obvious signs appear on your internal walls: Tide marks: A horizontal line of staining, typically 300mm-1m above floor level, often with a white salt deposit (efflorescence) above it Peeling or bubbling paint: Moisture pushes decorative finishes away from the wall surface Damaged wallpaper: Paper lifts at the bottom, feels damp to touch, shows brown staining Crumbling plaster: Gypsum-based plasters break down when saturated, becoming soft and friable Dark patches: Walls look wet or discoloured, especially after dry weather (unlike condensation which improves in dry conditions) Skirting board damage: Wooden skirtings rot, warp or show paint peeling at the base Pro Tip: Rising damp creates a distinctive horizontal pattern — if you’re seeing damage in random patches across the wall or concentrated around windows, you’re more likely dealing with penetrating damp or condensation. Rising damp always starts at floor level and works upward. Physical Signs Beyond the Wall Look for these additional indicators: Musty smell: A persistent damp, earthy odour that doesn’t improve with ventilation Mould growth: Black, green or white fungal growth on walls, particularly in corners Cold walls: Affected areas feel noticeably colder than dry sections Hygroscopic salts: White, crystalline deposits that appear on the wall surface and feel slightly damp even in dry weather The Efflorescence Test Those white salt deposits deserve special mention. When rising damp occurs, groundwater brings dissolved salts from the soil with it. As the water evaporates from your wall surface, these salts crystallise and form white patches. Here’s the crucial bit: some salts are hygroscopic, meaning they actively absorb moisture from the air. This is why damp patches can persist even after you think you’ve addressed the moisture source. These salts need to be removed — not painted over — or they’ll continue causing problems. Sign Rising Damp Condensation Penetrating Damp Location Ground floor, base of walls Upper floors, cold surfaces, behind furniture External walls, around windows, chimney breasts Pattern Horizontal tide mark, 0-1.5m high Random patches, water droplets Localised wet patches after rain Smell Musty, earthy Musty if mould present Musty, stronger after rain Salt deposits Common (white crystals) Rare Uncommon Seasonal variation Worse in winter, persists year-round Worse in winter, improves in summer Directly related to rainfall Root Causes of Rising Damp Understanding why rising damp occurs in your property is essential for choosing the right treatment. In our experience across Kent, these are the most common culprits: Failed or Absent Damp Proof Course The number one cause. Properties built before 1875 often have no DPC at all. Even when present, DPCs can fail: Physical damage: Slate DPCs can crack during settlement or building work Age deterioration: Bitumen felt DPCs typically last 50-60 years before breaking down Chemical breakdown: Ground salts can attack some DPC materials over time Poor installation: DPCs installed with gaps, incorrect overlaps, or at wrong heights Bridged Damp Proof Course Even a perfectly functional DPC can be rendered useless if moisture finds a route around it. Common bridging problems include: Raised external ground levels: Soil, paving, or patios built up above the DPC level allow moisture to bypass it entirely Internal render: Cement render applied across the DPC line creates a moisture path (we see this constantly in older properties) Debris in cavity walls: Mortar droppings sitting on wall ties create a bridge across the cavity Abutting structures: Garden walls, conservatories, or extensions built against the house above DPC level According

Rising Damp: Signs, Causes and How to Fix It Read More »

Damp Proofing and Home Insulation: A Homeowner’s Guide

Quick Answer: Damp proofing prevents moisture entering your home through walls, floors and rising damp, whilst proper insulation reduces heat loss and condensation. In 2026, UK homeowners spend £800-£3,500 on damp proofing and £2,000-£12,000 on insulation, but these investments pay back through lower energy bills, improved property value, and healthier living conditions. The two systems work hand-in-hand — without proper damp proofing, insulation can trap moisture and cause serious structural damage. Understanding the Connection Between Damp and Insulation Many homeowners treat damp proofing and insulation as separate concerns, but they’re intimately connected. Proper damp proofing creates the foundation for effective insulation, whilst good insulation reduces condensation that can lead to damp problems. When you insulate a property without addressing underlying damp issues, you’re essentially trapping moisture within the fabric of the building. This creates the perfect environment for mould growth, timber decay, and plaster deterioration — issues we see regularly on renovation projects across Kent. According to English Housing Survey data, approximately 4% of UK homes show signs of significant damp, whilst proper insulation could reduce heating costs by 25-35% in typical properties. Types of Damp and How to Identify Them Rising Damp Rising damp occurs when ground moisture travels up through walls via capillary action, typically reaching heights of 1-1.5 metres above ground level. You’ll recognise it by distinctive tide marks, flaking paint, and damaged skirting boards. Salt deposits (efflorescence) appearing as white, fluffy crystals on wall surfaces Peeling wallpaper and paint at the base of walls Damp patches that follow a horizontal line around the room Musty odours, particularly in ground floor rooms Rotting timber floors and skirting boards Rising damp typically results from failed or absent damp proof courses (DPCs). In properties built before 1875, DPCs weren’t mandatory, so many older homes lack this crucial barrier. Penetrating Damp This type moves horizontally through walls, often caused by external defects like damaged pointing, blocked gutters, or cracked rendering. Unlike rising damp, penetrating damp can occur at any height and often worsens during wet weather. Damp patches appearing after rainfall Staining on internal walls following the line of external defects Moisture appearing around window frames and door openings Plaster becoming soft or bubbling in affected areas Condensation The most common form of dampness in UK homes, condensation occurs when warm, moist air meets cold surfaces. Poor ventilation and inadequate insulation are the primary culprits. We cover condensation-related plaster problems in detail in our common plastering problems guide. Damp Type Typical Location Main Cause Average Repair Cost Rising Damp Ground floor, up to 1.5m high Failed/absent DPC £1,500-£3,500 Penetrating Damp Any height, external walls Building defects, poor pointing £800-£2,500 Condensation Cold surfaces, corners, windows Poor ventilation, inadequate insulation £500-£2,000 (ventilation/insulation) Damp Proofing Solutions for UK Homes Chemical Damp Proof Course Injection The most common solution for rising damp involves injecting silicone-based cream or liquid into the mortar course at 120mm intervals. This creates a water-repellent barrier that prevents moisture rising through the masonry. The process typically takes 1-2 days and requires replastering with a specialist salt-resistant render and finish. Products like Permagard DPC cream or Safeguard’s chemical DPC systems are industry standards, meeting BS 6576 requirements. Pro Tip: Always replaster with renovation plaster (sand/cement render with waterproofer plus a salt-inhibiting finish coat) after DPC installation. Standard gypsum plasters will fail within months when applied over salts drawn up by previous rising damp. Our damp proof plaster guide covers this in detail. Physical Damp Proof Membrane Installation For more severe cases or when chemical DPCs aren’t suitable, physical membranes provide a mechanical barrier. This involves cutting into the mortar course and inserting slate, polythene, or bitumen felt strips — a technique dating back to Victorian times but updated with modern materials. Physical DPC installation costs £80-£120 per linear metre and requires structural expertise, as removing bricks in sections can compromise wall stability temporarily. Tanking and Waterproof Rendering Basements and below-ground structures require tanking — applying waterproof coatings (cementitious or membrane systems) to walls and floors. This creates a completely watertight shell complying with BS 8102:2022 standards. Type A (Barrier protection): Waterproof membranes or renders Type B (Structurally integral protection): Waterproof concrete/masonry Type C (Drained protection): Cavity drainage systems with channels and pumps Most professional installations use Type C systems costing £3,000-£8,000 for an average basement, as they’re more forgiving when minor groundwater ingress occurs. Home Insulation Options in 2026 Cavity Wall Insulation The single most cost-effective insulation upgrade for UK homes built between 1920-1990, cavity wall insulation fills the gap between inner and outer brick leaves with mineral wool, polystyrene beads, or polyurethane foam. Installation takes 2-4 hours via small holes drilled every metre into the external wall. The materials are pumped in, then holes are filled and made good. Expect to pay £800-£1,500 for a typical semi-detached house. ⚠️ Warning: Never install cavity wall insulation if your property has existing damp issues or lacks adequate DPC protection. The insulation can bridge the cavity gap, allowing moisture to penetrate to internal walls. Always resolve damp problems first, then wait 6-12 months to ensure walls are fully dry before considering cavity insulation. Internal Wall Insulation (IWI) For solid wall properties (pre-1920s typically) or where external insulation isn’t possible, internal wall insulation adds insulated plasterboard or insulation batts fixed to interior walls. This reduces room sizes by 100-150mm but dramatically improves thermal performance. Modern IWI systems use materials like Kingspan K118 or Celotex PL4000, offering U-values of 0.18-0.25 W/m²K. Our article on insulated plasterboard explains application techniques in detail. Insulation Type Thickness Required U-Value Achieved Cost per m² Cavity Fill (beads) 50-100mm (cavity dependent) 0.35-0.55 W/m²K £15-£25 Internal Wall Insulation 100-150mm 0.18-0.30 W/m²K £80-£120 External Wall Insulation 100-200mm 0.15-0.25 W/m²K £100-£180 Loft Insulation (mineral wool) 270mm (Building Regs minimum) 0.15-0.16 W/m²K £15-£30 External Wall Insulation (EWI) External wall insulation wraps your home in a thermal blanket whilst protecting the existing structure. EPS or mineral wool boards are fixed to external walls, then covered with reinforced render and a decorative finish. This is

Damp Proofing and Home Insulation: A Homeowner’s Guide Read More »

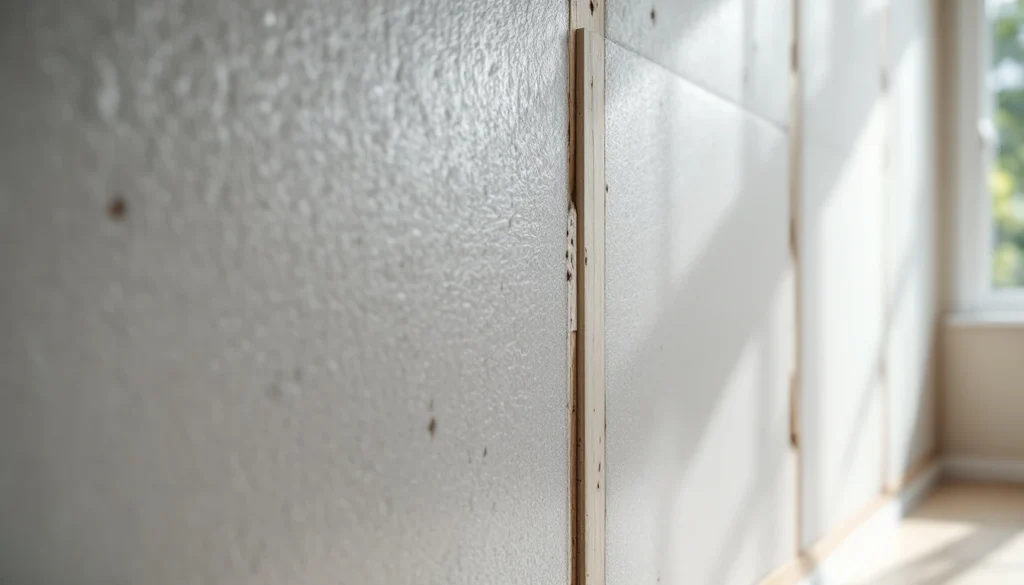
What is insulated plaster board and how does it work?

Quick Answer: Insulated plasterboard is a factory-bonded composite material combining gypsum plasterboard with an insulation layer (PIR, EPS, XPS, or rock wool). It delivers thermal efficiency and a smooth finish in one installation, perfect for solid-wall properties. Typical installations reduce heating costs by 25-40% whilst maximizing interior space compared to separate insulation systems. Insulated plaster board combines thermal efficiency with a smooth finish, transforming cold walls into warm, energy-saving surfaces. If you’re a homeowner in Kent or Bromley looking to upgrade your property’s energy performance while achieving a flawless plastered finish, understanding insulated plasterboard could save you money and space. This innovative material has become increasingly popular for both residential renovations and commercial projects, offering a dual-purpose solution that addresses two critical needs in one installation. TL;DR – Quick Summary Insulated plasterboard is a factory-bonded composite combining gypsum plasterboard with insulation backing, delivering thermal efficiency and a finished surface in one installation Available in four main core types (PIR, EPS, XPS, rock wool) with varying thermal performance from 0.022 to 0.038 W/m·K Particularly effective for solid-wall properties built pre-1920, saving significant heating costs whilst maximizing interior space Professional installation ensures compliance with building regulations and delivers lasting thermal and aesthetic benefits for Kent properties Ideal for internal wall lining, room conversions, and properties where external insulation isn’t feasible What is Insulated Plasterboard? The Basics Explained Insulated plasterboard is a factory-bonded composite material that revolutionizes how we approach interior wall finishing and thermal efficiency. Also known as thermal laminate or insulated dry-lining, this innovative product combines two essential building components into a single, integrated panel. For property owners in Kent and Bromley, this means achieving both a smooth, ready-to-decorate surface and enhanced insulation performance without the complexity of installing separate systems. The material eliminates the traditional two-step process of fitting insulation boards followed by standard plasterboard. Instead, everything arrives pre-bonded from the factory, ensuring consistent quality and significantly reducing installation time. This efficiency makes it particularly attractive for property developers working to tight schedules and homeowners keen to minimize disruption during renovation work. Understanding what insulated plasterboard actually contains helps explain why it performs so effectively. The composite nature means you’re not just adding a cosmetic finish—you’re fundamentally improving your property’s thermal envelope with every board installed. The Three-Layer Construction The effectiveness of insulated plasterboard lies in its carefully engineered three-layer structure. The outer layer typically consists of waterproof chipboard or specialized backing material that provides structural integrity and protection from moisture ingress. This outer surface faces the external wall, creating a barrier between the cold masonry and your living space. The middle layer forms the insulating core—the component that determines the panel’s thermal performance. This core varies depending on the specific product chosen, with options including: Rigid foam materials like PIR or EPS Extruded polystyrene (XPS) Mineral wool fibers The thickness and type of this insulation layer directly impact the overall thermal resistance (U-value) achieved. The inner layer comprises standard gypsum plasterboard, providing the smooth, firm surface that plasterers can skim coat for a perfect finish. This layer typically measures 9.5mm or 12.5mm thick, offering sufficient strength for decorating whilst maintaining a relatively slim overall profile. The three layers work synergistically, with each component contributing specific properties to the final performance. How It Differs from Traditional Plasterboard Traditional plasterboard installation on external walls typically requires separate insulation boards to be fitted first, followed by timber battens or metal framework, and finally the plasterboard itself. This multi-stage process demands different trades, various materials, and considerable time investment. Each layer must be carefully measured, cut, and fixed independently, creating multiple opportunities for thermal bridging and installation errors. Insulated plasterboard simplifies this entire process dramatically. The integrated design means you’re installing both insulation and finished surface simultaneously, reducing labor costs by up to 50% compared to separate systems. For Kent homeowners, this translates to shorter project timelines and less disruption to daily life during renovation work. The factory bonding also ensures perfect alignment between insulation and plasterboard layers—something that’s difficult to achieve consistently when installing components separately. This precision eliminates air gaps that can compromise thermal performance and create the cold spots that plague poorly insulated homes. Pro Tip: Always check your property’s wall condition before selecting insulated plasterboard. Solid walls in good condition work best with adhesive fixing methods, whilst uneven walls may require mechanical fixings to battens for optimal results. Understanding the Insulation Core: Types and Thermal Performance The insulation core represents the heart of any insulated plasterboard system, determining both thermal efficiency and overall board thickness. Choosing the right core material depends on your specific requirements, including: The U-value targets you need to achieve Available wall space Budget constraints Special performance needs such as fire resistance or acoustic insulation Thermal conductivity (measured in W/m·K) indicates how well a material resists heat flow—lower numbers mean better insulation performance. Understanding these values helps you compare different products and select the most appropriate solution for your Kent or Bromley property. Building regulations compliance often dictates minimum performance standards, making this knowledge essential for successful project planning. Insulation Type Thermal Conductivity (W/m·K) Key Benefits Best For PIR 0.022-0.024 Best thermal performance, thinner profile Space-constrained rooms EPS 0.034-0.038 Most cost-effective, reliable performance Large projects, budget-conscious renovations XPS 0.031-0.033 Moisture resistant, high compressive strength Bathrooms, kitchens, high-traffic areas Rock Wool 0.034-0.038 Fire resistant, excellent acoustic properties Fire safety priorities, noise reduction needed PIR (Polyisocyanurate) Insulation PIR insulation delivers exceptional thermal performance with a conductivity rating of 0.022-0.024 W/m·K, making it the most efficient option available in standard insulated plasterboard products. This superior performance means you can achieve excellent U-values with thinner board profiles, maximizing precious interior space in your property. The material consists of rigid foam with closed-cell structure, providing consistent insulation performance whilst remaining lightweight and easy to handle during installation. For rooms where every centimeter counts—such as smaller bedrooms in Victorian terraces common throughout Kent—PIR-backed boards offer the best thermal upgrade with minimal room size impact. PIR boards typically cost more than EPS

What is insulated plaster board and how does it work? Read More »

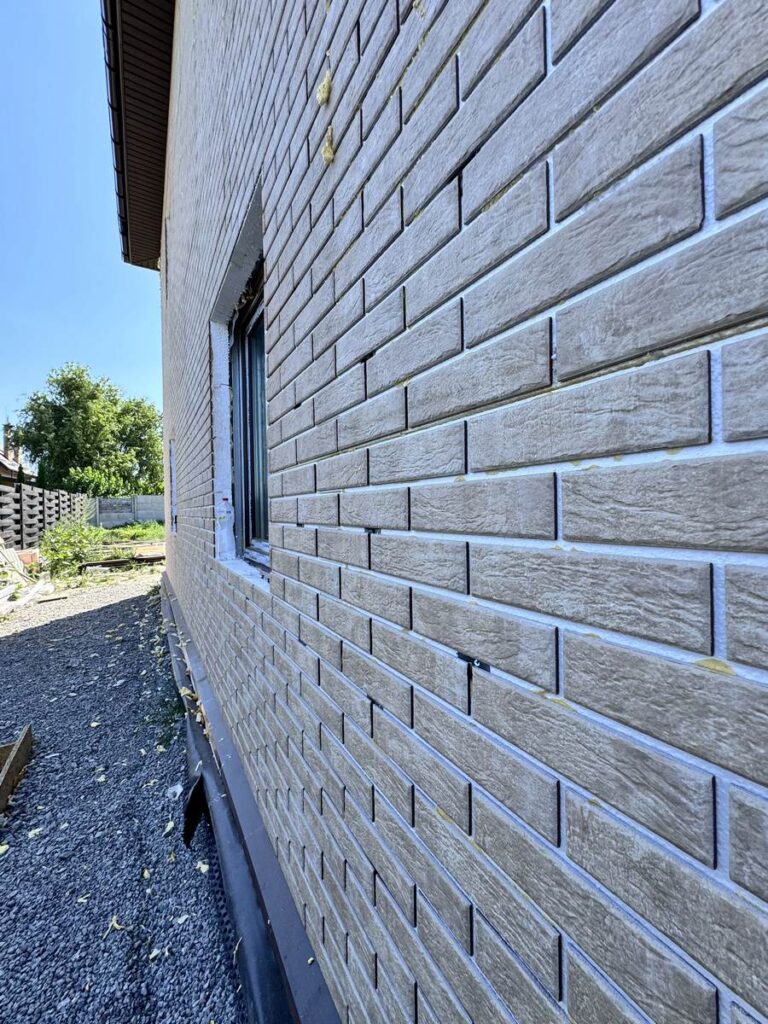
Royal Facade thermopanels grey stone texture installed

Royal Facade Thermopanels: Advanced Insulated Facade Panels for Superior Energy Efficiency

Quick Answer: Royal Facade Insulated Facade Panels combine high-density insulation with authentic clinker tiles to deliver U-values as low as 0.20 W/m²K, reducing heating costs by up to 40%. These advanced thermopanels install 50% faster than traditional systems and come with a 25-year warranty. Royal Facade Insulated Facade Panels represent a revolutionary approach to exterior wall insulation, combining cutting-edge thermal technology with stunning aesthetics. These innovative thermopanels offer property owners in Kent and beyond an exceptional solution for enhancing both energy efficiency and curb appeal. With their advanced clinker thermal insulation system, these panels deliver superior performance that traditional rendering simply cannot match. Understanding the Insulation Technology The core technology behind Royal Facade panels lies in their multi-layered construction. Each panel consists of high-density expanded polystyrene (EPS) or polyurethane foam insulation, bonded with authentic clinker tiles. This sophisticated combination creates an impermeable thermal barrier that significantly reduces heat transfer through external walls. The panels utilise a tongue-and-groove connection system, eliminating thermal bridges that typically compromise insulation effectiveness. This seamless integration ensures consistent thermal performance across the entire facade, achieving U-values as low as 0.20 W/m²K. Key Advantages of Clinker Thermal Insulation Panels Energy Efficiency Benefits Installing Royal Facade panels can reduce heating costs by up to 40%, making them an excellent investment for long-term savings. The superior insulation properties mean your property maintains comfortable temperatures year-round, requiring less energy for both heating and cooling. Weather Resistance and Durability These facade cladding solutions offer exceptional protection against the elements: Complete waterproofing prevents moisture penetration Frost-resistant materials withstand extreme temperatures UV-stable components maintain colour integrity for decades Impact-resistant surface protects against physical damage Installation Efficiency Unlike traditional external insulation systems, Royal Facade panels can be installed quickly and cleanly. The lightweight panels are easy to handle, and the mechanical fixing system eliminates lengthy drying times associated with wet renders. Most projects can be completed 50% faster than conventional methods. Pro Tip: The mechanical fixing system means you can install Royal Facade panels in almost any weather conditions, unlike traditional renders that require specific temperature and humidity levels to cure properly. Design Flexibility and Aesthetic Appeal Royal Facade offers extensive customisation options to complement any architectural style. Choose from various clinker tile colours, textures, and patterns to achieve your desired look. Whether you prefer traditional brick aesthetics or contemporary stone finishes, these panels deliver authentic appearance without the weight and cost of natural materials. Why Choose Royal Facade for Your Property? The combination of thermal performance, durability, and aesthetic versatility makes Royal Facade panels an ideal choice for both residential and commercial properties. The system’s compatibility with various substrates, including brick, concrete, and timber frame constructions, ensures broad application possibilities. Property owners benefit from: Increased property value through improved EPC ratings Reduced maintenance requirements compared to traditional renders 25-year manufacturer warranty for peace of mind Compliance with current building regulations Feature Royal Facade Panels Traditional Render Installation Time 50% faster Standard duration U-Value Performance As low as 0.20 W/m²K Variable, typically higher Energy Cost Reduction Up to 40% Standard savings Warranty Period 25 years Typically 10 years or less Weather-Dependent Installation No – mechanical fixing Yes – requires specific conditions Professional Consultation and Support Every project is unique, and selecting the right insulation solution requires expert guidance. Royal Facade specialists are available for telephone consultations at +48666273099 to discuss your specific requirements and provide tailored recommendations. For comprehensive product information, technical specifications, and installation guidelines, visit https://royalfacade.eu/. Their website features detailed case studies, installation videos, and a gallery showcasing completed projects across Europe. Transform Your Property Today Royal Facade Insulated Facade Panels represent the future of external wall insulation. By combining exceptional thermal performance with stunning aesthetics and long-lasting durability, these innovative panels offer a complete facade solution that delivers real value. Contact the Royal Facade team today to discover how their advanced clinker thermal insulation panels can transform your property while significantly reducing energy costs and environmental impact.

Royal Facade Thermopanels: Advanced Insulated Facade Panels for Superior Energy Efficiency Read More »

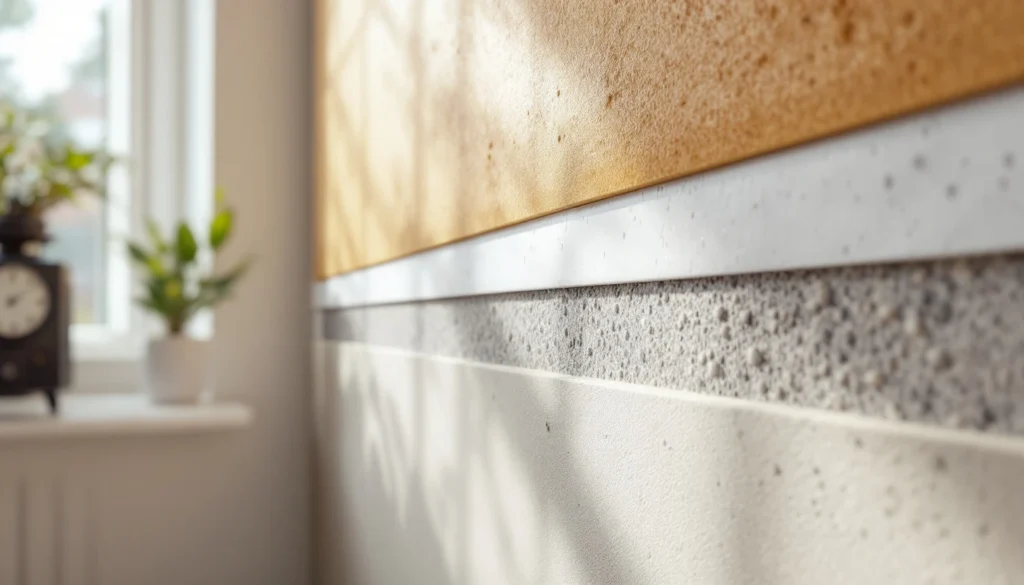
insulating plaster application thermal wall

Insulating Plaster: Energy-Efficient Homes Guide

Quick Answer: Insulating plaster combines traditional plastering with advanced thermal materials (cork, perlite, clay) to reduce heat loss by up to 30%. It costs £25-45 per square metre and can save UK homeowners up to £350 annually on heating bills, with a typical payback period of 3-5 years. Professional installation is essential for optimal results. Transform your home’s comfort with insulating plaster – the modern solution that’s revolutionising energy efficiency in British homes. Understanding Insulating Plaster: A Modern Solution for Energy Efficiency In today’s climate of soaring energy costs and growing environmental awareness, insulating plaster has emerged as a game-changing solution for UK homeowners. This innovative material combines traditional plastering techniques with advanced thermal properties, offering a practical way to enhance your home’s energy efficiency. Recent studies show that UK households could save up to £350 annually on heating bills through effective wall insulation. Insulating plaster works by incorporating special materials like cork, perlite, or clay into traditional plaster mixtures. This creates a barrier that significantly reduces heat loss while maintaining the aesthetic appeal of conventional plastered walls. The Science Behind Insulating Plaster The effectiveness of insulating plaster lies in its unique composition and scientific principles. At its core, insulating plaster utilises materials with low thermal conductivity values, typically ranging from 0.05 to 0.1 W/mK, compared to traditional plaster’s 0.8 W/mK. The primary components include: Natural or synthetic materials (cork granules, expanded perlite, or mineral aggregates) Lime or clay binders Millions of microscopic air pockets that trap heat These materials slow heat transfer through walls. The resulting thermal mass helps maintain stable indoor temperatures by absorbing excess heat during warm periods and releasing it when temperatures drop. This scientific approach to wall insulation represents a significant advancement in building technology, offering a sustainable solution for modern energy efficiency challenges. Pro Tip: The lower the thermal conductivity value (W/mK), the better the insulation performance. Look for materials below 0.1 W/mK for maximum heat retention. Types of Insulating Plaster and Their Applications Type Key Materials Best For Natural Insulating Plasters Clay-based with straw or hemp Humidity regulation and eco-friendly applications Lime-based Solutions Traditional lime enhanced with cork or perlite Breathability and thermal properties Modern Engineered Systems SprayCork and Diathonite products Advanced thermal and acoustic performance Hybrid Solutions Natural and synthetic combinations Specific applications and climates Key Benefits of Insulating Plaster The advantages of insulating plaster extend far beyond simple thermal insulation. Modern systems can reduce energy consumption by up to 30%, while simultaneously improving indoor air quality and comfort. Energy and Cost Savings: These plasters excel at regulating humidity levels, preventing condensation and mould growth – common issues in British homes. Breathability and Moisture Control: The material’s natural breathability allows walls to manage moisture effectively, creating healthier living spaces. Acoustic Performance: Many variants offer excellent acoustic properties, reducing noise transmission by up to 40 decibels. Space Efficiency: Perhaps most importantly, insulating plaster can be applied without sacrificing valuable floor space, making it an ideal solution for both period properties and modern homes. Installation and Application Process Stage Details Timeframe Surface Preparation Thorough cleaning, assessment, removal of old finishes, repair damages 1-2 days Application Methods Machine spraying or hand trowelling (product dependent) Varies by area Layer Requirements 15-40mm thickness, applied in multiple coats Multiple days Drying Times Between coats 24-48 hours Full Curing Complete hardening and performance optimization 7-28 days Professional Skills Required: Specialist training and experience are essential for optimal results. Best Practices and Common Applications Successful implementation of insulating plaster requires careful consideration of various factors. Interior Walls: The focus should be on achieving uniform coverage and proper thickness to maximise thermal benefits. Exterior Applications: These demand additional attention to weatherproofing and durability. Heritage Buildings: Breathability is crucial to preserve historical fabric. Modern constructions might prioritise thermal performance instead. Our experience shows that proper preparation and application techniques are essential for achieving the best results, whether working on Victorian terraces in Tunbridge Wells or contemporary developments in Bromley. Cost Considerations and ROI Cost Factor Details Initial Investment £25-45 per square metre (varies by system and preparation) Energy Savings 20-30% annual heating cost reduction Property Value Average 15% increase in energy efficiency rating Government Schemes Available grants through Green Homes Grant scheme Payback Period Typically 3-5 years through reduced energy bills Making the Right Choice for Your Property Selecting the appropriate insulating plaster system requires careful evaluation of your property’s specific needs. Key factors to consider include: Building’s age and construction type Existing insulation levels Local climate conditions Wall composition and exposure levels Internal humidity patterns For period properties in Kent, we often recommend breathable lime-based systems that complement original building materials. Modern properties might benefit from high-performance engineered solutions. Professional assessment is crucial to determine the most suitable approach. Pro Tip: Never skip the professional assessment. A proper evaluation of your property’s specific needs will ensure you choose the right system and avoid costly mistakes. Expert Installation and Maintenance Professional installation is crucial for achieving optimal performance from insulating plaster systems. At Kent Plasterers, our certified specialists understand the nuances of different products and application techniques. Minimal Maintenance Required: Regular maintenance typically requires only standard cleaning and occasional checks for damage. Long-Term Durability: Most systems offer excellent durability, lasting 15-20 years or more when properly installed. For best results, we recommend annual inspections to ensure continued performance and address any issues early. Conclusion: Transform Your Home’s Efficiency Insulating plaster represents a significant advancement in home energy efficiency, offering a practical solution for property owners looking to reduce energy costs and improve comfort. With potential savings of up to 30% on heating bills and improved living conditions, it’s an investment worth considering. Contact Kent Plasterers today for a professional consultation and discover how insulating plaster can transform your property’s energy performance while maintaining its character and charm. Sources [1] https://corksoluk.com/help-articles/a-guide-to-plaster-with-thermal-insulation/ [2] https://www.ecologicalbuildingsystems.com/products/insulation-and-materials/plaster-and-screed/insulating-plaster-and-screed [3] https://www.perlite.org/perlite-cement-based-lightweight-insulating-plasters/

Insulating Plaster: Energy-Efficient Homes Guide Read More »

ornate Victorian plaster moulding installation

Plaster Moulding: Period-Perfect Cornices Guide

Quick Answer: Plaster moulding is the art of creating decorative profiles and ornamental features using specially formulated plaster mixtures. Professional installation requires a precise mix of 60% lime putty, 30% plaster of Paris, and 10% marble dust, combined with traditional techniques and modern innovations. In the UK, proper plaster moulding can increase property value by up to 15% while adding authentic period character. Transform your home’s character with exquisite plaster moulding that turns plain walls into architectural masterpieces – discover the timeless art of ornamental plastering. Understanding Plaster Moulding: The Foundation of Architectural Beauty Plaster moulding stands as a testament to architectural craftsmanship, dating back centuries to when master craftsmen first began adorning palaces and grand homes with decorative elements. Today, this time-honoured technique continues to transform ordinary spaces into stunning showcases of period detail. At its core, plaster moulding involves creating decorative profiles and ornamental features using specially formulated plaster mixtures. The process requires exceptional skill, combining traditional techniques with modern innovations to achieve stunning results. In the UK, where period properties are particularly valued, proper plaster moulding can increase a property’s value by up to 15% while adding authentic character that cannot be replicated with modern alternatives. Essential Materials and Tools for Perfect Plaster Moulding Creating professional plaster moulding requires the right combination of materials and specialist tools: Base Materials: High-quality lime putty, plaster of Paris, and ultra-fine marble dust Bonding Agents: Modern PVA and specialised adhesives for ceiling work Running Moulds: Custom-made templates for creating consistent profiles Specialist Tools: Traditional hawks, trowels, and contemporary precision instruments Measuring Equipment: Digital levels, laser measurers, and traditional spirit levels Safety Gear: Dust masks, eye protection, and appropriate PPE The Art of Mixing and Preparation The secret to perfect plaster moulding lies in the precise mixing of materials. The traditional recipe calls for a careful balance of 60% lime putty, 30% plaster of Paris, and 10% marble dust, though proportions may vary based on specific requirements. Mixing must be methodical – first combining dry ingredients before gradually adding measured amounts of clean water. The consistency should be smooth and creamy, similar to thick paint. Temperature plays a crucial role, with optimal working conditions between 15-20°C. Modern additives can extend working time and enhance durability, particularly important for ceiling work where additional strength is required. Component Proportion Purpose Lime Putty 60% Base material providing workability Plaster of Paris 30% Sets the mixture and adds strength Marble Dust 10% Fine finish and durability Pro Tip: Always mix plaster in small batches to prevent premature setting. Work in a temperature-controlled environment between 15-20°C for optimal results, and never add more water once mixing has begun as this weakens the final structure. Installation Mastery: Creating Flawless Cornices Professional installation follows a precise sequence of steps to ensure perfect results. The substrate must first be thoroughly prepared, with any existing damage repaired and surfaces primed. Corners require particular attention, with precise 45-degree cuts ensuring seamless joins. For ceiling work, additional mechanical fixings may be necessary, carefully concealed within the design. The installation process typically involves: Thorough surface preparation and priming Application of bonding coat Installation of support brackets where needed Running of main profiles in sections Creation of perfect mitred corners Final finishing and cleaning Advanced Techniques for Period-Perfect Details Creating authentic period details requires deep knowledge of historical styles and advanced techniques. Victorian cornices, for instance, often feature intricate leaf patterns and geometric designs requiring multiple passes with specially crafted running moulds. Georgian styles, known for their elegant simplicity, demand perfect symmetry and precise proportions. Contemporary designs often combine traditional techniques with modern minimalism, requiring equally exacting standards. Our craftsmen at Kent Plasterers specialise in matching existing period features, ensuring seamless integration with original architectural elements. Troubleshooting and Professional Tips Even experienced plasterers encounter challenges. Here are professional solutions to common issues: Cracking Prevention: Use flexible additives in mix designs for areas subject to movement Corner Solutions: Create templates for complex angles to ensure perfect fits Ceiling Challenges: Install additional mechanical fixings for heavy designs Temperature Control: Maintain consistent workshop conditions for optimal results Moisture Management: Use dehumidifiers to control drying times in damp conditions Maintaining Your Plaster Mouldings Proper maintenance ensures the longevity of your plaster mouldings. Regular inspection can identify potential issues before they become serious problems. Clean mouldings annually using soft brushes and avoid harsh cleaning agents that might damage the surface. Address any cracks promptly to prevent water ingress and deterioration. In period properties, consider professional assessment every 5-7 years to ensure historical features remain in prime condition. Transform Your Space with Kent Plasterers At Kent Plasterers, we bring over two decades of expertise in creating and restoring plaster mouldings across Tunbridge Wells and the wider Kent area. Our skilled craftsmen combine traditional techniques with modern innovations to deliver exceptional results. Whether you’re restoring a Victorian property in Bromley or adding character to a contemporary home, we provide bespoke solutions tailored to your specific requirements. Contact us today to discover how we can enhance your property with beautiful, period-perfect plaster mouldings that will stand the test of time. FAQ How long do plaster molds last? As long as you use gypsum products (such as plaster, hydrocal or dental plaster) the molds will last for years and hundreds of casts. I’ve never had a mold wear out yet and I’ve used some as long as 10 years. Usually the molds don’t need to be cleaned. Does plaster mold like drywall? Plaster is less porous than drywall but can still support mold if moisture is present. Common causes include leaks, high humidity, and poor ventilation. Prompt moisture control and professional remediation are essential. Sources [1] https://www.finehomebuilding.com/project-guides/drywall/making-plaster-molding [2] https://www.usg.com/content/usgcom/en/products/industrial/art-statuary/no-1-moulding-plaster.html [3] https://www.youtube.com/watch?v=HzrUo3wi_Ko

Plaster Moulding: Period-Perfect Cornices Guide Read More »