Complete Guide to Plastering: Everything You Need to Know in 2026
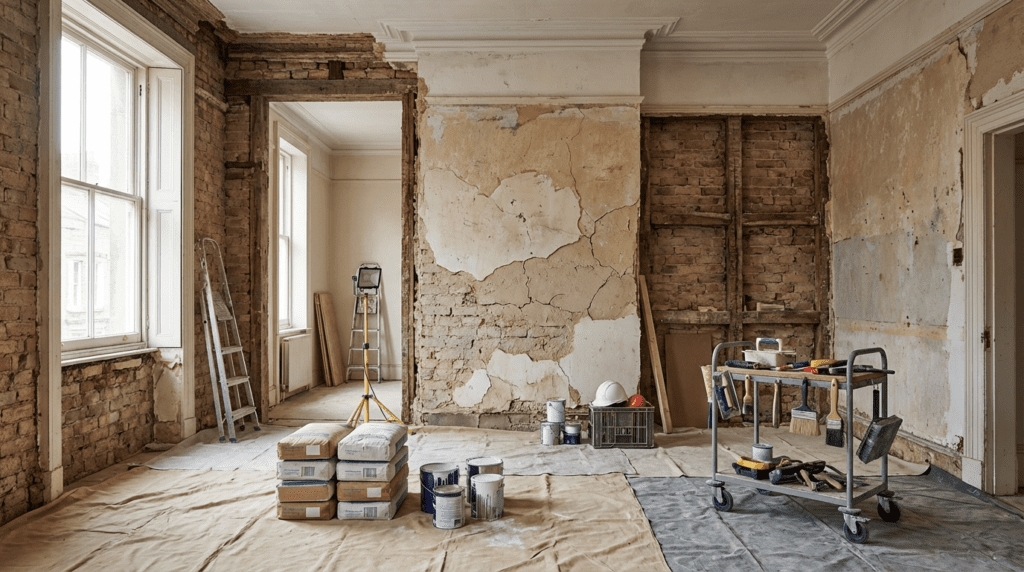
Quick Answer: Plastering is the process of applying a smooth, durable coating to walls and ceilings using gypsum-based or cement-based materials. A professional finish requires proper surface preparation, correct mixing ratios (typically 2:1 plaster to water for finishing plaster), two-coat application (browning/bonding followed by a 2-3mm skim), and controlled drying times of 5-7 days before decoration. Expect to pay £15-25 per square metre for professional plastering in Kent in 2026, with DIY projects requiring approximately £150-300 in materials and tools for a standard room. Understanding Plastering: What It Is and Why It Matters Plastering is one of the most fundamental skills in the building trade, transforming rough brickwork, blockwork, or plasterboard into smooth, paintable surfaces. Whether you’re renovating a period property or finishing a new-build extension, understanding the plastering process separates amateur patch jobs from professional finishes that last decades. In the UK construction industry, plastering must comply with Building Regulations Part B (fire safety) and relevant British Standards, particularly BS 5492:1990 for internal plastering. Modern plastering techniques have evolved significantly, with spray-applied systems and pre-mixed compounds now sitting alongside traditional sand-and-cement renders. Types of Plaster: Choosing the Right Material Walk into any Wickes or Travis Perkins, and you’ll face shelves of different plaster types. Each serves a specific purpose, and using the wrong one can lead to cracking, poor adhesion, or extended drying times. Gypsum-Based Plasters (Most Common for Interior Work) Browning plaster: Undercoat plaster for solid backgrounds (brick, block, concrete). Mixed to a thicker consistency, applied 8-12mm thick, provides excellent key for final coat. Bonding plaster: Undercoat for low-suction backgrounds like concrete, plasterboard, or painted surfaces. Contains additives for better adhesion, applied 8-15mm thick. Finishing plaster: Final skim coat applied 2-3mm thick over undercoats or directly onto plasterboard. British Gypsum’s Thistle Multi-Finish is the industry standard. One-coat plaster: Combines undercoat and finish in a single application (12-15mm). Popular for small repairs but rarely used for whole rooms by professionals. Board finish: Specifically formulated for direct application to plasterboard, thinner consistency than multi-finish. Cement-Based Plasters and Renders Sand-and-cement render: Traditional external render, typically 4:1 or 5:1 sand to cement ratio. Requires two or three coats totalling 15-20mm. Lime plaster: Breathable plaster for period properties, prevents moisture entrapment in solid walls. Sets slowly (several weeks) but offers superior flexibility. Monocouche render: Single-coat through-coloured render for external walls, popular in new builds, eliminates need for painting. Plaster Type Application Thickness Drying Time Cost (per 25kg bag) Browning Undercoat (solid backgrounds) 8-12mm 2-3 hours set, 5-7 days dry £8-12 Bonding Undercoat (low suction) 8-15mm 1.5-2 hours set, 5-7 days dry £9-13 Multi-Finish Final skim coat 2-3mm 1-1.5 hours set, 4-5 days dry £9-14 Board Finish Plasterboard skim 2-3mm 1-1.5 hours set, 3-4 days dry £9-13 One-Coat Single-application repairs 12-15mm 2 hours set, 7-10 days dry £11-15 Essential Plastering Tools and Equipment Professional results require professional tools. While you can technically plaster with just a trowel and bucket, the right equipment makes the difference between a frustrating struggle and a satisfying finish. Basic Tool Kit (£150-250 Total Investment) Plastering trowel (14-16″): Marshalltown or Ragni models (£25-45) are industry favourites. The trowel becomes an extension of your hand. Hawk (12-14″): Holds working plaster at chest height (£15-25). Aluminium models are lighter; stainless steel lasts longer. Bucket trowel (6-8″): For mixing and loading hawk (£8-12). Mixing paddle and drill: Dedicated mixer paddle (1600W minimum) prevents lumps (£60-120 from Screwfix). Mixing buckets: Flexible rubber buckets (2-3 buckets for rotation) (£5-8 each). Devil float: Creates key on browning/bonding coat before skim (£12-18). Plastering sponge: Float finish and smooth edges (£3-6). Feather edge or darby (1.8-2.4m): Levels large areas, essential for walls over 2m (£15-30). Corner trowel: Internal angles without damage (£12-20). Gauging trowel (6-8″): Small areas and mixing (£8-15). Pro Tip: Never buy cheap trowels from pound shops. A quality Marshalltown trowel properly cleaned after each use will last 10+ years. Cheap trowels rust, bend, and leave trowel marks you’ll spend hours polishing out. I’ve used the same 14″ Marshalltown for eight years—still performs like new. Additional Equipment for Serious Projects Plastering stilts: Work ceilings without scaffolding (£80-150). Takes practice but massively increases productivity. Mixer stand: Forced-action mixers for large projects (£200-400 hire per week). Dust sheets and protective covers: 12ft x 9ft heavy-duty sheets (£8-15 each). Spot board stand: Keeps plaster at working height (£25-45 or DIY from plywood). Spray bottles: Misting water onto drying plaster extends working time (£3-6). Surface Preparation: The Foundation of Quality Plastering Poor preparation causes 90% of plastering failures. A perfectly applied skim coat will still crack and blow if the substrate isn’t properly prepared. This stage separates DIY disasters from professional work. Preparing Different Substrates Brick and Blockwork: Remove dust, loose mortar, and organic growth with stiff brush Rake out joints 10mm deep if re-plastering old walls (improves mechanical key) Pre-wet high-suction backgrounds 30-60 minutes before plastering (prevents rapid moisture loss) Apply bonding agent (SBR diluted 1:3 with water) if surface is dusty or powdery Never use PVA as a bonding agent on high-suction backgrounds—it can form a waterproof barrier that causes delamination Plasterboard: Tape all joints with scrim tape before skimming (prevents cracking along seams) Fill any damage or large gaps with bonding plaster, let dry 24 hours Ensure all screws/nails are below surface by 1-2mm (countersunk) Apply PVA solution (1:4 PVA to water) if board has been installed for weeks (reduces suction variability) Work quickly—plasterboard creates even suction that speeds up setting time Painted or Sealed Surfaces: Remove loose or flaking paint completely (use scraper and wire brush) Score glossy surfaces with bolster chisel or scarifier to create mechanical key Apply neat SBR bonding agent or proprietary bonding liquid Use bonding plaster undercoat rather than browning (better adhesion to low-suction surfaces) ⚠️ Warning: Always test for asbestos in pre-1999 buildings before disturbing any surface coatings, especially textured finishes like Artex. Asbestos testing costs £50-100 per sample but could save your life. Contact an accredited asbestos surveyor before beginning work on older properties. The Plastering Process: Step-by-Step Application
Complete Guide to Plastering: Everything You Need to Know in 2026 Read More »