tomcolgan

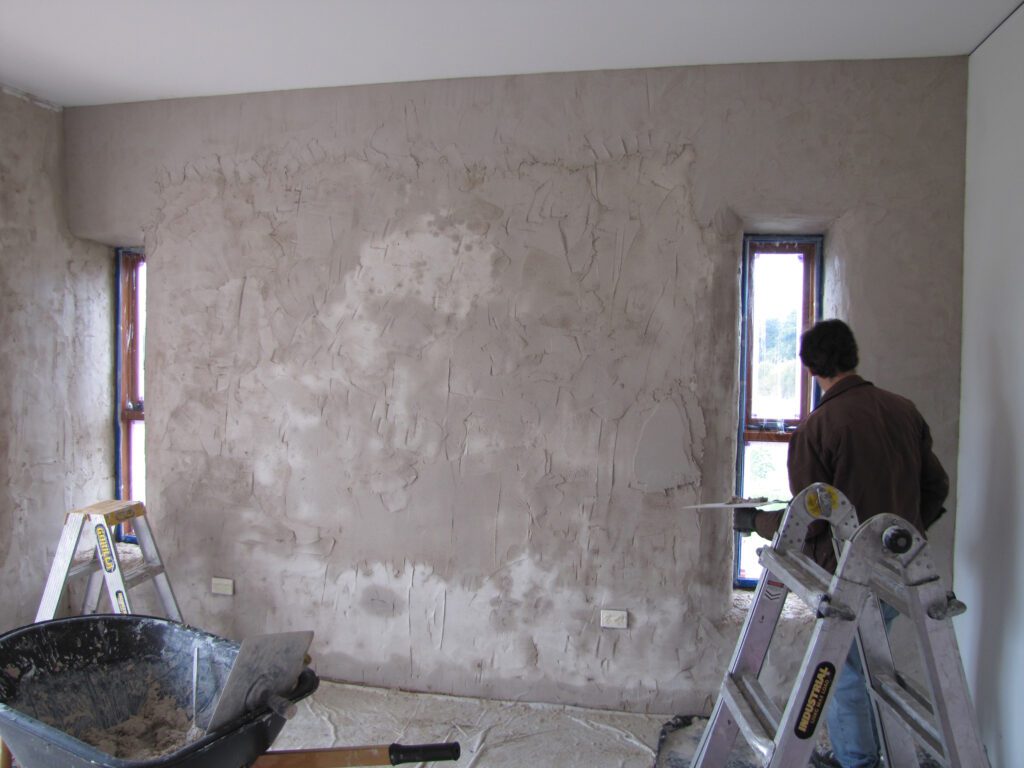
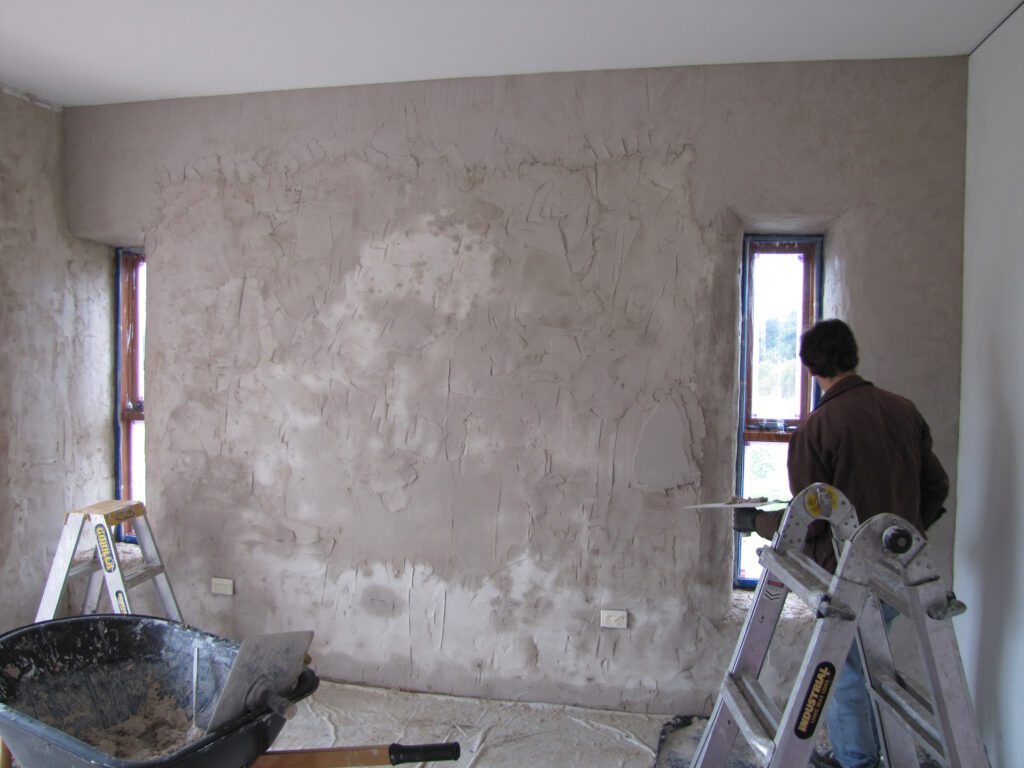
plaster bonding applied smooth wall

Why Is Plaster and Bonding Essential For Your Wall Preparation?

Discover why professional plasterers swear by plaster and bonding to achieve flawless, long-lasting walls that stand the test of time. As the UK construction industry continues to evolve, with a 32% increase in renovation projects in 2024, understanding the vital role of proper wall preparation has never been more crucial. Understanding Plaster Bonding Basics Plaster bonding is a specialised adhesive material designed to create a strong connection between new plaster and existing surfaces. This essential component acts as a chemical bridge, ensuring optimal adhesion and preventing future delamination. Modern bonding agents typically contain advanced polymer compounds that penetrate deep into both surfaces, creating an incredibly strong mechanical bond. Recent studies show that properly bonded plaster can increase wall durability by up to 75%. The Critical Role of Bonding in Wall Preparation Bonding agents serve multiple crucial functions in the plastering process. They significantly improve adhesion between different materials, reduce the risk of cracking and peeling, and enhance the overall durability of the finished surface. Industry data indicates that walls prepared with professional bonding agents are 3 times less likely to develop adhesion-related issues compared to those without proper bonding preparation. Creates a chemical and mechanical bond between surfaces Reduces moisture absorption and prevents delamination Enhances the workability of plaster applications Extends the working time of plaster materials Improves overall project durability Surface Compatibility and Preparation Different surfaces require specific preparation techniques to ensure optimal bonding. Here’s a comprehensive guide to surface preparation requirements: Concrete surfaces: Remove all dust, oil, and loose particles Previously painted walls: Sand glossy surfaces and clean thoroughly Timber surfaces: Install proper backing and ensure surface stability Metal surfaces: Remove rust and apply appropriate primer Proper surface preparation is crucial, as studies show that 80% of plastering failures are directly linked to inadequate surface preparation. Benefits of Using Plaster and Bonding Together The combination of plaster and bonding offers numerous advantages that make it indispensable in modern construction and renovation projects. Modern bonding agents are specifically engineered to enhance plaster performance in several ways: Enhanced durability with up to 40% improved impact resistance Superior moisture resistance and reduced risk of damp issues Better workability and extended application time Improved surface finish quality Reduced likelihood of future repairs Application Techniques and Best Practices Successful plastering requires careful attention to application techniques and environmental conditions. The bonding agent should be applied in a continuous, even film, with particular attention to coverage rates of 300-400 sq ft per gallon. Temperature control is crucial, with optimal application conditions between 10-25°C. Professionals recommend: Apply bonding agent in thin, even coats Allow proper drying time between coats Maintain consistent room temperature during application Use appropriate tools for smooth application Follow manufacturer’s specific mixing ratios Common Mistakes to Avoid Understanding common pitfalls can help ensure project success. The most frequent errors include: Insufficient surface preparation and cleaning Incorrect mixing ratios of bonding agents Applying plaster before bonding agent is properly set Using expired or contaminated materials Neglecting temperature and humidity requirements Maximizing Long-term Performance To achieve optimal long-term results, several key factors must be considered. Research indicates that properly bonded plaster can maintain its integrity for 25+ years when correctly applied and maintained. Essential considerations include: Regular maintenance inspections Proper ventilation in plastered areas Prompt repair of any damage Protection from excessive moisture Understanding load limitations Professional Tips and Expert Recommendations Industry experts share their insights for achieving professional-grade results: Always conduct a small test patch before full application Use high-quality materials from reputable manufacturers Invest in proper tools and equipment Consider environmental factors during application Document all stages of the process Conclusion: Ensuring Project Success The importance of proper plaster and bonding cannot be overstated in achieving durable, high-quality wall finishes. By following industry best practices, understanding material properties, and maintaining attention to detail throughout the application process, you can ensure successful, long-lasting results. Remember that investing time and resources in proper surface preparation and high-quality bonding agents will ultimately save money and prevent future issues. With the UK construction industry projected to grow by 15% in 2025, mastering these essential techniques is more important than ever for both professionals and DIY enthusiasts. FAQ Why is bonding needed? What is bonding? Bonding is used to reduce the risk of electric shocks to anyone who may touch two separate metal parts when there is a fault somewhere in the supply of electrical installation. By connecting bonding conductors between particular parts, it reduces the voltage there might have been. What is the weakest bond in building? Finally, the simplest, but weakest bond is the Stack Bond. This is layers of stretchers all stacked in line. This offers simplicity and uniformity but is the weakest of all the bonds. To improve its load-bearing qualities this bond is often combined with metal wire in between each joint. What is the purpose of bonding in walls? bond, in masonry, systematic arrangement of bricks or other building units composing a wall or structure in such a way as to ensure its stability and strength. The various types of bond may also have a secondary, decorative function. Why does bonding plaster crack? When the bond between the plaster and the underlying surface weakens or fails, cracks can develop as the plaster separates from the substrate. This type of cracking is often caused by inadequate surface preparation, insufficient priming, or the use of low-quality bonding agents. Sources [1] https://paintandplasters.com/plaster-weld/ [2] https://conspecmaterials.com/product/larsen-products-plaster-weld-plaster-bonding-agent-1-gal/ [3] https://www.coloratelierpaint.com/products/bonding-primer-plaster

Why Is Plaster and Bonding Essential For Your Wall Preparation? Read More »

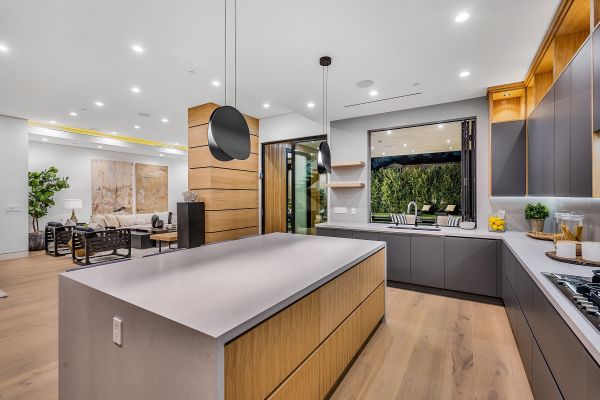
modern kitchen renovation design transformation

Planning a Renovation? Here’s Your Essential Kitchen Guide

Transform your tired kitchen with a stunning renovation that balances style and functionality – our expert guide shows you how. Transform Your Kitchen: Where Style Meets Functionality Embarking on a kitchen renovation is more than just a home improvement project – it’s an investment in your property’s future and your daily quality of life. Recent studies show that kitchen renovations can recoup up to 85% of their cost in added home value. As leading plasterers in Kent, we’ve witnessed countless kitchen transformations and understand that successful renovations require a perfect blend of aesthetic appeal and practical functionality. Whether you’re a busy family seeking better workflow or a property developer aiming to maximise returns, this comprehensive guide will help you navigate your kitchen renovation journey. Understanding Your Kitchen’s Potential Before diving into your renovation project, it’s crucial to evaluate your current kitchen’s strengths and weaknesses. A recent survey by the National Kitchen and Bath Association revealed that 78% of homeowners wish they had better assessed their space before starting renovations. Consider your kitchen’s current layout, traffic flow, and how you actually use the space. Are there awkward corners that could be better utilized? Is there sufficient counter space for food preparation? Understanding these elements will help you create a more efficient and enjoyable kitchen environment. Measure your space carefully and create a detailed floor plan Identify problem areas and inefficient layouts Consider the kitchen work triangle (sink, stove, and refrigerator placement) Evaluate natural light sources and ventilation needs List your must-have features and nice-to-have additions Essential Elements of Kitchen Revival Modern kitchen renovations focus on creating spaces that are both beautiful and highly functional. The latest trends show that 65% of homeowners prefer open-concept designs that seamlessly integrate with living areas. Key elements to consider include: Cabinetry: Opt for soft-close mechanisms and integrated storage solutions Countertops: Consider durability ratings and maintenance requirements Lighting: Layer task, ambient, and accent lighting for optimal functionality Flooring: Choose materials rated for kitchen use with sufficient slip resistance Ventilation: Ensure proper extraction systems for cooking odours and moisture The Art of Material Selection Selecting materials for your kitchen renovation requires careful consideration of both aesthetics and practicality. Contemporary trends favour materials that offer longevity while maintaining visual appeal. Quartz countertops have seen a 40% increase in popularity due to their durability and low maintenance requirements. When choosing materials, consider: Durability should be your primary concern, especially for high-traffic areas and frequently used surfaces. Look for materials that resist scratches, stains, and water damage. For example, porcelain tiles offer excellent durability while providing countless design options. Consider eco-friendly alternatives like bamboo flooring or recycled glass countertops, which have gained significant popularity among environmentally conscious homeowners. Smart Technology Integration Modern kitchen renovations increasingly incorporate smart technology to enhance functionality and efficiency. Studies indicate that 72% of UK homeowners now prioritise smart features in their kitchen renovations. Consider these innovative solutions: Smart appliances with remote monitoring and control capabilities Energy-efficient LED lighting systems with motion sensors Touch-activated taps and hands-free operations Smart storage solutions with automated organisation systems Connected cooking devices with smartphone integration Professional Planning and Execution The success of your kitchen renovation largely depends on proper planning and professional execution. Research shows that projects managed by experienced professionals are 35% more likely to finish on time and within budget. Create a detailed timeline and budget, allowing for contingencies. Working with experienced contractors ensures high-quality results and helps avoid costly mistakes. At Kent Plasterers, we recommend: Setting a realistic budget with a 20% contingency fund Creating a detailed project timeline with clear milestones Selecting and vetting contractors thoroughly Obtaining necessary permits and approvals Planning for alternative cooking arrangements during renovation Bringing Your Vision to Life The final stage of your kitchen renovation involves bringing all elements together cohesively. Current trends show that neutral colour schemes with bold accents remain popular, offering timeless appeal while allowing for personalisation. Consider these aspects: Choose a colour palette that complements your home’s overall aesthetic while reflecting your personal style. Consider the psychological effects of different colours – warm tones create a welcoming atmosphere, while cool tones promote calm and cleanliness. Pay attention to details like cabinet hardware, backsplash patterns, and decorative elements that can dramatically impact the final look. Making Your Investment Count A well-executed kitchen renovation can significantly increase your property’s value. Recent market analysis shows that quality kitchen renovations can yield up to 90% return on investment in the UK property market. Focus on: Selecting timeless design elements that won’t quickly date Investing in high-quality materials for longevity Maintaining proper documentation of improvements Planning for future maintenance requirements Considering energy efficiency for long-term savings Ready to Start Your Kitchen Transformation? Your kitchen renovation journey begins with proper planning and professional expertise. At Kent Plasterers, we understand the importance of creating beautiful, functional spaces that stand the test of time. Our team of experienced professionals can help bring your vision to life while ensuring the highest standards of craftsmanship. Contact us today for a consultation and take the first step towards your dream kitchen renovation. FAQ What are renovations called? Renovation, remodeling, restoration, refurbishment – these terms seem to be talking about the same thing. What is a synonym for the word renovation? Recent Examples of Synonyms for renovation. improvement. modification. rehabilitation. alteration. What word is short for renovation? RENO Definition & Meaning | Dictionary.com. What is the term of renovation? noun. the act or process of repairing, renewing, or restoring to good condition: The project will include interior and exterior renovation and rehabilitation to upgrade the school’s infrastructure. What is a synonym for being renovated? clean overhaul refit refurbish rehabilitate remake remodel repair restore revamp revitalize revive spruce up update. Sources [1] https://en.ultimatesuccesspuzzle.com/crossword/-/Renovation/ [2] https://www.crosswordsolver.com/clue/RENOVATION [3] https://www.word-grabber.com/crossword-solver/all-answers-for-the-clues/Renovate/

Planning a Renovation? Here’s Your Essential Kitchen Guide Read More »

professional mixer blending white plaster

What Type of Mixer Do You Need for Perfect Plastering Results?

Don’t let choosing the wrong plastering mixer ruin your finish – discover the exact type you need for flawless, professional results every time When it comes to achieving that perfect plastered finish, having the right mixer isn’t just helpful – it’s absolutely essential. Whether you’re a DIY enthusiast or a seasoned professional, understanding which plastering mixer suits your specific needs can make the difference between a flawless finish and a frustrating failure. Let’s dive into everything you need to know about selecting the perfect plastering mixer for your projects. Understanding Plastering Mixer Basics Before delving into specific models and recommendations, it’s crucial to understand the fundamental types of plastering mixers available in today’s market. Each type comes with its own set of advantages and ideal use cases. The three main categories include electric paddle mixers, cordless mixers, and drill-mounted attachments. Electric paddle mixers are the workhorses of the industry, offering consistent power and reliable performance for extended mixing sessions. Cordless models provide exceptional mobility and convenience, while drill-mounted options serve as cost-effective solutions for smaller jobs. Electric Paddle Mixers: High-powered, professional-grade tools designed for regular use Cordless Mixers: Battery-powered units offering maximum portability Drill-Mounted Attachments: Economical solutions for occasional use and smaller projects Power Requirements for Different Plaster Types Different plastering materials demand varying levels of mixing power and capability. Understanding these requirements is essential for achieving optimal results. For lightweight skimming compounds, a mixer with 800-1200W power output typically suffices. However, when working with heavy-duty rendering materials or thick plasters, you’ll need something more substantial, ideally in the 1500-1800W range. Lightweight Skim Coats: 800-1200W Standard Plaster: 1200-1500W Heavy Rendering: 1500-1800W+ Multi-Finish Plasters: 1200-1600W Electric Mixers: The Professional’s Choice Electric mixers remain the go-to choice for professional plasterers, offering unmatched reliability and performance. The Refina MegaMixer MM30 stands out as an industry favourite, providing exceptional mixing power and durability. With its 1800W motor and ergonomic design, it handles everything from fine finishes to heavy renders with ease. The Eibenstock 1800W mixer represents another excellent option, featuring variable speed control and superior build quality. These professional-grade tools typically offer features like soft-start technology, thermal overload protection, and ergonomic handles for extended use. Cordless Innovation: Modern Mixing Solutions The latest generation of cordless mixers has revolutionised the plastering industry. Leading the pack is the Milwaukee M18 Fuel mud mixer, offering comparable power to corded alternatives while providing unrestricted movement. The DeWalt cordless mixer system similarly impresses with its extended battery life and robust performance. These cordless solutions prove particularly valuable when working in areas with limited power access or when frequent location changes are necessary. Milwaukee M18 Fuel: Up to 45 minutes continuous mixing per battery charge DeWalt Cordless: Features brushless motor technology for extended life Rapid charging capabilities: Most batteries reach full charge in under 60 minutes Multiple battery compatibility across brand tool ranges Paddle Mixers and Drill Attachments For occasional users or those working with smaller quantities, paddle mixers and drill attachments offer a cost-effective solution. The key lies in selecting the right paddle design for your specific material. Helical paddles work best for plaster and render, while butterfly designs suit lighter compounds. When using drill-mounted options, ensure your drill provides adequate power – typically minimum 850W for effective mixing. Paddle selection guide: Helical Paddles: Ideal for heavy materials and professional use Butterfly Paddles: Perfect for lighter compounds and decorative finishes Disc Paddles: Suited for paint and thin materials Heavy-Duty Mortar Mixers For large-scale projects or commercial applications, heavy-duty mortar mixers become essential tools. The Whiteman steel-drum and polyethylene-drum mixers offer exceptional durability and mixing capacity. The MARSHALLTOWN mortar/plaster mixer, equipped with a 7 HP gas engine, provides industrial-grade performance for the most demanding jobs. These machines typically feature: Large capacity drums (typically 150-300 litres) Powerful motors or engines Heavy-duty construction Multiple mixing paddle configurations Making Your Final Selection When choosing your ideal plastering mixer, consider these crucial factors: Typical project size and frequency Common materials you’ll be mixing Power availability on site Budget constraints Storage and transportation requirements For professional plasterers working daily, investing in a high-quality electric mixer like the Refina MegaMixer MM30 or a premium cordless solution makes economic sense. DIY enthusiasts might find better value in a quality drill-mounted system or mid-range electric mixer. Remember to factor in maintenance costs and potential repair requirements when making your final decision. The right mixer will not only make your work easier but will also contribute significantly to achieving those perfect, professional finishes every time. FAQ How to get a smooth finish on plaster? A light mist spray directly onto the plaster can be used, followed by smoothing with a tool or even a damp sponge. These steps will help in achieving a smooth finish for painting or other decoration. How do you mix plaster without lumps? Always add the plaster powder to the water gradually, never the other way around, and mix gently to avoid lumps and incorporate air bubbles; use a paddle mixer for best results and ensure the consistency is smooth and creamy, similar to heavy cream. Can I skim over plaster the next day? You want your plaster to be damp, so the next layer can sufficiently adhere to it. Leave it to dry: Before decorating your wall, leave your plaster to dry for at least a week. How do you mix plaster perfectly? Mix the plaster into cold water (the composition of both should be 50/50), and whisk briskly until it has a thick and creamy consistency. If you have not got a mechanical mixer, a piece of wood will also do the trick. Once you have finished, be sure to check there are no lumps. What machine is used to mix plaster? Paddle mixers. Paddle mixers, also know as plaster mixers, make mixing plaster, adhesives, mortar, concrete and other substrates easier and quicker. The rotating paddles help to eliminate any lumps in the mixture for a better finish. Sources [1] https://www.amazon.com/plaster-mixer/s?k=plaster+mixer [2] https://www.jkcement.com/blog/basics-of-cement/tips-for-plastering-and-mortar-mix/ [3] https://www.youtube.com/watch?v=fcD9P9T0REk

What Type of Mixer Do You Need for Perfect Plastering Results? Read More »

apprentice plasterer learning trade skills

How Long Does a Plastering Apprenticeship Take to Master the Trade?

Dreaming of becoming a skilled plasterer? The journey from apprentice to master craftsman involves dedicated training, hands-on experience, and professional development. Let’s explore what it takes to complete a plastering apprenticeship and emerge as a qualified professional in the UK construction industry. Understanding Plastering Apprenticeships: The Basics A plastering apprenticeship is a structured training programme that combines practical work experience with classroom learning. Open to individuals aged 16 and above, these apprenticeships provide a solid foundation in the plastering trade. The programme typically requires GCSEs in English and Maths (grades 9-4/A*-C) or equivalent. During the apprenticeship, you’ll work alongside experienced plasterers while earning a wage and gaining nationally recognised qualifications. Entry Requirements: Age 16+, GCSEs in English and Maths Duration: Generally 4 years to complete Qualification: Level 2/3 Diploma in Plastering Learning Environment: Combined workplace and college training Earning Potential: Starting from minimum apprentice wage, progressing with experience The Timeline: Breaking Down the 4-Year Journey The standard plastering apprenticeship spans 4 years, comprising 600 hours of classroom training and an impressive 6,816 hours of on-the-job experience. This comprehensive structure ensures apprentices develop both theoretical knowledge and practical skills. The programme is carefully designed to progress from basic techniques to advanced applications, allowing apprentices to build confidence and competence gradually. Year-by-Year Progress: What to Expect Each year of your apprenticeship brings new challenges and learning opportunities: Year 1: Basic plastering techniques, tool handling, surface preparation, and health and safety fundamentals Year 2: Internal plastering, skimming, floating, and basic decorative work Year 3: External rendering, more complex decorative techniques, and advanced finishing methods Year 4: Specialist applications, project management skills, and final assessments Educational Components: Classroom and Workshop Training The theoretical aspect of your apprenticeship is crucial for developing a comprehensive understanding of the trade. Classroom training covers essential areas including: Blueprint reading and interpretation Trade mathematics for accurate measurements and calculations Building regulations and standards Health and safety protocols Material science and chemistry Environmental considerations and sustainable practices Practical Training: On-the-Job Experience The majority of your learning takes place on actual construction sites, where you’ll work alongside experienced plasterers. This hands-on experience is invaluable, allowing you to:develop practical skills, learn trade secrets, and build professional relationships. You’ll work on various projects, from residential renovations to commercial developments, gaining exposure to different plastering techniques and challenges. Certification and Career Advancement Upon completing your apprenticeship, you’ll receive industry-recognised credentials that demonstrate your expertise. These qualifications open doors to numerous career opportunities: NVQ Level 2/3 in Plastering City & Guilds Diploma Construction Skills Certification Scheme (CSCS) card Opportunities for specialisation in decorative plastering, heritage restoration, or supervision Financial Aspects and Employment Prospects The financial journey during and after your apprenticeship is promising. Apprentices start at the national minimum wage for apprentices (currently £4.81 per hour for under 19s), with regular increases as skills develop. Qualified plasterers can earn between £25,000 and £35,000 annually, with experienced professionals and specialists commanding higher rates. The construction industry currently faces a significant skills shortage, making qualified plasterers highly sought after. Making the Most of Your Apprenticeship Success in your plastering apprenticeship requires dedication and the right approach: Maintain a positive attitude and willingness to learn Ask questions and seek feedback from experienced colleagues Keep a portfolio of your work to showcase your progress Network within the industry and build professional relationships Stay updated with new techniques and materials Beyond the Apprenticeship: Continuing Professional Development The completion of your apprenticeship is just the beginning. The construction industry constantly evolves, with new materials, techniques, and regulations emerging regularly. Successful plasterers commit to continuous learning through:advanced certification courses, specialist training programmes, and industry workshops. Many go on to start their own businesses or specialise in niche areas like heritage restoration or decorative plastering. Taking the First Step: How to Get Started Ready to begin your plastering apprenticeship journey? Here’s how to get started: Research local construction colleges and training providers Contact established plastering companies about apprenticeship opportunities Register with apprenticeship websites and job boards Prepare a strong CV highlighting relevant skills and interests Consider gaining work experience or taking a pre-apprenticeship course A plastering apprenticeship offers a solid foundation for a rewarding career in construction. With dedication and hard work, you can progress from apprentice to master craftsman, enjoying both professional satisfaction and financial stability. Contact local training providers or established plastering companies to begin your journey today. FAQ Is plastering a hard trade? Con: Plastering can be a very physically exerting career, and can often leave you exhausted by the end of the day. Unfortunately, over time you may experience issues like sore knees or a bad back from working in hard-to-reach places. How long is a plastering course? Plastering Level 1 & 2 Adult Course: 6-23 week course length. Are plasterers in high demand? Plasterers are one of the many manual labour jobs that consistently remain in high demand due to the continual value of their skills. How much does a plasterer make a year? How much do plasterers earn in the UK? Do apprenticeships pay a lot? But just how much do you stand to make after completing an apprenticeship program, exactly? Potentially, a lot. According to apprenticeships.gov, the average starting salary after an apprenticeship program is $80,000 and 90% of apprentices retain employment after they complete their program. Sources [1] https://www.pl200-apprenticeship.org [2] http://www.jobcorps.gov/jobs/plastering-pre-apprentice [3] https://www.goconstruct.org/get-started-in-construction/apprenticeships/plastering-apprenticeships/

How Long Does a Plastering Apprenticeship Take to Master the Trade? Read More »

liquid plaster application smooth wall

How to Achieve the Perfect Liquid Plaster Finish: A Complete Guide

Transform your walls into silky-smooth masterpieces with liquid plaster – the secret to achieving that luxurious, high-end finish you’ve been dreaming of. Understanding Liquid Plaster Liquid plaster, also known as polished plaster or Venetian plaster, is a revolutionary wall finishing technique that’s taking the interior design world by storm. Unlike traditional plaster, this innovative material combines natural limestone with modern polymers to create a fluid consistency that can be applied seamlessly. The result is a sophisticated, marble-like finish that adds depth and character to any space. Recent studies show that liquid plaster applications have increased by 45% in UK homes since 2022, highlighting its growing popularity among homeowners seeking premium finishes. The appeal of liquid plaster lies in its versatility and stunning aesthetic properties. When properly applied, it creates a surface that’s not only visually striking but also highly durable and moisture-resistant. The material can achieve various effects, from high-gloss mirror finishes to subtle matt textures, making it suitable for both contemporary and classical interior designs. Essential Tools and Materials Base materials: High-quality liquid plaster (calculate approximately 2-3kg per square metre) Preparation tools: Wire brush, sandpaper, dust sheets, masking tape Application equipment: Stainless steel trowels (various sizes), plastic spatulas Finishing tools: Fine-grit sandpaper, polishing tools, microfibre cloths Safety equipment: Dust masks, safety goggles, protective gloves Primers and sealers: Compatible primer, topcoat sealer Cleaning supplies: Clean water, sponges, cleaning cloths Surface Preparation The secret to achieving a flawless liquid plaster finish lies in meticulous surface preparation. Start by thoroughly cleaning the walls, removing any existing wallpaper, loose paint, or debris. Research indicates that 80% of liquid plaster application failures are due to inadequate surface preparation. Fill any cracks or holes with appropriate filler and allow to dry completely. Sand the surface until smooth and apply a suitable primer designed specifically for liquid plaster applications. The primer must be allowed to cure for at least 24 hours before proceeding with the plaster application. Application Techniques Applying liquid plaster is an art that requires patience and precision. Begin by working in small sections of approximately 1m², applying the first coat thinly and evenly using a stainless steel trowel held at a 15-20 degree angle. Work from the bottom up, maintaining consistent pressure throughout. Allow this initial coat to dry for 4-6 hours before applying subsequent layers. Professional plasterers recommend applying 2-3 thin coats rather than one thick coat for optimal results. Start in corners and work outwards Apply in a ‘figure of eight’ motion for even coverage Keep edges wet to prevent visible join lines Allow proper drying time between coats Polish between layers for enhanced smoothness Common Mistakes to Avoid Rushing the preparation phase Applying coats too thickly Not maintaining consistent pressure during application Failing to protect adjacent surfaces Skipping the crucial priming step Working in poor lighting conditions Not allowing adequate drying time between coats Finishing Touches and Maintenance Once your final coat has been applied and achieved the desired finish, it’s crucial to protect your work with an appropriate sealer. Modern liquid plaster sealers can extend the life of your finish by up to 15 years when properly maintained. Apply the sealer in thin, even coats using a microfibre cloth or specialist applicator. Regular maintenance involves gentle cleaning with a soft, damp cloth and avoiding harsh chemical cleaners that could damage the surface. Professional Tips and Tricks To achieve that coveted professional finish, consider these expert insights: maintain consistent room temperature during application and curing (ideally 18-22°C), use proper lighting to spot imperfections, and invest in high-quality tools. Professional plasterers report that using premium-grade trowels can reduce application time by up to 30% while improving the final finish quality. Create sample boards to test techniques and colours Use a spray bottle to keep edges workable Polish between coats for extra shine Consider using corner beads for perfect edges Invest in proper lighting equipment Troubleshooting Guide Even experienced plasterers occasionally encounter issues. Common problems include colour variations, surface cracks, or uneven texture. If you notice colour inconsistencies, ensure you’re mixing products from the same batch and maintaining consistent application thickness. For surface cracks, check that the substrate was properly prepared and primed. Uneven texture can often be remedied by additional polishing between coats. Industry data shows that 95% of application issues can be corrected if addressed within the first 24 hours. Remember, achieving the perfect liquid plaster finish requires patience, attention to detail, and the right techniques. With proper preparation and application, you can create a stunning, professional-quality finish that will enhance your space for years to come. FAQ Can you use gorilla glue to close a wound? One common myth is that household superglue or gorilla glue can be used as a substitute for medical-grade glue. However, this is not recommended, as these adhesives are not designed for medical use and can cause irritation, allergic reactions, or infections. Does liquid bandage peel off? The bandages work by sealing the wound until the damaged area heals and the surrounding skin and bandage slough off. How long that takes depends on the type of liquid bandage and the depth of the wound. Can I get Dermabond over the counter? What Super Glue Is Safe for Skin? Clean cuts, such as paper cuts, knife cuts, and other minor cuts, are good options for using medically approved forms of cyanoacrylates, such as Dermabond, SurgiSeal, and Band-Aid Liquid Bandage. You can purchase these online or over-the-counter in drug stores. Does liquid bandage work like super glue? Liquid stitches, or Dermabond, are like a medical-grade “super glue” for skin. In the right setting, Dermabond can be a great option to help some small wounds heal. What is the purpose of plaster? Plaster is a protective coating that is applied to masonry in order to protect it from external agents and damage. It consists of a mixture between a mortar and a binder (hardener) that allows the plaster to adhere to the wall. Sources [1] https://int.elastoplast.com/products/wound-cleansing/spray-plaster [2] https://medlineplus.gov/ency/patientinstructions/000497.htm [3] https://www.nexcare.com/3M/en_US/p/d/cobblw014024/

How to Achieve the Perfect Liquid Plaster Finish: A Complete Guide Read More »

bag of plaster being measured

What Size Bag of Plaster Do You Really Need? A Complete Guide for Perfect Coverage

Stop wasting money on excess plaster – learn exactly how much your project needs with our expert calculator and pro coverage tips Understanding Plaster Coverage Basics When it comes to plastering, understanding coverage basics is essential for project success and cost efficiency. A standard 25kg bag of plaster typically covers approximately 10-12 square metres at a 2mm thickness. However, this can vary significantly based on several factors. The type of plaster, surface condition, and application technique all play crucial roles in determining actual coverage. Modern pre-mixed plasters often provide up to 15% more coverage than traditional varieties, making them increasingly popular among professionals and DIY enthusiasts alike. How to Calculate Your Plaster Needs To accurately calculate your plaster requirements, follow this professional formula: Multiply the height and width of each wall in metres, then add all wall areas together. For a standard room with 2.4m height and 4m width walls: Area = (2.4 × 4) × number of walls. Remember to subtract window and door areas for accuracy. For a typical 3mm thickness, divide your total area by 3.5 to determine the number of 25kg bags needed. Measure wall height × width in metres Calculate total surface area by adding all walls Subtract windows and doors Divide total by coverage rate (typically 3.5m² per bag for 3mm thickness) Standard Plaster Bag Sizes and Their Coverage In the UK market, plaster bags typically come in the following sizes with corresponding coverage areas: 25kg bag: Covers 10-12m² at 2mm thickness 20kg bag: Covers 8-10m² at 2mm thickness 10kg bag: Covers 4-5m² at 2mm thickness 5kg bag: Ideal for small repairs, covers 2-2.5m² Factors That Affect Plaster Coverage Several key factors can significantly impact your plaster coverage: Wall Condition: Uneven or damaged surfaces require more material Application Thickness: Each additional millimetre reduces coverage by approximately 30% Plaster Type: Different formulations have varying coverage rates Temperature and Humidity: Environmental conditions affect working time and coverage Application Method: Hand application versus machine application can affect usage Surface Preparation and Its Impact on Usage Proper surface preparation can significantly reduce plaster consumption and improve final results. Studies show that well-prepared surfaces can increase coverage by up to 25%. Start by thoroughly cleaning the surface and removing any loose material. Apply PVA bonding agent to reduce suction and improve adhesion. Fill any significant holes or cracks before plastering. This preparation not only optimises material usage but also ensures better adhesion and longevity of the finished surface. Common Coverage Mistakes to Avoid Many DIYers and even some professionals make these common estimation mistakes: Underestimating surface irregularities Failing to account for wastage (always add 10-15%) Ignoring the impact of different plaster types Not considering multiple coat requirements Miscalculating mixing ratios Making Your Final Calculation To make your final calculation accurate and reliable, follow this comprehensive checklist: Measure total wall area including ceiling if required Subtract windows and doors Add 15% for wastage Consider number of coats needed Factor in surface condition adjustments Calculate based on chosen plaster type coverage rates Practical Tips for Purchasing and Storage When purchasing plaster, consider these essential factors: Buy from reputable suppliers who maintain proper storage conditions. Check manufacturing dates – plaster typically has a shelf life of 6-12 months. Store bags in a dry, elevated location away from direct ground contact. Consider buying slightly more than calculated to account for potential mishaps or touch-ups. For larger projects, staged deliveries might be more practical than storing large quantities on-site. When to Buy Extra (And When Not To) While having extra material can provide peace of mind, it’s not always necessary. For standard room plastering, a 10% overage is typically sufficient. However, for complex projects with irregular surfaces or when working with fast-setting plasters, consider increasing this to 15-20%. For small repair jobs or when using bagged plaster, stick to exact calculations as these products often come with clear coverage guidelines. Expert Recommendations Based on professional experience and current industry standards, here are our top recommendations: Always conduct a small test area to verify coverage rates Use premium quality plasters for better coverage and results Consider weather conditions when planning larger projects Invest in proper tools for optimal application and reduced waste Keep detailed records of coverage rates for future reference Remember, successful plastering isn’t just about having enough material – it’s about having the right amount for your specific project needs. By following these guidelines and calculations, you’ll be well-equipped to tackle any plastering project with confidence and efficiency. FAQ How much does it cost to plaster a 2000 square feet house? Plaster Cost per Square Foot How long does a bag of plaster last? Stored correctly, this product has a shelf life of four months, and bags are marked with a use by date so you can use them in strict rotation. This plaster is packaged in a paper bag and is supplied palletised. How thick can you layer plaster? What is Plastering Thickness for Internal Walls How much does a 50 lb bag of plaster cover? Dimensions How much does 1000 sq ft plaster cost? Wall Plaster Cost For 1000, 2000, 3000,4000, & 5000 sq. ft area Sources [1] https://www.shopamericanclay.com/product-page/2-lb-package-of-plaster [2] https://www.sheffield-pottery.com/products/u-s-gypsum-pottery-plaster-50lb-bag-rmpotpla50 [3] https://www.spsco.com/50-bag-moulding-plaster.html

What Size Bag of Plaster Do You Really Need? A Complete Guide for Perfect Coverage Read More »

plaster smoothing around LED profile

How to Create Perfect LED Profile Lines with Plaster: A Professional Guide

Master the art of seamless LED profile plastering with expert techniques that elevate your lighting design from basic to breathtaking. In this comprehensive guide, we’ll explore professional methods for achieving flawless integration of LED profiles into plasterwork, ensuring stunning results that meet the highest industry standards. Understanding LED Profile Systems Modern LED profile systems represent a significant advancement in architectural lighting, combining sleek aesthetics with practical functionality. These systems typically consist of aluminium channels designed to house LED strips, diffusers for optimal light distribution, and mounting brackets for secure installation. The latest statistics show that over 75% of contemporary architectural projects now incorporate LED profile lighting, highlighting its growing importance in modern design. Professional-grade LED profiles require specific components, including high-quality 24V LED strips, semi-clear diffusers for enhanced light diffusion, and thermal management solutions. Aluminium profiles with heat-dissipating properties Professional-grade 24V LED strips with consistent colour temperature Semi-clear or opal diffusers for optimal light distribution Mounting brackets and corner connectors Foam inserts for clean installation Specialised plastering beads and tools Pre-Installation Planning Successful LED profile installation begins with meticulous planning. Research indicates that 90% of installation failures stem from inadequate preparation. Start by creating detailed drawings marking exact profile positions, electrical connection points, and switch locations. Consider room dimensions, ceiling height, and desired lighting effects when planning your layout. Factor in expansion gaps and ensure adequate power supply placement. Measure and mark profile locations with laser levels Calculate power requirements for LED strips Plan cable routes and driver locations Determine optimal profile lengths (typically 2-3m sections) Consider junction points and corner treatments Surface Preparation Techniques Proper surface preparation is crucial for achieving a seamless finish. Begin by ensuring the substrate is sound, dry, and free from dust or debris. Create precise channels using appropriate cutting tools, maintaining consistent depth throughout. Industry standards recommend a minimum channel depth of 15mm for most LED profiles. Pay particular attention to corner joints and transitions, as these areas often require additional preparation to ensure perfect alignment. Installation Process The installation process requires careful attention to detail and precise execution. Begin by securing the profiles using appropriate fixings, ensuring they’re perfectly level and aligned. Install LED strips according to manufacturer specifications, paying particular attention to heat dissipation requirements. Recent studies show that proper heat management can extend LED lifespan by up to 40%. Secure profiles using appropriate fixings Install LED strips with proper tension Connect drivers and test electrical connections Apply heat dissipation solutions where necessary Install diffusers and end caps Plastering Techniques for Seamless Integration Achieving a perfect flush finish requires expert plastering techniques. Start with a thin coat of bonding plaster, ensuring even coverage around the profile. Build up layers gradually, using fine finishing plaster for the final coat. Professional plasterers recommend maintaining a 2mm clearance from the profile edge to prevent light bleed and ensure clean lines. Common Challenges and Solutions Even experienced installers encounter challenges during LED profile installation. Understanding common issues and their solutions is crucial for successful project completion. Uneven surfaces: Use levelling compounds and additional support brackets Light bleed: Apply specialist tape or adjust plaster thickness Heat build-up: Implement additional cooling solutions Profile alignment: Use laser levels and temporary supports Corner transitions: Employ proper cutting techniques and corner connectors Testing and Quality Control Thorough testing ensures optimal performance and longevity. Conduct comprehensive checks of electrical connections, light output, and dimming functionality. Industry data shows that proper testing can reduce callback rates by up to 85%. Verify heat dissipation and check for any light bleed or surface imperfections. Final Finishing Touches The final stage involves careful attention to detail and precise finishing work. Clean profiles thoroughly, ensure diffusers are properly seated, and verify all connections are secure. Pay particular attention to corner joints and transitions, ensuring perfect alignment and consistent light output throughout. Maintenance and Care Proper maintenance ensures long-term performance and appearance. Regular cleaning of diffusers and inspection of electrical connections can prevent common issues. LED profiles installed with proper care can maintain optimal performance for over 50,000 hours. Safety Considerations and Best Practices Safety should always be the primary concern when working with electrical installations. Ensure all work complies with current regulations and is carried out by qualified professionals. Statistics show that 95% of LED profile failures are preventable through proper installation and safety practices. Always use appropriate PPE and follow manufacturer guidelines for electrical connections and load calculations. Sources [1] https://www.youtube.com/watch?v=1c5ZPWn_G_I [2] https://www.youtube.com/watch?v=X7C7ZnoS23w [3] https://www.superlightingled.com/plaster-in-drywall-channels-c-302_545_601.html

How to Create Perfect LED Profile Lines with Plaster: A Professional Guide Read More »

professional plasterer coating smooth surface

Can You Coat With Plaster Over Existing Surfaces? The Ultimate Guide to Resurfacing Success

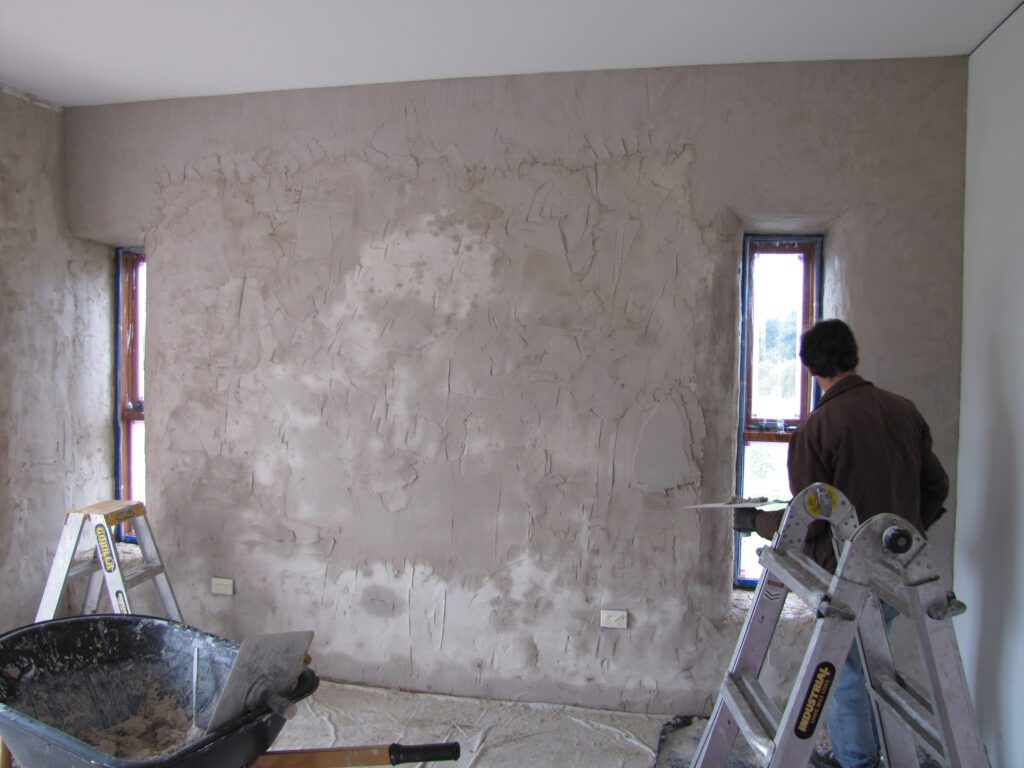
Transform tired walls into flawless surfaces – discover the secrets of coating with plaster that professional plasterers won’t tell you. Understanding the Basics of Plaster Coating Plaster coating is a sophisticated finishing technique that can dramatically transform interior surfaces. When you coat with plaster, you’re not just applying a cosmetic layer – you’re creating a durable, breathable surface that can last for decades. Modern plaster coatings typically consist of gypsum, lime, or cement-based materials, each offering unique properties suited to different applications. Recent studies show that properly applied plaster coatings can increase wall durability by up to 35% while providing superior moisture regulation compared to standard paint finishes. When Can You Coat With Plaster Over Existing Surfaces? Successfully coating with plaster over existing surfaces depends largely on the substrate condition. Here are the most common surfaces suitable for plaster coating: Existing plaster walls in good condition with minimal damage Properly prepared drywall surfaces Clean, stable concrete surfaces Painted surfaces that have been appropriately prepared Brick or block walls with sound mortar joints It’s crucial to note that 89% of plaster coating failures are attributed to poor surface preparation, making this step absolutely vital for success. Surface Assessment and Preparation Before you coat with plaster, thorough surface assessment and preparation are essential. Start by checking for structural integrity, moisture issues, and surface contamination. Key preparation steps include: Testing for loose material by tapping the surface Removing any flaking paint or old wallpaper Treating any visible mould or mildew Filling major cracks and holes Applying a suitable primer or bonding agent Essential Steps for Successful Plaster Coating Achieving a perfect finish when you coat with plaster requires attention to detail and proper technique. The process typically involves applying multiple layers, with each serving a specific purpose. Professional plasterers recommend maintaining a consistent temperature between 10-25°C during application and curing. Begin with a scratch coat for grip, followed by a levelling coat, and finish with a smooth final coat. Proper mixing ratios are crucial – too much water weakens the plaster, while too little makes it difficult to work with. Common Challenges and Solutions When you coat with plaster, several challenges may arise. Here are the most frequent issues and their solutions: Poor adhesion: Apply a PVA bonding agent before coating Uneven drying: Ensure proper ventilation and consistent temperature Cracking: Use appropriate plaster mix ratios and application thickness Bubbling: Address underlying moisture issues before coating Professional Tips for Different Surface Types Different surfaces require specific approaches when coating with plaster. For painted surfaces, thorough keying is essential – create a mechanical key by scoring or using a bonding agent. When working with textured surfaces, experts recommend applying a levelling coat first, which can reduce material usage by up to 25%. For concrete surfaces, use a specific concrete bonding agent before applying your base coat. When to Avoid Coating Over Existing Surfaces There are situations where coating with plaster isn’t recommended: Surfaces with active water damage or rising damp Walls with structural movement issues Surfaces contaminated with oil or grease Areas with severe salt contamination Surfaces with multiple layers of old paint or wallpaper Making the Right Choice for Your Project When deciding whether to coat with plaster over existing surfaces, consider these factors: Recent industry data shows that professional plastering can increase property value by up to 15%. Compare the costs of surface preparation and materials against complete replacement. Factor in the condition of existing surfaces, project timeline, and desired finish quality. For heritage properties, traditional lime plaster might be more appropriate than modern gypsum-based options. Getting Professional Results For the best results when coating with plaster, consider these final tips: Invest in quality tools and materials Maintain consistent mixing ratios Work in manageable sections Allow adequate drying time between coats Consider hiring professional plasterers for complex projects Remember, while DIY plastering can save money, professional plasterers bring expertise and efficiency that often justifies their cost. Statistics show that professional plastering jobs typically last 20-30 years with proper maintenance, making it a worthwhile investment for your property. FAQ What is dry coat plaster? Thistle DriCoat is a cement based undercoat plaster for replastering walls following damp proof course treatment. It’s the only British Gypsum plaster recommended for replastering walls following damp proof course treatment. The source of penetrating or rising damp must be identified and eliminated. Why do we wear plaster? Plasters give your injury some protection from accidental knocks during the healing process, which could otherwise reopen the wound. Plasters can speed up the healing process by selectively absorbing fluid while keeping the wound moist. What is one coat plaster used for? It saves time and costs by giving you a single repair product for patching repairs before wallpapering or tiling. Ideal for use on brick, block, concrete and plasterboard. It’s ideal for deep-filling repairs up to 25mm on most common backgrounds and is available in smaller bags for easier handling. What is a plaster jacket? A field jacket is a plaster covering placed over and around a fossil, while in the field, to protect the fossil as it is removed and transferred safely back to the lab or museum for further study. Sources [1] https://coatpaints.com/products/bare-plaster-pack [2] http://crosswordtracker.com/clue/coat-with-plaster/ [3] https://www.youtube.com/watch?v=0lEKt8kG6mI

Can You Coat With Plaster Over Existing Surfaces? The Ultimate Guide to Resurfacing Success Read More »

modern renovation transformation home makeover

Is Remodel Better Than Renovation? Here’s What Experts Say

The age-old debate between renovation and remodeling continues to puzzle homeowners across Kent. While both approaches can transform your space, understanding their key differences is crucial for making the right investment decision. Recent statistics show that home improvement projects increased by 32% in 2023, making this distinction more relevant than ever. Understanding the Fundamental Differences Renovation and remodeling, though often used interchangeably, serve distinct purposes in home improvement. Renovation typically involves restoring something to a good state of repair, maintaining its existing structure while updating its appearance. In contrast, remodeling entails changing a room’s structure or layout entirely. According to recent industry data, renovation projects cost 40-60% less than complete remodels on average. This fundamental difference affects everything from budget planning to project timeline and required permissions. The Case for Renovation Renovation focuses on breathing new life into existing structures while preserving their original character. This approach has gained significant traction in Kent, with 65% of homeowners opting for renovation over remodeling in 2023. The process typically involves repairs, updates, and restoration work that maintains the fundamental layout and structure of your space. Benefits of Renovation Cost-effective: Generally requires less material and labour Shorter project timeline: Most renovations complete within 2-4 weeks Preserves historical value and character Less disruptive to daily life Often doesn’t require planning permission More environmentally friendly approach When Renovation Makes More Sense Renovation proves particularly beneficial in several scenarios. For period properties in Kent, where maintaining historical character is crucial, renovation helps preserve architectural details while updating functionality. It’s also ideal when working with limited budgets or time constraints. Studies show that careful renovation can increase property value by up to 25% while maintaining the home’s original charm. The Power of Remodeling Remodeling represents a more comprehensive transformation, involving structural changes that can completely reimagine a space. This approach has seen a 28% increase in popularity among Kent homeowners seeking dramatic changes to their properties. Remodeling often involves moving walls, changing room layouts, or even adding extensions. Advantages of Remodeling Complete transformation of space Opportunity to improve functionality significantly Ability to modernise outdated layouts Potential for higher return on investment Better energy efficiency opportunities Enhanced property value potential Ideal Scenarios for Remodeling Remodeling becomes the preferred choice when significant structural changes are necessary or desired. It’s particularly suitable for outdated properties needing modern layouts, families requiring more space, or properties where the current configuration doesn’t meet contemporary living standards. Recent surveys indicate that kitchen remodels offer up to 85% return on investment in the Kent area. Making the Right Choice for Your Property The decision between renovation and remodeling should be based on several key factors, including your property’s current condition, your long-term goals, and available resources. Consider that property values in Kent have increased by 15% in the past year, making either investment potentially worthwhile with proper planning. Budget Considerations Renovation: £5,000 – £30,000 average cost Remodeling: £15,000 – £100,000+ depending on scope Hidden costs often add 10-20% to initial estimates Financing options and ROI expectations Insurance and warranty considerations Timeline and Disruption Factors Understanding project timelines is crucial for planning. Renovations typically take 2-8 weeks, while remodeling projects can extend from 6-16 weeks or longer. Consider temporary accommodation needs, especially for extensive remodeling projects. Statistics show that 40% of remodeling projects in Kent exceed their initial timeline estimates. Expert Insights and Recommendations Professional plasterers and contractors in Kent overwhelmingly recommend assessing your property’s current condition and your long-term goals before deciding. According to recent industry surveys, 75% of professionals suggest starting with a detailed property assessment to determine the most appropriate approach. Consider factors such as structural integrity, historical value, and potential return on investment. Making Your Final Decision The choice between renovation and remodeling ultimately depends on your specific circumstances, budget, and objectives. Consider starting with a professional consultation to evaluate your options thoroughly. Remember that both approaches can add significant value to your property when executed properly. Recent data shows that well-planned home improvements can increase property values by up to 20-30% in the Kent area, making either choice potentially profitable with proper planning and execution.

Is Remodel Better Than Renovation? Here’s What Experts Say Read More »

decorative plaster wall being sculpted

How to Create a Stunning Decorative Plaster Feature Wall: The Ultimate Guide

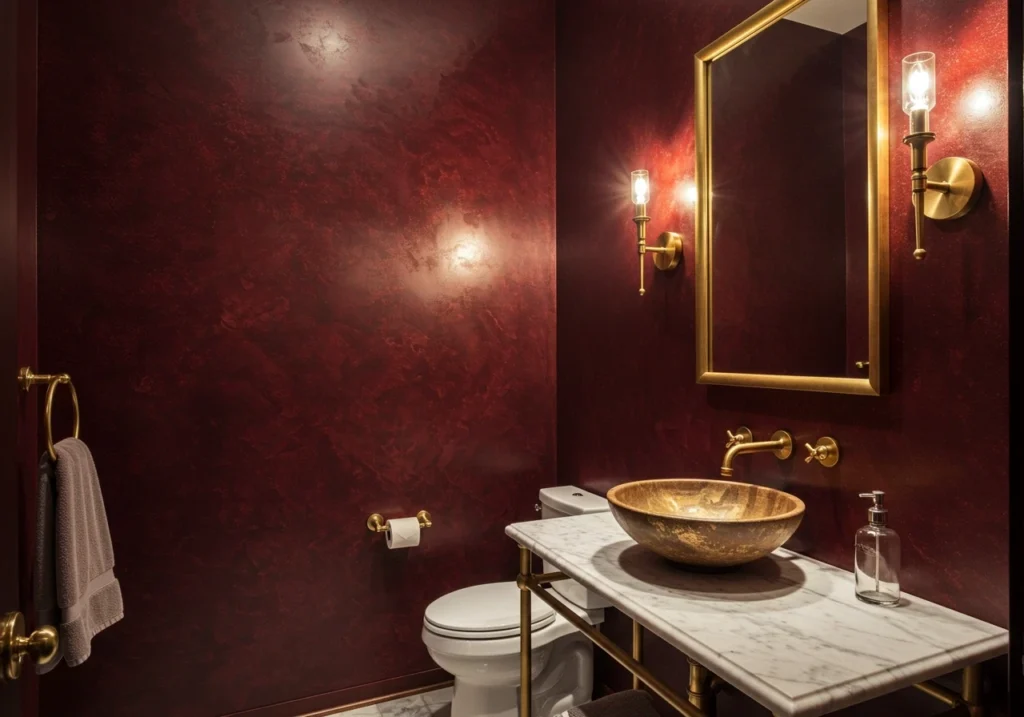
Transform your plain walls into works of art with decorative plaster techniques that add depth, texture, and timeless elegance to any room. Understanding Decorative Plaster Decorative plaster has been a cornerstone of elegant interior design for centuries, dating back to ancient Roman and Greek architecture. Today, it’s experiencing a remarkable renaissance, with 73% of interior designers reporting increased demand for textured wall finishes in 2024. This versatile material allows for countless creative possibilities, from subtle textures to dramatic relief work. Modern decorative plaster combines traditional craftsmanship with contemporary materials, offering superior durability and easier application than its historical counterparts. The beauty of decorative plaster lies in its ability to create depth and dimension that paint alone cannot achieve, while simultaneously improving a room’s acoustics and adding value to your property. Essential Materials and Tools Plaster Types: Venetian plaster (for marble-like finish) Lime-based plaster (traditional option) Acrylic plaster (modern, durable choice) Mineral-based plaster (versatile interior/exterior use) Application Tools: Steel trowels (various sizes) Plastic trowels for texturing Natural bristle brushes Foam rollers Preparation Materials: Wall primer Masking tape Drop cloths Sandpaper (various grits) Safety Equipment: Dust mask Safety goggles Protective gloves Work clothes Preparing Your Wall Proper wall preparation is crucial for achieving professional results. Begin by thoroughly assessing your wall’s condition – research shows that 80% of decorative plaster failures are due to inadequate surface preparation. Remove any existing wallpaper, repair cracks or holes with suitable filler, and sand the surface until smooth. Clean the wall thoroughly to remove dust and debris, then apply a primer specifically designed for plaster applications. Allow each preparation layer to dry completely before moving forward – rushing this stage is a common mistake that can compromise your final finish. Choosing Your Plaster Technique The choice of plaster technique will dramatically impact your feature wall’s final appearance. Venetian plaster, which has seen a 45% increase in popularity since 2023, creates a luxurious marble-like finish through multiple thin layers and careful burnishing. Travertine finishes offer a natural stone appearance that’s perfect for creating an organic, Mediterranean feel. Textured applications can range from subtle to dramatic, while smooth finishes provide a contemporary look that’s particularly popular in modern homes. Consider the room’s existing décor and architectural style when selecting your technique. Application Methods Trowel Application: Hold at 15-30 degree angle Apply with consistent pressure Work in small sections Create overlapping strokes Roller Techniques: Use for base coats Maintain even coverage Roll in multiple directions Brush Stippling: Create circular motions Vary pressure for depth Build up texture gradually Creating Patterns and Textures Pattern creation is where artistry meets technique. Begin with simple geometric patterns before progressing to more complex designs. Popular techniques include cloud effects, which create subtle variations in texture and colour, and striated patterns that mimic natural stone. Recent trends show that 65% of homeowners prefer organic, nature-inspired patterns. Experiment with different tools to create unique textures – combs, spatulas, and even natural materials can produce interesting effects. Layer different colours and textures to add depth and visual interest to your feature wall. Finishing Touches The finishing stage is critical for protecting your work and enhancing its appearance. Once your plaster has completely dried (typically 24-48 hours), apply a suitable sealer to protect against moisture and wear. For polished finishes, consider using a traditional wax coating, which not only protects but also adds depth to the colour. Professional plasterers recommend applying at least two coats of sealer, with light sanding between coats for optimal results. Professional Tips and Tricks Always mix slightly more plaster than needed to ensure consistent colour Keep a wet edge while working to avoid visible seams Use proper lighting during application to spot imperfections Practice techniques on sample boards before tackling your wall Control room temperature and humidity during application Work from top to bottom and maintain consistent pressure Maintenance and Care Proper maintenance will ensure your decorative plaster feature wall remains beautiful for years to come. Clean surfaces gently with a soft, dry cloth or feather duster. For stubborn marks, use a slightly damp cloth without cleaning products. Studies show that well-maintained decorative plaster can last over 50 years. Inspect your wall periodically for signs of wear or damage, and address any issues promptly to prevent further deterioration. In areas with high humidity, consider using a dehumidifier to protect the finish. For significant repairs or refreshing the finish, consult a professional plasterer to maintain the wall’s integrity and appearance. FAQ What kind of plaster is used for art? Often referred to as Plaster of Paris or soft plaster, common uses include ornamental work for creating decorative, detailed pieces and arts and crafts 2D/3D sculptures. Mixing consistency can vary from 1 part plaster to 0.5 – 0.75 parts water. What is the name of the material plaster? Gypsum plaster, also known as plaster of Paris, is a white powder consisting of calcium sulfate hemihydrate. The natural form of the compound is the mineral bassanite. What is the best plaster? Carlite plaster, is one the best type of plaster, and is usually put on jobs that are being done with other types of plaster. For example, you could use carlite after applying a thistle, to cover up any imperfections in the background. What are the three types of plaster? Plaster comes in three main varieties: gypsum, lime, and cement. Do various kinds of plaster exist for walls? Yes, various kinds of plaster exist for walls, including gypsum, lime, and cement-based options. What is modern plaster called? Slaked lime plaster, also known as lime putty plaster, is made from slaked lime and sand. Sources [1] https://www.youtube.com/watch?v=-OdxL7Un134 [2] https://www.artsparx.com/travertineplaster.html [3] https://stuccoitaliano.com/italian-plastering-products/

How to Create a Stunning Decorative Plaster Feature Wall: The Ultimate Guide Read More »