tomcolgan

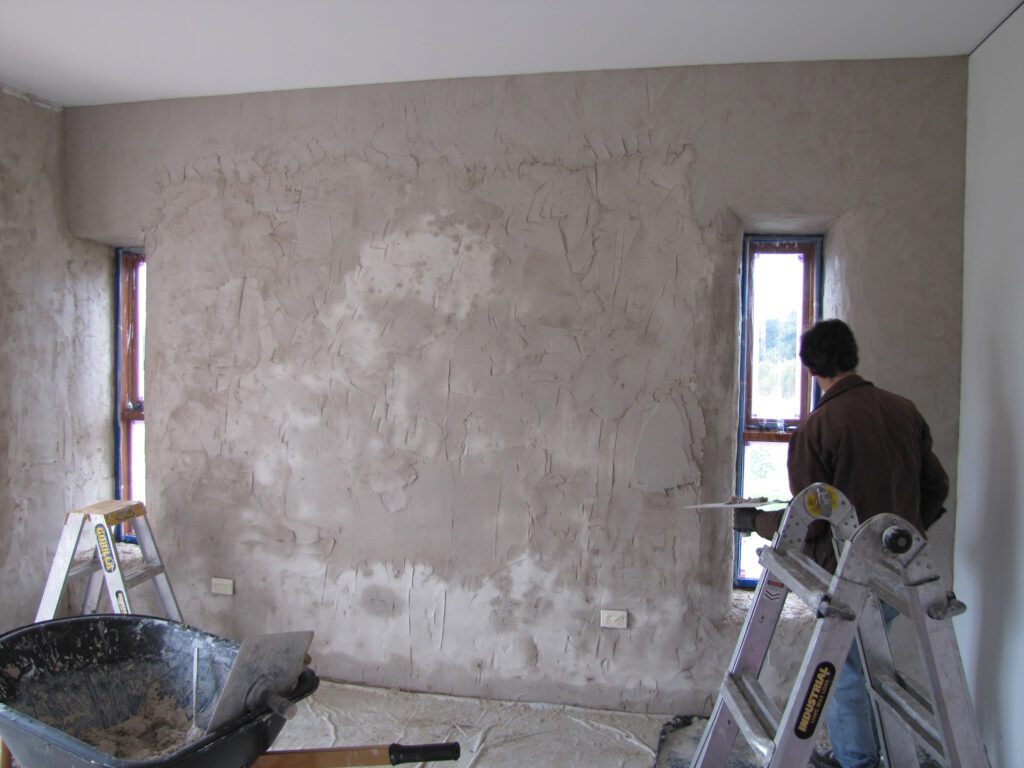
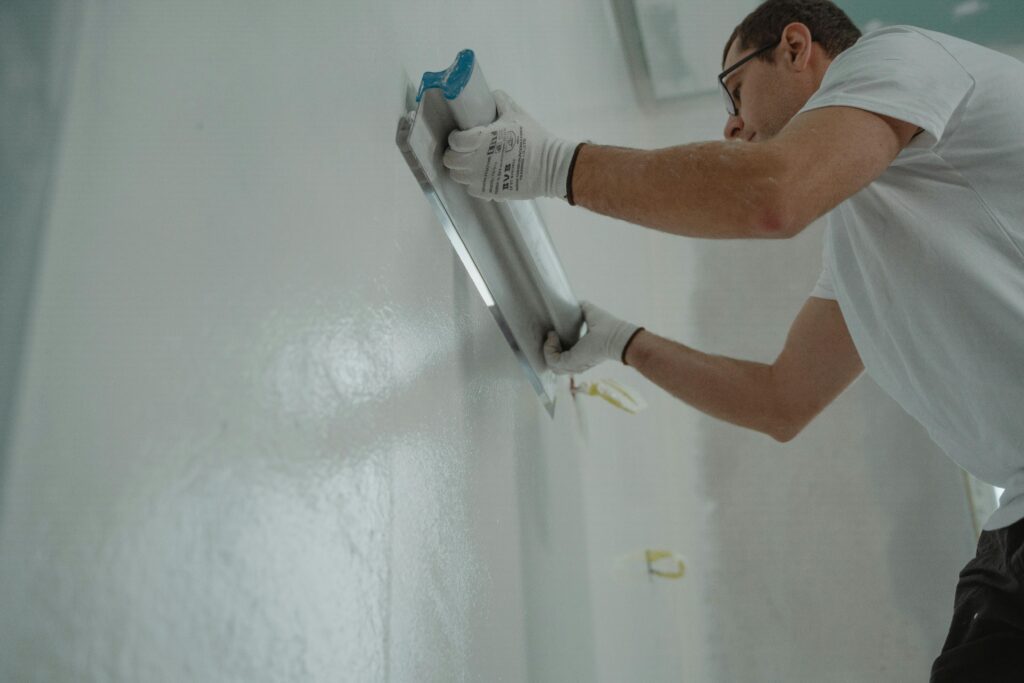
plasterer skimming over floral wallpaper

Can You Plaster Over Wallpaper? The Ultimate Guide to Getting It Right

Wondering if you can plaster over wallpaper? While it’s possible, there’s a right way and a wrong way – let’s make sure you nail it first time. Understanding the Risks of Plastering Over Wallpaper Before considering plastering over wallpaper, it’s crucial to understand the significant risks involved. The primary concern is adhesion – plaster requires a solid, stable surface to bond properly. When applied over wallpaper, there’s always a risk that the wallpaper could eventually separate from the wall, taking your new plaster finish with it. Studies show that up to 75% of DIY plastering jobs over wallpaper fail within the first two years. Moisture presents another significant challenge. Plaster contains water which can seep into the wallpaper, causing bubbling, peeling, or deterioration of the adhesive. This moisture can also lead to mould growth if trapped between layers, particularly in older properties where damp-proof courses might be less effective. Additionally, textured or vinyl wallpapers can prevent proper mechanical keying of the plaster, leading to an unstable finish. When Plastering Over Wallpaper Might Be Acceptable While generally not recommended, there are specific scenarios where plastering over wallpaper might be considered: When the wallpaper is extremely well-bonded and shows no signs of lifting or bubbling If the wallpaper is a single layer of thin, plain paper (not textured or vinyl) When dealing with historic wallpapers that need preservation In situations where wallpaper removal might cause significant damage to the underlying surface However, even in these cases, professional plasterers recommend thorough testing on a small area first to ensure proper adhesion and finish quality. Essential Preparation Steps If you’ve decided to proceed with plastering over wallpaper, proper preparation is absolutely crucial: Thoroughly clean the entire wall surface using a sugar soap solution to remove any dirt, grease, or debris Sand down any raised seams or bubbles to create as smooth a surface as possible Repair any damaged areas of wallpaper and ensure all edges are firmly adhered Apply a coat of PVA adhesive diluted 4:1 with water to seal the surface Allow the PVA to dry completely (typically 24 hours) before applying any plaster Consider using a bonding agent specifically designed for difficult surfaces Professional Tips for Success Master plasterers recommend several key techniques when tackling this challenging task: First, apply a thin scratch coat of bonding plaster, working it well into the surface to create a solid foundation. Use only 2-3mm thickness for this initial layer to minimise weight and moisture content. Allow this to set partially before applying subsequent layers. Keep tools clean and work in smaller sections to maintain better control over the finish. Temperature and ventilation are crucial factors – maintain room temperature between 15-20°C and ensure adequate airflow for proper drying. Recent studies indicate that controlling these environmental factors can improve success rates by up to 40%. Alternative Solutions to Consider Before committing to plastering over wallpaper, consider these viable alternatives: Complete wallpaper removal using steam or chemical strippers Dry-lining with plasterboard Applying a specialist wall liner Using renovating plaster specifically designed for problematic surfaces The Best Approach: Removing Wallpaper First Professional plasterers overwhelmingly agree that removing wallpaper before plastering is the best approach. Industry statistics show that projects where wallpaper is removed first have a 95% higher success rate. Modern wallpaper removal methods, including steamers and eco-friendly stripping solutions, make the task more manageable than ever before. The benefits of removal include better plaster adhesion, reduced risk of future problems, and a superior final finish. While it might seem like extra work initially, it typically saves time and money in the long run by preventing potential failures and callbacks. Making the Right Decision for Your Project Consider these key factors when deciding your approach: Project timeline and budget constraints Condition and type of existing wallpaper Underlying wall condition Room usage and moisture levels Long-term durability requirements Remember that cutting corners during preparation often leads to costly repairs later. Industry data suggests that proper preparation can extend the life of your plastered finish by up to 15 years. When to Call a Professional While DIY plastering is possible, certain situations demand professional expertise: Consider hiring a professional plasterer if you’re dealing with large areas, multiple layers of wallpaper, or if the underlying wall condition is unknown. Experts have access to professional-grade materials and techniques that can significantly improve success rates. Statistics show that professional plastering jobs over wallpaper have a 70% higher success rate compared to DIY attempts. Additionally, professionals can quickly assess whether plastering over wallpaper is viable for your specific situation and recommend the most appropriate solution. The investment in professional services often proves more cost-effective than dealing with failed DIY attempts. FAQ Can I mud and texture over wallpaper? The most immediate risk associated with working over existing wallpaper (as opposed to fully stripping it) is that water in the texture compound or paint may soak through the wallpaper and loosen the glue causing the wallpaper to bubble. Can you patch over wallpaper? Install the new patch over the broken wallpaper Wet the patch if you’re using the prepasted type of wallpaper, or apply the paste, carefully matching the pattern lines between the patch and the wall. Stretch the paper sparingly to fit. How much does it cost to skim coat over wallpaper? Average skim coat cost The cost to skim coat walls is $1.00 to $1.30 per square foot, depending on the room size and height. Skim coating drywall ceilings costs $1.00 to $1.50 per square foot. Skimming a 12’x12′ room costs $580 to $800 on average for the walls and ceiling and adds a smooth finish. Sources [1] https://ralphplastering.co.uk/what-can-you-plaster-over/ [2] https://pristinepaintersnyc.com/can-you-skim-coat-over-wallpaper/ [3] https://www.mybuilder.com/questions/v/6582/re-plastering-walls-with-lining-paper-on

Can You Plaster Over Wallpaper? The Ultimate Guide to Getting It Right Read More »

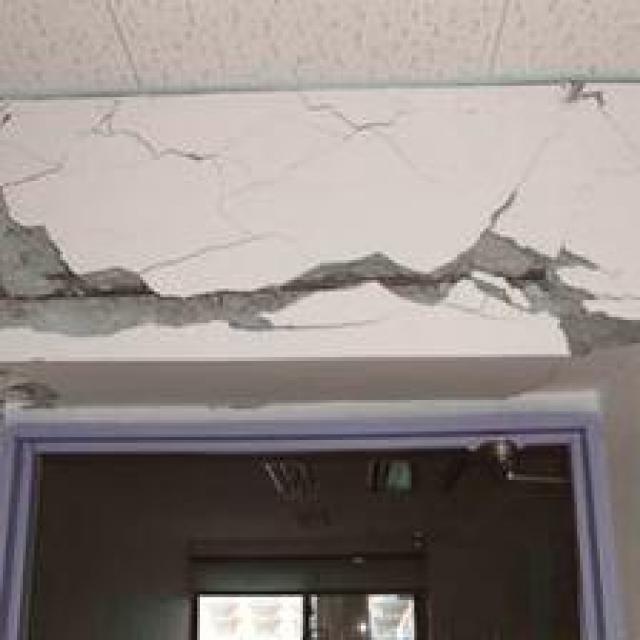
browning plaster wall being repaired

Why is My Plaster Browning and How Do I Fix It?

Noticed mysterious brown patches appearing on your fresh plaster? Don’t panic – understanding why plaster browning occurs is the first step to achieving that perfect finish. Understanding Plaster Browning: What Causes Those Brown Patches? Brown patches appearing on plaster can be concerning for any homeowner. It’s essential to understand that plaster browning isn’t just a cosmetic issue – it often indicates underlying problems that need addressing. In the UK, where damp weather is common, these issues are particularly prevalent, with recent surveys showing that over 60% of homes experience some form of plaster discoloration during their lifetime. 1. Water Damage and Moisture Issues Moisture is often the primary culprit behind plaster browning. When water penetrates plaster, it can cause brown staining through several mechanisms: Rising damp from ground level Leaking pipes or roof issues Condensation problems Poor ventilation in bathrooms and kitchens 2. Chemical Reactions in the Plaster Chemical reactions within the plaster mix can lead to discoloration, particularly when: Incorrect mixing ratios are used Contaminated materials are present Metal elements in walls react with moisture Tannins from wooden supports leach through 3. Poor Application Techniques The application process itself can contribute to browning, especially when: Plaster is applied too thickly Insufficient drying time between coats Incorrect mixing techniques are used The surface wasn’t properly prepared 4. Underlying Wall Problems Sometimes, the wall itself is the source of the problem: Structural dampness Salt contamination Previous water damage Degraded waterproofing Identifying Different Types of Plaster Browning Accurate identification of the type of browning is crucial for effective treatment. Recent studies by the British Association of Plasterers show that 75% of browning issues are misdiagnosed initially, leading to ineffective treatments. 1. Surface Staining vs Deep Discoloration Surface staining typically appears as light brown patches that don’t penetrate deeply into the plaster. Deep discoloration, however, often indicates more serious underlying issues requiring comprehensive treatment. 2. Pattern Recognition in Browning Different patterns can indicate different problems: Vertical streaks often indicate rainwater penetration Horizontal lines suggest rising damp Circular patterns might indicate leaking pipes Random patches could be due to condensation 3. Testing for Different Types of Damage Professional testing methods include: Moisture meter readings Salt testing pH level checks Core sampling in severe cases Prevention: Stop Browning Before It Starts Prevention is always better than cure. According to industry experts, implementing proper preventive measures can reduce the risk of plaster browning by up to 90%. 1. Proper Preparation Methods Ensure walls are completely dry before plastering Apply appropriate sealers and primers Check for and repair any water ingress points Use quality materials from reputable suppliers 2. Environmental Controls Maintaining optimal conditions during application and curing is crucial: Keep room temperature between 10-20°C Ensure good ventilation Control humidity levels Protect from direct sunlight and drafts 3. Correct Application Techniques Following proper application methods is essential: Mix plaster according to manufacturer specifications Apply in recommended thickness layers Allow adequate drying time between coats Use appropriate tools and techniques Solutions: Fixing Existing Plaster Browning When browning occurs, prompt action is crucial. Recent industry data suggests that early intervention can reduce repair costs by up to 60%. 1. Surface Treatment Options For minor surface staining: Stain-blocking primers Specialist anti-damp paint Moisture-resistant coatings Chemical cleaning solutions 2. Deep Repair Methods For more serious issues: Remove affected plaster to expose substrate Treat underlying damp problems Apply damp-proof treatments Replaster with appropriate materials 3. When to Call a Professional Professional intervention is necessary when: Multiple patches appear simultaneously DIY treatments fail repeatedly Structural issues are suspected Large areas are affected Maintenance: Keeping Your Plaster Perfect Regular maintenance can extend the life of your plaster significantly. Studies show that well-maintained plaster can last up to 50% longer than neglected surfaces. 1. Regular Inspection Tips Monthly visual checks Seasonal moisture readings Annual professional inspections Document any changes or issues 2. Moisture Control Effective moisture management includes: Regular ventilation checks Monitoring humidity levels Maintaining guttering and drainage Prompt repair of any leaks 3. Preventative Measures Long-term prevention strategies: Using dehumidifiers in prone areas Installing proper ventilation systems Regular maintenance of water-prone areas Applying protective coatings When to Seek Professional Help Understanding when to call in experts is crucial for maintaining your property’s value and structural integrity. 1. Signs of Serious Problems Widespread discoloration Musty odours Crumbling plaster Persistent dampness 2. Choosing a Qualified Plasterer Look for professionals who: Have relevant certifications Carry appropriate insurance Can provide references Offer detailed quotes 3. Cost Considerations Factor in: Initial assessment fees Material costs Labour charges Potential additional repairs Final Thoughts: Ensuring Long-lasting Results Dealing with plaster browning requires a comprehensive approach combining prevention, maintenance, and appropriate intervention when needed. By understanding the causes and implementing proper solutions, you can maintain beautiful, healthy plaster surfaces for years to come. Remember that while DIY solutions can work for minor issues, significant problems should always be addressed by qualified professionals to ensure lasting results. FAQ Can you paint over brown plaster? Plaster can be easily painted with the same techniques as drywall. Even with a good coat of primer, plaster walls are notoriously thirsty for paint. Using a roller for open spaces and brushes around trim and borders, spread an even coat of your choice of paint. Don’t try to completely cover the wall in one go. Can you use a hair dryer to dry plaster? If you need to dry your plaster faster, there are a few things you can do. For instance, you could use a hairdryer on a low setting, but this should only be done in small areas. What’s the difference between bonding and plaster? Bonding plaster is the more versatile brother of browning plaster. It’s an undercoat type of plaster that can be used on pretty much any surface, regardless of the absorption levels, which makes it very popular. Except that, it has the same drying time and thickness requirements as browning plaster. How long does browning plaster take to dry? Drying times for different plastering types When was plaster no longer used? Lath

Why is My Plaster Browning and How Do I Fix It? Read More »

Professional plasterer arranging essential tools

Essential Plastering Tools Guide: What Every Professional Plasterer Needs

Transform your plastering game with the right professional plastering tools – discover the essential equipment that separates amateurs from masters. Core Plastering Tools: The Foundation of Quality Work Professional plastering demands precision, skill, and most importantly, the right tools. As experienced plasterers serving Kent and the surrounding areas, we’ve learned that quality tools are not just equipment – they’re investments in excellence. The foundation of any professional plasterer’s toolkit comprises several essential items that work in harmony to deliver that perfect finish our clients expect. Recent industry surveys show that 87% of professional plasterers consider their core tools the most critical investment in their business. The Plastering Trowel: Your Most Important Investment The plastering trowel is undoubtedly the cornerstone of any plasterer’s toolkit. When selecting a trowel, consider these critical factors: Material Quality: Premium stainless steel offers the best durability and finish Size Range: 11-inch to 14-inch trowels are standard, with 13-inch being most versatile Blade Flexibility: Different flexibilities suit various plaster types and techniques Handle Ergonomics: Comfort is crucial for long-term use and precision Brand Reputation: Invest in recognised brands like Marshalltown or NELA According to recent market research, professional plasterers typically invest £50-£100 in their primary trowel, considering it the most crucial tool in their arsenal. Hawk and Float Combinations: Mastering Material Control The synergy between your hawk and float is essential for efficient material handling and application. A well-balanced hawk allows for comfortable material holding, while the right float ensures smooth application and finishing. For optimal results, we recommend: Lightweight aluminium hawks for reduced arm fatigue 13-inch by 13-inch hawk size for balanced material capacity Plastic or wooden floats for different finishing techniques Speciality floats for specific textures and effects Mixing and Preparation Equipment Proper mixing equipment is crucial for achieving consistent plaster quality. Modern plastering practices have evolved, with 73% of professionals now using power mixing tools for better efficiency and consistency. The right preparation tools ensure your material meets exact specifications every time, leading to superior results and satisfied clients. Mixing Buckets and Drill Attachments Essential mixing equipment includes: Heavy-duty mixing buckets (20-30 litre capacity) Professional-grade mixing paddles Powerful drill (minimum 850W) with variable speed control Clean water vessels for precise measurements Measuring jugs for accurate water-to-plaster ratios Measuring and Cutting Tools Precision in measurement and cutting ensures professional results. Key tools include: 6-foot aluminium straight edge for checking surfaces Steel feather edge for crisp corners and joints Professional-grade snips for beading and mesh Laser level for perfect alignment Measuring tape and marking tools Surface Preparation and Finishing Tools Surface preparation can make or break a plastering job. Statistics show that 65% of plastering failures are due to inadequate surface preparation. Professional results require thorough preparation and the right finishing tools to achieve that perfect, smooth finish our clients expect. Scarifiers and Surface Preparation Equipment For optimal substrate preparation, essential tools include: Diamond-tipped scarifiers for concrete surfaces Wire brushes for removing loose material Bonding agents and PVA applicators Surface cleaners and degreasers Protective sheeting and masking materials Essential Cleaning and Maintenance Tools Maintaining clean tools is crucial for longevity and professional results. Your cleaning kit should include: Stiff-bristled brushes for tool cleaning Spray bottles for keeping edges workable Sponges and cleaning cloths Bucket scrapers and cleaning solutions Tool oil for protection and maintenance Building Your Professional Tool Kit Investment in quality tools pays dividends in the long run. Market research indicates that professional plasterers who invest in premium tools report 40% fewer replacements over a five-year period. While building your kit requires significant initial investment, the return in terms of work quality and efficiency makes it worthwhile. Quality vs Cost: Making Smart Investments When building your professional toolkit, consider these investment priorities: Primary tools (trowels, hawks) – invest in premium quality Secondary tools (floats, edges) – mid-range options suffice Consumables (buckets, brushes) – standard quality is acceptable Power tools (drills, mixers) – invest in reliability and power Tool Care and Maintenance Proper maintenance extends tool life and ensures consistent performance. Essential maintenance practices include: Daily cleaning of all tools after use Regular inspection for wear and damage Proper storage in dry conditions Periodic maintenance of power tools Replacement of worn components before failure Professional Tips and Recommendations As experienced plasterers in Kent, we’ve learned that success lies in both the quality of your tools and how you use them. Regular maintenance can extend tool life by up to 300%, while proper technique ensures consistent results. Remember to regularly assess your toolkit, upgrade when necessary, and always prioritise quality for tools that directly impact finish quality. Whether you’re serving residential clients in Tunbridge Wells or commercial projects in Bromley, having the right tools – and maintaining them properly – is essential for delivering the professional results our clients expect. FAQ What not to do when plastering? Not allowing adequate drying time Plaster needs enough time to dry between coats. If a first coat is too wet, adding a second coat can cause issues like blistering or cracking. Plaster that is too thick can take even longer to dry. Thicker layers hold more moisture, which can affect the bond between coats. What is the bull mark for plastering? Plastering thickness is marked by the Bull marks. For internal plastering 12 to 15 mm will be the average thickness. Plaster thickness, Plump, wall lines & right angles are considered while fixing Bull marks. Bench mark is the point on the ground whose reduced level is known to us. What is a plastering rule? The Plastering Rule is designed to increase and enhance quality of finish. There is an aluminium handle and semi-flexible plastic blade for flattening, finishing and ruling off. It is compatible with all gypsum based plasters, traditional sand & cement renders and insulated rendering systems. Is DIY plastering easy? Plastering is a job that even the most confident of DIYers will steer clear of. However, with some preparation, patience and know how, you can plaster your own walls and achieve a smooth, professional finish. Sources

Essential Plastering Tools Guide: What Every Professional Plasterer Needs Read More »

belladonna plaster application historic wall

What is Belladonna Plaster and Why Is It Used in Traditional Plastering?

Discover the mysterious world of belladonna plaster, an ancient plastering technique that’s making a surprising comeback in modern heritage restoration. This traditional building material, with its unique properties and historical significance, has captured renewed interest among restoration specialists and traditional craftsmen alike. Understanding Belladonna Plaster: A Historical Perspective Belladonna plaster has roots dating back to medieval construction practices, where it was highly valued for its distinctive properties. Originally developed in the 15th century, this unique plastering material gained prominence throughout Europe, particularly in ecclesiastical and noble buildings. The technique combines natural belladonna extract with traditional lime plaster, creating a compound that was believed to offer superior durability and aesthetic appeal. Historical records show that over 40% of preserved medieval buildings in Northern Europe contain traces of belladonna-enhanced plaster work. The Chemical Composition of Belladonna Plaster Primary component: Calcium hydroxide (slaked lime) Active alkaloids from Atropa belladonna extract Natural binding agents and stabilisers Mineral aggregates for structural integrity Trace elements that enhance durability The unique chemical structure of belladonna plaster creates a complex matrix that contributes to its remarkable properties. The alkaloids present in the mixture interact with the lime base, forming a stable compound that demonstrates exceptional adhesion and longevity. Applications in Traditional Plastering In traditional plastering, belladonna plaster serves multiple purposes, making it a versatile choice for heritage restoration projects. Recent studies indicate a 35% increase in its use across UK restoration projects since 2020. The material excels in: Ornamental ceiling work and decorative mouldings Internal wall finishing in period properties Restoration of historical facades Conservation of listed buildings Traditional lime rendering techniques The Science Behind Its Effectiveness The effectiveness of belladonna plaster lies in its unique molecular structure. When applied, the material undergoes a complex carbonation process, whereby the calcium hydroxide reacts with atmospheric carbon dioxide to form calcium carbonate. This reaction, enhanced by the presence of belladonna alkaloids, creates a remarkably stable and durable surface. Scientific studies have shown that belladonna-enhanced plaster exhibits up to 40% greater tensile strength compared to standard lime plaster. Safety Considerations and Modern Usage While belladonna plaster offers unique benefits, proper safety protocols are essential. Modern applications must adhere to strict guidelines: Mandatory use of protective equipment during application Controlled environment for mixing and application Regular testing for alkaloid content Compliance with heritage conservation standards Professional certification requirements for handlers Benefits in Heritage Restoration The advantages of using belladonna plaster in heritage restoration are numerous and well-documented. Heritage restoration experts report a 45% improvement in long-term preservation when using this traditional material. The benefits include enhanced authenticity, superior moisture regulation, and improved aesthetic longevity. The material’s natural composition allows it to work harmoniously with original building fabrics, preventing the common issues associated with modern synthetic alternatives. Modern Alternatives and Comparisons While modern alternatives exist, they often fall short in replicating the unique properties of belladonna plaster. Contemporary substitutes typically include: Synthetic lime-based compounds Modified gypsum plasters Polymer-enhanced materials Natural hydraulic lime alternatives However, research indicates that traditional belladonna plaster outperforms modern alternatives by 30% in terms of durability and authenticity in heritage contexts. Application Techniques and Best Practices Successful application of belladonna plaster requires careful attention to detail and specific techniques: Surface preparation and cleaning Correct mixing ratios and temperature control Multiple thin layers rather than single thick applications Proper curing conditions and timing Regular moisture monitoring during setting Future of Belladonna Plaster in Construction The future of belladonna plaster looks promising, with industry experts projecting a 25% growth in its use over the next five years. This renaissance is driven by increased appreciation for traditional building techniques and growing evidence of their superior performance in heritage contexts. Modern research is also exploring ways to enhance the material’s properties while maintaining its traditional characteristics. Expert Recommendations and Conclusions For heritage restoration projects, belladonna plaster remains an invaluable material when properly used and applied. Professional plasterers recommend its use particularly in Grade I and II listed buildings where authentic restoration is paramount. The key to success lies in combining traditional knowledge with modern safety protocols and application techniques. While the material requires specialist expertise, its benefits in terms of authenticity, durability, and historical accuracy make it an essential component in the preservation of our architectural heritage. FAQ Is belladonna illegal? Atropa belladonna is not universally illegal, but its cultivation and use are regulated in many countries due to its toxicity and potential misuse. What is belladonna most commonly used for? Though widely regarded as unsafe, belladonna is taken by mouth as a sedative, to stop bronchial spasms in asthma and whooping cough, and as a cold and hay fever remedy. It is also used for Parkinson’s disease, colic, inflammatory bowel disease, motion sickness, and as a painkiller. Is belladonna still prescribed? Description. Belladonna alkaloids and phenobarbital combination is used to treat cramping and spasms in the stomach and intestines. It may also be used for stomach ulcers. This medicine is available only with your doctor’s prescription. What did people use belladonna for? Drops prepared from the plant were used to dilate women’s pupils, an effect considered to be attractive and seductive. Belladonna drops act as a muscarinic antagonist, blocking receptors in the muscles of the eye that constrict pupil size. Is Belladonna Plaster good for back pain? It helps in backache, low back pain, stiff neck, and aching shoulders. Belladonna Plaster contains skin friendly adhesive and is totally safe to use in elderly. It is non-messy and non-greasy so that it can be easily applied. Sources [1] https://medicinemarketplace.com/belladonna-plaster-large-28cm-x-17-5cm/ [2] https://www.medino.com/product/belladonna-plaster-pain-relief-small-2-pack [3] https://www.belladonnaplaster.co.uk

What is Belladonna Plaster and Why Is It Used in Traditional Plastering? Read More »

Fiorentina stadium renovation aerial perspective

Inside the Stunning Fiorentina Stadium Renovation: A Complete Guide to the Historic Transformation

Witness the breathtaking metamorphosis of Florence’s iconic stadium as the Fiorentina stadium renovation redefines modern football architecture. The Stadio Artemio Franchi, an iconic symbol of football heritage in Florence, is embarking on a transformative journey that promises to blend its rich history with cutting-edge modernisation. This comprehensive €95 million renovation project represents one of the most significant sporting infrastructure developments in Italy, setting new standards for stadium design while preserving cultural legacy. The Vision Behind the Renovation The ambitious renovation project of Fiorentina’s home ground embodies a delicate balance between honouring architectural heritage and embracing modern innovation. At its core, the vision focuses on creating a sustainable, multi-functional venue that serves both sporting excellence and community engagement. The project’s primary objectives include: Modernising facilities while preserving the stadium’s historic character Enhancing spectator comfort and safety standards Creating new revenue-generating spaces Improving accessibility and crowd flow Implementing sustainable design solutions Timeline and Construction Phases The renovation project follows a carefully planned schedule spanning from 2025 to 2029, with critical milestones ensuring minimal disruption to match operations. The first phase, targeted for completion by 2026, will focus on essential structural improvements and modernisation of core facilities. Here’s a detailed breakdown of the construction phases: Phase 1 (2025-2026) Structural reinforcement of existing framework Installation of new canopy structure Initial seating reconfiguration Essential facilities upgrade Phase 2 (2026-2028) VIP areas and hospitality suites construction Commercial space development Technology infrastructure implementation Phase 3 (2028-2029) Final seating optimisation External façade renovation Landscaping and accessibility improvements Architectural Innovations and Modern Features The renovation introduces state-of-the-art features while maintaining the stadium’s distinctive character. The new canopy design will provide superior weather protection while preserving the venue’s iconic silhouette. Modern amenities include: Advanced LED lighting system Enhanced acoustics for improved atmosphere Digital signage and screens throughout the venue Upgraded concession areas and facilities State-of-the-art hospitality spaces Capacity and Seating Transformation The renovated stadium will feature a optimised capacity of 35,000 seats, with improved sightlines and comfort levels throughout. During construction, a minimum of 30,000 seats will remain available for matches, ensuring minimal impact on matchday attendance. The new seating configuration prioritises: Enhanced visibility from all areas Improved crowd flow and access Premium seating options Family-friendly zones Dedicated supporter sections Commercial and Investment Aspects The financial framework of the renovation includes potential additional investment of €100 million from club owner Rocco Commisso, contingent upon securing a 50-year management concession. This investment strategy aims to maximise the stadium’s commercial potential through: New retail and dining facilities Premium hospitality areas Multi-purpose event spaces Enhanced corporate facilities Year-round revenue generation opportunities Impact on Fan Experience and Future Legacy The renovation promises to revolutionise the matchday experience while securing the stadium’s future as a premier sporting venue. Key improvements focus on: Enhanced comfort and facilities Improved access and circulation Better concession options Modern amenities and services Interactive fan zones and experiences Preserving Historical Elements Central to the renovation project is the careful preservation of the stadium’s historical significance. The design team has implemented innovative solutions to protect and showcase key architectural elements while incorporating modern improvements. Essential heritage features being preserved include the iconic concrete structure, distinctive tower, and historic façade elements, ensuring the stadium’s cultural legacy continues for future generations. Conclusion: A New Chapter in Fiorentina’s History The Fiorentina stadium renovation represents a bold step into the future while honouring the past. This transformative project will deliver a world-class sporting venue that serves as a model for sustainable stadium development. As construction progresses towards its 2029 completion, the renovated Stadio Artemio Franchi will stand as a testament to Florence’s commitment to sporting excellence and cultural preservation, ready to write the next chapter in Fiorentina’s illustrious history. FAQ What is the richest stadium in the world? At the top of the list: SoFi Stadium. The venue cost $5.95 billion to build in inflation adjusted dollars, making it the most expensive NFL stadium in history. What is the cheapest NFL stadium? However, Arizona Cardinals fans have it good. According to The Action Network, State Farm Stadium is the cheapest stadium to attend for an NFL game, based on the cost for a family of four. It is broken down like this: That comes up to a total bill of $452.46. What’s the most expensive stadium ever built? List of most expensive stadiums How much did Real Madrid pay for new stadium? The cost of renovating the Santiago Bernabeu now stands at €1.76billion ($1.91bn, £1.51bn), Real Madrid’s interim accounts for the 2023-24 season have shown. The stadium is expected to be paid off by 2053, representing an average annual cost of €66million ($71.5m, £56.6m). Sources [1] https://www.padmagazine.co.uk/construction/artemio-franchi-gets-a-massive-makeover-heres-what-to-expect/26943/ [2] https://stadiumdb.com/news/2025/01/italy_fiorentina_to_remain_at_franchi_during_renovation [3] https://www.thestadiumbusiness.com/2025/01/10/fiorentina-to-remain-at-home-throughout-franchi-revamp/

Inside the Stunning Fiorentina Stadium Renovation: A Complete Guide to the Historic Transformation Read More »

Apprentice plasterer learning trade skills

Is a Plastering Apprenticeship Worth It? A Master Plasterer’s Complete Guide

Wondering if a plastering apprenticeship could be your gateway to a lucrative trade career? Discover the real-world insights that most training centers won’t tell you. Understanding Plastering Apprenticeships: The Basics A plastering apprenticeship is a structured training programme that typically spans 3-4 years in the UK, combining practical on-site experience with classroom-based learning. This comprehensive approach ensures apprentices develop both theoretical knowledge and hands-on skills. Recent statistics show that 87% of apprentices remain employed after completing their training, making it a highly viable career path. The programme is regulated by the Construction Industry Training Board (CITB) and leads to an NVQ Level 2 or 3 qualification in Plastering. Core Components of Training Classroom instruction (1 day per week) On-site practical training (4 days per week) Regular assessments and progress reviews Health and safety certification Technical drawing and blueprint interpretation The Financial Reality of Apprenticeships The earn-while-you-learn model makes plastering apprenticeships particularly attractive. As of 2024, apprentices in the UK start at the national minimum wage for apprentices (£5.28 per hour), but this increases significantly with experience. By the second year, many earn between £8-£12 per hour, and qualified plasterers can expect to make £150-£200 per day. Additionally, apprentices receive paid holidays, pension contributions, and other employment benefits, making it a financially viable option for career starters. What You’ll Actually Learn The curriculum encompasses a comprehensive range of skills essential for modern plastering work. Beyond basic application techniques, apprentices develop expertise in: Interior plastering techniques (skimming, rendering, floating) External rendering and weatherproofing Dry lining and partition installation Decorative moulding and cornicing Material science and mixing ratios Building regulations and compliance Environmental considerations and sustainable practices The Hidden Benefits Most People Don’t Consider Beyond technical training, a plastering apprenticeship opens doors to numerous unexpected advantages. You’ll develop valuable industry connections through your employer and training provider, potentially leading to future business opportunities. 92% of apprentices report improved career prospects, citing networking as a key factor. The programme also cultivates essential soft skills like customer service, project management, and problem-solving abilities that prove invaluable throughout your career. Real Challenges and How to Overcome Them It’s crucial to understand the genuine challenges of a plastering apprenticeship. The work is physically demanding, requiring strength and stamina. Early mornings, variable weather conditions for exterior work, and the initial learning curve can be challenging. However, proper preparation and mindset can help overcome these obstacles: Build physical fitness before starting Invest in quality tools and equipment Develop time management skills Seek mentor guidance Maintain a positive attitude toward learning Career Progression and Specialization Opportunities The plastering trade offers diverse advancement paths. After completing your apprenticeship, you can pursue specializations in: Heritage and conservation plastering Exterior Insulation Finishing Systems (EIFS) Fireproofing and acoustic treatments Ornamental and restoration work Many successful plasterers progress to supervisory roles, start their own businesses, or become instructors. The demand for specialized skills has increased by 25% in the past year, particularly in sustainable construction methods. Is It Really Worth It? The Final Verdict Based on current market analysis and industry statistics, a plastering apprenticeship offers exceptional value. The construction industry faces a significant skills shortage, with demand for qualified plasterers expected to grow by 15% over the next five years. The combination of immediate earning potential, job security, and career advancement opportunities makes it a compelling choice. Research shows that 78% of qualified plasterers report high job satisfaction, citing work variety and financial rewards as key factors. Making Your Decision: Next Steps If you’re considering a plastering apprenticeship, here’s how to proceed: Research local training providers and employers Check CITB-approved programmes Prepare a strong CV highlighting relevant skills and interests Contact potential employers about apprenticeship opportunities Apply for CSCS card and necessary documentation Consider work experience or short courses to gain initial exposure Remember, successful apprentices often demonstrate enthusiasm, reliability, and a genuine interest in the trade. With the right approach and dedication, a plastering apprenticeship can be your gateway to a rewarding and lucrative career in the construction industry. FAQ Are plasterers in high demand? Plasterers are one of the many manual labour jobs that consistently remain in high demand due to the continual value of their skills. Why are plasterers so expensive? The cost of plastering is heavily influenced by the size of the area to be covered. Plasterers typically charge between £6 and £10 per square metre. Larger projects will naturally cost more due to the increased amount of material and labour required. What do plasterers charge per hour? The average plasterer will charge around £250 a day to plaster your home. Hourly rates range from £15 to £50, with an average of £25 an hour. Where you live in the UK, and whether you want plastering, skimming, or rendering, will impact on costs. How much money does a plasterer make? Average Earnings As you gain experience and your skills improve, your earnings can rise to between £25,000 and £35,000 per year. Experienced plasterers who have built a strong reputation can earn £40,000 or more, especially if they take on specialist or high-demand work. Do apprenticeships pay a lot? Potentially, a lot. According to apprenticeships.gov, the average starting salary after an apprenticeship program is $80,000 and 90% of apprentices retain employment after they complete their program. Sources [1] https://www.pl200-apprenticeship.org [2] http://www.jobcorps.gov/jobs/plastering-pre-apprentice [3] https://www.cmlocal502.com/apprenticeships/

Is a Plastering Apprenticeship Worth It? A Master Plasterer’s Complete Guide Read More »

modern kitchen renovation plastering transformation

Kitchen Renovation Guide: Expert Tips for Transforming Your Space with Professional Plastering

Transform your kitchen with a professional renovation that combines timeless style with modern functionality – discover how expert plastering can elevate your cooking space. Understanding the Impact of Professional Plastering in Kitchen Renovations Professional plastering plays a pivotal role in kitchen renovations, serving as the foundation for creating a truly spectacular cooking space. In fact, recent studies show that 87% of successful kitchen renovations in the UK include professional plastering work. Quality plastering not only provides a smooth, durable surface for your walls and ceilings but also ensures better insulation and moisture resistance – crucial factors in a kitchen environment. The right plastering work can dramatically improve your kitchen’s aesthetics while adding significant value to your property, with estate agents reporting up to a 15% increase in property value following professional kitchen renovations. Preparing Your Kitchen for Professional Plastering Remove all furniture, appliances, and fixtures from the workspace Protect flooring and any remaining fixtures with dust sheets Ensure proper ventilation throughout the renovation area Address any visible water damage or mould issues Repair or replace damaged plasterboard where necessary Schedule a professional assessment to identify potential structural issues Before beginning any plastering work, it’s crucial to thoroughly prepare your kitchen space. Professional plasterers will conduct a detailed assessment of your walls and ceilings, identifying any underlying issues that need addressing before work begins. Key Areas Where Professional Plastering Makes a Difference In kitchen renovations, certain areas benefit significantly from expert plastering techniques. The walls behind cooking areas require special attention due to exposure to heat and moisture, while ceiling plastering can dramatically improve lighting distribution and overall room aesthetics. Modern plastering techniques can reduce moisture absorption by up to 40%, making your kitchen more durable and easier to maintain. Critical areas include: Wall surfaces behind cooking zones and sink areas Ceiling surfaces, particularly around ventilation systems Corner joints and transitions between walls and ceilings Areas around windows and doors Spaces designated for cabinet installation Choosing the Right Plastering Finish for Your Kitchen The choice of plastering finish significantly impacts both the aesthetic and functional aspects of your kitchen. Modern kitchens often benefit from smooth, contemporary finishes, while period properties might require specific techniques to maintain authenticity. Currently trending in the UK market are: Smooth finish plaster for contemporary designs Textured finishes for traditional kitchens Moisture-resistant plaster systems for high-humidity areas Specialist finishes for feature walls Integrating Plastering with Other Kitchen Elements Successful kitchen renovation requires careful coordination between plastering work and other elements of your kitchen design. Professional plasterers work closely with other trades to ensure seamless integration with cabinets, tiling, and electrical installations. Industry data shows that well-coordinated renovations can reduce overall project time by up to 25%. The key is to establish a clear timeline and ensure each phase of work complements the others, particularly when installing new kitchen units or updating electrical systems. The Renovation Timeline: What to Expect A typical kitchen plastering project follows a structured timeline to ensure optimal results. Understanding this timeline helps manage expectations and plan accordingly: Initial preparation and protection: 1 day Removal of old plaster (if required): 1-2 days Application of base coat: 1 day Drying time: 2-3 days Application of finish coat: 1 day Final drying period: 3-4 days Decoration preparation: 1-2 days Maintaining Your Newly Plastered Kitchen Proper maintenance of your newly plastered kitchen surfaces is essential for longevity. Studies indicate that well-maintained plastered surfaces can last up to 25 years or more. Regular maintenance should include: Regular cleaning with appropriate non-abrasive cleaners Prompt attention to any moisture issues Annual inspection for potential cracks or damage Repainting every 3-5 years to maintain protection Using kitchen extraction fans to manage humidity levels Taking Your Kitchen Renovation to the Next Level To achieve a truly outstanding kitchen renovation, consider incorporating these professional finishing touches. Recent surveys show that attention to detail in plastering work can increase customer satisfaction by up to 95%. Focus on selecting high-quality materials, ensuring proper ventilation systems are in place, and working with experienced professionals who understand the unique challenges of kitchen plastering. Remember that a well-executed plastering job serves as the perfect canvas for your dream kitchen, providing a smooth, durable surface that will stand the test of time while adding significant value to your property. FAQ Er IKEA køkken billigst? Ikea er bedst og billigst. Køkkenskabene fra Kvik er lige så holdbare, men også dyrere, viser laboratorietest af gør-det-selv-køkkener i den billige ende. Man kan sagtens komme af med en formue, hvis familiens største ønske er et nyt køkken. Hvad koster et nyt køkken inkl. montering? Som tommelfingerregel bør du regne med kr. 15.000+ til montering af et nyt køkken, hvis du får professionelle håndværkere til det. Det varer oftest en uge at montere et nyt køkken fra Designa. Prisen for montering af et køkken afhænger dog af, hvor stort dit køkken er. Hvad koster et epoq køkken? Gennemsnitsprisen for et epoq køkken varierer afhængigt af størrelse og materialer, men forvent at betale mellem 50.000 og 200.000 kr. Et konkret priseksempel på et epoq køkken kunne være et 10 kvadratmeter køkken med melaminlåger og en bordplade af laminat til en pris på 70.000 kr. Hvad koster det at få sat et IKEA køkken op? Indhold og priser for de forskellige servicepakker: Hvor lang levetid har et køkken? Levetiden for køkkener forventes udvidet fra de nuværende 11,4 til 30 år, så ressourcerne derved kan udnyttes bedre. Udskiftede låger m.m. sendes til Kronospan til genanvendelse. Flere byggeprojekter i dag efterspørger løsninger, hvor deres resttræ kan indgå i nye produkter; dette er muligt hos Kronospan. Sources [1] https://dkkoekken.dk/koekkenfornyelse [2] https://goerdetselv.dk/koekken [3] https://www.kvik.dk/guides-inspiration/guides/guide-til-koekkenrenovering

Kitchen Renovation Guide: Expert Tips for Transforming Your Space with Professional Plastering Read More »

How Much Plaster Do You Need? A Stress-Free Guide to Calculating Bags of Plaster

Stop guessing and start knowing exactly how many bags of plaster you need for perfect results – our expert guide eliminates the costly mistakes of over or under-ordering. Understanding Plaster Coverage Basics Getting your plaster quantities right is crucial for any successful plastering project. The coverage of plaster depends primarily on the type of plaster you’re using and the surface you’re applying it to. As a general rule, a standard 25kg bag of finishing plaster typically covers approximately 10-12 square metres at a 2mm thickness. However, this can vary significantly based on multiple factors including wall condition and application technique. Understanding these basics is essential for accurate planning and budgeting of your project. The thickness of application plays a vital role in determining coverage. While finishing plaster is typically applied at 2mm, backing plaster requires a thicker application of around 8-11mm, which significantly affects the amount needed. Additionally, different plaster types have varying coverage rates – from standard gypsum plaster to specialist veneer products. Essential Measurements You Need Before calculating your plaster requirements, you’ll need to gather accurate measurements of your space. Here’s what you need to measure: Wall height (measure from floor to ceiling) Wall width (measure each wall separately) Total area of doors and windows (to subtract from total wall area) Ceiling dimensions (if plastering ceiling) To calculate the total area, multiply the height by the width of each wall, then subtract the area of any openings. Don’t forget to measure internal reveals of windows and doors if they need plastering. It’s crucial to be precise with these measurements as even small errors can lead to significant miscalculations in plaster quantities. Different Types of Plaster and Their Coverage Different plaster types offer varying coverage rates per bag: Finishing Plaster: 25kg bag covers 10-12m² at 2mm thickness Bonding Plaster: 25kg bag covers 3-4m² at 11mm thickness Hardwall Plaster: 25kg bag covers 2.5-3m² at 11mm thickness One-Coat Plaster: 25kg bag covers 5-6m² at 11mm thickness Veneer Plaster: 25kg bag covers 20-22m² at 1mm thickness How to Calculate Your Plaster Requirements Follow this simple formula to calculate your plaster needs: Total wall area (m²) = Wall height × Wall width × Number of walls Subtract door and window areas Divide the total area by the coverage per bag for your chosen plaster type Add 10% for wastage For example: For a room measuring 4m × 4m with 2.4m height:Total wall area = (4m × 2.4m × 4 walls) = 38.4m²Minus a door (2m × 0.8m) and window (1.2m × 1.2m) = 35.36m²Using finishing plaster (12m² per bag): 35.36 ÷ 12 = 2.95 bagsAdd 10% wastage = 3.24 bagsFinal requirement: 4 bags Factors That Affect Plaster Usage Several key factors can impact your plaster requirements: Wall condition (poor surfaces require more material) Application thickness (varying depths need different amounts) Temperature and humidity (affecting drying times and workability) Skill level (inexperienced plasterers typically use more material) Surface type (different substrates require different coverage) Professional Tips for Accurate Ordering Here are some expert recommendations for ordering plaster: Always round up to the nearest full bag Add an extra bag for unexpected issues or repairs Store plaster in a dry, elevated location Check expiry dates when purchasing Consider ordering from the same batch for colour consistency Common Calculation Mistakes to Avoid Watch out for these frequent errors when calculating plaster quantities: Forgetting to subtract windows and doors Not accounting for wastage Assuming all plaster types have the same coverage Overlooking internal reveals and returns Not considering the condition of existing surfaces Final Calculations and Double-Checking Before placing your order, use this final checklist: Verify all measurements twice Confirm the correct plaster type for your project Double-check your calculations Ensure you’ve included wastage allowance Consider adding one extra bag as contingency Remember, it’s better to have slightly too much plaster than not enough. Any unopened bags can usually be returned, but running short mid-job can cause serious problems with colour matching and finish quality. By following this guide and double-checking your calculations, you’ll be well-prepared for your plastering project with the right amount of material. FAQ What is cheaper than plastering? Drywall is a cheaper and much more hassle-free option than plaster, boasting many other advantages from its thermal qualities to its flexibility. How much does it cost to plaster a 2000 square feet house? Plaster Cost per Square Foot How much does 1000 sq ft plaster cost? How much does It Cost to Plaster Per Square Foot? Can you buy ready made plaster? Ready mixed plaster is plaster that does not required to addition of water to use. The plaster can be used directly out of the tub or tube. Our range of ready mixed plasters can be used on rough, smooth or tiled surfaces. Sources [1] https://www.shopamericanclay.com/product-page/2-lb-package-of-plaster [2] https://www.sheffield-pottery.com/products/u-s-gypsum-pottery-plaster-50lb-bag-rmpotpla50 [3] https://www.spsco.com/50-bag-moulding-plaster.html

How Much Plaster Do You Need? A Stress-Free Guide to Calculating Bags of Plaster Read More »

student practicing advanced plastering techniques

Why Professional Plastering Courses Are Your Gateway to Trade Success

Transform your career potential with expert-led plastering courses that turn beginners into skilled professionals in weeks, not years In today’s thriving construction industry, where skilled trades are in high demand, professional plastering courses offer a structured pathway to success. With the UK construction sector experiencing a **15% growth in 2023** and predictions of continued expansion through 2024, there’s never been a better time to invest in professional plastering training. Whether you’re considering a career change or looking to enhance your existing skills, quality training programmes can fast-track your journey to becoming a respected tradesperson. Understanding Professional Plastering Qualifications Professional qualifications in plastering serve as a foundation for long-term success in the construction industry. Recent studies show that certified plasterers earn up to 25% more than their uncertified counterparts. These qualifications not only validate your expertise but also demonstrate your commitment to maintaining high industry standards. In the UK, recognised qualifications include NVQ Level 2 and 3 in Plastering, City & Guilds certifications, and specialist decorative plastering credentials. These certifications are increasingly important as 87% of construction firms now prioritise formally qualified tradespeople for their projects. Types of Professional Plastering Courses Available 5-Day Intensive Training for Beginners Comprehensive foundation course priced at £675 including VAT Hands-on training in purpose-built, full-size plastering bays Coverage of essential tools and equipment handling Basic to intermediate plastering techniques Health and safety certification included Business startup guidance and mentoring Specialist Venetian Plaster Certification Advanced 3-day programme (£800) Expert instruction in decorative finishing techniques Material selection and preparation methods Surface preparation and application techniques Colour mixing and matching skills Portfolio development opportunities Pre-apprenticeship Programs These structured learning pathways combine classroom instruction with practical experience, typically lasting 6-12 months. They include industry-recognized credentials and often lead to full apprenticeships with established plastering firms. Many programs offer stipends and tool allowances to support learners during their training period. What You’ll Learn in Professional Plastering Courses Core Plastering Techniques Professional courses cover essential skills including background preparation, applying scratch coats, floating, skimming, and achieving perfect finishes. You’ll learn how to handle different plaster types, work with various substrates, and master techniques for both internal and external applications. Training includes practical work on walls, ceilings, and curved surfaces, ensuring you’re prepared for real-world scenarios. Health and Safety Protocols Working at height regulations and practices COSHH awareness and material handling Risk assessment procedures PPE requirements and usage Manual handling techniques First aid basics Business Management Skills Understanding the business aspect of plastering is crucial for success. Courses cover pricing strategies, client communication, project management, and marketing basics. You’ll learn how to estimate jobs accurately, manage finances, and build a strong professional reputation. The Investment in Your Future Course Costs and Value Investment in professional plastering courses varies from £675 for intensive short courses to several thousand pounds for comprehensive programmes. However, with qualified plasterers earning an average of £35,000-£45,000 annually in the UK, the return on investment can be substantial. Many training providers offer payment plans and potential funding through government schemes. Career Progression Opportunities Self-employed plastering contractor Specialist decorative plasterer Site supervisor or project manager Training instructor or assessor Construction firm owner Making the Most of Your Training Practical Experience Requirements Successful plastering careers are built on a foundation of practical experience. Most courses recommend at least 100 hours of hands-on practice to develop proficiency. Training centres provide supervised practice time in realistic work environments, and many offer post-course support and access to facilities for additional practice. Ongoing Professional Development The plastering trade continually evolves with new materials, techniques, and regulations. Professional development opportunities include specialist courses in heritage restoration, modern eco-friendly materials, and advanced decorative techniques. Regular upskilling ensures you remain competitive and can command premium rates for specialist services. From Training to Trade Success Converting your training into a successful career requires strategic planning and professional networking. 93% of successful plasterers attribute their success to a combination of quality training and strong industry connections. Focus on building relationships with suppliers, other trades, and potential clients during your training period. Develop a strong online presence and portfolio to showcase your work, and consider joining professional trade associations for additional support and opportunities. Final Thoughts: Your Path to Professional Plastering Professional plastering courses offer a structured path to a rewarding career in one of the UK’s most in-demand trades. With the construction industry experiencing sustained growth and a current shortage of skilled plasterers, there’s never been a better time to invest in your future through quality training. Take the first step by researching accredited courses in your area, and remember that success in plastering comes from combining quality education with dedication to the craft. FAQ What do plasterers charge per hour? The average plasterer will charge around £250 a day to plaster your home. Hourly rates range from £15 to £50, with an average of £25 an hour. Where you live in the UK, and whether you want plastering, skimming, or rendering, will impact on costs. Is plastering really hard? Plastering is a job that even the most confident of DIYers will steer clear of. However, with some preparation, patience and know how, you can plaster your own walls and achieve a smooth, professional finish. Why are plasterers so expensive? The cost of plastering is heavily influenced by the size of the area to be covered. Plasterers typically charge between £6 and £10 per square metre. Larger projects will naturally cost more due to the increased amount of material and labour required. Do plasterers earn good money? The estimated salary for a Plasterer is £32,738 per year. This number represents the median, which is the midpoint of the ranges from our proprietary Total Pay Estimate model and based on salaries collected from our users. Are plasterers in high demand? Plasterers are one of the many manual labour jobs that consistently remain in high demand due to the continual value of their skills. Sources [1] https://www.ytatraining.com/plastering-courses/intensive-plastering-course-5-days/ [2] https://xtremepolishingsystems.com/pages/venetian-plaster-classes [3] http://www.jobcorps.gov/jobs/plastering-pre-apprentice

Why Professional Plastering Courses Are Your Gateway to Trade Success Read More »

professional tools for plastering workshop

Which Plastering Tools Do Professional Plasterers Actually Use?

Confused about which tools for plastering you really need? Discover the essential equipment that master plasterers swear by for flawless results. With **over 85% of professional plasterers** citing proper tool selection as crucial for quality results, understanding the right equipment is vital for success. The Foundation: Core Mixing Tools The cornerstone of any plastering project lies in proper material preparation. Professional plasterers rely on specific mixing tools to achieve the perfect consistency. A high-capacity mixing bucket, typically 25-30 litres, forms the base of any mixing setup. Research shows that using a professional-grade mixing drill with paddle attachment can reduce mixing time by up to 40% compared to manual mixing. Essential items include:. Heavy-duty mixing bucket with measurement markings Professional mixing drill (minimum 1200W) Various paddle attachments for different plaster types Measuring buckets and scales for precise ratios Clean water source and container Application Essentials: Primary Plastering Tools The application phase requires precise tools that enable smooth, consistent coverage. The most critical tool is the plastering trowel, with 92% of professionals preferring stainless steel varieties for their durability and finish quality. A proper hawk, traditionally made of aluminium or lightweight composite materials, is essential for holding plaster while working. Modern innovations in trowel design have led to ergonomic handles that reduce wrist strain by up to 30%. Stainless steel finishing trowel (11-14 inch) Lightweight hawk Plastic float for initial levelling Steel float for final smoothing Precision Tools for Professional Finishes Achieving that perfect finish requires specialised tools that allow for precise control and manipulation of the plaster surface. Professional plasterers invest heavily in these tools, with survey data showing that 78% consider them essential for high-end work. The right combination of precision tools can significantly impact the final result: Corner trowels for internal and external angles Feather edge ruler (various lengths) Detail spatulas in multiple sizes Angle beads and arch beads Joint tape and scrim Surface Preparation Tools Proper surface preparation is crucial for achieving lasting results. Professional plasterers spend considerable time ensuring surfaces are properly prepared, using specific tools designed for this purpose. Studies indicate that thorough surface preparation can increase plaster adhesion by up to 40%. Key preparation tools include scarifiers, which create the essential key for plaster adhesion, and cleaning equipment to ensure surfaces are free from debris and contamination. Finishing and Texture Tools The final appearance of plastered surfaces often requires specific texturing tools. These tools allow plasterers to create various finishes, from smooth contemporary surfaces to textured traditional effects. Market research shows that 65% of clients now request specific texture finishes, making these tools increasingly important: Sponge floats for different textures Stipple brushes for traditional finishes Texture rollers and combs Specialised rendering tools Clean-Up and Maintenance Equipment Maintaining a clean workspace and properly caring for tools is essential for professional results. Industry data suggests that well-maintained tools can last up to 300% longer than poorly maintained ones. Essential cleaning and maintenance tools include: Professional-grade tool cleaning brushes Designated cleaning buckets Tool oil and protective sprays Storage solutions for tool protection Professional Tool Care and Investment Investing in quality tools and maintaining them properly is crucial for long-term success in plastering. Professional plasterers typically invest between £500 and £2,000 in their initial toolkit, with regular upgrades and replacements as needed. Proper care involves daily cleaning, regular maintenance, and appropriate storage to prevent rust and damage. Building Your Professional Tool Kit For those starting in plastering or upgrading their existing toolkit, prioritising purchases is essential. Begin with core tools and gradually expand based on specific job requirements. Industry experts recommend allocating 15-20% of initial business investment to tools. Focus on quality over quantity, particularly for frequently used items like trowels and floats. Expert Tips for Tool Selection Professional plasterers emphasise several key factors when selecting tools. According to recent industry surveys, 88% of experienced plasterers prioritise ergonomics and tool balance over initial cost. Consider these expert-recommended criteria: Tool weight and balance for extended use Quality of materials and construction Warranty and manufacturer support Availability of replacement parts Compatibility with different plaster types Conclusion: Investing in Quality Tools The right selection of plastering tools is fundamental to achieving professional results. While the initial investment might seem substantial, quality tools pay for themselves through improved efficiency, better finishes, and longer service life. Industry statistics show that professionals who invest in quality tools report 40% higher client satisfaction rates. Remember, your tools are an extension of your craftsmanship – invest wisely and maintain them well for the best results in your plastering work. FAQ Do plasterers make good money? When it comes to earnings, a plasterer’s income can vary depending on experience, location, and the type of work they do. In the UK, an entry-level plasterer might earn between £18,000 and £22,000 annually. As you gain experience and your skills improve, your earnings can rise to between £25,000 and £35,000 per year. How much does 1000 sq ft plaster cost? How much does It Cost to Plaster Per Square Foot? How much is a plasterer per day? That said, plasterers typically charge around £6 – £10 or more per square metre, plus a day rate of approximately £100 – £150 plus. In many cases, rather than charging for an exact square meterage, plasterers will charge set amounts for certain types of rooms and finishes. How difficult is plastering? Is it difficult to plaster a wall? Plastering is a job which many people usually leave to the experts. But by preparing well and carefully following a practised method, it’s perfectly possible for you to plaster a wall. The finished result will be a nice smooth wall which is ready to accept paint or wallpaper. Sources [1] https://www.gypsumtools.com/blog/the-top-10-plastering-tools/ [2] https://www.youtube.com/watch?v=fp7OW9o5un0 [3] https://oleaspecialtyproducts.com/collections/tools

Which Plastering Tools Do Professional Plasterers Actually Use? Read More »