
What Is Corner Bead and Why It’s Essential for Professional Plastering
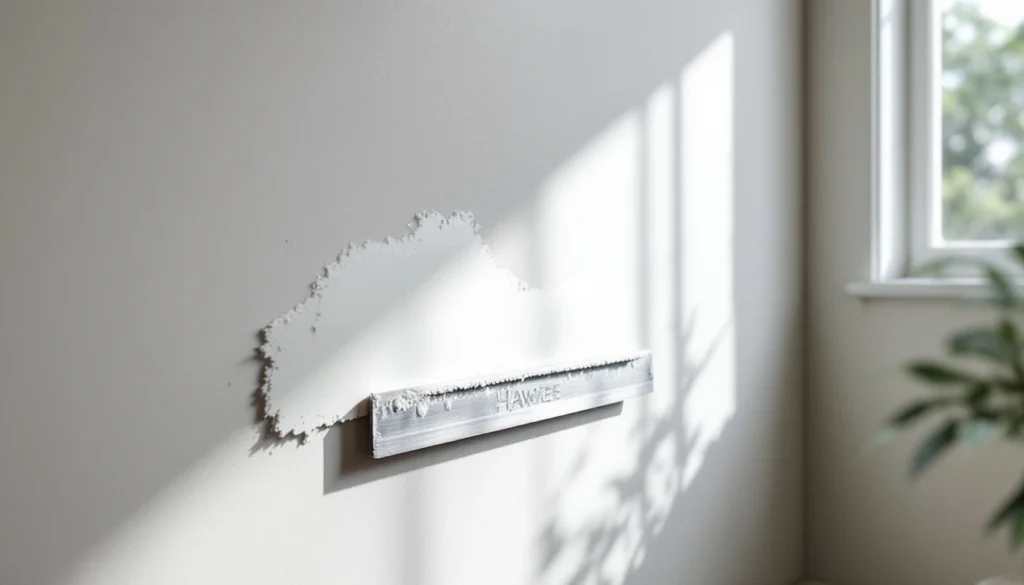
Corner bead—also called angle bead—is one of those plastering essentials that separates professional work from amateur efforts. It’s a pre-formed metal, plastic, or composite strip installed on all external (outward-facing) corners before you apply finishing plaster.
Without corner bead, plaster corners are vulnerable. They chip easily from knocks, furniture impacts, and vacuum cleaners. They’re difficult to form accurately by hand, and they rarely stay straight over time as buildings settle and plaster cures.
The primary functions of corner bead include:
- Creating a perfectly straight, crisp 90-degree corner edge
- Reinforcing the corner to prevent impact damage and chipping
- Providing a guide for plastering to the correct depth
- Speeding up the plastering process significantly
- Ensuring consistency across all corners in a room or building
According to British Gypsum’s technical guidance, proper corner reinforcement is considered essential for achieving BS 8000-8 standards for plastering workmanship. Every professional plasterer in 2026 carries a selection of corner beads in their van.
Types of Corner Bead Available in 2026
The corner bead market has evolved significantly over the past decade. While galvanised steel remains dominant, plastic and composite options have improved considerably. Here’s what’s available at your local builders’ merchant:
Galvanised Steel Corner Bead (The Professional Standard)
Galvanised steel bead is the traditional choice and still accounts for roughly 70% of corner bead installations in UK domestic plastering. It’s manufactured from thin gauge galvanised steel with perforated wings for keying into the plaster.
Typical dimensions are 3 metres long with a 25mm nose (the visible corner edge) and 35-50mm wings on each side. The standard thickness is 0.5mm gauge steel, providing excellent rigidity without adding excessive build-up.
Advantages:
- Creates the sharpest, most durable corner finish
- Stays perfectly straight—no bowing or warping
- Handles heavy impacts without crushing
- Compatible with all plaster types
- Cost-effective at £1.20-£1.80 per 3m length from Screwfix or Wickes
Disadvantages:
- Can rust if exposed to prolonged moisture before plastering
- Sharp edges require careful handling
- Not suitable for curved walls or arched openings
- Visible through thin skim coats if not bedded properly
PVC Plastic Corner Bead (Flexible and Rust-Free)
Plastic corner bead has improved dramatically since the early versions from the 2000s. Modern PVC beads feature enhanced rigidity and better plaster adhesion profiles.
These beads are particularly popular for renovation work where existing corners may not be perfectly square or straight. The flexibility allows them to follow slight irregularities in the substrate.
Key applications include:
- Curved walls and radius corners
- Arched doorways and feature walls
- Bathrooms and wet rooms (completely rust-proof)
- External renders where moisture is present
Pricing ranges from £1.80-£2.50 per 3m length. The premium reflects the manufacturing process and material costs, but it’s worth it for specific applications.
Paper-Faced Bead (For Plasterboard Systems)
Paper-faced metal bead combines a thin metal reinforcing strip with paper facings that tape directly onto plasterboard. This type is specifically designed for drywall systems rather than wet plastering.
The paper edges accept jointing compound (like Gyproc EasiJoint) and blend seamlessly into the plasterboard surface. Professional drywall installers prefer these because they eliminate the need for plaster dabbing to fix the bead.
These beads cost £2.20-£3.00 per 3m length and are stocked by specialist drywall suppliers like Travis Perkins and Jewson.
Thin Coat Bead (For Skim-Only Applications)
A more recent innovation is the thin coat bead, designed specifically for skim coat applications over plasterboard. These have a much lower profile—typically 6-8mm total build-up compared to 12-15mm for standard beads.
They’re ideal for modern new-builds where walls are plasterboarded and only receive a 2-3mm skim coat. The thinner profile prevents the corner bead from showing through or creating a noticeable ridge.
| Bead Type | Best Use | Cost per 3m | Build-Up | Installation Method |
|---|---|---|---|---|
| Galvanised Steel | Standard corners, wet plaster | £1.20-£1.80 | 12-15mm | Bonding/nails |
| PVC Plastic | Curves, arches, wet areas | £1.80-£2.50 | 12-15mm | Bonding/adhesive |
| Paper-Faced | Plasterboard/drywall | £2.20-£3.00 | 10-12mm | Jointing compound |
| Thin Coat | Skim-only systems | £2.00-£2.80 | 6-8mm | Adhesive/nails |
How to Install Corner Bead: Professional Techniques
Proper installation is critical. A poorly fixed corner bead will show ridges, create hollow spots, or worse—fall off mid-way through plastering. Here’s how professionals do it in 2026:
Method 1: Bedding in Bonding Coat (Traditional Wet Method)
This is the most common method for traditional two-coat plastering on brick, block, or lath. It creates the strongest bond and allows for adjustment if walls aren’t perfectly plumb.
Step-by-step process:
- Cut the corner bead to length using tin snips (for metal) or a hacksaw. Always cut 5-10mm short of floor-to-ceiling to allow for skirting boards and coving.
- Mix a small amount of bonding plaster slightly stiffer than normal working consistency—you want it to hold the bead without slumping.
- Apply vertical dabs of bonding down both sides of the corner, roughly 50-75mm wide and 150-200mm apart.
- Press the corner bead firmly into the bonding, ensuring the nose sits proud of the surrounding wall by the thickness of your finishing coat (typically 2-3mm).
- Use a spirit level to check vertical alignment. Adjust by pressing or pulling as needed while the bonding is still workable.
- Run your trowel down both wings to remove excess bonding and feather the edges.
- Allow to set for 30-45 minutes before applying your main basecoat.
The bonding creates mechanical keying through the perforations and provides a solid bed that won’t move during subsequent plastering operations.
Method 2: Mechanical Fixing with Drywall Nails
For plasterboard backgrounds, mechanical fixing is faster and eliminates waiting time. This method uses 30-40mm galvanised drywall nails or staples.
Nail through the pre-punched holes or perforations in the bead wings, spacing fixings at 200-250mm centres. Drive nails just below flush—if they protrude, they’ll catch your trowel during plastering.
Check alignment every 3-4 fixings with a straight edge. Plasterboard is rarely perfectly flat, so you may need to pack behind the bead with small shims or adjust nail depth.
Method 3: Adhesive Fixing (Modern Fast Method)
Grip adhesives like Evo-Stik Serious Stuff or UniBond No More Nails have become popular for fixing corner bead, particularly on difficult substrates like painted walls or tile backer boards.
Apply adhesive in a continuous bead down both wings, press into position, and hold for 30-60 seconds. Use temporary props or masking tape to hold the bead while adhesive cures (typically 15-20 minutes).
This method works well for repairs and small jobs but isn’t recommended for full room re-plasters where you’re applying heavy basecoats that could pull the bead away before adhesive fully cures.
Cutting Accurate Mitres and Intersections
Where corner beads meet—such as ceiling-to-wall junctions or when boxing out services—you’ll need accurate mitres. Professional plasterers use these techniques:
- 45-degree mitres: Use an angle grinder with a thin cutting disc or aviation snips. Measure twice, cut once. The junction should be tight with no gaps exceeding 1mm.
- Stop beads: Where a corner bead terminates mid-wall (like a half-height feature wall), use a stop bead or cut the corner bead at 90 degrees and fold back the wings to create a clean finish.
- Curved transitions: For curves meeting straight runs, overlap the flexible plastic bead over the rigid metal bead and trim to shape.
According to guidance from the Construction Industry Training Board (CITB), accurate cutting and fitting of beads is a Level 2 plastering competency that should be demonstrated in all professional work.
Plastering Over Corner Bead: Getting a Perfect Finish
Installing the bead is only half the job. The real skill is in plastering over it to create an invisible, perfectly straight corner. This is where experience shows.
First Coat: Embedding and Building Out
When applying your basecoat (typically Carlite Bonding, Hardwall, or Browning depending on substrate), work the material well into the bead perforations. Press firmly with your laying-on trowel to ensure complete coverage behind the wings.
Build up to within 2-3mm of the bead nose. Use the corner bead itself as a screed guide—your straight edge should bridge from the bead nose across to your wall dots or screeds.
Pay special attention to the area immediately adjacent to the bead. This 50-75mm strip is where most problems occur. If it’s hollow or poorly bonded, it will crack away when knocked.
Second Coat: Achieving the Perfect Arris
The finishing coat (typically Multi-Finish or Board Finish) should completely cover the bead nose while maintaining a crisp corner edge. This requires proper trowel technique:
- Apply finishing plaster to both faces of the corner, building slightly proud of the bead nose
- Use firm, vertical strokes with your trowel angled at roughly 30 degrees to the wall
- Work each face independently first, then blend across the corner with diagonal strokes
- As the plaster stiffens, use light vertical pressure directly on the corner arris to sharpen the edge
- Final trowelling should leave no ridges or trowel marks and a perfectly straight edge when viewed from below with a light source behind
The entire process from basecoat to polished finish typically takes 3-4 hours for a standard room corner, including drying time between coats.
Common Corner Bead Problems and How to Fix Them
Even experienced plasterers encounter issues with corner beads. Here are the most common problems we see on jobs across Kent and how to address them:
Bead Showing Through the Finish (Shadowing)
This happens when there’s insufficient plaster thickness over the bead nose or when using thin coat beads with standard plaster systems. The metal or plastic creates a visible line or shadow, especially under raking light.
Prevention: Ensure your basecoat brings the wall level to within 2-3mm of the bead nose. Apply finishing plaster in two thin layers rather than one thick layer, building up gradually over the bead.
Fix: If it’s already plastered, you’ll need to apply an additional skim coat across the entire corner area, feathering out 300-400mm from the corner. This is additional cost but necessary for a quality finish.
Hollow Corners (Drumming)
When you tap the corner with your knuckle and hear a hollow sound, the plaster hasn’t bonded properly behind the bead wings. This is usually caused by insufficient pressure during application or contaminated surfaces.
Prevention: Always ensure the wall behind the bead is clean, dust-free, and properly primed. When applying basecoat, press firmly to force material through the perforations. Don’t use bonding that’s too wet—it won’t have enough body to fill behind the wings.
Fix: Drill 3mm holes along the hollow area and inject PVA-thinned bonding using a grouting gun. Once set, skim over the holes. Alternatively, hack off and replaster the affected section.
Bead Movement or Cracking
If the corner bead wasn’t adequately fixed, building movement or impact can cause it to shift, creating cracks along the corner edges. This is particularly common in new-builds during the first year as the structure settles.
Prevention: Use adequate fixings (minimum 6 nails per 3m length for plasterboard, or properly bedded bonding for masonry). On renovation work over old plaster, ensure the substrate is sound before fixing beads.
Fix: Remove loose material, re-fix or replace the bead section, and replaster. Small cracks can be filled with flexible filler, but this is only cosmetic—structural movement requires proper repair.
Rust Stains Bleeding Through
Standard galvanised steel beads can rust if exposed to moisture before plastering, particularly in bathrooms or on external renders. The rust bleeds through paint as brown staining months after decoration.
Prevention: Use stainless steel or PVC beads in wet areas. If you must use galvanised bead, ensure it’s plastered within 48 hours of installation and never leave exposed to water.
Fix: Treat rust spots with a stain-blocking primer like Zinsser BIN before decorating. For severe cases, the affected plaster may need replacing with proper rust-proof beading.
| Problem | Cause | Prevention Cost | Repair Cost (2026) |
|---|---|---|---|
| Bead shadowing | Insufficient coverage | £0 (technique) | £35-£50 per corner |
| Hollow corners | Poor bonding | £0 (technique) | £40-£70 per corner |
| Movement cracks | Inadequate fixing | £8-£12 extra fixings | £60-£120 per corner |
| Rust staining | Wrong bead type | £0.60-£1.30 premium per metre | £45-£90 per corner |
Corner Bead Specifications for Different Applications
Not all corners are created equal. Different parts of a building require different corner protection levels. Here’s how to specify correctly:
Domestic Internal Corners
Standard 25mm nose galvanised steel bead with 0.5mm gauge is perfectly adequate for most internal room corners. Expected lifespan exceeds 50 years with normal domestic use.
For high-traffic areas like hallways and staircases, consider 30mm nose beads or impact-resistant PVC variants rated to BS EN 13963. These provide 30-40% additional crush resistance.
Commercial and Public Buildings
Building Regulations Approved Document M (Access to and Use of Buildings) requires corners in circulation spaces to withstand wheelchair impacts. This typically means heavy-duty beads with 0.7-1.0mm gauge steel or reinforced plastic systems.
Healthcare facilities often specify radius beads (25-50mm radius corners) rather than sharp 90-degree angles to reduce injury risk. These use flexible PVC bead bent to shape or pre-formed corner pieces.
External Render Applications
External corners on rendered buildings require expanded metal mesh beads or stainless steel variants. Standard galvanised bead will rust through in 3-5 years when exposed to weather.
Modern render systems like Weber or K Rend supply proprietary beads designed to work with their base coats and finishing renders. Always use manufacturer-specified beads to maintain system warranties.
Fire-Rated Partitions
Where partitions must achieve fire ratings (30, 60, or 90 minutes), corner beads must not compromise the system. Most steel and PVC beads are compatible with fire-rated plasterboard systems, but always check manufacturer certification.
For critical applications, specify beads tested as part of complete fire-rated assemblies as per Approved Document B (Fire Safety) requirements.
Cost Analysis: Corner Bead Installation in 2026
Understanding the true cost of corner bead work helps with accurate estimating. Here’s the complete breakdown for typical projects:
Material Costs
- Galvanised steel bead: £1.20-£1.80 per 3m length (£0.40-£0.60 per metre)
- PVC flexible bead: £1.80-£2.50 per 3m length (£0.60-£0.83 per metre)
- Fixing materials: £0.15-£0.25 per metre (nails, adhesive, or bonding)
- Additional plaster: £0.30-£0.50 per metre for embedding and coverage
For a typical 4m tall corner, total material cost is £2.20-£4.00 depending on bead type and fixing method.
Labour Costs
Professional plasterers typically allow these timeframes for corner bead work:
- Cutting and fixing: 8-12 minutes per corner (standard straight corners)
- Embedding and basecoating: 15-20 minutes per corner
- Finishing and polishing: 12-18 minutes per corner
At 2026 plasterer rates of £200-£280 per day (£25-£35 per hour in Kent), labour cost per corner is approximately £12-£20 for complete installation and finishing.
For detailed pricing information across different plastering services, see our comprehensive 2026 UK plastering cost guide.
Complete Project Example: 4m x 4m Room
A standard bedroom with four corners (floor to ceiling approximately 2.4m each):
| Item | Quantity | Unit Cost | Total |
|---|---|---|---|
| Galvanised bead (3m) | 4 lengths | £1.50 | £6.00 |
| Fixing materials | 10m total | £0.20/m | £2.00 |
| Additional plaster | 10m total | £0.40/m | £4.00 |
| Labour (fixing) | 48 mins | £30/hour | £24.00 |
| Labour (plastering) | 120 mins | £30/hour | £60.00 |
| Total | £96.00 |
This corner bead work would typically be included in a complete room plastering quote rather than priced separately, but understanding the component costs helps with accurate room pricing.
Tools and Equipment for Corner Bead Installation
Professional corner bead installation requires specific tools beyond standard plastering equipment. Here’s what you need in your toolkit:
Essential Tools
- Tin snips or aviation snips: For cutting metal beads cleanly without crushing the nose. Invest in a quality pair (£15-£25 from Screwfix) rather than cheap versions that won’t cut cleanly through 0.5mm steel.
- Spirit level (1200mm): Essential for checking vertical alignment. Longer levels provide better accuracy over the full corner height.
- Drywall hammer or palm nailer: For mechanical fixing. A proper drywall hammer has a convex face that won’t damage bead edges.
- Angle grinder with cutting disc: For accurate mitres and cutting stainless steel beads. Use 1mm thin cutting discs for cleanest cuts.
- Corner trowel or internal angle tool: While not essential, these specialist trowels help achieve perfect corner finish particularly for beginners.
Recommended Products for 2026
Based on professional usage across hundreds of jobs, these are the most reliable corner bead products available:
- Expamet Angle Bead (Standard): Industry-standard galvanised bead, available from all major merchants. Consistent quality, accurate dimensions.
- ClarkDietrich ProBead: Premium steel bead with enhanced perforations for superior plaster key. Worth the 20% premium for high-end work.
- Trim-Tex Rigid Vinyl Bead: Best PVC option for curved work. More rigid than competitors, less prone to warping in hot conditions.
- British Gypsum Gyproc DriWall Bead: Paper-faced bead specifically designed for plasterboard systems. Perfect for modern new-builds.
All major builders’ merchants (Wickes, B&Q, Screwfix, Travis Perkins, Jewson) stock corner beads, but trade counters offer better selection and pricing for bulk purchases. For more specialist information on plastering tools and equipment, visit our complete plastering trowel guide.
Alternatives to Traditional Corner Bead
While corner bead is the standard solution, certain applications benefit from alternative approaches:
Hand-Formed External Angles
Traditional plasterers can form external corners freehand using just plaster and a straight edge. This technique is still used for heritage restoration work where maintaining original profiles is essential.
The process involves building up plaster in multiple coats, using timber battens as temporary guides. It’s time-consuming (adding 45-60 minutes per corner) and requires significant skill, but produces authentic results for period properties.
Shadow Gap Details
Modern architecture increasingly uses shadow gaps rather than traditional corners. Instead of meeting at 90 degrees, walls stop 5-10mm apart, creating a dark reveal line.
This eliminates corner beads entirely, replacing them with precision-cut plasterboard edges and careful detailing. The gap is kept clear using specialist shadow gap profiles. This approach is common in contemporary extensions and new-builds.
Stainless Steel or Aluminium Extrusions
High-end commercial work sometimes specifies exposed metal corner trims rather than plastering over corner beads. Brushed stainless steel or anodised aluminium profiles create clean, modern corners that won’t chip.
These are significantly more expensive (£8-£15 per metre) but provide superior durability in heavy-traffic environments like hospitals, schools, and retail spaces.
Frequently Asked Questions About Corner Bead
Do You Need Corner Bead on Every External Corner?
Yes, professional standards require corner bead on all external (outward-facing) corners in plastered construction. This includes ceiling-to-wall junctions, boxing around beams or pipes, windowsill returns, and chimney breast corners.
The only exceptions are where alternative details like shadow gaps are specified or on curved walls where the plaster thickness itself provides adequate strength. Internal corners (where walls meet inward) never need corner bead—these are formed with the trowel during plastering.
Skipping corner bead to save cost is false economy. Unprotected corners chip within months, requiring repair that costs far more than the original bead installation.
Can You Plaster Over Existing Corner Bead?
Yes, you can plaster over existing corner bead if it’s still sound and properly fixed. This is common during replastering work where only the plaster surface is damaged but the underlying beads remain intact.
Check each corner by pressing firmly along its length. If the bead moves, shows rust damage, or has pulled away from the substrate, it must be removed and replaced. Plastering over damaged beads simply transfers the problem to your new finish.
Where the existing bead is sound but the corner has been knocked or chipped, fill any hollows with bonding plaster, allow to dry, then apply your finishing coat. The existing bead continues to provide reinforcement and a straight edge guide.
What’s the Difference Between Corner Bead and Stop Bead?
Corner bead reinforces external corners where two plaster surfaces meet at 90 degrees. Stop bead creates a clean edge where plaster terminates against another material (like tiles, timber, or concrete).
Stop bead has a flat profile on one side (which sits against the adjoining material) and a perforated wing on the other (which embeds in the plaster). It’s used at floor levels before skirting installation, around door frames, and where plaster meets different finishes.
Both products are essential for professional results, and most plasterers use stop bead on virtually every job. They’re similarly priced (£1.40-£2.20 per 3m) and available from the same suppliers. For complete information on plastering beads and trims, see our comprehensive beading guide.
How Do You Fix Corner Bead on Curved Walls?
Flexible PVC corner bead is specifically designed for curved walls and arched openings. The plastic material bends to follow radius curves without kinking or breaking.
For gentle curves (radius above 600mm), standard flexible bead works well. Fix using adhesive or closely-spaced mechanical fixings (every 100-150mm) to hold the curve. The bead must follow the wall curve exactly—any deviation shows through the finished plaster.
For tight radius curves (below 600mm) like arched doorways, use specialist archway bead or build up the curve in short sections, mitring the bead to follow the curve. Some manufacturers produce pre-formed arch kits for common radius sizes.
Very tight curves (below 300mm radius) may require hand-forming without bead, using the plaster itself to create and reinforce the corner. This is specialist work requiring advanced plastering skills.
Can Corner Bead Be Reused or Salvaged?
No, corner bead should never be reused. Once installed and plastered over, removal inevitably damages both the bead and surrounding plaster. The cost of corner bead (£1.20-£2.50 per 3m) makes salvage completely uneconomical.
During renovation work, if you’re carefully removing plaster to expose original features or brickwork, the corner beads come off with the plaster and should be discarded. Any attempt to clean and reuse them results in bent, twisted beads that won’t sit straight when re-installed.
New corner bead is cheap enough that using fresh material is always the professional approach. The small material saving is massively outweighed by the time wasted trying to straighten and reuse damaged beads.
What Causes Corner Bead to Show Through Paint?
Corner bead shows through paint when there’s insufficient plaster coverage over the bead nose or when using the wrong bead type for your plaster system. The metal or plastic creates a visible ridge or colour difference that becomes apparent once decorated.
This problem is most common when using standard 12-15mm beads with thin coat plaster systems, or when plasterers skim too thinly over the bead to save material. The solution requires building up adequate plaster thickness—minimum 2-3mm over the bead nose for standard finishing plaster.
For skim-only applications over plasterboard, always specify thin coat bead (6-8mm profile) rather than standard bead. The reduced profile prevents shadowing even with 2mm skim coats.
If bead shadowing appears after decoration, the only permanent fix is applying an additional skim coat across affected corners, feathering out at least 300mm from the corner edge. This adds cost but eliminates the problem completely.