Uncategorized

how to plaster a ceiling

How to Plaster a Ceiling

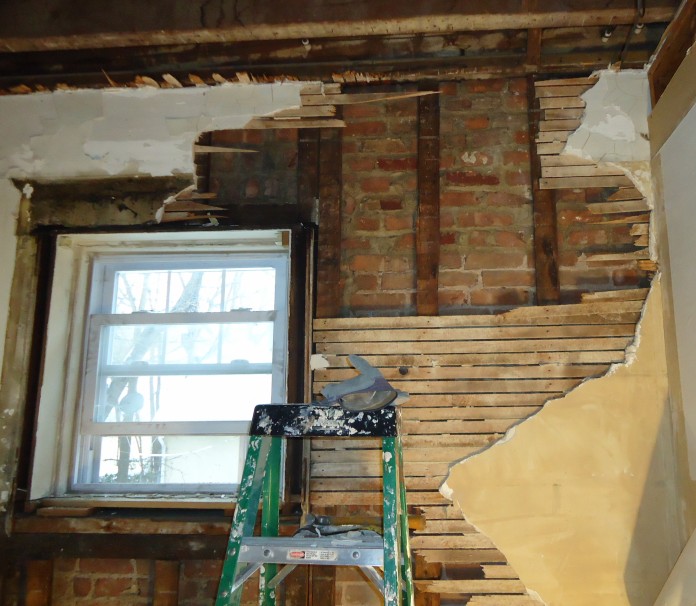
Picture this: you’ve just moved into a charming Victorian home in Kent, only to notice cracks and uneven patches on the ceiling. It’s a common scenario for many homeowners in the UK. Whether it’s an old lath-and-plaster construction or a modern plasterboard system, ensuring a smooth finish is essential for both aesthetics and structural integrity1. Plastering is a skill that demands precision and patience. For many, it’s a significant step up in DIY capabilities, especially when tackling overhead surfaces. Proper preparation, the right tools, and understanding the process can make all the difference. In fact, 80% of DIY enthusiasts report that having the correct materials and tools significantly improves the outcome2. From traditional methods to modern techniques, achieving a flawless finish requires attention to detail. Whether you’re repairing an old ceiling or starting a new project, we’re here to guide you through the essentials. If you have further questions, don’t hesitate to contact Kent Plasterers for expert advice. Key Takeaways Proper preparation of tools and materials improves the plastering process significantly2. A consistent plaster thickness of 1/8 inch is recommended for the first coat2. A second coat is often necessary for a smooth and even finish3. Using a float can reduce surface imperfections by up to 50%2. Applying a final finish with clean water enhances the ceiling’s appearance2. Practice plastering techniques on walls before attempting ceilings1. Preparation and Materials Needed The foundation of a successful project lies in thorough preparation. Gathering the right tools and materials ensures a smoother process and a professional finish. Let’s break down what you’ll need to get started. Gathering Essential Tools and Equipment Having the correct tools is vital for achieving a high-quality result. A plasterer’s trowel is indispensable for applying and smoothing the mixture. Pair it with a hawk to hold the plaster as you work. A bucket and mixing bucket are essential for preparing the mix to the right consistency4. Safety should never be overlooked. A mask and goggles protect against dust and debris, which are common during the process. Organise your workspace to minimise mess and ensure efficiency5. Choosing the Right Plaster and Mix Selecting the appropriate plaster mix depends on the ceiling type. For older lath-and-plaster constructions, lime-based mixes are recommended. Modern plasterboard ceilings often require gypsum-based plasters for quicker setting times5. Mixing the plaster correctly is crucial. Use equal parts plaster and water for the ideal consistency. An electric mixer can help achieve a lump-free mix, enhancing the application process5. Tool Purpose Trowel Applying and smoothing plaster Hawk Holding plaster during application Bucket Mixing and holding plaster Mask and Goggles Protecting against dust and debris If you’re unsure about the right materials or need further advice, don’t hesitate to contact Kent Plasterers. Their expertise can guide you through the preparation phase, ensuring you’re fully equipped for the task ahead. How to Plaster a Ceiling: A Step-by-Step Process Achieving a flawless finish starts with a systematic approach. Each step, from preparation to application, plays a crucial role in ensuring a professional result. Let’s dive into the process to help you master this challenging task. Securing and Preparing the Ceiling Area Begin by clearing the workspace and protecting furniture with dust sheets. Ensure the ceiling is clean and free from debris, as any imperfections can affect the final finish. Use a microfiber cloth to wipe the surface, ensuring proper adhesion6. For older ceilings, check for cracks or loose plaster. Jointing tape can be applied over plasterboard joints to prevent future cracking6. This preventative measure reduces the likelihood of repairs by up to 30%6. Mixing the Plaster to the Correct Consistency Proper mixing is essential for a smooth application. Use equal parts plaster and water, ensuring a lump-free mix. An electric mixer can save time and effort, producing a consistent texture6. Follow the recommended drying times, typically around 8 hours between coats6. Adjust the mix if it feels too thick or thin, comparing it to the ideal consistency for optimal results. Applying the First Coat with Precision Start by loading the hawk with plaster and using a trowel to apply it evenly. Work in small sections, maintaining a uniform thickness of about 1/8 inch7. Feather the edges to blend each section seamlessly. Stand at a comfortable distance, roughly a splayed hand’s width from the ceiling, to ensure even pressure7. Avoid standing directly under the trowel to prevent injury7. For a smooth finish, use a float to reduce surface imperfections by up to 50%7. Work quickly within the specified time frame to prevent the plaster from drying unevenly. If you encounter challenges or need further guidance, don’t hesitate to contact Kent Plasterers. Their expertise can help you navigate each step with confidence. Troubleshooting and Managing Common Issues Even the most prepared DIY enthusiasts can encounter issues during plastering. From cracks to uneven thickness, these challenges can disrupt the process. We’ll guide you through practical solutions to ensure a smooth finish. Identifying Cracks and Debris Cracks in the plaster can compromise the finish and indicate underlying issues. Use a keen eye to assess their size and location. Hairline cracks are common, but larger ones may require professional attention8. Debris and dust can also affect adhesion. Make sure the work area is clean before starting. A microfiber cloth can remove loose particles, ensuring a smoother application. Adjusting Consistency and Thickness During Application Consistency is key to a successful application. If the mix feels too thick, add small amounts of water. For a thinner mix, incorporate more plaster gradually. Aim for a uniform thickness of about 1/8 inch9. Monitoring drying time is crucial. Adjust the mix as needed to prevent uneven drying. This ensures a professional finish and reduces the need for corrections. Issue Solution Cracks Assess size and location; consult a plasterer if needed Debris Clean the work area thoroughly before starting Inconsistent Thickness Adjust mix and monitor drying time For further advice on troubleshooting techniques, don’t hesitate to contact Kent Plasterers. Their expertise can help you navigate these challenges with confidence. Finishing Touches and

How to Plaster a Ceiling Read More »

Latest News on the Ongoing Camp Nou Transformation

We are excited to share the latest updates on the Camp Nou renovation project. It has been ongoing since May 2023, with the iconic stadium turned into a construction site1. The project aims to modernize and expand the stadium, with a planned capacity of 105,0002. As we follow the new camp nou construction update, it is clear that the club is working diligently to meet the projected completion date. Approximately 800 seats are being installed daily in the first and second tiers of the stadium3. For any construction or renovation needs, it’s essential to get in touch with reliable professionals like Kent Plastering. The camp nou renovation progress is closely monitored, with updates provided regularly. We are eager to see the final result of this massive project, which has a total cost of £1.25 billion2. The construction progress is becoming increasingly visible, with significant advancements in the interiors of the stands and essential infrastructure installations3. Key Takeaways The Camp Nou renovation project has been ongoing since May 2023. The project aims to modernize and expand the stadium, with a planned capacity of 105,000. The club is working diligently to meet the projected completion date. The camp nou renovation progress is closely monitored, with updates provided regularly. The total cost of the Camp Nou renovation project is £1.25 billion2. Approximately 800 seats are being installed daily in the first and second tiers of the stadium3. Overview of the Camp Nou Renovation Project The Camp Nou renovation is a big project. It aims to boost the stadium’s size, better the fan experience, and add green features4. The latest barcelona stadium construction news shows it will grow from 99,354 to 105,000 seats. This makes it one of Europe’s biggest stadiums5. This change is key for FC Barcelona and its fans. It will give them a top-notch place to watch games. The project is also about adding cool features, like a 360-degree screen and 30,000 square meters of solar panels5. It aims to have more seats and keep everyone dry. The cost is about €1.07 billion, and it’s set to finish by summer 2026. Fans can expect full capacity from the 2026/27 season4. Some main features of the new stadium include: Increased seating capacity to 105,0006 Improved fan experience with enhanced amenities and services Incorporation of sustainable features, such as solar panels and energy-efficient systems This renovation is a big step for FC Barcelona and its fans. It’s expected to boost the local economy and community4. Construction Timeline: Phase by Phase The camp nou construction timeline is complex, with each phase aiming for specific goals7. Over 1,200 workers were involved in the summer8. The club hopes to finish the stadium by August 2026. It will then have a capacity of 105,000 and an underground parking lot with up to 4,000 spaces. Important milestones include finishing the upper tier’s metal structure, partitions, and seating9. Fans can follow the latest camp nou construction photos and news. The construction is ongoing 24/7, with about 1,000 workers expected by late January 20249. Here are some key facts about the construction timeline: The main construction works for the Camp Nou expansion are scheduled to begin in full force after the 2022/23 season7. The completion date is set for 2026, with the club expecting to return to Camp Nou in the 2024/25 season, initially with a limited capacity7. Approximately 800 seats are being installed daily at the renovated Camp Nou8. Architectural Design and Features The camp nou expansion project updates show a stunning design. It focuses on new ideas and being green. The plan includes a roof with solar panels to cut down on carbon emissions10. This move towards sustainability is a big step. It helps reduce the stadium’s harm to the environment. The new design has big, comfy seats for everyone. Every fan will be under cover, making the experience better. The solar panels on the roof show the plan’s green commitment10. Also, the renovation uses old concrete and steel. This cuts down on waste and helps the planet10. Some key features of the new design are: Europe’s largest stands with three huge LED screens A full capacity of 105,000 seats Advanced technologies, such as rainwater harvesting and photovoltaic panels, for sustainability11 The camp nou expansion project updates are exciting. The project aims to finish before the 2025/2026 season. It’s hoped the stadium will open with two-thirds of its capacity by 202410. Economic Impact of the Renovation The new camp nou construction update will greatly affect the local economy. A massive €1.5 billion is being spent on the renovation12. This will surely help the local economy grow and create jobs. The camp nou renovation progress is set to bring in a lot of money. It’s expected to make €350 million each year12. This is a big jump from what it makes now. The project will also add more than 6,000 premium seats, bringing in more money for the club13. The renovation won’t just help the club. It will also benefit the local community. New jobs and more money will help local businesses and people. As the camp nou renovation progress keeps going, the local area will see a big economic boost. It’s an exciting time for everyone involved. Creation of new job opportunities Increase in revenue for the club Boost to the local economy Increased premium seats and corporate clients These positive changes will help the local community grow economically13. Fan Reactions to the Renovation The latest news on Camp Nou’s redevelopment is exciting. The construction timeline shows a big change is coming. Fans are looking forward to the end of the project, which will add 5,000 seats, making it 104,00014. The renovation aims to boost FC Barcelona’s income. It’s expected to bring in £25 million more each year14. The club hopes to return to Camp Nou by late 2024, after 18 months away14. The total cost for the upgrade is £1.25 billion14. Some of the key features of the renovated stadium include: Increase in seating capacity Improved

Latest News on the Ongoing Camp Nou Transformation Read More »

Enhance Your Construction Site with Sturdy Construction Hoarding

Construction hoarding is key for construction sites. It acts as a barrier between the site and the public. It must be at least 2 metres high to be effective1. We’re here to guide you on choosing the right barriers and enclosures for your site. For plastering needs, contact Kent Plastering. Hoarding reduces visual and noise disturbances, vital in residential or commercial areas1. It also stops unauthorized access 24/7, meeting HSE’s Construction (Design and Management) Regulations2. We’ll look at the benefits, needs, and suppliers of construction hoarding, including barriers and enclosures. Key Takeaways Construction hoarding is essential for site safety and security It helps reduce visual and noise disturbances in residential or commercial areas Regular inspections of hoarding are essential to maintain compliance with HSE regulations2 Construction hoarding can be made from various materials, including steel and timber1 Compliance with HSE guidelines is crucial to avoid penalties from authorities2 Construction hoarding can be customized to enhance marketing efforts and build anticipation for construction projects2 Steel hoarding is fully reusable and often chosen for long-term projects due to its customization options and ease of installation2 What is Construction Hoarding? Construction hoarding is a strong, temporary barrier made from thick boards. It goes around the edge of a building site. Its main job is to keep the site safe and protect nearby people from dangers3. It also acts as a temporary fencing solution and construction site privacy screen, keeping everything secure. There are different kinds of hoarding, like timber, steel, and plastic. Each has its own good points and downsides. For instance, timber is cheaper, but steel lasts longer and needs less upkeep4. We also use builder hoardings to add extra safety and protection. When choosing hoarding, think about its height, material, and design. Hoardings should be at least 2.4 meters tall, sometimes going up to 3 meters3. The material affects the cost and how much upkeep it needs. It’s important to check hoardings often to make sure they’re still safe5. Need plastering help? Contact Kent Plastering. Our team can give you advice on hoarding and temporary fencing. Benefits of Using Construction Hoarding Construction hoarding brings many benefits, like safety and security, better looks, and less noise and dust6. It keeps the public safe from construction dangers and makes a safe place for workers. Using fence panels and barriers helps keep sites secure and stops unwanted visitors7. It also makes construction sites look better. We can design the hoarding to show off our project and brand8. Plus, it helps keep noise and dust down, making the area nicer for everyone nearby. Some main benefits of construction hoarding are: Improved site security and safety Enhanced visual appeal and branding opportunities Noise and dust control Protection of the public from construction hazards Investing in good construction hoarding means a safer and better project. Contact Kent Plastering for your plastering needs6. Choosing the Right Construction Hoarding Choosing the right construction hoarding involves several factors. These include the project type, location, and budget. We need to decide between temporary and permanent solutions based on the project’s needs. For example, temporary barriers might work for short projects, while permanent ones are better for longer ones9. The cost of construction hoarding varies a lot. Prices depend on the materials and project size. For instance, hiring steel hoarding can start at £2.80 per unit per week (excluding VAT), while buying starts at £60.50 per unit (excluding VAT)9. Sustainable options, like those from Hoard-it, offer a green and affordable choice with reusable parts and a carbon-neutral model10. Important things to think about when picking construction hoarding include: Local laws and health and safety rules How long it lasts and how to keep it up How it looks and if it can be branded Its impact on the environment By looking at these points and the project’s specific needs, we can find the best hoarding. This ensures a safe, efficient, and affordable build. For plastering needs, contact Kent Plastering for expert services. Design Options for Construction Hoarding We know how crucial it is to make construction site privacy screens look good. With the help of11, we can add custom graphics and branding. This can include logos, images, and text that show off the project’s spirit. Choosing the right color and material for builder hoardings is key. According to12, you can pick from timber and steel. Timber is great for smaller projects, while steel is better for bigger ones. Adding community messages to construction hoarding can really connect with locals. We can share project details like its purpose, timeline, and benefits11. This builds trust and goodwill, making the construction process better for everyone. Need help with your construction project? Contact Kent Plastering for plastering services. They can help design a construction hoarding that fits your needs. Material Advantages Disadvantages Timber Eco-friendly, cost-effective May not be as durable as steel Steel Durable, strong May be more expensive than timber Compliance and Regulations At construction sites, following local rules is key. This means using site security barricades, outdoor barriers, and hoarding for safety13. The Health and Safety at Work etc. Act 1974 makes it clear that employers must keep everyone safe13. In the UK, the Construction (Design and Management) Regulations 2015 outline duties for clients, designers, and contractors14. Section 17 of the 2015 Regulations says sites must stop unauthorized entry13. It’s also important to check hoardings often for safety and strength15. Some important things to remember for compliance are: Stopping unauthorized site access Keeping the site clean and safe with clear signs and fencing Identifying hazards and assessing risks before setting up site perimeters Using construction hoarding is vital to keep sites safe and prevent unauthorized entry14. By sticking to these rules, sites can be safe for everyone involved. We suggest contacting Kent Plastering for plastering work. Following these guidelines helps avoid risks and ensures a project’s success15. Construction Hoarding Installation Process Setting up construction site barriers, site safety enclosures, and temporary fencing is key. We know how important it is to do it

Enhance Your Construction Site with Sturdy Construction Hoarding Read More »

BWIC: The Key Construction Term You Need to Know

In the construction world, hundreds to thousands of tenders are up for grabs at any time1. It’s vital to grasp terms like bwic meaning construction. In the UK, knowing the bwic definition construction is key for project success. Understanding what is bwic in construction helps avoid risks to your reputation. For plastering needs, contact Kent Plastering. Key Takeaways Understanding bwic definition construction is essential for construction projects. BWIC tasks are critical for integrating mechanical, electrical, and plumbing (MEP) systems, which are crucial for 90% of modern construction projects2. Clear payment provisions are crucial; ambiguous terms can lead to disputes1. Building relationships with clients and suppliers can enhance chances of winning tenders1. The integration of BWIC tasks into project planning can reduce overall project costs by 15-20%2. Assessing profit margins is essential to ensure projects are financially viable1. What Does BWIC Mean in Construction? In the construction world, BWIC is a key term. It stands for bwic abbreviation construction or bwic acronym construction. In the building industry, bwic meaning in building industry means specific tasks linked to a main project3. These tasks help projects run smoothly by cutting down on delays and mistakes, which can save up to 30% of project time3. BWIC includes important tasks like setting up HVAC, electrical, and plumbing systems2. Making sure structural openings are precise is crucial. Any mistake can cause delays and extra costs2. Managing BWIC well can save 10-15% of costs by tackling extra work early3. Some important parts of BWIC are: Creating openings for HVAC ducts and other systems Building supports for heavy equipment, like chiller units Putting in fire-stopping to keep fire safety high Adding BWIC tasks to project planning can cut costs by 10%2. This is because it helps with accurate budgeting and using resources wisely2. Understanding BWIC’s role in construction helps us see its big impact on project success. The Role of BWIC in Project Management In the construction world, the bwic construction acronym is key. It stands for Builder’s Work in Connection. This term is vital for linking building services in projects, making sure all trades work together smoothly4. A clear bwic definition can cut down on rework by up to 30%, saving a lot of money4. BWIC covers important tasks like ancillary, coordination, and finalization works. These are crucial for finishing a project3. Good bwic management can save up to 20% of costs by spotting and fixing issues early3. It also cuts down project delays by about 30%, making sure everything is done on time3. Understanding the bwic term is crucial for project success. It leads to more efficient projects, less delays, and more savings4. Good communication among team members can boost project success by up to 35%, helping with bwic tasks3. Adding bwic to the planning phase can lower project costs by 20%4. Detailed bwic records can also make tracking projects 50% more efficient, helping manage scope and costs better3. So, the bwic acronym is crucial for project success, making it vital for managers to grasp its importance4. How to Use BWIC in Construction Contracts Understanding BWIC in construction is key for any project’s success. BWIC stands for Best Work In Construction, covering all construction activities and processes. Including BWIC in contracts is vital to ensure everyone knows the required works and can plan well5. This prevents misunderstandings and disputes that might happen during the project. In construction contracts, BWIC must be clearly defined to avoid confusion. This can be achieved by including a detailed description of the work, timelines, and expectations in the Closed Tender or contract documents5. This way, everyone is on the same page, and the project will run smoothly. Managing BWIC well can cut unexpected expenses by 15-20% during construction3. Some important points to remember when including BWIC in construction contracts are: Clearly define the scope of work and expectations Set timelines and milestones Specify the work standards and quality needed Outline communication and reporting needs By following these tips and including BWIC in construction contracts, professionals can ensure their projects are well-planned and completed successfully. This is crucial for understanding BWIC in construction and its meaning3. The Connection Between BWIC and Budgeting Understanding bwic definition construction is key to good budgeting. In construction, managing money is vital, as projects need a lot of investment6. The UK’s use of Building Information Modelling (BIM) shows its value in planning costs6. Knowing what is bwic in construction helps manage costs well. It’s crucial to match client needs with budget limits early on6. Whole life cycle costing (WLCC) is also vital for budgeting, focusing on long-term costs6. These steps help avoid cost overruns and ensure projects succeed. Some important budgeting points in construction are: Cost planning and estimation Client needs and budget constraints Whole life cycle costing (WLCC) Grasping the link between bwic definition construction and budgeting helps manage finances better6. This knowledge is vital for project success and helps construction firms handle budgeting and cost control. Common Misunderstandings About BWIC We often come across wrong ideas about bwic in the construction world. Bwic is about a key part of building projects. It’s vital to know its role in managing construction7. Many think bwic is misunderstood, so it’s key to clear up its meaning and why it matters7. One big mix-up is mixing bwic with other building terms. This can cause confusion and bad communication. It’s important to know exactly what bwic means in building projects8. Some myths say bwic is only for big projects or is hard to understand. But, bwic is for all kinds of projects, big or small. Its ideas are easy to get7. By clearing up these myths, we can improve how we talk and work in building projects. Bwic is crucial for managing projects well and talking clearly It makes sure everyone knows what the project needs It makes the building process open and fair By seeing how important bwic is, we can make building projects better and more successful8. How BWIC Affects Subcontractor Relationships In the building industry, understanding

BWIC: The Key Construction Term You Need to Know Read More »

BISF Construction: A Modern Building Solution

In the UK, about 700,000 homes are not standard, including BISF houses1. BISF construction is a modern way to build homes. It started in the mid-20th century to solve the housing crisis after World War II. Many BISF homes have lasted longer than expected, with some over 60 years old2. We use steel frame houses and materials for affordable, sustainable homes. Non-traditional homes were made to quickly solve the housing shortage after World War II3. BISF construction is a good choice for those wanting affordable, green homes. For plastering needs, contact Kent Plastering. Key Takeaways BISF construction is a modern building solution that has been around since the mid-20th century Approximately 700,000 non-standard construction homes exist in the UK, including BISF houses1 Many BISF homes have exceeded their expected lifespan of 40 years, with some still standing at over 60 years old2 Non-traditional construction methods were mainly made to quickly solve the housing shortage after World War II3 BISF construction uses steel frame houses and materials for affordable, sustainable homes For all your plastering needs, consider getting in touch with Kent Plastering What is BISF Construction? We’re looking into BISF construction, a way to build homes using steel frames and prefabricated panels. It started in the 1940s by the British Iron and Steel Federation to tackle the housing shortage. It’s key for affordable housing and sustainable building, mainly in residential construction. Over 6 years, over 35,000 BISF houses were built in the UK4. Between 1946 and 1966, around 156,000 BISF houses were built5. BISF construction uses steel frames, prefabricated panels, and quick assembly. Houses were built fast, often in weeks5. They were made with steel frames and covered with asbestos cement panels or metal sheets5. Today, about 50,000 BISF houses remain in the UK, mostly in Scotland and England5. Benefits of BISF construction include: Lower construction costs Faster construction time Energy efficiency upgrades are often necessary due to insulation issues5 BISF houses are often cheaper than brick-built houses4. But, getting a mortgage can be tough because of the Housing Defects Act (1985)4. The average price of a BISF house is £150,0005. BISF construction is a smart way to build homes. It’s affordable and sustainable. We’ll look into its benefits, materials, and methods. This will give us a full picture of residential construction using BISF. Advantages of BISF Construction BISF construction is known for its speed, cost savings, and lasting quality. It uses steel frames for quick house building. This method is great for making energy-saving homes. After World War II, about 30,000 BISF houses were built in the UK6. The benefits of BISF construction are many. Some key points include: Speed of construction: BISF houses are built fast, saving time and effort. Cost-effectiveness: It uses prefabricated parts and steel frames, cutting down on waste and labor costs. Durability and longevity: BISF houses are built to last, needing little upkeep and are energy efficient. Many BISF homes are still around today, showing they were meant to last7. Keeping them in good shape is key to their long life. Adding new insulation and framing makes them even better at saving energy and money. In summary, BISF construction is a smart choice for building homes. It’s fast, affordable, and strong. It’s a good way to meet the UK’s housing needs. Materials Used in BISF Construction We use many materials in BISF construction to make buildings sustainable and affordable. The choice of materials affects the quality and durability of the structure. BISF houses were built with prefabricated panels from concrete, asbestos, and steel8. These materials help make the buildings sustainable. Prefabricated components, like panels and frames, are made from concrete, asbestos, and steel. Insulation is key in BISF construction for energy efficiency. Common insulations include glass quilting and fibre wool9. The right insulation depends on climate, budget, and personal choice. Structural steel is vital in BISF construction, forming the house’s framework. The steel columns support standard metal windows. The upper floor’s outer cladding is steel trussed sheeting fixed to the columns8. Steel makes BISF construction quick and efficient, perfect for affordable housing. The materials in BISF construction are durable and sustainable. Prefabricated components and insulation make houses energy-efficient and eco-friendly. As we innovate, we’ll see more sustainable and affordable housing options. BISF Construction Techniques BISF construction has seen big improvements over time. It now uses both old and new methods. Prefabricated panels and steel frames are key, making buildings go up fast. This is great for homes, where quick and efficient building is important. About 26,000 BISF houses are in the UK, mostly in Glasgow and Liverpool10. There’s a big push for making BISF homes more green and energy-saving. Eco-friendly materials and better insulation are used. This makes homes that are good for the planet. Steel frames also help, making buildings strong and easy to look after. Well-kept BISF homes can last a long time without needing much work. Renovations need light materials to avoid damaging the building11. Some main benefits of BISF building are: Less time to build Greener and more energy-efficient Strong and easy to keep up Costs less These points make BISF a good choice for building homes that save energy. As we keep improving BISF, we’ll see even better, greener ways to build homes in the future. Typical Applications of BISF Construction BISF houses were made for homes but are also used for business and temporary needs12. This makes BISF a great choice for many projects, like affordable housing. It’s also good for the planet because it uses green materials13. BISF homes save energy and money14. But, they might cost more to heat because of thin walls and roofs12. To fix this, you can add better insulation and roofing14. Some main uses of BISF construction are: Residential buildings, like semi-detached and terraced houses Commercial spaces, like offices and shops Temporary places, like emergency homes and disaster shelters Using affordable housing and sustainable building ideas, BISF offers many benefits12. It helps save money and energy. As people want more green

BISF Construction: A Modern Building Solution Read More »

SVP Meaning: What It Means in the Construction Industry

Drainage systems in buildings are complex, and the Soil Vent Pipe (SVP) is key. It helps manage pressure and keeps foul smells and gases out. It’s important to have access points for maintenance1. Understanding SVPs is vital for drainage systems to work well and safely. A good SVP prevents pressure buildup, which can cause bad smells. Access points should be in the roof or at flat roof level for easy testing1. Soil pipes come in 110mm and 160mm sizes, with 110mm being common above ground2. SVPs are crucial for drainage systems to operate efficiently and safely. In the UK, waste pipe sizes are 32mm, 40mm, and 50mm. A typical 110mm PVC-U soil system has a vertical stack and is vented through or above the roof2. Key Takeaways SVPs are important for managing pressure and keeping buildings free from foul smells and gases. Access points for maintenance should be at 3 storey intervals or less, above appliance spillover levels1. A well-designed SVP prevents pressure buildup, which can cause bad smells and gases. Soil pipes are usually 110mm or 160mm, with 110mm being common above ground2. For plastering needs, contact Kent Plastering. SVPs are essential for drainage systems to work efficiently and safely, key to svp meaning construction and definition. It’s important to maintain soil and waste systems to avoid blockages, a common plumbing problem2. Understanding SVP in Construction Context In construction, SVP stands for soil vent pipe. It’s key for managing pressure in drainage systems. This prevents pressure buildup, which can cause bad smells and gas emissions3. Simply put, it’s a pipe that lets air and gases move in and out, keeping the system working right. A good SVP stops pressure buildup, avoiding bad smells and gas. Traditionally, SVPs were cast iron, but now plastic is more common4. For example, a well-made SVP stops pressure buildup, keeping the system safe and clean. For more on SVPs, contact Kent Plastering. When designing an SVP system, consider a few things: * The material, like cast iron or plastic * The size and shape of the SVP * Where the SVP is placed in the system * Regular checks to make sure it works well3 Common Uses of SVP in Construction In the construction world, you might hear about SVP. It stands for svp abbreviation construction or svp construction acronym. Let’s look into how SVPs help keep drainage systems running smoothly. SVPs are key in managing pressure in drainage systems. They stop pressure from building up, which can cause bad smells and gases5. This is vital in tall buildings, where plumbing is far from the main drainage line. Proper venting is needed to avoid pressure issues6. Some important things about SVPs in construction are: They need to be installed correctly, with brackets and supports every 1.2 to 1.5 meters5. They must follow local building codes to avoid fines of $500 to $5,0005. Regular checks are needed to stop blockages and leaks, suggested every 6 to 12 months5. Understanding SVPs in construction shows their vital role in keeping buildings safe and healthy. Whether called svp abbreviation construction or svp construction acronym, their importance is clear. Need help with SVP installation or maintenance? Contact Kent Plastering for expert and dependable services. Benefits of Implementing SVP Using SVP in the building industry brings many advantages. It makes projects more efficient and cuts down costs. Knowing the svp meaning in construction terminology helps professionals design and manage projects better. The first web source says SVPs prevent pressure buildup in drainage systems7. This stops foul odors and gases from being released, which is bad for health and the environment. In the svp in building industry world, good drainage is key. A well-planned SVP stops pressure buildup, avoiding bad smells and gases. This means projects run smoother and cheaper. For example, a 110mm PVC-U soil system has a vertical stack and a main drain, vented through the roof2. SVPs also save money by avoiding expensive fixes and upkeep. By knowing the svp meaning in construction terminology and using SVPs, projects get better and cheaper. Contact Kent Plastering for plastering work and they’ll help with SVPs. With their help, your project will be done well and fast, saving money and improving efficiency7. How SVP Affects Project Management SVP construction terminology is key in the building world. It greatly affects how projects are managed. SVP meaning construction is linked to managing drainage systems well. This stops pressure buildup and foul smells and gases. According to8, 88% of top executives say projects must align with strategy to succeed. SVPs are crucial in this alignment. SVPs give project managers the info they need for drainage system decisions. They understand the svp construction terminology interpretation and its project relevance. A good SVP ensures the drainage system works right, avoiding errors and costly fixes8. Clear communication is vital in project management. SVPs help by explaining the drainage system clearly. This makes team and stakeholder communication better, leading to more efficient projects and lower costs8. For plastering needs, contact Kent Plastering. They offer expert advice and services for top-quality project completion. Understanding SVPs in project management helps professionals. They ensure projects have the right drainage systems. This leads to successful outcomes and lower costs8. Key Stakeholders Involved in SVP Understanding the svp construction definition is key when dealing with Soil Vent Pipes (SVPs) in construction. SVPs are crucial for keeping buildings clean and safe by letting sewer gases out. The question of what does svp stand for in construction is important to many in the field. Project managers, architects, and engineers are at the heart of SVP projects9. These professionals work together to make sure SVPs are properly designed and installed. Project managers ensure SVPs are part of the project plan. Architects and engineers focus on the design and installation of the drainage systems. For expert advice on SVP installation and maintenance, contact Kent Plastering. The materials used for SVPs are important. They are usually made of cast iron or plastic, with cast iron used for

SVP Meaning: What It Means in the Construction Industry Read More »

The Ultimate Guide to Castle Construction for Beginners

We’re excited to share our knowledge on castle construction. This complex process needed careful planning, skilled hands, and lots of resources. It has a history of about 1,000 years, from the 5th to the 15th century1. We’ll look at the key steps to build a castle, like picking the right spot and choosing materials. These are vital for castle building2. For more info, check out “Castle Builders: Approaches to Castle Design and Construction in the Middle Ages”. It has a 4.4 out of 5 star rating from 40 reviews3. Let’s start with the basics. Castles used natural moats, like rivers, for defense2. Hundreds to thousands of workers, including masons and carpenters, were needed for the job1. This guide is for history buffs and castle dreamers alike. It’s packed with useful info to kickstart your project. Remember, building a castle is a big deal, taking years or even decades to finish1. Key Takeaways Castle construction involves careful planning, skilled craftsmanship, and significant resources. The history of castle construction spans approximately 1,000 years, from the 5th to the 15th century1. Natural moats, such as rivers, were used to enhance defensive capabilities2. Skilled labor, including hundreds to thousands of workers, is needed for construction1. Kent Plastering can provide expert plastering services for your castle construction needs. Castle construction requires a significant investment of time and resources, often requiring several years to decades to complete1. Understanding the Basics of Castle Construction Exploring castle construction, we find it’s rich in history and culture. Early medieval castles were made of timber and earthworks. Later, stone became more common due to timber’s weakness to fire and decay4. When we talk about fortress building, we must consider old construction methods. Building stone castles took years, even decades, showing a big investment in time and effort4. Lime mortar was key for holding stones together, making the castles strong and lasting4. King Edward I spent about 100,000 pounds on castles in Wales5. Building a castle took 2 to 10 years5. Project Gueledon, a modern castle project, started in 1997 and will take about 25 years5. Castles had moats, battlements, and towers for both use and meaning. When building our own castles, we should remember their history and cultural value. We can mix old and new to make something special and useful, using historical construction techniques and fortress building ideas. Planning and Designing Your Castle Planning and designing a castle is key. We must think about the terrain, climate, and resources like water and stone6. Building a medieval castle needed careful planning, considering the landscape and resource access6. A good castle design includes windows, doors, and a floor plan that suits our needs. Stone masonry is vital, and choosing the right stone and craftsmen is crucial for a strong castle. The Guédelon project shows how planning and design lead to a remarkable castle7. Some important things to consider when planning a castle are: Choosing the right location, considering accessibility, defense, and resources Designing a functional and comfortable floor plan, with features like windows, doors, and storage Selecting the right stone and skilled craftsmen for the masonry work By planning and designing our castle carefully, we can create a unique and functional space. Whether it’s medieval or modern, careful planning and design are key to a successful castle project8. Materials Used in Castle Construction The choice of materials for castle building was key, influenced by what was available, its cost, and the look and strength needed9. The medieval era, from the 5th to the 15th century, brought new materials and ways of building9. Old favorites like stone, wood, and lime mortar are still used, but steel and concrete are now options too. Stone was a top choice for its lasting quality, with types like limestone, sandstone, and granite picked based on what was local9. Building a castle was a big job, needing many workers and using timber and ropes to move heavy stones9. Today, we have materials that are stronger and last longer, and need less upkeep. Building a castle that’s safe and lasts means it must be well-made10. We must weigh the good and bad of old versus new materials. We should also think about building in a way that’s good for the planet. With the right materials and methods, we can build a castle that’s strong, looks great, and is kind to the environment. Learning from old building methods, like lime mortar and timber framing, can help us build better castles10. By using these techniques, we can make a castle that works well and looks good. The choice of materials and methods will depend on what we need, our budget, and what we have available. Construction Techniques and Methods We’re going to look at how castles were built, from old stone masonry to new methods. Building a medieval castle needed skilled workers and special tools. These included stone masons, carpenters, and blacksmiths11. Stone masonry was key, with craftsmen making stones fit together for strength12. Stone was chosen for castles because it’s strong and good for defense. Builders used limestone, sandstone, and granite, picking what was local11. They used lime mortar, clay, and iron to hold the stones together11. Cutting and shaping big stone blocks was a skill that made walls strong11. Some important castle building methods are: Stone masonry: using stone for walls and structures Timber framing: using wood for frames Lime mortar: a mix of lime, water, and sand to hold stones These methods helped build strong castles that could last for ages12. Building a medieval castle needed skill, engineering, and planning for defense12. Today, building fortresses and using stone masonry is still done, but with new ways and materials. Stone masonry in modern buildings adds beauty and strength12. We see how castle building methods have changed, from old stone masonry to new techniques11. Budgeting for Castle Construction Budgeting is key when building a castle. We must think about all costs, like materials, labor, permits, and inspections. Building a castle can be pricey, with 50% of the budget

The Ultimate Guide to Castle Construction for Beginners Read More »

Mastering NVQ Level 6 Construction Site Management

We’re excited to dive into the world of construction site management. The NVQ Level 6 is like a Bachelor’s degree1. It’s for those already in the construction field aiming for site management roles1. This field is fast-paced and demanding, needing technical skills, leadership, and hands-on experience. For those looking to manage construction projects well, the NVQ Level 6 is key. It boosts your career, possibly leading to top management roles1. For plastering needs, consider Kent Plastering. They know how crucial NVQ Level 6 and construction site management certification are. Key Takeaways NVQ Level 6 Construction Management is like a Bachelor’s degree1. The qualification opens doors to further education, like a Master’s degree or Chartered status1. NVQ Level 6 shows you have advanced skills, knowledge, and experience in site management2. Getting an NVQ Level 6 can make projects run better, from planning to completion2. The Level 6 NVQ Diploma is widely recognised, boosting your job prospects in construction3. Assessments include building a portfolio, writing assignments, practical tests, and exams3. Mastering NVQ Level 6 and higher construction qualifications can really advance your career. It makes you a strong candidate for senior roles2. It also ensures you meet industry standards, making you a valuable team member2. This qualification also helps in personal growth. It improves leadership and management skills, like motivating teams and handling conflicts2. Plus, it opens doors to further education, like a Master’s degree or Chartered status1. Understanding NVQ Level 6 Construction Site Management Exploring construction site management, NVQ Level 6 qualifications are key. They offer a great way to boost your career4. These qualifications focus on advanced construction site supervision, helping you improve your skills and knowledge. In the construction world, site manager training is vital for project success. NVQ Level 6 meets the needs of those looking to grow professionally. It provides a variety of construction management courses to pick from4. You need to complete at least 20 units to get the Level 6 Construction NVQ, with 18 must-do units and 2 optional ones5. Getting NVQ Level 6 qualifications brings many benefits. It can lead to better job opportunities and higher pay. For example, a Construction Safety Manager can earn between £34K and £54K a year5. With the right site manager training and construction management courses, you can reach your career goals. Investing in advanced construction site supervision and construction management courses opens doors in the construction industry. NVQ Level 6 qualifications offer endless possibilities and great rewards4. Key Competencies and Skills Required To do well in construction site management, you need both management skills and technical knowledge. Getting construction industry qualifications is key for moving up in your career. The NVQ Level 6 in Construction shows you’re serious about quality and standards6. It can also get you the CSCS Black Manager Card, opening more doors6. For NVQ Level 6 Construction Site Management, you need skills in planning, monitoring, and health and safety. The ProQual Level 6 NVQ Diploma is recognized everywhere, helping site managers in all sectors7. To finish the ProQual Diploma, you must get 20 units, with 8 must-haves for management skills7. These skills are vital for handling big construction projects safely and well. Getting these skills and qualifications can boost your career, improve project management, and increase your pay. Companies with CITB can get up to £1,500 back for each learner who finishes NVQ6. The qualification also gives free Mental Health First Aid for Level 6 learners, helping team wellbeing7. Investing in professional development in construction and getting construction industry qualifications puts you ahead in the game and helps projects succeed. The Benefits of Achieving NVQ Level 6 Getting NVQ Level 6 in Construction Site Management brings many benefits. It can help you move up in your career and earn more8. This qualification is also known worldwide, which is great for jobs in places like Australia, Canada, and New Zealand8. Many people who get this qualification become construction managers, project managers, or contracts managers8. Having a construction site management certification shows you’ve studied hard and are very skilled. It’s like having an undergraduate degree9. This qualification is a strong base for growing in the construction world. It helps you go from being a site supervisor to a project manager or a senior manager8. You’ll be tested with a portfolio, professional talks, and knowledge tests to prove you’re good at your job8. Some of the main benefits of getting NVQ Level 6 are: More money in better jobs8 Better skills in managing projects8 Being seen as very skilled and educated9 More chances to move up in the construction field8 In summary, getting NVQ Level 6 in Construction Site Management is a smart choice for career growth in the construction field8. It shows you’ve done deep study and are very skilled. This can lead to better jobs and more money9. How to Enrol in NVQ Level 6 Courses To start NVQ Level 6 courses, first find a training provider. Look for ones that offer site manager training and construction management courses. MT Training is a good choice, with online NVQs in carpentry, plastering, and brickwork10. Make sure the course meets industry standards. After picking a provider, apply for the course. You’ll need to fill out an induction checklist10. An assessor will guide you and contact you within 3 days10. Think about the course length, which is 3 to 6 months11, and the payment, which is 50% upfront11. The NVQ Level 6 Construction Site Management course has 8 units10. You must pick 4 units from 14 options10. You’ll show your skills through videos, witness statements, and discussions10. For site manager training and construction management courses, contact Kent Plastering. Also, you’ll get a Pearson Edexcel NVQ Level 6 qualification and a CSCS Managers Black Card for free11. Your evidence will show your skills, experience, and knowledge11. Remember, you must be 16 or older and have good English skills11. Assessment and Certification Process The process of getting certified for NVQ Level 6 Construction Site Management might seem tough. But it’s

Mastering NVQ Level 6 Construction Site Management Read More »

Non-Standard Construction Houses: Thinking Outside the Box

More people are choosing non-standard construction houses for their unique designs. About 150,000 steel-framed houses were built in the UK after World War II by the British Iron and Steel Federation (BISF)1. These homes are becoming popular for their custom features, with materials like timber saving money compared to brick or stone1. These houses use thin-shell concrete, a new building method used worldwide. It’s perfect for creating one-of-a-kind homes1. For plastering needs, contact Kent Plastering. Consider non-standard construction houses for your next project for their unique designs. Key Takeaways Non-standard construction houses offer unique and customized living spaces, such as unique home builds. Non-standard construction materials, like timber, can lead to potential savings compared to traditional materials, such as brick or stone walls1. Non-standard construction houses can be built using thin-shell concrete, which is a novel construction technology that has been used globally for years1. Non-standard construction houses, such as non standard construction houses, are becoming increasingly popular as homeowners look for unconventional housing design. Get in touch with Kent Plastering for your plastering needs, and consider non standard construction houses for your next project. Non-standard construction houses can offer a range of benefits, including unique architectural styles and customization options, which can be classified as non standard construction houses1. Understanding Non-Standard Construction Non-standard construction houses use alternative building methods and innovative construction techniques. This makes them different from traditional houses. About 1.5 million non-standard homes exist in the UK2. They are custom-built to fit the needs of homeowners, offering a unique living space. Types of non-standard homes include prefabricated houses, thatched properties, and listed buildings3. These homes can be hard to get mortgages for because of their unique materials and building methods4. Yet, they might be cheaper than standard homes for some buyers2. It’s important to know the pros and cons of non-standard construction homes. Some advantages are: Unique and tailored living spaces Potentially more affordable options Environmentally friendly building methods For plastering needs, contact Kent Plastering. For more on non-standard homes, talk to experts4. Key Materials Used in Non-Standard Construction Non-standard construction is all about being innovative and eco-friendly. It focuses on making homes that are good for the planet. Timber frame construction is a big hit because it’s sustainable and eco-friendly5. It cuts down on waste and reduces the environmental harm of building, making it a great choice for eco-conscious homeowners. Materials like recycled metal, low-carbon concrete, and reclaimed wood are key in non-standard construction. They’re not just good for the planet but also add a special look to homes. Plus, materials like insulated panels and SIPs help make homes more energy-efficient6. These materials help lower the building’s carbon footprint and make homes cozy. Choosing the right materials for non-standard construction is important. You need to think about how long they last, how easy they are to look after, and their cost. For example, timber-framed houses need regular treatment to stop rot and pest damage, while steel-framed homes can rust over time5. Knowing what each material is like helps homeowners make smart choices and build homes that are both sustainable and fit their values. For plastering needs, contact Kent Plastering. By using eco-friendly architecture and sustainable housing in non-standard construction, we can build homes that are unique and kind to the environment. As we explore new materials and methods, we’ll see more eco-friendly non-standard homes. These homes will focus on the health of people and the planet. Design Innovations in Non-Standard Construction In the world of non-standard construction, unique home builds and unconventional housing design are more than just trends. They are essential. Designers and architects are creating sustainable, eco-friendly buildings. Many manufacturers have earned Buildoffsite Property Assurance Scheme (BOPAS) accreditation. This means their factory-built homes last at least 60 years, longer than traditional homes. Thin-shell concrete is a big innovation in non-standard construction. It can be shaped in many ways, making it perfect for unique home builds and unconventional housing design. This lets homeowners design their dream home. For plastering needs, contact Kent Plastering. A new-build project usually takes 18 months, saving about 14 months with modern construction methods. Non-standard construction offers many benefits: It saves time It’s more sustainable It ensures better quality The Self-build and Custom Housebuilding Act 2015 requires authorities to keep a self-build register. This can boost the number of unique home builds and unconventional housing design. Thanks to technology and new materials, the future of non-standard construction looks bright. We’ll see more unique home builds and unconventional housing design. Cost Considerations for Non-Standard Construction Building custom homes comes with its own set of costs. We must weigh the initial cost against long-term savings. Modular construction, for instance, can save money over time7. It’s also better for the environment, reducing waste and pollution. Non-standard construction can cut down on expenses. Modular homes use less material and labor, saving money. They also use less energy, which means lower bills and more savings8. But, there are risks like higher insurance and fewer mortgage options. When looking at non-standard construction costs, consider these points: Initial investment: Non-standard homes might cost more upfront. Long-term savings: They can save money over time with energy efficiency and lower maintenance. Insurance costs: These homes might cost more to insure due to their unique nature7. For plastering needs, contact Kent Plastering. We can guide you through non-standard construction and suggest the best methods for your project. Regulatory and Zoning Challenges Non-standard construction faces big hurdles like regulatory and zoning challenges. We must deal with complex building codes and compliance rules. These can be slow and hard to predict9. Zoning rules also limit the use of new building methods, making it key to find ways around these issues. Using sustainable housing solutions, like timber frame construction, can help. It cuts down waste and environmental harm10. This method is also cheaper, needing less expensive materials and labor. The UK government aims to use more new building methods in public projects, boosting demand for green homes10. To beat zoning rules, we must

Non-Standard Construction Houses: Thinking Outside the Box Read More »

The Ultimate Guide to Castle Construction for Beginners

We’re excited to share our knowledge on castle construction. This complex process needed careful planning, skilled hands, and lots of resources. It has a history of about 1,000 years, from the 5th to the 15th century1. We’ll look at the key steps to build a castle, like picking the right spot and choosing materials. These are vital for castle building2. For more info, check out “Castle Builders: Approaches to Castle Design and Construction in the Middle Ages”. It has a 4.4 out of 5 star rating from 40 reviews3. Let’s start with the basics. Castles used natural moats, like rivers, for defense2. Hundreds to thousands of workers, including masons and carpenters, were needed for the job1. This guide is for history buffs and castle dreamers alike. It’s packed with useful info to kickstart your project. Remember, building a castle is a big deal, taking years or even decades to finish1. Key Takeaways Castle construction involves careful planning, skilled craftsmanship, and significant resources. The history of castle construction spans approximately 1,000 years, from the 5th to the 15th century1. Natural moats, such as rivers, were used to enhance defensive capabilities2. Skilled labor, including hundreds to thousands of workers, is needed for construction1. Kent Plastering can provide expert plastering services for your castle construction needs. Castle construction requires a significant investment of time and resources, often requiring several years to decades to complete1. Understanding the Basics of Castle Construction Exploring castle construction, we find it’s rich in history and culture. Early medieval castles were made of timber and earthworks. Later, stone became more common due to timber’s weakness to fire and decay4. When we talk about fortress building, we must consider old construction methods. Building stone castles took years, even decades, showing a big investment in time and effort4. Lime mortar was key for holding stones together, making the castles strong and lasting4. King Edward I spent about 100,000 pounds on castles in Wales5. Building a castle took 2 to 10 years5. Project Gueledon, a modern castle project, started in 1997 and will take about 25 years5. Castles had moats, battlements, and towers for both use and meaning. When building our own castles, we should remember their history and cultural value. We can mix old and new to make something special and useful, using historical construction techniques and fortress building ideas. Planning and Designing Your Castle Planning and designing a castle is key. We must think about the terrain, climate, and resources like water and stone6. Building a medieval castle needed careful planning, considering the landscape and resource access6. A good castle design includes windows, doors, and a floor plan that suits our needs. Stone masonry is vital, and choosing the right stone and craftsmen is crucial for a strong castle. The Guédelon project shows how planning and design lead to a remarkable castle7. Some important things to consider when planning a castle are: Choosing the right location, considering accessibility, defense, and resources Designing a functional and comfortable floor plan, with features like windows, doors, and storage Selecting the right stone and skilled craftsmen for the masonry work By planning and designing our castle carefully, we can create a unique and functional space. Whether it’s medieval or modern, careful planning and design are key to a successful castle project8. Materials Used in Castle Construction The choice of materials for castle building was key, influenced by what was available, its cost, and the look and strength needed9. The medieval era, from the 5th to the 15th century, brought new materials and ways of building9. Old favorites like stone, wood, and lime mortar are still used, but steel and concrete are now options too. Stone was a top choice for its lasting quality, with types like limestone, sandstone, and granite picked based on what was local9. Building a castle was a big job, needing many workers and using timber and ropes to move heavy stones9. Today, we have materials that are stronger and last longer, and need less upkeep. Building a castle that’s safe and lasts means it must be well-made10. We must weigh the good and bad of old versus new materials. We should also think about building in a way that’s good for the planet. With the right materials and methods, we can build a castle that’s strong, looks great, and is kind to the environment. Learning from old building methods, like lime mortar and timber framing, can help us build better castles10. By using these techniques, we can make a castle that works well and looks good. The choice of materials and methods will depend on what we need, our budget, and what we have available. Construction Techniques and Methods We’re going to look at how castles were built, from old stone masonry to new methods. Building a medieval castle needed skilled workers and special tools. These included stone masons, carpenters, and blacksmiths11. Stone masonry was key, with craftsmen making stones fit together for strength12. Stone was chosen for castles because it’s strong and good for defense. Builders used limestone, sandstone, and granite, picking what was local11. They used lime mortar, clay, and iron to hold the stones together11. Cutting and shaping big stone blocks was a skill that made walls strong11. Some important castle building methods are: Stone masonry: using stone for walls and structures Timber framing: using wood for frames Lime mortar: a mix of lime, water, and sand to hold stones These methods helped build strong castles that could last for ages12. Building a medieval castle needed skill, engineering, and planning for defense12. Today, building fortresses and using stone masonry is still done, but with new ways and materials. Stone masonry in modern buildings adds beauty and strength12. We see how castle building methods have changed, from old stone masonry to new techniques11. Budgeting for Castle Construction Budgeting is key when building a castle. We must think about all costs, like materials, labor, permits, and inspections. Building a castle can be pricey, with 50% of the budget

The Ultimate Guide to Castle Construction for Beginners Read More »