
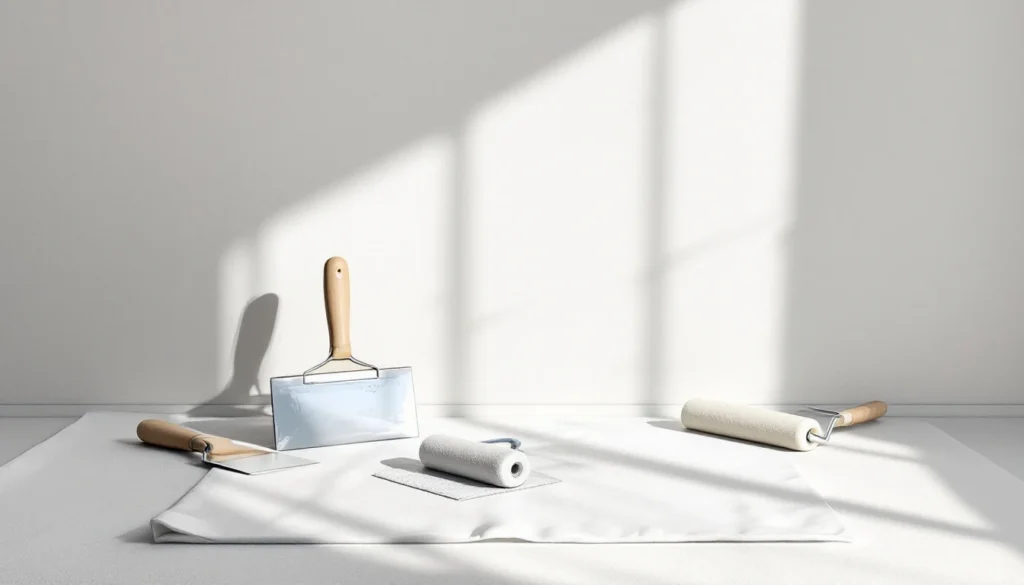
Why You Shouldn’t Paint Bare Plasterboard Directly
Plasterboard (also called drywall or gyproc in the UK) has two distinct surfaces: the ivory-coloured paper face and the grey backing paper. The face is designed to accept finishing treatments, but it’s incredibly absorbent.
When you apply emulsion or other paints directly to unsealed plasterboard, several problems occur:
- Uneven absorption: The paper face soaks up paint at different rates, especially where joints have been filled with compound
- Flashing and patchiness: Areas show through differently even after multiple coats, creating a mottled appearance
- Paint waste: You’ll use 30-40% more paint than necessary as the board acts like a sponge
- Poor adhesion: Without proper priming, subsequent coats may not bond properly to the surface
- Visible joints: Filled seams become more obvious rather than less as paint highlights texture differences
Professional decorators and plasterers always seal plasterboard before applying finish coats. This creates a consistent surface that accepts paint evenly and looks professional.
The Two Main Methods for Sealing Plasterboard Before Painting
There are two widely accepted approaches in the UK trade for preparing plasterboard for decoration:
Method 1: Plasterboard Primer/Sealer (Recommended)
Purpose-made plasterboard primers like Dulux Trade Plasterboard Sealer or Zinsser Gardz are formulated specifically for this application. These products penetrate and seal the porous paper surface without over-saturating it.
Advantages:
- Designed specifically for plasterboard’s absorption rate
- Creates an ideal surface for topcoats
- Dries quickly (typically 2-4 hours)
- Reduces total paint consumption by 25-35%
- Helps prevent “picture framing” around joints
- Some products offer mould resistance (important in bathrooms and kitchens)
Application: Apply one coat using a roller with medium pile (9-12mm). Work methodically in sections, maintaining a wet edge. Don’t oversaturate—one even coat is sufficient.
Method 2: Mist Coat (Traditional Approach)
A mist coat is diluted emulsion paint (usually the same colour as your topcoat) mixed with water. The standard ratio is 5 parts water to 1 part paint, though some professionals use 4:1 for slightly better coverage.
Advantages:
- More economical—uses your actual topcoat paint
- Time-tested method used by generations of decorators
- Gives a slight tint that helps you see coverage
- Works well when you’re painting the whole room anyway
Important considerations: Modern vinyl emulsions don’t dilute as well as older formulations. Check manufacturer instructions—some paints explicitly state not to thin beyond certain ratios. Contract matt emulsions generally dilute better than vinyl silks or satins.
Step-by-Step Guide to Painting Plasterboard
Here’s the complete process professional decorators follow when painting plasterboard in 2026:
Step 1: Preparation (Critical for Professional Results)
Check the plasterboard installation:
- Ensure all screws are countersunk below the surface (not protruding)
- Check joints are properly taped and filled
- Look for any damage, dents or torn paper that needs repair
- Verify the board has been installed correctly per British Gypsum guidelines
Fill and finish joints: Even if the plasterboard was installed by professionals, joints need attention. Use a quality jointing compound like Gyproc Easi-Fill or British Gypsum Multi-Finish for small repairs.
| Joint Type | Treatment Required | Drying Time |
|---|---|---|
| Tapered edge joints | Scrim tape + 2-3 coats jointing compound, feathered 200mm+ either side | 24 hours between coats |
| Butt joints (cut edges) | Scrim tape + 3 coats, feathered 300mm+ either side | 24 hours between coats |
| Internal corners | Paper corner tape + 2 coats jointing compound | 24 hours between coats |
| Screw heads | 2 coats jointing compound in cross pattern | 2-4 hours between coats |
Sand the surface: Once all filler is completely dry (usually 24-48 hours depending on conditions), sand with 120-150 grit sandpaper. Use a pole sander for large areas and hand-sand corners. Wear a dust mask—plasterboard dust is fine and unpleasant.
Clean thoroughly: Vacuum or brush down all surfaces to remove dust. Wipe with a slightly damp cloth if necessary. Dust contamination will prevent proper primer adhesion.
Step 2: Apply Primer or Mist Coat
This is the crucial stage that most DIYers skip—and it’s where professionals make the difference.
For plasterboard primer:
- Stir the primer thoroughly (don’t shake—this creates bubbles)
- Pour into a roller tray
- Use a medium-pile roller (9-12mm) for smooth boards
- Cut in edges and corners with a 2-inch brush first
- Roll in a W-pattern to ensure even coverage
- Work in 1-2 metre sections, maintaining a wet edge
- Don’t go back over areas once they start to dry
For mist coat method:
- Mix 5:1 water to paint ratio (500ml water to 100ml paint as a starting point)
- Stir gently but thoroughly
- Apply with the same roller technique as primer
- Expect some streaking—this is normal and will disappear when dry
- The surface should look evenly damp, not soaking wet
Drying times: Plasterboard primers typically dry in 2-4 hours at 20°C with good ventilation. Mist coats using emulsion take 4-6 hours. Don’t rush this stage—applying topcoat over damp primer leads to poor adhesion and potential peeling.
Step 3: Apply First Topcoat
Once your primer or mist coat is completely dry, you can apply your chosen paint. For new plasterboard, most professionals recommend two topcoats minimum.
- Contract matt emulsion: Best for ceilings and low-wear walls, offers excellent coverage
- Vinyl matt: More durable than contract matt, wipeable surface, good for general living areas
- Vinyl silk/satin: Moisture-resistant finish for kitchens and bathrooms, shows imperfections more readily
Apply the first coat using standard decorating technique: cut in edges first, then roll main areas in overlapping W-patterns. Don’t overwork the paint or go back over sections that have started to dry.
Step 4: Apply Second Topcoat
Allow the first topcoat to dry completely (typically 4-6 hours for emulsion, though check manufacturer specifications). The second coat provides depth of colour and ensures complete, even coverage.
Professional decorators often apply the second coat in a different direction to the first—if you rolled vertically for coat one, go horizontally for coat two. This helps eliminate any thin spots or missed areas.
Common Mistakes When Painting Plasterboard
After twenty years in the trade, here are the errors I see most frequently when homeowners tackle plasterboard painting themselves:
1. Painting Directly Without Sealing
This is by far the most common mistake. The plasterboard absorbs paint unevenly, leading to patchy results and excessive paint consumption. Always seal first.
2. Over-Thinning the Mist Coat
Some DIYers think “thinner is better” and create 10:1 or even more dilute mixtures. This doesn’t seal properly and you end up needing multiple mist coats, negating any benefit. Stick to 5:1 or 4:1 maximum.
3. Not Waiting for Complete Drying
Plasterboard joints filled with compound need 24-48 hours to dry completely before painting. Rushing this causes the paint to reactivate the compound moisture, leading to cracking and poor adhesion. If you’re working on a property renovation project, factor in proper drying times.
4. Inadequate Sanding
Visible ridges around joints telegraph through paint, no matter how many coats you apply. Take the time to sand properly with appropriate grit paper (120-150 grit for finishing).
5. Wrong Paint Type for Location
Using standard matt emulsion in high-moisture areas like bathrooms leads to problems. Use moisture-resistant formulations or add a fungicidal wash to your primer in vulnerable areas.
6. Ignoring Damaged Paper
Torn or damaged plasterboard paper must be sealed with a specialist primer like Zinsser Gardz or similar. Otherwise, the exposed gypsum core absorbs moisture from paint and can cause bubbling or delamination.
Special Considerations for Different Plasterboard Types
Not all plasterboard is created equal. Different board types may require slightly different approaches:
Standard Plasterboard (Ivory Face)
This is the most common type, used for general walls and ceilings. Follow the standard priming process outlined above. Available in 12.5mm thickness for most applications.
Moisture-Resistant Plasterboard (Green Face)
Used in bathrooms and kitchens, this board has water-resistant additives. The green paper face is slightly less absorbent than standard board but still requires priming. Use moisture-resistant primers and topcoats for best results.
Fire-Resistant Plasterboard (Pink Face)
Contains glass fibre and vermiculite for enhanced fire resistance. Prime as standard, though these boards are typically plastered rather than painted directly in most applications.
Acoustic/Sound-Resistant Plasterboard
Dense boards designed to reduce sound transmission. These benefit particularly from purpose-made primers as their denser core can have different absorption characteristics. Read more about noise insulation plasterboard.
Thermal Plasterboard (Insulated Backing)
Boards with foam insulation bonded to the back. Paint the plasterboard face as standard, but ensure joints are properly filled as thermal movement can be greater. See our guide on thermal plasterboard applications.
Cost Comparison: Painting vs Skimming Plasterboard
Many homeowners wonder whether to paint plasterboard directly or have it skimmed with finishing plaster first. Here’s a realistic cost comparison for 2026:
| Approach | Materials Cost (per m²) | Labour Cost (per m²) | Total Cost (per m²) | Finish Quality |
|---|---|---|---|---|
| Paint directly (DIY) | £1.50-£3.00 | £0 (DIY) | £1.50-£3.00 | Good if well-prepared |
| Paint directly (professional) | £2.00-£4.00 | £8-£15 | £10-£19 | Excellent with proper prep |
| Skim coat + paint (professional) | £4.00-£6.00 | £15-£25 | £19-£31 | Superior, plastered finish |
When to choose painting directly:
- Budget constraints make plastering unaffordable
- Plasterboard joints are exceptionally well finished
- You’re comfortable with a slightly textured finish
- The room is utilitarian (garage conversion, storage room, etc.)
- You’re planning future renovation and don’t want to invest heavily now
When to choose skim coating:
- You want the smoothest possible finish
- The property is a high-end renovation or new build
- Plasterboard installation has visible imperfections
- You prefer traditional plastered walls aesthetically
- Budget allows for the additional cost (typically £15-25/m² for labour)
Tools and Materials You’ll Need
Proper equipment makes the job significantly easier and produces better results:
Essential Materials
- Plasterboard primer (Dulux Trade Plasterboard Sealer, Zinsser Gardz, or similar) – £15-£25 per 5L
- Topcoat paint (vinyl matt/silk emulsion) – £20-£60 per 5L depending on quality
- Jointing compound (Gyproc Easi-Fill or similar) – £8-£12 per 10kg bag
- Scrim tape for joints – £3-£6 per roll
- Sandpaper (120-150 grit) – £5-£10 for mixed pack
Essential Tools
- Roller frame and sleeves (9-12mm medium pile) – £8-£20
- Roller tray – £3-£8
- 2-inch cutting-in brush – £5-£15 (quality matters here)
- Filling knife (100mm and 200mm) – £8-£20 for both
- Pole sander – £15-£30
- Dust sheets – £10-£25 depending on size and quality
- Step ladder – £40-£80
- Dust mask/respirator – £8-£25
Total equipment cost for a DIY project: £150-£300 depending on what you already own. These tools will last for multiple projects if properly maintained.
Professional vs DIY: When to Call in the Experts
Painting plasterboard is achievable for most competent DIYers, but certain situations warrant professional help:
Consider DIY if:
- You have time to properly prepare and aren’t rushing
- The plasterboard installation is high quality with minimal imperfections
- You’re comfortable working at height (for ceilings)
- The room is small to medium-sized (under 20m²)
- You’re happy with a good rather than perfect finish
Call a professional if:
- Plasterboard joints are poorly finished or need extensive repair
- You’re dealing with high ceilings (3m+) requiring scaffolding
- The project involves multiple rooms on a tight deadline
- You want a flawless finish for a high-value property
- You’re uncertain about which products to use for specific conditions
- The walls have damage or require replastering in sections
Professional decorators in Kent typically charge £150-£250 per day, and an experienced tradesperson can prepare and apply primer to 40-60m² of plasterboard per day. Topcoats go faster, around 60-80m² per day per coat.
Maintaining Painted Plasterboard
Once properly painted, plasterboard surfaces are relatively low-maintenance:
Regular cleaning: Vinyl emulsions can be wiped with a damp cloth. Avoid harsh chemicals or abrasive cleaners that can damage the paint film. Contract matt finishes are less wipeable and may need touching up rather than cleaning.
Touch-ups: Keep leftover paint for repairs. When touching up, feather the edges into existing paint rather than creating hard lines. Small touch-ups often dry slightly different shades than aged paint, so you may need to repaint an entire wall section for invisible repairs.
Repainting: Properly primed and painted plasterboard should last 5-10 years before requiring repainting, depending on the room’s use and environmental conditions. Bathrooms and kitchens may need refreshing sooner due to moisture and cooking residues.
Preventing damage: In high-traffic areas, consider applying a third coat or using more durable paint formulations. Vinyl silk/satin finishes are more resistant to marks and easier to clean than matt finishes.
FAQ: Common Questions About Painting Plasterboard
Can you paint plasterboard without plastering?
Yes, absolutely. You can paint plasterboard without plastering it, but you must properly prepare the surface first. This means filling and sanding all joints and screw holes, then applying a plasterboard primer or mist coat before your topcoat paint. Many modern UK homes have painted plasterboard rather than plastered walls, particularly in new builds where speed and cost are factors. The key is proper preparation—poorly finished joints will show through paint no matter how many coats you apply.
What’s the best primer for plasterboard?
Purpose-made plasterboard primers like Dulux Trade Plasterboard Sealer, Zinsser Gardz, or Wickes own-brand plasterboard primer are ideal. These products are formulated specifically for plasterboard’s absorption rate and create the optimal surface for topcoats. If budget is tight, a properly mixed mist coat (5:1 water to contract matt emulsion) works well—this has been the traditional approach for decades. Avoid standard all-purpose primers as they may over-saturate the paper or not seal adequately.
How long after plasterboarding can you paint?
If the plasterboard is freshly installed, you can paint it as soon as all jointing compounds are completely dry. This typically means 24-48 hours after the final coat of filler, depending on temperature, humidity, and ventilation. Don’t rush this—damp filler under paint will cause problems. The plasterboard itself doesn’t need to “cure” like wet plaster does. However, ensure the room is adequately ventilated and at a stable temperature (ideally 15-20°C) for best results.
Do you need to PVA plasterboard before painting?
No, you should never use PVA on plasterboard before painting. This is a common misconception. PVA is used to prepare walls for plastering, not painting. PVA creates a slightly rubbery surface that can cause paint adhesion problems and may yellow over time. Always use proper plasterboard primer or a mist coat instead. If someone suggests PVA before painting plasterboard, they’re confusing two different processes.
Can you use silk paint on plasterboard?
Yes, you can use silk (satin sheen) emulsion on plasterboard, but be aware that silk finishes highlight imperfections more than matt finishes. Ensure your plasterboard joints are exceptionally well finished and sanded, as any ridges or dips will show in the light reflection. Silk paints are excellent for bathrooms and kitchens due to their moisture resistance and wipeable surface. Always prime first with plasterboard sealer, then apply two coats of your chosen silk emulsion for best coverage.
Why is my paint patchy on plasterboard?
Patchy paint on plasterboard almost always indicates inadequate sealing before topcoating. The unsealed plasterboard paper absorbs paint at different rates, especially where jointing compound has been applied versus bare paper. Other causes include: applying paint too thinly, not allowing primer to dry fully before topcoating, using low-quality paint that lacks opacity, or the room being too cold/humid during application. The solution is to ensure proper priming and apply adequate topcoats—usually two coats minimum after primer.