
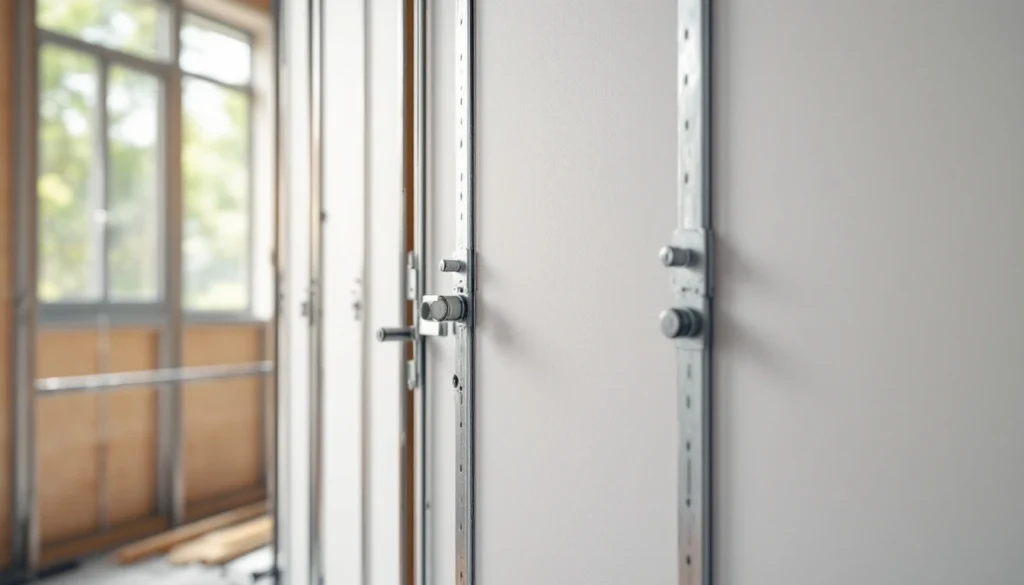
Understanding 12.5mm Plasterboard: The UK Standard
Walk into any builders’ merchant in the UK—whether it’s Wickes, Screwfix, or Travis Perkins—and you’ll find 12.5mm plasterboard stacked high. It’s not just popular by chance; it’s the industry standard thickness for good reason.
This thickness strikes the perfect balance between structural integrity, weight, cost-effectiveness, and ease of installation. Whether you’re boarding out a bedroom, creating stud walls, or lining ceilings, 12.5mm plasterboard handles the job without being unnecessarily heavy or expensive.
In this comprehensive guide, we’ll cover everything a homeowner or tradesperson needs to know about 12.5mm plasterboard—from technical specifications and weight considerations to installation techniques and when you might need a different thickness altogether.
Technical Specifications of 12.5mm Plasterboard
Understanding the specifications helps you make informed decisions and ensures compliance with UK Building Regulations.
Standard Dimensions and Weight
The most common sheet size for 12.5mm plasterboard in the UK is 2400mm x 1200mm (8ft x 4ft), though other sizes are available for specific applications:
| Sheet Size | Weight (Standard) | Weight (Moisture-Resistant) | Typical Use |
|---|---|---|---|
| 2400mm x 1200mm | 22-23kg | 24-25kg | Standard walls and ceilings |
| 1800mm x 1200mm | 17-18kg | 18-19kg | Awkward spaces, loft conversions |
| 3000mm x 1200mm | 28-29kg | 30-31kg | Taller walls, reduced joints |
| 2700mm x 1200mm | 25-26kg | 27-28kg | Standard UK ceiling heights |
The weight varies slightly depending on the manufacturer and type. British Gypsum, the UK’s leading manufacturer, produces boards with consistent density across their range, but moisture-resistant and fire-rated variants are always slightly heavier due to additives in the gypsum core.
Core Composition
Standard 12.5mm plasterboard consists of a gypsum core (calcium sulphate dihydrate) sandwiched between two layers of heavy-duty paper liner. The ivory-coloured face is designed for plastering or direct decoration, while the grey backing provides structural stability.
- Core density: Approximately 680-720 kg/m³ for standard boards
- Paper liner weight: 180-220 g/m² on the face, 150-180 g/m² on the back
- Moisture content: Less than 1% when manufactured, can absorb up to 10% before installation
- Fire classification: Class A1 or A2-s1, d0 per BS EN 13501-1
Edge Types
The long edges of 12.5mm plasterboard come in different profiles, each suited to specific finishing methods:
- Tapered edge (TE): Most common for jointing and skim coating, creates a slight depression for joint tape and compound
- Square edge (SE): Flush edges for direct decoration or when skim coating the entire surface
- Bevelled edge (BE): Chamfered edges, less common, used in some commercial applications
- Round edge (RE): Rounded profile, rarely used in modern construction
Types of 12.5mm Plasterboard Available in the UK
Not all 12.5mm plasterboard is created equal. Different variants offer enhanced performance for specific applications.
Standard Plasterboard (White/Ivory)
This is your basic, general-purpose board suitable for the majority of residential drylining projects. It’s the most economical option and perfectly adequate for bedrooms, living rooms, and dry areas.
Typical cost: £6-£8 per standard 2400mm x 1200mm sheet (2026 prices)
Moisture-Resistant Plasterboard (Green Board)
Identified by its distinctive green paper face, this board contains water-repellent additives in both the core and paper lining. It’s essential for bathrooms, kitchens, and utility rooms where humidity levels are elevated.
Typical cost: £10-£13 per sheet
Key standard: Meets BS 5492 requirements for moisture resistance
Fire-Resistant Plasterboard (Pink/Red Board)
Contains glass fibre and vermiculite in the core to improve fire resistance. Pink board typically offers 30 minutes fire protection, while red (fireline) offers 60-120 minutes depending on system design.
Typical cost: £12-£18 per sheet
Applications: Required by Building Regulations Part B for means of escape routes, attached garages, and between semi-detached properties
Acoustic Plasterboard (Blue Board)
These boards have enhanced density and sometimes incorporate sound-damping layers. They’re specifically designed to reduce sound transmission between rooms.
Typical cost: £15-£25 per sheet
Sound reduction: Can achieve 40-45 dB reduction in party wall systems (versus 35-38 dB for standard board)
Impact-Resistant Plasterboard
Reinforced with fibreglass or high-density core materials, these boards resist damage from impacts—ideal for schools, hospitals, or high-traffic commercial areas. Rarely needed in domestic settings.
Typical cost: £20-£30 per sheet
When to Use 12.5mm Plasterboard vs Other Thicknesses
Choosing the right thickness is crucial for structural performance, cost-effectiveness, and building regulation compliance. For a complete overview of available options, see our guide to plasterboard sizes and dimensions.
| Thickness | Best Applications | Key Advantages | Limitations |
|---|---|---|---|
| 9.5mm | Ceilings with joists at 400mm centres, curved walls, repair work | Lighter weight, easier to bend, cheaper | Less robust, requires closer joist spacing |
| 12.5mm | Standard walls, ceilings with 600mm centres, most residential work | Industry standard, widely available, good balance of strength and weight | May need doubling up for enhanced fire/sound performance |
| 15mm | Commercial buildings, enhanced fire protection, areas requiring extra impact resistance | Superior rigidity, better sound insulation, improved fire ratings | Heavier (30kg+ per sheet), more expensive, harder to cut |
| Double layer 12.5mm | Party walls, cinema rooms, recording studios | Excellent sound and fire performance, staggered joints prevent cracking | Labour-intensive, expensive, reduces room size by 12.5mm each side |
For most UK domestic projects—whether you’re building an extension or renovating an existing room—12.5mm is the sweet spot. It satisfies Building Regulations, works with standard 600mm stud centres, and provides sufficient rigidity for a quality skim finish.
Installation Guide for 12.5mm Plasterboard
Proper installation is critical for achieving a professional finish. Rushed or incorrect boarding creates problems that no amount of plastering can fix. For comprehensive drylining techniques, refer to our guide on plasterboard installation and fitting.
Tools and Materials Required
Before starting any boarding job, ensure you have the right kit:
- Plasterboard saw or electric jigsaw (for cutting openings)
- Stanley knife with snap-off blades (for scoring and snapping straight cuts)
- Plasterboard screw gun (clutch-driven, depth-adjustable to prevent over-driving)
- Drywall screws: 32mm for single-layer walls, 38-42mm for ceilings
- Straight edge or T-square (2400mm ideally, for marking cuts)
- Rasp or Surform (for tidying edges)
- Footlifter or deadman prop (essential for ceiling work)
- Measuring tape and pencil
- Dust mask and eye protection (gypsum dust is an irritant)
Stud/Joist Spacing Requirements
The structural framing must be properly spaced to support 12.5mm plasterboard:
- Walls: Studs at 400mm or 600mm centres (600mm is standard for 12.5mm board)
- Ceilings: Joists at 400mm centres minimum (600mm maximum with additional noggings)
- Horizontal orientation: Preferred for walls over 2400mm high to reduce butt joints
- Vertical orientation: Common for lower walls and when sheets align with ceiling height
Cutting and Fitting Technique
Experienced plasterers can board out a room remarkably quickly using the score-and-snap method:
- Measure twice, mark once: Measure the required length/width and mark on the board face
- Score the face: Use a sharp Stanley knife with a straight edge, making 2-3 passes to cut through the paper and lightly into the gypsum core
- Snap cleanly: Position the board with the scored line along a straight edge (bench, trestle, or floor edge) and snap the board back firmly
- Cut the backing paper: Fold the board fully and run your knife along the crease to separate
- Tidy edges: Use a rasp or Surform to smooth rough edges and ensure tight butt joints
For openings (doorways, windows, electrical boxes), mark the opening position on the board face and cut with a plasterboard saw or jigsaw. Always cut slightly oversized (2-3mm) for sockets—you can trim or fill small gaps, but you can’t add material back.
Fixing: Screws vs Nails
Modern best practice strongly favours screws over nails for several reasons:
| Fixing Method | Advantages | Disadvantages | Best Use |
|---|---|---|---|
| Drywall Screws | No nail pops, adjustable depth, removable, better grip, faster with screw gun | Requires power tool, slightly more expensive | All professional work, walls and ceilings |
| Galvanised Nails | Cheap, no power required, traditional method | Nail pops common, difficult to remove, slower, can crack board | Rarely used now except for repairs or small areas |
Screw spacing guidelines:
- Screw every 150mm around the perimeter of each sheet
- Screw every 200-250mm on intermediate studs/joists
- Keep screws at least 10mm from cut edges, 13mm from factory edges
- Drive screws just below the surface (creating a slight dimple) but not so deep they break the paper face
- Use black phosphate-coated drywall screws (they grip better than zinc-plated)
Positioning and Joint Planning
Strategic positioning reduces waste and creates stronger walls:
- Stagger joints: Never align butt joints vertically—offset them by at least 600mm
- Avoid short pieces: Plan cuts so no piece is shorter than 300mm (small sections lack rigidity and are difficult to fix properly)
- Factory edges together: Where possible, join factory tapered edges together rather than cut edges
- Windows and doors: Position joints away from opening corners—stress concentrates here and causes cracking
- Electrical boxes: Mark and cut before fixing where possible, or cut in situ carefully
Jointing and Finishing 12.5mm Plasterboard
Once the boards are fixed, the joints and screw heads need finishing before you can skim coat or decorate.
Joint Compound Application
For a professional finish on tapered edge boards:
- Fill the taper: Apply joint compound (such as Knauf Jointing Compound or British Gypsum Gyproc Easi-Fill) with a 150mm jointing knife, pressing firmly into the tapered recess
- Embed the tape: While the compound is wet, centre paper jointing tape over the joint and press in with your knife, removing excess compound
- First coat: Apply a thin coat over the tape, feathering edges to about 200mm wide; allow to dry completely (2-4 hours)
- Second coat: Apply a wider coat (250-300mm), feathering edges; allow to dry
- Third coat (optional): For a perfect finish, apply a final skim coat, feather to 300-350mm wide
- Fill screw dimples: Two coats minimum, allowing drying time between
Skim Coating vs Dry Lining
After jointing, you have two finish options:
Skim coating (most common in UK): Apply a 2-3mm layer of finishing plaster (typically Multi-Finish or Board Finish) over the entire surface. This creates the smooth, monolithic finish that British homes are known for. See our detailed guide on skim coat application techniques.
Dry lining (American/European method): Joint and fill only, then paint directly onto the paper face. Requires perfect jointing to avoid visible seams. Rarely used in UK domestic work but common in commercial settings.
Cost Analysis: 12.5mm Plasterboard in 2026
Understanding the full cost picture helps with accurate project budgeting. Prices include VAT unless stated.
Material Costs
| Material | Unit Price (2026) | Coverage | Notes |
|---|---|---|---|
| Standard 12.5mm (2400x1200mm) | £6.50-£8.00 | 2.88m² | Bulk discounts available on 50+ sheets |
| Moisture-resistant 12.5mm | £10.00-£13.00 | 2.88m² | Essential for wet areas |
| Fire-resistant 12.5mm (Pink) | £12.00-£15.00 | 2.88m² | 30-minute fire rating |
| Acoustic 12.5mm | £15.00-£25.00 | 2.88m² | Higher-density for sound reduction |
| Drywall screws (1000 box) | £8.00-£12.00 | ~30-40m² coverage | 32mm for walls, 38-42mm for ceilings |
| Joint tape (per 150m roll) | £4.00-£6.00 | 150m of joints | Paper tape preferred for strength |
| Jointing compound (per 12.5kg) | £8.00-£12.00 | ~30-40m² joints | Allow 2-3 coats per joint |
Labour Costs
Professional installation costs vary regionally but expect to pay:
- Boarding only: £15-£25 per m² (London and Southeast typically £20-£25)
- Boarding + taping: £20-£30 per m²
- Boarding + taping + skim: £35-£50 per m² (full drylining service)
- Day rate for experienced boarder: £200-£300 (can typically fix 30-40m² per day on straightforward walls)
For a comprehensive breakdown of plastering costs including drylining, see our guide on how much to plaster a room in 2026.
Common Mistakes to Avoid
Even experienced tradespeople occasionally make these errors—here’s how to avoid them:
1. Over-Tightening Screws
Driving screws too deep breaks the paper face and destroys the holding power. The screw head should sit just below the surface (creating a dimple you can fill) but not penetrate through the back paper. Use a screw gun with an adjustable clutch set to the correct depth.
2. Inadequate Fixing Density
Skimping on screws to save time creates loose, rattling boards that crack when skimmed. Always follow the recommended spacing: 150mm around perimeters, 200-250mm on intermediate supports.
3. Ignoring Moisture Control
Using standard white board in bathrooms, kitchens, or utility rooms is false economy. The board will eventually fail when moisture penetrates the core. Always use green moisture-resistant board in wet areas.
4. Poor Joint Planning
Aligning multiple butt joints vertically creates a weak line that’s prone to cracking. Stagger joints by at least 600mm—ideally 1200mm—and never position joints directly above doorways or windows.
5. Wrong Board Orientation
On walls over 2400mm high, sheets should run horizontally (landscape orientation) to reduce the number of butt joints, which are weaker and harder to finish than tapered edge joints. Vertical orientation is fine for standard 2400mm walls where sheets reach floor to ceiling.
6. Insufficient Stud Support
Every board edge must land on a stud centreline with at least 25mm contact width. Boards overhanging into thin air will crack. Where necessary, add extra studs or noggings to support board edges.
Storage and Handling Best Practices
Plasterboard is relatively fragile before installation. Proper storage prevents waste and maintains quality.
Delivery and Storage
- Store flat: Never lean boards at an angle—they’ll warp and crack. Stack horizontally on level timber battens
- Keep dry: Store under cover, off the ground. Wet plasterboard is ruined—the paper delaminates and the core crumbles
- Stack height limit: Maximum 10-12 sheets per stack to prevent crushing of lower boards
- Support along length: Use at least three support battens running across the stack width (one at each end, one in the middle)
- Acclimatisation: If possible, store boards in the room where they’ll be fitted for 24-48 hours before installation to allow temperature and moisture equalisation
Manual Handling
A 2400 x 1200 x 12.5mm sheet weighs 22-25kg—within the HSE recommended lifting limits for a single person, but awkward due to size.
- Two-person carry: Best practice for full sheets, one person each end
- On edge carry: For single-person movement over short distances, carry on edge (like carrying a large picture frame)
- Board lifter/carrying aid: Simple metal hooks that slip under the sheet make handling much easier and reduce back strain
- PPE: Wear gloves—board edges are sharp and paper cuts from plasterboard are particularly painful
Building Regulations Compliance
Using 12.5mm plasterboard correctly helps satisfy various Building Regulations requirements.
Part B (Fire Safety)
Standard 12.5mm plasterboard provides 30 minutes fire resistance when correctly installed on timber studs at 600mm centres. For enhanced protection:
- Use pink/red fire-resistant board for garage conversions, attached garages, and escape routes
- Double-layer 12.5mm provides 60 minutes protection in party wall applications
- Seal all penetrations (cables, pipes) with intumescent products to maintain fire integrity
Part E (Sound Insulation)
For new-build or conversion work, sound insulation standards must be met. Standard 12.5mm on single studs with mineral wool provides approximately 40-42 dB reduction. Enhanced performance requires:
- Acoustic plasterboard (high-density variants)
- Resilient bars or sound-isolation clips
- Double stud walls with staggered frames
- Proper sealing of all gaps and service penetrations
Part L (Energy Efficiency)
Plasterboard itself has minimal insulation value (thermal resistance ≈ 0.06 m²K/W for 12.5mm). When drylining external walls, insulated plasterboard or separate insulation is required to meet current U-value requirements (typically 0.18-0.30 W/m²K depending on application).
Frequently Asked Questions
Can I use 12.5mm plasterboard on ceilings with 600mm joist centres?
Yes, 12.5mm plasterboard is suitable for ceilings with joists at 600mm centres, but this is the maximum spacing. If joists are spaced wider, you must either install additional noggins to reduce spacing to 600mm, or use thicker 15mm board. For particularly heavy skim coats or textured finishes (like Artex), 400mm centres with 12.5mm board or 600mm centres with 15mm board provides better long-term performance with reduced sagging risk.
How many screws do I need per sheet of 12.5mm plasterboard?
For a standard 2400mm x 1200mm sheet on walls with studs at 600mm centres, you’ll typically need 40-50 screws. Calculate roughly: perimeter screws at 150mm spacing (approximately 24 screws), plus screws along two intermediate studs at 200-250mm spacing (approximately 20-24 screws). For ceilings, increase density slightly due to gravity loading. A 1000-screw box covers approximately 25-30 sheets on walls, 20-25 sheets on ceilings.
What’s the difference between 12.5mm and 15mm plasterboard?
The primary differences are thickness (obviously), weight, and performance characteristics. A 12.5mm sheet weighs approximately 22-23kg and costs £6-£8, while 15mm weighs around 30-32kg and costs £9-£12. The thicker board offers superior impact resistance, better sound insulation (approximately 2-3 dB improvement), and enhanced fire resistance. However, 15mm is harder to cut, more difficult to handle, and rarely necessary for standard domestic walls. Use 12.5mm for typical residential work, 15mm for commercial applications or where enhanced performance is specifically required.
Can I skim directly onto 12.5mm plasterboard without taping joints?
Technically yes, but this isn’t recommended for tapered-edge boards. The depression where boards meet will telegraph through even a thick skim coat, creating visible lines once painted. Square-edge boards are designed for direct skim coating without taping, but you must skim the entire surface to 2-3mm thickness to achieve a level plane. Many plasterers prefer to tape and fill tapered edges even when skim coating the whole surface—it provides a flatter substrate and reduces the risk of cracking at joints. The small additional cost and time investment (1-2 hours extra on a typical room) is worthwhile for quality assurance.
How long should I wait before skimming over new plasterboard?
If you’ve taped and filled joints, wait until the jointing compound is completely dry—typically 24 hours minimum, though rapid-setting compounds may be ready in 90-120 minutes. For untaped square-edge board, you can skim immediately after fixing. The plasterboard itself doesn’t need to “dry out” since it arrives dry. However, if boards have been stored in a damp environment and absorbed moisture, allow 48-72 hours in a warm, dry room before skimming. Run dehumidifiers if the building is particularly damp. Moisture in the substrate can cause the skim coat to dry unevenly, leading to suction issues and cracking.
Do I need special plasterboard for ceilings or will wall board work?
There’s no specific “ceiling board” versus “wall board” in standard 12.5mm plasterboard—it’s the same product. However, some manufacturers produce slightly higher-density variants marketed for ceiling use, which resist sagging marginally better. The real determinant is joist spacing: 12.5mm board works fine on ceilings with joists at 400-600mm centres. If joists are spaced wider, you need either additional cross-noggings to reduce effective span, or thicker 15mm board. For very large open-plan rooms or where you want belt-and-braces assurance against sagging, some tradespeople use 15mm board or even double-layer 12.5mm on ceilings, though this is rarely necessary in typical residential construction.
12.5mm plasterboard remains the workhorse of UK drylining for good reason—it delivers reliable performance across the majority of residential applications while remaining economical and manageable. Whether you’re a DIY enthusiast tackling a bedroom or a professional plasterer boarding out an entire house, understanding the specifications, proper installation techniques, and appropriate applications ensures quality results that will last decades.