
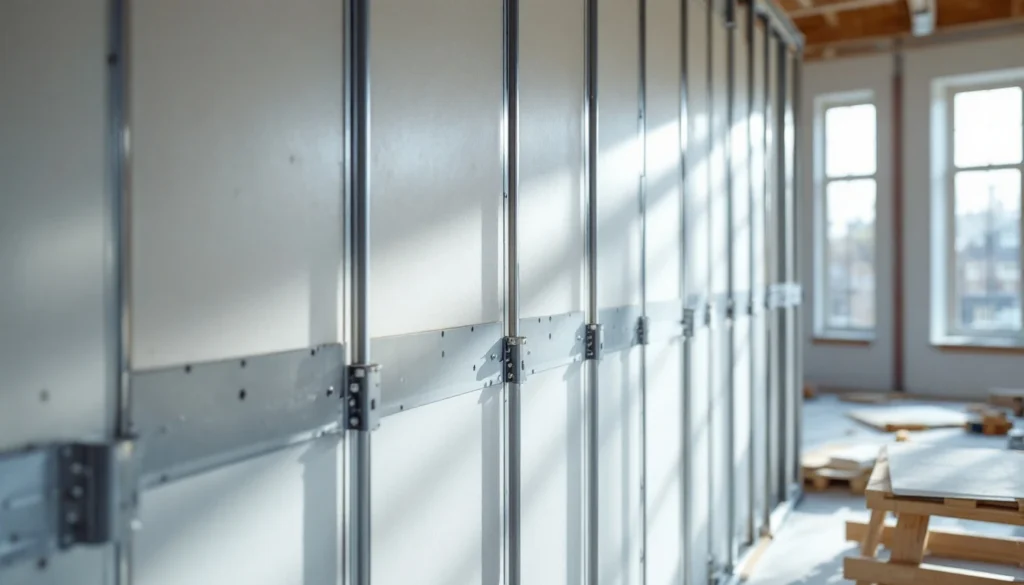
What Is Drywall Installation? Understanding Plasterboard Fitting
In the UK construction industry, we use the term plasterboard fitting or drylining rather than “drywall installation,” though they mean exactly the same thing. This method involves attaching large plasterboard sheets (typically 2400mm x 1200mm) to timber or metal framework to create internal walls and ceilings.
Unlike traditional wet plastering which requires multiple coats and extensive drying time, drylining offers a faster, cleaner alternative that’s become the standard in modern UK construction. According to British Gypsum, over 90% of new-build homes now use plasterboard for internal walls.
The process involves three main stages: framework preparation, board fixing, and joint finishing. When done properly, you get perfectly flat walls ready for decoration in days rather than weeks.
Why Choose Plasterboard Over Traditional Plastering?
Modern builders and homeowners favour drylining for several compelling reasons beyond just speed. Understanding these advantages helps you appreciate why this method dominates contemporary construction.
- Speed of installation: A skilled team can board and finish a typical three-bedroom house in 5-7 days, compared to 3-4 weeks for traditional plastering
- Thermal performance: Plasterboard backed with insulation (like Kingspan or Celotex) achieves U-values of 0.18-0.22 W/m²K, meeting Building Regulations Part L requirements
- Sound insulation: Acoustic plasterboard reduces sound transmission by 40-45dB when installed correctly with resilient bars
- Fire resistance: Fire-rated boards provide 30-120 minutes protection, essential for separating walls between properties
- Moisture resistance: Purpose-designed boards for wet areas prevent the mould and degradation issues common with traditional lime plaster
- Cost efficiency: Materials and labour combined typically cost 30-40% less than full wet plastering
For homeowners planning renovations, drylining also allows easier installation of internal wall insulation and simplifies future modifications like adding electrical outlets or data cabling.
Types of Plasterboard: Choosing the Right Sheet for Your Project
Walking into Jewson or Travis Perkins, you’ll face a bewildering array of plasterboard options. Each type serves specific purposes, and using the wrong one can lead to problems down the line.
| Board Type | Colour | Applications | Price (2400x1200x12.5mm) |
|---|---|---|---|
| Standard (Wallboard) | Ivory/Grey | General walls and ceilings in dry areas | £6-£8 |
| Moisture Resistant | Green | Bathrooms, kitchens, utility rooms | £9-£12 |
| Fire Resistant (Fireline) | Pink | Escape routes, garages, party walls | £11-£14 |
| Impact Resistant | Yellow | Schools, corridors, commercial | £15-£19 |
| Acoustic (SoundBloc) | Blue | Party walls, home cinemas, bedrooms | £13-£17 |
| Thermal Laminate | Silver backing | External walls, solid wall insulation | £25-£45 |
For most domestic projects, 12.5mm thickness suffices for walls, while ceilings benefit from 15mm boards to resist sagging between joists. Commercial projects often specify 15mm throughout for enhanced durability.
Our detailed guide on plasterboard sizes and specifications covers thickness options, sheet dimensions, and weight considerations that affect handling and support requirements.
Essential Tools and Materials for Plasterboard Installation
Professional results require proper tools. While you can manage with basics, investing in quality equipment saves time and frustration, especially on larger projects.
Core Tools Required
- Plasterboard saw: Hardpoint or specialist padsaw for cutting apertures (£8-£15 from Screwfix)
- Stanley knife with snap-off blades: For scoring and cutting straight edges (£6-£12)
- T-square or straight edge: 1200mm minimum for accurate cutting (£15-£35)
- Screw gun or drill/driver: 18V cordless with depth-stop attachment (£80-£200)
- Plasterboard screws: 25mm for walls, 38mm for ceilings, black phosphate finish (£7-£10 per 1000)
- Rasp or surform: For tidying cut edges (£8-£15)
- Plasterboard lift/lifter: Essential for ceilings or single-person installation (£25-£120)
- Taping knife set: 150mm, 200mm, and 250mm widths for joint finishing (£30-£60)
- Hawk: For holding compound during application (£12-£25)
- Mixing paddle: SDS attachment for preparing joint compound (£8-£18)
Materials Checklist
- Plasterboard sheets: Calculate square metreage plus 10-15% wastage
- Metal or timber framework: 70mm x 50mm C-stud for metal, 75mm x 50mm CLS for timber
- Joint tape: Paper tape for flat joints, corner tape for angles (£3-£8 per roll)
- Joint compound: Pre-mixed all-purpose or setting-type (Easifill, Gyproc Easi-Fill) at £8-£15 per 10kg
- Corner beads: Metal or plastic for external corners (£2-£4 each)
- Fixings: Frame fixings, wall plugs, and appropriate screws
- Insulation: If required for thermal or acoustic performance
For comprehensive tool recommendations, see our plastering tools guide which covers professional-grade equipment.
Step-by-Step Plasterboard Installation Process
Professional plasterboard installation follows a systematic sequence. Rushing or skipping steps leads to visible joints, screw pops, and cracked corners that require expensive remediation.
1. Framework Preparation and Installation
Before any boards go up, you need a straight, secure framework. This determines how flat and plumb your finished walls will be.
For timber stud walls: Use 75mm x 50mm kiln-dried CLS timber, fixing vertical studs at 400mm or 600mm centres depending on board thickness. Horizontal noggins every 1200mm prevent twisting and provide additional fixing points.
For metal framework: 70mm x 50mm C-stud and track create a more stable, dimensionally consistent frame. Metal doesn’t shrink or warp like timber, making it preferable for larger installations.
- Check framework is plumb using a 1800mm spirit level
- Ensure studs align perfectly at joins to avoid proud edges
- Install additional studs around doorways and windows
- Run cables and pipes before boarding, drilling holes at stud centres
- Add insulation between studs if specified for thermal or acoustic performance
2. Measuring and Cutting Plasterboard
Accurate cutting minimises wastage and speeds up installation. Professional plasterers can cut and fit a sheet in under 5 minutes once they’ve mastered the technique.
The score-and-snap method:
- Measure the required length and mark both edges
- Position T-square or straight edge between marks
- Score through the paper face with firm pressure using a sharp Stanley knife
- Snap the board back along the score line
- Cut through the backing paper from behind
- Smooth rough edges with a rasp or surform
For apertures (sockets, switches, light fittings), measure carefully from fixed reference points and cut using a plasterboard saw. Mark the position on the board face, drill corner pilot holes, then saw between them.
3. Fixing Plasterboard to Framework
Proper fixing prevents sagging ceilings, screw pops, and loose boards. This stage separates amateur DIY jobs from professional installations.
Screw spacing and placement:
- Fix screws at 300mm centres along all studs for walls
- Reduce to 150mm centres for ceilings to prevent sagging
- Start fixing from the centre of the board, working outward
- Keep screws at least 13mm from cut edges, 10mm from bound edges
- Drive screws just below the surface (dimpled, not broken through)
- Use 25mm screws for 12.5mm board into timber, 38mm for ceilings
Board orientation and positioning:
- Position boards horizontally on walls where possible to reduce visible joints
- Stagger board joints in a brick pattern, avoiding cross-joints
- Leave 10-15mm gap at floor level (covered by skirting later)
- Butt boards tightly together without forcing or overlapping
- Support ceiling boards with a plasterboard lifter or deadman while fixing
For ceiling installation, two people make the job significantly easier. If working alone, hire a panel lifter (£30-£50 per day from HSS or Brandon Hire) rather than risking injury or poor installation.
4. Taping and Jointing
This final stage creates seamless walls. Poor jointing shows through paint as shadows or cracks, ruining otherwise good work.
First coat (taping coat):
- Mix joint compound to a thick cream consistency
- Apply 100mm-wide band of compound along all joints using 150mm knife
- Embed paper joint tape into wet compound, smoothing out bubbles
- Apply thin coat over tape, feathering edges to about 200mm width
- Fill all screw dimples with compound
- Allow 24 hours drying time
Second coat (finishing coat):
- Lightly sand any high spots or ridges from first coat
- Apply wider band (250-300mm) of compound using 200mm or 250mm knife
- Feather edges smoothly to blend into surrounding board
- Apply second coat to screw dimples
- Allow 24 hours drying
Final coat (optional): For premium finishes, apply a third coat feathered to 400mm width. This creates virtually invisible joints indistinguishable from the board surface.
Many professionals now skim the entire surface with 2-3mm of multi-finish plaster rather than multiple coats of jointing compound. This creates a more uniform texture and superior finish for painting or wallpapering.
Internal Walls vs Ceilings: Key Installation Differences
While the fundamental principles remain constant, walls and ceilings require different approaches due to gravitational forces and structural considerations.
| Aspect | Walls | Ceilings |
|---|---|---|
| Board Thickness | 12.5mm standard | 15mm to prevent sagging |
| Screw Spacing | 300mm centres | 150mm centres |
| Joist/Stud Centres | 400-600mm acceptable | 400mm maximum, 300mm preferred |
| Installation Direction | Horizontal preferred (fewer joints) | Perpendicular to joists |
| Screw Length | 25-32mm | 38-42mm |
| Helpers Required | Optional for most work | Strongly recommended |
Ceiling installation demands greater precision because gravity accentuates any imperfections. Sagging between joists creates visible waves, especially under directional lighting. Always use 15mm board on ceilings with joists over 400mm centres.
Common Plasterboard Installation Mistakes and How to Avoid Them
Even experienced tradespeople occasionally make errors. Recognising these pitfalls helps you avoid costly remediation work.
Screw Pops and Proud Fixings
These appear weeks or months after installation as small bumps or circles showing through paint. They occur when:
- Screws are overdriven, breaking the paper face and losing grip
- Screws are underdriven, leaving the head proud of the surface
- Screws miss studs entirely, pulling out under board tension
- Wrong screw length allows fixings to pull through in ceiling installations
Prevention: Use a screw gun with depth adjustment collar set to dimple the surface without breaking through. Check every fixing by running your hand across—you should feel a shallow depression, not a raised area.
Visible Joints and Ridges
The most common complaint about plasterboard work stems from poorly finished joints that show as shadows under certain lighting conditions.
- Insufficient feathering creates hard edges that cast shadows
- Too much compound in one coat causes cracking as it dries
- Inadequate sanding between coats leaves ridges
- Working in cold conditions slows drying and affects compound adhesion
Prevention: Apply thin coats, feather edges progressively wider with each coat, and sand lightly between applications. Work in temperatures above 10°C and ensure adequate ventilation.
Cracked Corners
External corners crack when subjected to impact or building movement without proper reinforcement.
Prevention: Always install metal or plastic corner beads on external angles, embedding them in compound and applying at least two finishing coats. For particularly vulnerable areas (near doorways, in children’s rooms), consider impact-resistant corner beads. Our guide to corner beads and their installation covers selection and fitting techniques.
Board Sagging
Ceiling boards can sag over time if inadequately supported, creating visible waves and potential collapse risk.
- Joist spacing exceeds 400mm for 12.5mm board
- Insufficient screw fixings at 150mm centres
- Moisture exposure causing board weakness
- Heavy insulation installed above boards without additional support
Prevention: Use 15mm board for all ceilings, maintain 150mm screw spacing, and add cross-battens if joist spacing exceeds 400mm. For wet room ceilings, specify moisture-resistant board and ensure adequate ventilation.
Cost Breakdown: Professional Installation vs DIY
Understanding the true costs helps you decide whether to hire professionals or tackle the work yourself. While DIY saves labour costs, it requires significant time investment and tool purchase.
Professional Installation Costs (2026)
| Room Type | Board & Skim | Board Only | Typical Timeline |
|---|---|---|---|
| Small bedroom (3m x 3m) | £400-£600 | £250-£400 | 1-2 days |
| Medium bedroom (4m x 4m) | £600-£900 | £400-£600 | 2 days |
| Living room (5m x 5m) | £800-£1,200 | £550-£800 | 2-3 days |
| Whole house (3-bed semi) | £3,500-£5,500 | £2,200-£3,500 | 5-8 days |
Prices vary by region (London adds 20-30%), board specification (moisture-resistant costs more), ceiling height, and whether you’re boarding over existing plaster or new framework. Get at least three quotes and check the full breakdown of drylining costs before committing.
DIY Material Costs
For a typical medium bedroom (4m x 4m with 2.4m ceiling height), expect to spend:
- Plasterboard: 10 sheets @ £7 each = £70
- Screws: 500 count box = £8
- Joint tape: 2 rolls = £10
- Joint compound: 20kg = £25
- Corner beads: 6 lengths @ £3 = £18
- Sundries: (blades, sandpaper, etc.) = £15
Total materials: £145-£175
Tool hire (if needed) adds £50-£100 for a week, while purchasing basic tools costs £150-£300 for a starter kit. Your labour represents the hidden cost—experienced DIYers need 3-5 days for a room, novices often double that.
Building Regulations and Compliance Considerations
Plasterboard installation intersects with several regulatory areas. While non-structural drylining often falls under permitted development, certain scenarios require Building Control notification or approval.
When You Need Building Control Involvement
- Fire separation: Any wall between properties or separating garages from habitable rooms requires fire-rated board and inspection
- Structural changes: Removing walls, creating openings, or altering load-bearing elements needs structural engineer input
- Sound insulation: Party walls in conversions must meet Approved Document E standards (minimum 45dB reduction)
- Thermal performance: External wall insulation systems must achieve specified U-values per Part L
- Wet room installations: Tanking and waterproofing require certification for warranty purposes
Most internal partition walls using standard plasterboard don’t need formal approval, but checking with your local authority prevents costly remediation later. Our article on planning permission vs permitted development clarifies when you need formal consent.
Specialist Applications: Beyond Standard Wall and Ceiling Installation
Modern plasterboard systems handle far more than basic room lining. Understanding specialist applications expands your renovation possibilities.
Curved Walls and Architectural Features
Standard 12.5mm plasterboard can flex to gentle curves (minimum 1000mm radius) when wetted slightly. For tighter curves, use 6mm flexible plasterboard layered in two coats. This technique creates reception desk curves, bar fronts, and designer feature walls.
Professional plasterers wet the board face lightly with a spray bottle, allow 5 minutes absorption, then fix to curved formwork starting from one end. The board dries rigid in its curved position within 24-48 hours.
Acoustic Panels and Sound Studios
Double-skin plasterboard systems with resilient bars reduce sound transmission significantly. This involves:
- Installing standard framework with mineral wool insulation between studs
- Fixing resilient bars horizontally to studs (breaks vibration transmission)
- Applying two layers of 15mm acoustic plasterboard to resilient bars
- Sealing all penetrations and edges with acoustic sealant
This system achieves 55-60dB sound reduction, suitable for home cinemas, recording studios, or noisy neighbour mitigation.
Waterproof Systems for Wet Rooms
Modern wet room installations use specialised cement-based boards or waterproof plasterboard rather than standard moisture-resistant sheets. These integrate with tanking membranes to create fully waterproof environments.
The system requires specialist knowledge of drainage gradients, membrane application, and joint sealing. Most local authorities require certification from the manufacturer for Building Control sign-off.
Finishing Options: What Comes After the Boards Are Up?
Once plasterboard is installed and jointed, several finishing routes create your desired wall surface. The choice affects both appearance and cost.
Taped and Filled (Drylining Finish)
This traditional approach involves taping joints and filling screw holes with joint compound, creating a textured surface suitable for painting. Most new-build homes use this method.
Advantages: Lower cost, faster drying, DIY-friendly
Disadvantages: Slight texture difference between joints and board surface, visible under raking light
Full Board Skim
Applying 2-3mm of multi-finish plaster across the entire surface creates a uniformly smooth finish. This UK preference produces superior results for painting or wallpapering.
Advantages: Uniform texture, conceals imperfect jointing, professional appearance
Disadvantages: Higher cost (£8-£12 per m² extra), longer drying time (3-5 days)
Direct Decoration
Some premium plasterboards feature smooth, decorative faces allowing direct painting or wallpapering without any finishing compound. These cost 40-60% more than standard board but eliminate finishing labour entirely.
For comprehensive guidance on surface preparation after plastering, see our article on preparing walls for wallpapering.
Frequently Asked Questions
How long does plasterboard installation take for an average room?
A professional plasterer can board and finish a typical 4m x 4m bedroom in 1.5-2 days. This breaks down to 4-6 hours for boarding and fixing, then two separate days for joint compound application with 24-hour drying between coats. If you’re adding a full skim coat, expect 2-3 days total. DIY installations typically take 2-3 times longer, especially for first-time attempts.
Larger projects benefit from team working—two plasterers can board an entire three-bedroom house in 2-3 days, with finishing adding another 3-4 days depending on whether you’re taping only or applying a skim coat across all surfaces.
Can I plasterboard directly over existing plaster walls?
Yes, provided the existing plaster is sound and securely attached to the substrate. This technique, called dot-and-dab, uses plasterboard adhesive (like Gyproc Dri-Wall Adhesive) applied in regular dabs to bond new board over old surfaces.
However, this only works when existing plaster is stable. Test by tapping—hollow sounds indicate blown plaster that must be removed first. Dot-and-dab reduces room dimensions by 50-65mm total (board thickness plus adhesive), which matters in small spaces. The alternative involves battening out the wall with timber framework, allowing insulation installation but losing 75-100mm of floor area.
What’s the difference between drywall screws and normal screws?
Drywall screws (or plasterboard screws in UK terminology) feature several critical design differences from general-purpose wood screws:
- Bugle head: Countersinks automatically without splitting the plasterboard paper face
- Sharp point: Self-tapping design eliminates pilot hole requirements
- Coarse thread: Provides superior grip in timber or metal framework
- Black phosphate coating: Prevents rust and provides better compound adhesion than zinc-plated screws
Standard wood screws have tapered heads that break through the paper surface, destroying the board’s structural integrity. Always use proper plasterboard screws—they cost the same but prevent failure. Our detailed guide to plasterboard screw selection and usage covers length selection and specialist applications.
Do I need moisture-resistant plasterboard for bathrooms?
Yes, absolutely. Standard plasterboard absorbs moisture, leading to mould growth, paper face degradation, and eventual structural failure in high-humidity environments. Moisture-resistant (MR) board features water-repellent additives in the core and treated paper faces.
Use moisture-resistant plasterboard in:
- Bathrooms (especially around baths and showers, though waterproof board is better for shower enclosures)
- Kitchen splash-back areas
- Utility rooms
- Any space where humidity regularly exceeds 70%
The green-coloured MR board costs only £3-£4 more per sheet than standard—a worthwhile investment preventing water damage repairs costing hundreds of pounds later. Building Regulations require MR or waterproof board in wet areas as part of compliance with ventilation and condensation standards.
How do I fix heavy items like TVs to plasterboard walls?
Plasterboard itself can’t support significant weight—a standard 12.5mm sheet holds only 5-8kg maximum with standard fixings. Heavy items require one of three approaches:
1. Fix into studs: Locate timber or metal framework behind the board using a stud detector, then screw directly into these structural members. This supports 20-40kg depending on stud size and fixing quality.
2. Use specialist plasterboard fixings: Spring toggles, metal cavity anchors, or Rawlplug Heavy Duty fixings distribute load across larger board areas, supporting 10-15kg each. Use multiple fixings for heavier items.
3. Install backing boards: Plan ahead and add 18mm plywood behind the plasterboard where you’ll mount TVs, kitchen cabinets, or shelving. This provides solid fixing throughout the area.
For wall-mounted TVs over 32 inches, always fix to studs or install backing boards during the boarding stage. Cavity fixings alone create gradual sagging or catastrophic failure over time.
Can I install plasterboard in an unheated garage or outbuilding?
Yes, but with important considerations. Standard plasterboard tolerates temperature variations but suffers from condensation and moisture in unheated spaces. For garages and outbuildings, specify:
- Moisture-resistant board: Handles condensation better than standard types
- Vapour control layer: Install polythene sheet behind the board to prevent moisture migration
- Adequate ventilation: Trickle vents or air bricks prevent damp accumulation
- Insulation: Consider insulated plasterboard to reduce cold surface temperatures that promote condensation
Where vehicles park inside, use impact-resistant board on lower walls to withstand knocks and scrapes. For garages attached to houses, fire-rated plasterboard on the party wall provides required 30-60 minute protection per Building Regulations.
What causes screw pops and how can I prevent them?
Screw pops appear as small circles or bumps on finished walls, caused by screws pushing through the surface over time. The main causes include:
- Timber shrinkage: Framework drying out contracts away from screws, leaving them proud
- Incorrect driving: Overdriven screws break through the paper face, underdriven screws sit proud
- Wrong screw length: Insufficient penetration into framework allows pull-through
- Structural movement: Building settlement or thermal expansion stresses fixings
Prevention strategies:
- Use kiln-dried timber framework rather than green (wet) lumber
- Set screw gun depth collar correctly for shallow dimpling without paper breakthrough
- Use 25mm minimum penetration into framework for walls, 38mm for ceilings
- Fix boards to studs at 300mm centres for walls, 150mm for ceilings
- Consider adhesive bonding (dot-and-dab or continuous ribbons) alongside screws for premium installations
If screw pops appear after decoration, repair by slightly loosening the screw, filling the dimple with compound, then redecorating the area once dry.