
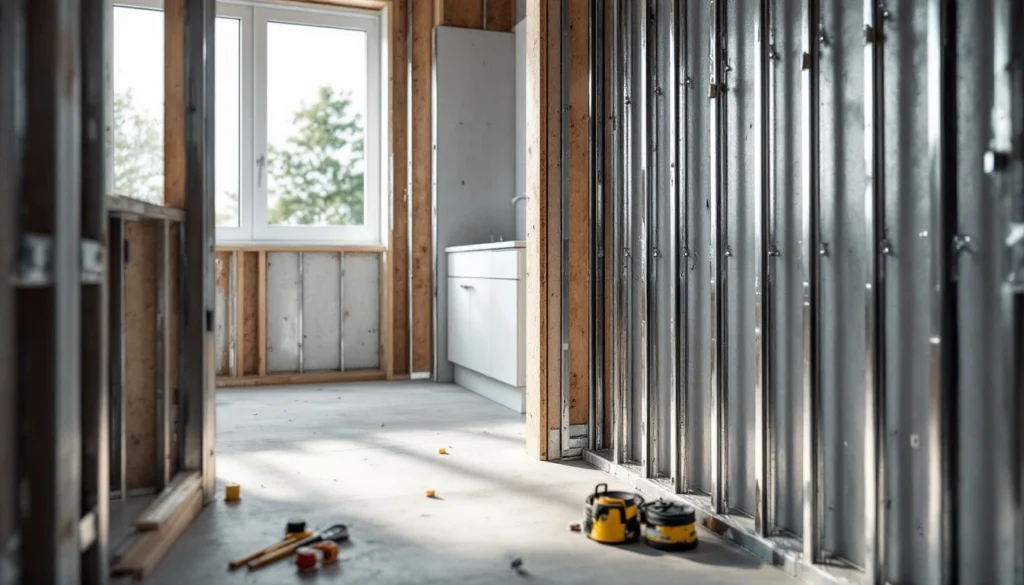
What Is Waterproof Plasterboard and How Does It Work?
Let’s clear up some confusion straight away: what tradesmen call “waterproof plasterboard” isn’t actually waterproof in the technical sense. The correct term is moisture-resistant plasterboard (MR board), and it’s designed to resist moisture exposure better than standard board, not to be completely impervious to water.
Standard plasterboard consists of a gypsum plaster core sandwiched between two layers of paper liner. When water penetrates this, the gypsum core absorbs moisture, the paper delaminates, and the board essentially falls apart. You’ve probably seen the damage yourself — sagging ceilings, crumbling walls, and that distinctive brown water staining.
Moisture-resistant plasterboard addresses this problem through two key modifications:
- Water-repellent additives mixed into the gypsum core that reduce water absorption by up to 95% compared to standard board
- Green-faced paper liners (or sometimes blue) that are treated with silicone or wax to repel water rather than absorbing it
- Enhanced core density that provides better structural integrity when exposed to humidity
- Reduced edge absorption through sealed or treated edges on quality products
The most common product you’ll find in UK builders’ merchants is British Gypsum’s Gyproc Moisture Resistant board, identifiable by its distinctive green paper face. Knauf also produces a competing product called Aquapanel, though this is a cement-based board rather than gypsum.
Moisture-Resistant vs. Standard Plasterboard: The Real Differences
| Feature | Standard Plasterboard | Moisture-Resistant Board |
|---|---|---|
| Paper colour | Ivory/cream | Green (occasionally blue) |
| Water absorption | Up to 25% by weight | Less than 5% by weight |
| Price (per 2400x1200mm sheet) | £5-7 | £8-12 |
| Suitable locations | Living rooms, bedrooms, offices | Bathrooms, kitchens, utility rooms |
| Direct water contact | Not suitable | Requires additional tanking |
| BS standards compliance | BS EN 520 Type A | BS EN 520 Type H1 |
The key takeaway: MR board handles humidity and occasional splashes brilliantly, but it’s not designed for constant water contact. That’s where additional waterproofing measures come in, which we’ll cover shortly.
Building Regulations and British Standards for Bathroom Plasterboard
When you’re working on bathrooms and wet rooms, you’re not just making aesthetic choices — you’re working within a framework of regulations designed to prevent structural damage and mould growth.
Building Regulations Part F (Ventilation) sets out requirements for moisture control in habitable rooms and wet areas. In practical terms, this means your bathroom needs adequate ventilation — typically an extractor fan with a minimum extraction rate of 15 litres per second for bathrooms.
For the plasterboard itself, you need to comply with BS EN 520, which classifies plasterboard types. Type H1 boards (moisture-resistant) are the minimum acceptable standard for bathroom walls and ceilings that aren’t in direct water contact. Type H2 and H3 boards offer even higher moisture resistance but are rarely available in standard builders’ merchants.
For wet rooms and shower enclosures specifically, you’ll also need to consider BS 8000-11.1, which covers internal wall and floor tiling. This standard requires a waterproofing system behind tiles in areas subject to water jets or pooling water — MR board alone won’t cut it.
Where Should You Use Moisture-Resistant Plasterboard?
Not every room needs the expense of MR board, and knowing where to specify it will save your clients money without compromising performance. Here’s the breakdown based on 20+ years of real-world installations:
Always Use MR Board:
- Bathroom walls and ceilings — even areas away from direct water contact benefit from the humidity resistance
- Shower enclosure surrounds — but only as a substrate under tanking membrane, never as the final waterproof layer
- Behind bathroom sinks and basins — splashbacks see constant moisture exposure
- Utility room walls — washing machines and tumble dryers generate significant humidity
- Kitchen walls adjacent to sinks and cookers — steam from cooking and washing creates a high-moisture environment
- Unheated spaces — garages and outbuildings where condensation is common
Standard Board Is Fine:
- Bedroom walls and ceilings (unless the room has an en-suite without a door)
- Living rooms and dining areas
- Hallways and staircases
- Home offices and studies
Special Consideration Areas:
Loft conversions with bathrooms: Use MR board throughout the bathroom, but pay particular attention to ventilation. Poor airflow in loft spaces can trap moisture even with the best boards.
Below-ground rooms: Basements and cellars may need tanking on the external walls regardless of plasterboard type. MR board doesn’t stop damp penetration from outside — you need proper tanking for that.
For more guidance on bathroom renovations and layout considerations, our en-suite bathroom ideas guide covers design principles that work with moisture-resistant drylining systems.
Installation Standards for Waterproof Plasterboard
Installing MR board follows the same basic principles as standard board, but there are critical differences that affect long-term performance. Get these wrong and you’ll be back to repair water damage within 18 months.
Board Thickness and Spacing
For bathroom walls, always use 12.5mm board as a minimum. Some tradesmen try to save money with 9.5mm board, but the thinner profile absorbs moisture more readily and provides less structural support for heavy tiles.
Stud spacing should be maximum 400mm centres for 12.5mm board, or 600mm for horizontal fixing with adequate noggings. In wet areas, I actually recommend 400mm centres regardless — the extra timber costs £20-30 but massively improves rigidity when tiling.
Fixing and Joints
- Use stainless steel or galvanised plasterboard screws — standard black phosphate screws will rust in humid environments
- Space screws at 150mm centres on edges, 200mm in the field (closer than standard board)
- Avoid screwing through the green face where possible — each screw penetration is a potential water entry point
- Apply scrim tape and setting compound to all joints, feathering out 300mm either side
- Consider using moisture-resistant jointing compound for wet areas — products like Knauf Uniflott have water-resistant additives
Cutting and Handling
MR board cuts identically to standard board — score and snap. However, the treated edges mean slightly more force is needed to snap cleanly. Use a sharp Stanley knife and replace the blade frequently; blunt blades tear the green facing rather than cutting it.
Store boards flat and keep them dry before installation. Even MR board will absorb moisture if left in damp conditions for weeks, which defeats the point of specifying it in the first place.
The Tanking Membrane Question: When MR Board Isn’t Enough
Here’s where many DIYers and even some inexperienced plasterers get it wrong: MR board alone is not adequate waterproofing for shower areas. You need a tanking system.
A tanking membrane (also called waterproofing membrane) is a liquid-applied or sheet membrane that creates a continuous waterproof barrier behind tiles. In the UK, the most common systems are:
- BAL WP1 tanking kit (£45-60 for 7.5kg, covers about 6-8m²) — liquid-applied, two-coat system
- Mapei Mapelastic AquaDefense (£85-110 for 15kg) — single-component, fast-curing membrane
- Schlüter KERDI (£120-150 for 30m roll, 1m wide) — sheet membrane system with bonded joints
The application process for liquid tanking over MR board:
- Install 12.5mm MR board as normal, ensuring all joints are properly taped and filled
- Prime the board surface if required by the manufacturer (some products need it, others don’t)
- Apply first coat of tanking membrane using a brush or roller, working into corners with a small brush
- Embed waterproof tape over all joints, corners, and floor-wall junctions while the first coat is still wet
- Allow to cure (typically 4-6 hours in a well-ventilated bathroom)
- Apply second coat perpendicular to the first for complete coverage
- Cure for 24 hours minimum before tiling
For detailed guidance on proper bathroom preparation, see our article on bathroom tile removal and replastering, which covers the full substrate preparation process.
Cement Backer Board: The Alternative for Wet Areas
In areas with constant water exposure — shower trays, wet room floors, commercial changing facilities — cement backer board often outperforms even tanked MR plasterboard.
Cement board consists of a cement and aggregate core reinforced with fibreglass mesh. Unlike gypsum-based boards, it’s genuinely waterproof and won’t deteriorate even with prolonged water contact. The trade-off? It’s harder to cut, heavier to handle, and more expensive.
| Product | Thickness | Price per Sheet | Best Use |
|---|---|---|---|
| Knauf Aquapanel | 12.5mm | £25-32 | Wet room walls and floors |
| Marmox Board | 10mm | £45-55 | Wet room floors (insulated) |
| Wedi Building Board | 20mm | £65-80 | Complete wet room systems |
| Jackoboard Aqua | 12mm | £40-50 | Shower enclosures |
Cement boards require different fixing methods than plasterboard. You’ll need specialised screws with deep threads and corrosion resistance, and joints must be reinforced with alkaline-resistant mesh tape and a flexible joint compound.
Our comprehensive wet room installation guide covers the complete installation process for cement board systems, including drainage, tanking, and tiling specifications.
Finishing Options for Moisture-Resistant Board
Once your MR board is installed, you have several finishing options depending on the room’s use and your aesthetic preferences.
Direct Decoration
MR board can be decorated directly after proper joint treatment, just like standard board. However, there are some considerations:
- Use moisture-resistant primer before painting (Zinsser Bulls Eye 1-2-3 or Dulux Trade Diamond Matt) — standard emulsion primers can react with the green facing
- Apply at least two coats of bathroom-specific paint with mould inhibitors
- Consider using vinyl matt or satin rather than standard emulsion in splash zones
Skim Coating
For a traditional smooth plaster finish, you can skim coat MR board with multi-finish or board finish plaster. The process is identical to standard board — PVA sizing (two coats, first diluted 4:1, second coat 2:1) followed by two coats of finishing plaster.
The green face of MR board actually provides excellent key for plaster, often better than standard ivory board. Drying times are similar — expect 4-7 days before decorating depending on ventilation and room temperature.
If you’re considering a skim finish, our detailed guide on how to skim coat a wall covers techniques, tools, and common mistakes to avoid.
Tiling
This is the most common finish for bathroom MR board. Key points:
- Always use flexible tile adhesive (Class S1 or S2 to BS EN 12002) — rigid adhesive can crack with substrate movement
- Apply adhesive in maximum 8mm thickness using a notched trowel
- Use waterproof grout (epoxy grout for shower floors, high-quality cementitious grout elsewhere)
- Apply silicone sealant at all changes of plane (wall to floor, wall to wall corners)
Common Mistakes with Waterproof Plasterboard (and How to Avoid Them)
In two decades of rectifying botched bathroom installations, I’ve seen the same mistakes repeatedly. Here are the most common:
1. Using MR Board Without Tanking in Showers
The single biggest error. MR board is moisture-resistant, not waterproof. Water will eventually penetrate through tile grouting, and without a tanking membrane, it’ll reach the board and cause failure. Always tank shower areas, regardless of board type.
2. Poor Ventilation Despite Good Boarding
Brilliant boarding won’t save you from inadequate ventilation. Your extractor fan needs to be sized correctly (15 litres/second minimum for bathrooms) and actually ducted to outside — not into the loft space. Run the fan on a timer overrun for 15-20 minutes after the light switches off.
3. Mixing Board Types Mid-Wall
I’ve seen installations where tradesmen used MR board in “wet zones” but standard board in the upper wall to save money. This creates a moisture differential that shows up as a visible horizontal line once painted. Use the same board type throughout each room.
4. Skimping on Joint Treatment
Poorly filled joints are the weak point in any plasterboard installation. In bathrooms, moisture can penetrate through cracks in joint compound and attack the gypsum core. Use proper scrim tape, apply compound in thin coats (maximum 5mm), and feather edges properly.
5. Installing Board Before Building Work Is Complete
Plumbers and electricians will need access after boarding for first-fix work. If you board too early, they’ll cut holes for pipes and cables, compromising your moisture barrier. Coordinate trades properly and board only after first-fix is complete and tested.
Costs: What to Budget for Waterproof Plasterboard in 2026
Material and labour costs vary by location and project complexity, but here are realistic 2026 figures for Kent and the South East. Expect 10-15% less in northern regions, 10-15% more in central London.
Material Costs
| Item | Specification | Price |
|---|---|---|
| MR plasterboard | 12.5mm, 2400x1200mm | £8-12 per sheet |
| Jointing compound | 25kg bag (covers 8-10m²) | £12-16 |
| Scrim tape | 90m roll | £3-5 |
| Plasterboard screws | 1000 count, stainless steel | £15-20 |
| Tanking membrane | 7.5kg kit (6-8m²) | £45-65 |
| Cement backer board | 12.5mm, 1200x800mm | £25-35 per sheet |
Labour Costs for Typical Bathroom (2.4m x 2.0m)
- Drylining with MR board: £350-500 (walls and ceiling, boarding only)
- Joint treatment and finishing: £180-250
- Tanking application: £220-320 (shower area only, approximately 4-5m²)
- Skim coating: £280-400 (if required instead of direct decoration)
Total typical bathroom drylining cost: £800-1,200 for materials and labour, or £35-50 per square metre of wall area.
Compare this to standard drylining costs of £25-35/m² for non-moisture-resistant applications to understand the premium you’re paying for bathroom-spec work.
Maintenance and Long-Term Performance
Properly installed MR board should last the lifetime of the building without issues, but long-term performance depends on ongoing maintenance.
Ventilation Maintenance
Your extractor fan is as critical as the board itself. Clean the grille every 3-4 months (just vacuum the dust off), and replace the fan unit every 8-10 years. A failing fan means moisture builds up regardless of board quality.
Checking for Water Damage
Inspect your bathroom annually for signs of moisture penetration:
- Soft spots when you press the wall — indicates water behind the board
- Paint bubbling or peeling — moisture trying to escape through the decoration
- Discolouration of grout — often means water is penetrating behind tiles
- Musty odours — suggests mould growth within the wall cavity
Caught early, most moisture issues can be rectified with localised repairs. Left too long, you’re looking at complete re-boarding.
Renovation and Redecoration
When redecorating, use the same quality of moisture-resistant paint or primer. Switching to standard emulsion saves £10 per tin but negates much of the moisture protection you’ve paid for with the special boarding.
If you’re considering broader renovations, our article on modern home surface upgrades explores how to refresh bathrooms without full re-boarding.
Frequently Asked Questions
Can you use moisture-resistant plasterboard instead of cement board in showers?
You can, but only with a proper tanking membrane system. MR board alone is not waterproof enough for direct water jets. The better approach is MR board with liquid tanking membrane (two coats) or, for ultimate peace of mind, cement backer board. In my experience, cement board is worth the extra cost for enclosed shower cubicles where you’re tiling floor to ceiling.
For walk-in showers and wet rooms where water containment is critical, cement board is the professional choice every time. The typical cost difference (£150-200 for a standard shower area) is negligible compared to repairing water damage 18 months down the line.
How can you tell if plasterboard is moisture-resistant?
Genuine MR board has a green paper facing (occasionally blue with some manufacturers). The colour goes all the way through the paper, not just surface-printed. Check for manufacturer markings — British Gypsum boards say “Gyproc Moisture Resistant” stamped along the length every 300mm or so.
If you’re buying from a builders’ merchant rather than a retail shed, ask to see the product specification sheet. MR board should be classified as Type H1 to BS EN 520. Don’t trust sellers who claim “it’s the same thing” when offering cheaper ivory-faced board — it definitely isn’t.
Do you need to PVA moisture-resistant plasterboard before skimming?
Yes, exactly as you would with standard board. Apply two coats of PVA solution — first coat 4:1 water to PVA, second coat 2:1 — allowing each to dry. Apply your finishing plaster when the second PVA coat is tacky (about 30-60 minutes depending on temperature and humidity).
The green paper facing on MR board can actually be slightly more absorbent than standard ivory paper if not properly sized, which makes the PVA step even more important. Skip it and you’ll find the plaster dries too quickly and won’t bond properly.
Can moisture-resistant plasterboard get wet during installation?
Avoid it if possible. While MR board handles moisture better than standard board, getting it soaked during installation isn’t ideal. If boards do get wet from rain or leaks, let them dry completely before installation — a damp board will deform once fixed and cause problems down the line.
If you’re working on a site where boards might be exposed to weather (during a loft conversion, for example), store them under cover and inspect each board before installation. Reject any that feel heavy, have swollen edges, or show water staining on the green facing.
What’s the difference between green and blue moisture-resistant board?
In the UK market, green is the standard colour for moisture-resistant plasterboard and indicates Type H1 specification. Blue-faced board typically indicates enhanced moisture resistance (sometimes called Type H2) or moisture resistance combined with impact resistance.
Some manufacturers (particularly Knauf) use blue colouring for their premium moisture-resistant range. In practical terms, both offer good moisture resistance for bathrooms. The key is checking the actual BS EN 520 classification rather than relying on colour alone.
How long before you can tile on moisture-resistant plasterboard?
If you’re tiling directly onto MR board (not recommended for shower areas without tanking), wait at least 24 hours after installation and joint treatment. The jointing compound needs to fully cure before you add the weight and stress of tiles.
If you’ve applied a liquid tanking membrane, follow the manufacturer’s cure time — typically 24 hours minimum, though some products specify 48 hours. Don’t rush this stage. Tiling onto partially cured tanking can compromise the waterproof layer, which defeats the entire point of the system.
Can you dot and dab moisture-resistant board onto walls?
You can, using plasterboard adhesive (dot and dab method), but it’s less common in bathrooms than stud framework. If you’re adhering MR board to solid walls, use a continuous ribbon of adhesive around the perimeter and dots every 300mm in the field — don’t leave large gaps where moisture could accumulate.
For shower areas, avoid dot and dab entirely. Water that penetrates the tanking and tiles can pool in the gaps behind dot-and-dab board with no escape route, leading to mould growth and eventual failure. Stud framework with ventilated cavity is the professional approach for wet areas.