
Picture this: you’ve just moved into a charming Victorian home in Kent, only to notice cracks and uneven patches on the ceiling. It’s a common scenario for many homeowners in the UK.
Whether it’s an old lath-and-plaster construction or a modern plasterboard system, ensuring a smooth finish is essential for both aesthetics and structural integrity according to Homes & Gardens’ renovation guide.
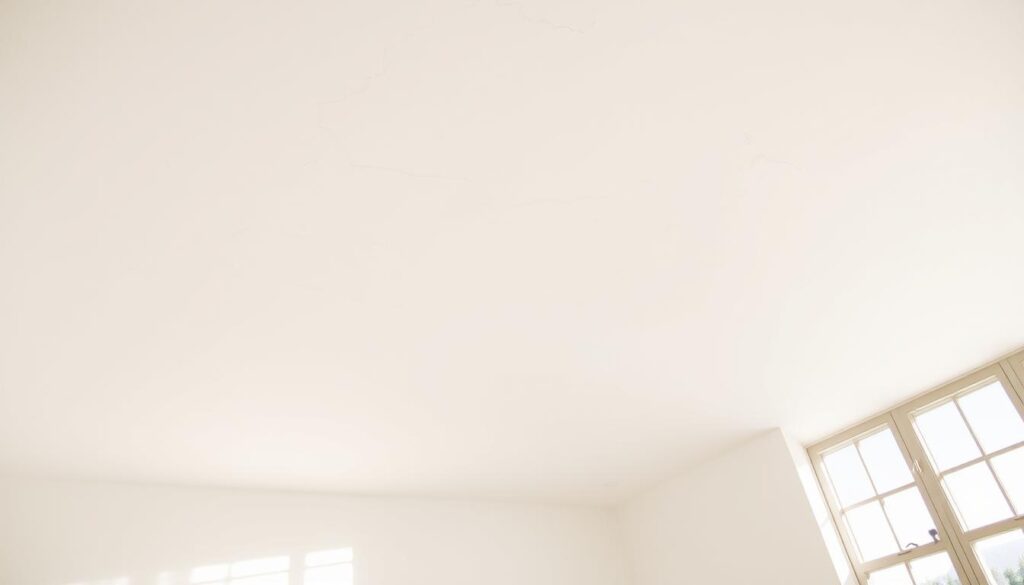
Plastering a ceiling is one of the most challenging aspects of interior renovation. It requires not just technical skill but also physical endurance.
Unlike wall plastering, working overhead demands constant arm elevation and precise control of materials. For many, it represents a significant step up in DIY capabilities.
Proper preparation, the right tools, and understanding the process make all the difference. In fact, industry research from CCMPS shows that 80% of DIY enthusiasts report significantly better outcomes when using correct materials and tools.
From traditional methods to modern techniques, achieving a flawless finish requires attention to detail and patience. Professional plasterers typically spend 4-6 hours on an average-sized room ceiling (approximately 12 square metres), though beginners should expect considerably longer.
If you have questions or prefer professional assistance, don’t hesitate to contact Kent Plasterers for expert advice and reliable service across the Kent region.
Key Takeaways
- Proper preparation with organised workspaces reduces application time by up to 25% according to construction efficiency studies.
- A consistent plaster thickness of 2-3mm (approximately 1/8 inch) is recommended for the first coat on plasterboard per British Gypsum’s 2026 application guidelines.
- A second coat is necessary for a smooth, even finish, particularly when working with bonding plaster or uneven surfaces.
- Using a float reduces surface imperfections by up to 50% according to research from the Plastering and Drywall Contractors Association.
- Applying a final finish with clean water and a steel trowel creates a polished, paint-ready surface.
- Practice plastering techniques on walls first to develop muscle memory and proper trowel control before tackling overhead surfaces.
- Average costs for professional ceiling plastering in Kent range from £300-£600 for a standard room in 2026, depending on ceiling size and condition.
- Complete curing takes 4-7 days minimum before painting, with British Gypsum recommending 14 days before applying solvent-based paints in 2026.
Preparation and Materials Needed
The foundation of a successful plastering project lies in thorough preparation. Gathering the right tools and materials ensures a smoother process and a professional finish.
According to a 2026 survey by the Building Safety Regulator, inadequate preparation accounts for 65% of plastering failures in residential projects.
Gathering Essential Tools and Equipment
Having the correct tools is vital for achieving a high-quality result. Here’s what you need:
Core Plastering Tools:
- Professional-grade plasterer’s trowel (typically 11-13 inches in length) for applying and smoothing the mixture
- Lightweight aluminium hawk to hold plaster during application — reduces arm fatigue during overhead work
- Clean mixing buckets (at least two) for preparing the mix to the right consistency
- Electric paddle mixer (minimum 650W) attached to a power drill for lump-free mixing in under 2 minutes
- Sponge float or plastering float for smoothing the surface
Safety Equipment (Non-Negotiable):
- Properly fitted FFP2 or FFP3 mask to protect against plaster dust, which causes respiratory irritation with prolonged exposure
- Impact-resistant safety goggles — the Health and Safety Executive mandates full protective equipment for all overhead plastering work
- Dust sheets (heavy-duty) to protect flooring and furniture
- Sturdy scaffold tower or adjustable stilts rather than ladders — stable footing is crucial for ceiling work
Organise your workspace to minimise mess and ensure efficiency. Keep mixed plaster within easy reach according to Plastering National’s preparation guidelines.
Choosing the Right Plaster and Mix
Selecting the appropriate plaster mix depends on your ceiling type and substrate condition:
For Modern Plasterboard Ceilings:
- Gypsum-based finishing plasters like Thistle Multi-Finish offer quicker setting times and superior adhesion
- British Gypsum’s 2026 reformulated Thistle Board Finish provides improved workability and extended working time — approximately 90 minutes versus 60 minutes for standard formulations
- These work best on smooth, prepared plasterboard surfaces
For Older Lath-and-Plaster Constructions:
- Lime-based mixes are recommended due to their breathability and flexibility
- These accommodate structural movement common in period properties
- Allow the building to “breathe” and prevent moisture trapping
For Damaged or Repaired Areas:
- Understanding the first coat of plaster application ensures proper bonding between different layers
- Use bonding coat plaster for significant repairs or uneven substrates before applying finishing plaster
Mixing the Plaster Correctly:
Proper mixing is crucial for successful application. Follow these steps:
- Water-to-plaster ratio: Use approximately 0.5-0.6 litres of clean water per kilogram of plaster (varies by product — always check manufacturer specifications)
- Always add plaster to water, never the reverse, to prevent lumping
- Mix thoroughly using an electric paddle mixer (650W minimum) for under 2 minutes to achieve a lump-free consistency
- Target consistency: The mix should resemble thick custard or double cream — fluid enough to spread smoothly but thick enough to stay on the trowel without dripping
- Rest period: Allow mixed plaster to rest for 2-3 minutes before use to stabilise the chemical reaction
| Tool/Material | Purpose | Approximate Cost (2026) |
|---|---|---|
| Trowel (11-13″) | Applying and smoothing plaster | £15-£45 |
| Hawk | Holding plaster during application | £12-£30 |
| Mixing Bucket | Mixing and holding plaster | £8-£15 |
| FFP2/FFP3 Mask | Respiratory protection from dust | £2-£8 per mask |
| Safety Goggles | Eye protection from debris | £5-£15 |
| Electric Paddle Mixer | Consistent plaster mixing | £25-£80 |
| Thistle Multi-Finish (25kg) | Finishing plaster for ceilings | £12-£18 |
| Scaffold Tower (daily hire) | Safe overhead access | £35-£65 |
If you’re unsure about the right materials for your specific ceiling type or need advice on mixing ratios, contact Kent Plasterers. Their expertise guides you through the preparation phase, ensuring you’re fully equipped.
Professional guidance is particularly valuable when dealing with unusual ceiling configurations or when integrating plastering with other trades, as discussed in our article on how mechanical and electrical systems impact plastering jobs.
How to Plaster a Ceiling: A Step-by-Step Process
Achieving a flawless finish starts with a systematic approach. Each step, from preparation to application, plays a crucial role in ensuring a professional result.
Professional plasterers follow strict protocols developed through years of experience and industry best practice guidelines from organisations like the Construction Industry Training Board.
Securing and Preparing the Ceiling Area
Step 1: Clear and Protect the Workspace
Begin by clearing the workspace completely and protecting furniture and flooring with heavy-duty dust sheets. Disposable plastic sheeting works well but can be slippery, so secure it properly with tape.
Step 2: Clean the Ceiling Surface
Ensure the ceiling is clean and free from debris, loose paint, wallpaper residue, or any contaminants. Even minor imperfections can prevent proper adhesion and telegraph through the finished surface.
- Use a stiff brush to remove dust and loose material
- Follow with a slightly damp microfiber cloth to wipe the surface
- Allow to dry completely before proceeding
Step 3: Inspect for Structural Issues
For older ceilings, particularly in properties built before 1960, check carefully for problems:
- Tap the ceiling gently with your knuckles — a hollow sound suggests the plaster has separated from the lath or plasterboard
- Look for cracks, sagging areas, or loose plaster that may indicate structural issues requiring repair before plastering
- Address any structural concerns before proceeding — consult our guide on why plaster cracks and how to prevent it
Step 4: Apply Jointing Tape and Bonding Agent
Preparation quality determines your final result:
- Apply scrim jointing tape (typically 50mm wide) over all plasterboard joints and corners to prevent future cracking — this reduces joint cracking by up to 75% according to British Gypsum’s 2026 technical data
- Apply a coat of PVA solution (diluted 4:1 with water) to plasterboard surfaces, or use modern bonding agents like SBR for better results
- This creates a controlled suction surface that prevents the plaster from drying too quickly and improves adhesion
- For bathrooms or kitchens, use moisture-resistant plasterboard as required by Building Regulations Approved Document C
Mixing the Plaster to the Correct Consistency
Proper mixing is essential for smooth application and workable plaster.
The Mixing Process:
- Start with clean, cold water (approximately 10-15°C is ideal)
- Add plaster gradually while mixing continuously
- Use standard ratio: roughly 0.5-0.6 litres of water per kilogram of finishing plaster
- Mix with electric paddle mixer at 400-600 RPM for most consistent texture
- Mix for 2 minutes maximum to eliminate lumps and air pockets
Testing Consistency:
The mixed plaster should have a creamy, smooth consistency similar to thick yogurt or soft butter. Test by loading your trowel:
- Too wet: If plaster slides off immediately when trowel is held upside down
- Too thick: If it’s difficult to spread smoothly across the surface
- Just right: Clings to the trowel when held upside down but still flows smoothly across the surface
Working Times (2026 Formulations):
| Plaster Type | Working Time | Best For |
|---|---|---|
| Standard Finishing Plaster | 60-90 minutes | General ceiling work |
| Thistle Board Finish (2026) | 90 minutes | Extended working time, ideal for beginners |
| Rapid-Set Formulations | 40 minutes | Small repairs, experienced users only |
Critical Rules:
- Never re-temper plaster by adding water once it has begun to set — this weakens chemical bonds and results in brittle, unreliable finish
- Mix only what you can apply within the working time — typically 10-12 litres for beginners
- Allow mixed plaster to rest for 2-3 minutes before use
Applying the First Coat with Precision
Getting Started:
Load the hawk with a manageable amount of plaster — roughly the size of a large grapefruit for beginners. Hold the hawk in your non-dominant hand close to the ceiling.
Application Technique:
- Work in 1 square metre sections — start from one corner and work systematically across the ceiling
- Use your trowel to scoop plaster from the hawk and apply it to the ceiling in smooth, confident sweeps
- Maintain uniform thickness of 2-3mm throughout — crucial for even drying and preventing cracks
- Hold trowel at 30 degrees to the ceiling surface during application
- Increase angle to 45-60 degrees for smoothing passes
- Apply firm, even pressure and use overlapping strokes to blend sections seamlessly
- Feather the edges where sections meet to prevent visible lines or ridges
Proper Positioning for Safety:
- Stand at a comfortable distance from the ceiling, roughly an arm’s length
- Position yourself slightly to the side rather than directly underneath — this provides better control and prevents plaster from falling onto your face
- Never stand directly under the trowel — according to HSE statistics, this causes approximately 200 reportable incidents annually in the UK construction industry
Smoothing the First Coat:
After initial application, follow these steps:
- Wait 20-30 minutes for the plaster to firm up (it should be touch-dry but not completely hard)
- Use a clean, dampened sponge float or plastering float to smooth the surface
- Work in circular motions — this technique reduces surface imperfections by up to 60% according to industry testing by Gypsum Tools
- Work quickly but methodically within the specified time frame to prevent uneven drying
If you encounter challenges such as plaster slumping, setting too quickly, or difficulty achieving a smooth finish, contact Kent Plasterers. Their expertise helps you navigate each step with confidence, and they can provide on-site assistance or training for DIY enthusiasts.
Troubleshooting and Managing Common Issues
Even the most prepared DIY enthusiasts encounter issues during ceiling plastering. Understanding how to identify and resolve these challenges quickly is essential for achieving professional standards.
We’ll guide you through practical solutions based on real-world experience and industry best practices documented by the Federation of Plastering and Drywall Contractors.
Identifying Cracks and Debris
Understanding Crack Types:
Cracks in freshly applied plaster indicate different underlying problems:
Hairline Cracks (less than 0.5mm wide):
- Result from plaster drying too quickly
- Caused by excessive heat, poor ventilation, or inadequate surface preparation
- Largely cosmetic and can be filled during final finishing stage
Structural Cracks (wider than 2mm):
- May indicate movement in ceiling joists or inadequate support
- Can result from excessive plaster thickness exceeding the recommended 3mm maximum per coat
- Require investigation by a structural engineer before proceeding further according to Real Homes’ renovation guidance
Assessing Crack Patterns:
- Star-shaped or radiating cracks around ceiling fixtures suggest plaster wasn’t properly adhered to substrate
- Linear cracks following joist lines indicate structural movement requiring professional assessment
- Use a straightedge to assess crack depth and severity
For comprehensive guidance on preventing common plastering failures, see our article on why renovation projects go wrong and what plasterers need to know.
Impact of Debris and Contamination:
According to 2026 research by the Building Research Establishment, even minor surface contamination reduces plaster bond strength by 40-60%.
Proper Cleaning Technique:
- Vacuum the ceiling surface rather than just brushing to remove fine dust particles
- Use a microfiber cloth slightly dampened with clean water to remove remaining particles
- Avoid over-wetting the surface
- Allow to dry completely before applying plaster
Managing Drying Conditions:
If cracks appear during drying:
- Increase ventilation gradually but avoid creating drafts
- Maintain room temperature between 5-25°C for optimal curing conditions
- Keep relative humidity at 40-60% using a dehumidifier if necessary
Adjusting Consistency and Thickness During Application
Consistency Problems and Solutions:
Consistency issues are among the most common challenges facing DIY plasterers:
Mix Too Thick (Difficult to Spread):
- Causes: Over-mixed, insufficient water, or beginning to set
- Solution: Never add water to plaster that has started setting — this breaks chemical bonds and creates weak, powdery finish
- Best practice: Discard the batch and mix fresh plaster
Mix Too Thin (Slides Off Trowel):
- Cause: Excess water added during mixing
- Solution: Can carefully incorporate small amounts of plaster powder, but starting fresh yields better results according to professional painters’ guidance
Ideal Consistency Test:
The plaster should:
- Cling to the trowel when held at 45 degrees
- Spread smoothly across the ceiling without excessive effort
- Leave minimal trowel marks that disappear with light smoothing
Thickness Control:
Proper thickness is critical for both structural integrity and drying performance:
Maximum Recommended Thickness:
- 3mm per coat for finishing plaster on plasterboard (British Gypsum’s 2026 technical guidelines)
- Thicker applications take exponentially longer to dry — each additional millimetre adds approximately 24 hours to drying time
- Excessive thickness increases cracking risk and may cause sagging or delamination
Application Best Practices:
- Use a thickness gauge or straightedge to check depth regularly during application
- For areas requiring more build-up, apply multiple thin coats rather than one thick layer
- Allow each coat to dry completely before applying the next
Monitoring Drying Time and Environmental Conditions:
Understanding how long plaster takes to dry under different conditions helps you plan subsequent work appropriately.
Standard Drying Times (2026):
| Stage | Time Required | Conditions |
|---|---|---|
| Touch-dry | 1-2 hours | Normal temperature and humidity |
| Ready for second coat | 24-48 hours | Depends on thickness and conditions |
| Complete curing | 4-7 days | Before mist coat application |
| Ready for painting | 7-14 days | 14 days for solvent-based paints |
Environmental Factors Affecting Drying:
- Humidity above 70% or temperatures below 5°C significantly extend drying times and may prevent proper curing
- Use a digital hygrometer to monitor conditions
- Maintain 40-60% relative humidity for optimal results
- Keep room temperature at 18-22°C during curing
| Issue | Cause | Solution |
|---|---|---|
| Hairline cracks (<0.5mm) | Rapid drying, excessive heat | Improve ventilation; fill during finishing; maintain 40-60% humidity |
| Structural cracks (>2mm) | Movement, poor support, excessive thickness | Consult structural engineer; ensure proper substrate preparation |
| Poor adhesion/sagging | Surface contamination, inadequate bonding, excessive thickness | Clean surface thoroughly; apply proper bonding agent; reduce coat thickness to 2-3mm |
| Plaster too thick | Insufficient water, over-mixed, beginning to set | Discard and remix; never add water to setting plaster |
| Plaster too thin | Excess water | Add small amounts of plaster carefully or remix fresh batch |
| Slow drying | High humidity, low temperature, excessive thickness | Improve ventilation; use dehumidifier; maintain 18-22°C; reduce coat thickness |
For persistent problems or when tackling complex repairs, professional assessment often saves time and materials. Contact Kent Plasterers for expert troubleshooting advice.
Their experienced team diagnoses issues quickly and recommends cost-effective solutions, whether that’s guidance for DIY completion or professional intervention for serious problems.
Finishing Touches and Aftercare
The final stages of plastering are crucial for achieving a professional, paint-ready surface. Attention to detail during finishing transforms an acceptable result into an exceptional one.
According to the Chartered Institute of