
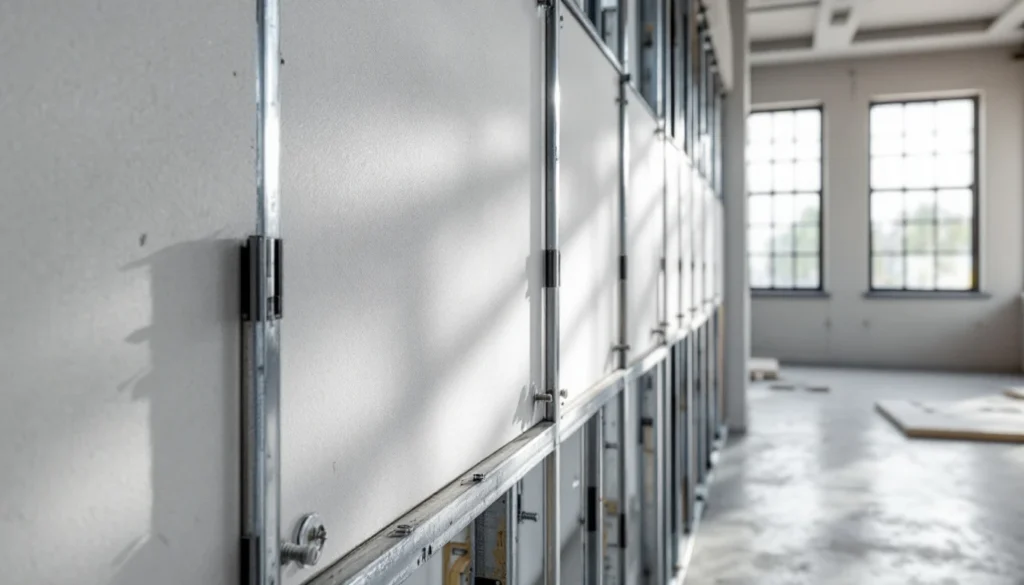
What Is 6mm Plasterboard and Where Does It Fit in Construction?
6mm plasterboard sits at the thinnest end of the plasterboard spectrum available in the UK. While 12.5mm plasterboard dominates most drylining projects and 9.5mm serves as the lightweight alternative for walls, 6mm occupies a specialised niche.
This ultra-thin board measures just 6 millimetres thick — roughly the thickness of three stacked two-pound coins. It weighs approximately 4.8-5.2 kg per square metre, making it around 40% lighter than standard 9.5mm board and about 50% lighter than 12.5mm.
The reduced thickness comes with trade-offs. The board offers minimal impact resistance, limited acoustic performance, and negligible thermal insulation. However, its flexibility and light weight make it invaluable for specific applications that other boards simply can’t accommodate.
When Should You Use 6mm Plasterboard?
Understanding where 6mm board excels — and where it fails — separates professional installations from problematic ones. Here are the legitimate uses:
Curved Walls and Archways
This is where 6mm plasterboard truly shines. The thin profile allows the board to bend around curves with a minimum radius of approximately 600mm (dry) or down to 300mm when wet. Standard 12.5mm board cracks under this kind of stress.
Curved feature walls, barrel-vaulted ceilings, and rounded alcoves all benefit from 6mm’s flexibility. Professional plasterers often use two layers of 6mm board on curves rather than attempting to bend thicker material.
Overlaying Existing Surfaces
Dry lining over damaged plaster, tired artex ceilings, or uneven masonry often requires minimal thickness to avoid reducing room height or creating door clearance issues. 6mm board adds just 6-8mm total thickness (including adhesive dabs), compared to 15-18mm with 12.5mm board.
This application works particularly well in:
- Period properties where ceiling height is already limited
- Rental properties needing quick cosmetic updates
- Commercial spaces where millimetre-level clearances matter around sprinkler heads or fire detectors
- Renovation projects where door frames can’t accommodate thicker boarding
Lightweight Ceiling Repairs
Small ceiling repairs in older properties with lath-and-plaster construction sometimes benefit from 6mm board. The reduced weight minimises stress on weakened joists or existing fixings, though this should never substitute for proper structural assessment.
You’ll occasionally see 6mm used for bulkhead ceilings or decorative ceiling features where the board spans only 300-400mm between supports and carries no significant load.
Temporary or Non-Structural Partitions
Exhibition stands, temporary office partitions, or theatrical set construction sometimes use 6mm board for its ease of handling and cutting. These applications prioritise quick installation over longevity or performance.
When NOT to Use 6mm Plasterboard
The limitations of 6mm board are significant. Avoid it in these common scenarios:
| Application | Why 6mm Fails | Minimum Recommended |
|---|---|---|
| Standard ceilings | Insufficient strength, will sag between joists | 9.5mm (12.5mm preferred) |
| Load-bearing walls | No structural contribution, inadequate fixings | 12.5mm minimum |
| High-traffic areas | Extremely vulnerable to impact damage | 12.5mm or impact-resistant board |
| Bathrooms/kitchens | Poor moisture resistance, tiles too heavy | 12.5mm moisture-resistant board |
| Fire-rated partitions | Insufficient fire resistance for Building Regs | 12.5mm fire-rated (often double-layer) |
| Acoustic separation | Minimal mass = poor sound reduction | 15mm+ acoustic board |
6mm Plasterboard Specifications and Performance
Understanding the technical specifications helps you make informed decisions about when 6mm board is genuinely appropriate.
Physical Properties
- Thickness: 6mm (±0.5mm tolerance)
- Weight: 4.8-5.2 kg/m² (approximately half the weight of 12.5mm)
- Core: Standard gypsum plaster encased in paper liners
- Edge types: Usually tapered edge, occasionally square edge
- Standard sheet sizes: 2400mm × 1200mm, 2400mm × 900mm (smaller sizes for easier handling)
Structural Performance
According to British Gypsum technical specifications, 6mm board has significantly reduced structural capacity compared to thicker alternatives:
- Maximum joist/stud spacing: 300mm centres (compared to 600mm for 12.5mm)
- Bending strength: Approximately 40% of 12.5mm board
- Impact resistance: Minimal — fails British Standard tests for standard wall applications
- Load capacity: Not rated for fixtures heavier than picture hooks
Thermal and Acoustic Performance
The thin profile limits both thermal and acoustic performance:
- Thermal resistance (R-value): Approximately 0.03 m²K/W (negligible insulation)
- Sound reduction (Rw): Around 28-30 dB as single-layer partition (inadequate for Part E compliance)
- Fire resistance: 30 minutes maximum (single layer, not suitable for critical applications)
Installing 6mm Plasterboard: Professional Techniques
Working with 6mm board requires modified techniques compared to standard plasterboard installation. The flexibility that makes it useful for curves also makes it challenging for straight applications.
Tools and Materials
Gather these before starting:
- 6mm plasterboard sheets (calculate area + 10% wastage)
- Plasterboard adhesive (for dot-and-dab application)
- 25mm or 30mm drywall screws (standard 38mm screws over-penetrate)
- Sharp utility knife or plasterboard saw
- Straight edge (min. 1200mm)
- Spirit level
- Scrim tape for joints
- Jointing compound
Dot-and-Dab Application Over Existing Surfaces
This is the most common professional installation method for 6mm board:
- Surface preparation: Remove loose material, fill major holes, and ensure the substrate is dry and dust-free. PVA prime if necessary (though British Gypsum Dri-Wall adhesive works on most surfaces without priming).
- Adhesive application: Apply 50-75mm diameter dabs at 400mm centres vertically and 600mm horizontally. Use slightly larger dabs than you would for 12.5mm board to compensate for reduced board rigidity.
- Board placement: Press the board firmly into the adhesive, using a straight edge to check for level. The thin profile means even minor hollows in the substrate telegraph through more readily than with thicker board.
- Support during curing: Props or temporary fixings may be necessary for ceiling applications. The board has less inherent rigidity to resist sagging while adhesive cures (typically 24-48 hours).
Screw-Fixing to Timber Framework
When fixing to studs or battens:
- Stud spacing: Maximum 300mm centres (closer than standard 400-600mm)
- Screw spacing: 150mm around perimeter, 200mm in the field
- Screw depth: Set screws just below the surface without breaking the paper face — this is more critical with thin board where over-driving easily damages the gypsum core
- Edge support: Noggings are essential at all horizontal joints; the board lacks the rigidity to span unsupported edges
Creating Curves
Exploiting 6mm board’s primary advantage requires specific technique:
- Frame preparation: Build your curved framework with close centres — typically 150-200mm for tight curves. Use flexible MDF, thin plywood strips, or purpose-made flexible metal track.
- Orientation: Run the board perpendicular to the curve direction (the shorter dimension wraps around the curve). This works with the board’s natural bending properties.
- Wetting (optional): For radii below 600mm, lightly mist the back face with clean water. Don’t saturate — you want damp, not wet. Wait 10-15 minutes for the moisture to penetrate.
- Gradual fixing: Start at one end and work progressively around the curve, fixing every 150mm. Don’t try to force the entire sheet into position at once.
- Double-layer technique: For structural curved walls, apply two layers of 6mm board with staggered joints. This provides better rigidity than attempting to curve single-layer 12.5mm.
| Curve Radius | Board Preparation | Framework Spacing | Recommended Layers |
|---|---|---|---|
| 1000mm+ | Dry installation, no preparation needed | 300mm centres | Single layer acceptable |
| 600-1000mm | Light misting optional | 200-250mm centres | Single or double layer |
| 300-600mm | Mist back face, wait 10-15 mins | 150-200mm centres | Double layer recommended |
| Below 300mm | Consider alternative methods (flexible beading, render) | N/A | Not recommended |
Jointing and Finishing
The thin profile affects finishing procedures:
Joint reinforcement: Use scrim tape on all joints — the reduced board thickness provides less mechanical support for jointing compound. Some professionals prefer paper tape for added strength.
Jointing compound: Apply in thin layers (1-2mm maximum per coat). Thick compound application can telegraph through the thin board, creating visible ridges or stress cracks.
Skim coating: A 2-3mm skim coat over the entire surface often produces better results than spot jointing, as it masks the board’s inherent flexibility and creates a more uniform finish.
Drying time: Allow 24 hours between coats minimum. The thin board provides less mass to absorb moisture, potentially increasing drying time despite the reduced thickness.
Cost Comparison: Is 6mm Plasterboard Worth It?
Pricing varies by supplier and volume, but here’s what you can expect in 2026:
| Board Type | B&Q/Wickes Price (per sheet) | Trade Price (per sheet) | Price per m² |
|---|---|---|---|
| 6mm x 1200 x 2400 | £8-12 | £6-9 | £2.08-4.17 |
| 9.5mm x 1200 x 2400 | £9-14 | £7-11 | £2.43-4.86 |
| 12.5mm x 1200 x 2400 | £10-16 | £8-13 | £2.78-5.56 |
The material cost saving is minimal — typically £1-3 per sheet compared to standard 12.5mm board. However, the reduced weight delivers genuine savings:
- Transport costs: A van can carry nearly double the quantity of 6mm sheets versus 12.5mm (weight rather than volume becomes the limiting factor)
- Labour efficiency: Solo plasterers can handle full sheets without assistance, reducing installation time by 15-25%
- Waste disposal: Offcuts weigh substantially less, reducing skip costs on larger projects
For detailed pricing on different board types, see our comparison of plasterboard suppliers.
Where to Buy 6mm Plasterboard
Availability can be problematic — many outlets don’t stock 6mm as standard due to limited demand:
National builders’ merchants: Travis Perkins, Jewson, and Buildbase typically stock or can order 6mm board. Expect 3-5 day lead times if not in stock.
DIY chains: B&Q and Wickes occasionally stock 6mm in larger stores, but it’s not guaranteed. Check online availability before visiting. Screwfix offers next-day delivery on most plasterboard types.
Specialist suppliers: Plasterboard Direct and similar online specialists usually stock the full range including 6mm, often at better prices than retail outlets.
Trade counters: British Gypsum trade counters stock professional ranges but require a trade account. Their Gyproc 6mm boards are premium quality compared to budget alternatives.
Alternatives to 6mm Plasterboard for Specific Applications
Before committing to 6mm board, consider whether these alternatives better suit your needs:
For Curves
- Flexible plasterboard: Purpose-made flexible boards (Knauf FlexBoard, British Gypsum Gyproc Curve) bend to tighter radii with less preparation
- Wet plastering: Traditional lime plaster over timber laths creates curves without modern boards
- Render and mesh: For external curves or very tight radii, metal mesh and render offers more control
For Overlaying Existing Surfaces
- 9.5mm plasterboard: Only 3.5mm thicker but significantly stronger; worth the trade-off in most cases
- Direct skim coating: If the existing surface is reasonably sound, a 3-5mm skim coat adds minimal thickness
- Thermal board: Insulated plasterboard (typically 27-50mm total thickness) improves thermal performance while dry lining
For a comprehensive overview of thickness options, consult our complete plasterboard thickness guide.
Common Mistakes When Using 6mm Plasterboard
These errors plague DIY installations and even catch out inexperienced tradespeople:
Using it on standard ceiling joist spacing: The single most common mistake. 6mm board sags between joists at 400-600mm centres. It’s not a question of if it will fail, but when.
Over-tightening screws: The thin profile means minimal gypsum thickness around screw threads. Over-driving punches straight through the core, destroying holding power.
Inadequate framework support: Assuming 6mm board provides the same rigidity as 12.5mm leads to wavy walls and cracked joints. Close centres aren’t optional — they’re essential.
Expecting standard impact resistance: Homeowners don’t realise how vulnerable 6mm walls are until a door handle puts a hole through it. Always warn clients about the limitations.
Attempting to tile directly onto 6mm board: Even lightweight tiles exceed the board’s load capacity. Moisture-resistant 6mm board exists but still can’t support tiling — use minimum 12.5mm moisture-resistant board in wet areas.
Building Regulations and 6mm Plasterboard
Understanding where 6mm board complies with UK Building Regulations prevents costly mistakes:
Part B (Fire Safety): Single-layer 6mm board achieves only 30 minutes fire resistance — insufficient for most separating walls or protected routes. Fire-rated applications require 12.5mm minimum, often in double layers.
Part E (Sound Insulation): The minimal mass of 6mm board makes it unsuitable for sound separation between dwellings. Meeting Part E requirements typically requires double-layer 15mm acoustic board or specialist systems.
Part L (Conservation of Fuel and Power): 6mm board contributes essentially nothing to thermal performance. Using it on external walls requires separate insulation strategies to meet current U-value requirements.
According to Approved Document B, any plasterboard used in fire-rated assemblies must meet specific performance criteria that 6mm standard board cannot achieve alone.
Professional Perspective: When We Recommend 6mm Board
After decades of plastering experience across Kent, we use 6mm board in perhaps 5% of projects — exclusively for these applications:
- Period property restoration: Overlaying damaged lath-and-plaster ceilings in listed buildings where minimal thickness preserves ceiling heights and cornices
- Curved feature walls: Decorative curves in reception areas or high-end residential properties where architectural effect justifies the specialised material
- Bulkhead ceilings: Small dropped sections boxing in services where the span is under 400mm and weight is critical
- Temporary partitions: Exhibition spaces or commercial fit-outs with planned removal within 2-5 years
For standard domestic plastering — walls, ceilings, extensions — we default to 12.5mm board. The modest additional cost buys substantially better performance, longevity, and regulatory compliance.
Homeowners sometimes request 6mm to save money, but the material cost difference is negligible compared to labour. The real savings come from reduced transport and handling, benefits that matter to contractors but barely register on a domestic quote.
For more on industry-standard practices, see our guide to professional plasterboard installation.
Frequently Asked Questions
Can you skim coat 6mm plasterboard?
Yes, you can apply a 2-3mm skim coat to 6mm plasterboard using standard multi-finish plaster. However, the thin board requires more careful technique — ensure the board is adequately supported before skimming, as the additional weight of wet plaster can cause sagging if fixing centres are too wide. Apply a thin first coat (around 1.5-2mm), allow to firm up, then apply the finishing coat. Total skim thickness should not exceed 3mm to avoid excess weight and shrinkage stress on the thin substrate.
Is 6mm plasterboard strong enough for ceilings?
No, 6mm plasterboard is not suitable for standard ceiling applications. Building practice and manufacturer specifications require minimum 9.5mm board for ceilings (12.5mm preferred), even with reduced joist spacing. The exception is small decorative features or bulkheads spanning less than 400mm with support on all edges. Any ceiling installation using 6mm board will eventually sag, crack at joints, and potentially fail. This isn’t just best practice — it affects insurance validity and building regulation compliance.
What’s the minimum radius for bending 6mm plasterboard?
Dry 6mm plasterboard can bend to approximately 600mm radius without cracking. When lightly dampened, this reduces to around 300-400mm radius. Tighter curves require either specialist flexible plasterboard products (which can achieve 150-200mm radii) or alternative construction methods like render over mesh. The actual achievable radius depends on board orientation (bending across the width is easier than along the length), temperature, and humidity levels. Always test with offcuts before committing to the full installation.
Can you use 6mm plasterboard in bathrooms?
While moisture-resistant 6mm plasterboard exists, it’s generally unsuitable for bathroom walls. The thin profile cannot support wall tiles (even lightweight ones), shower fixtures, or bathroom furniture. Moisture-resistant 6mm board might work for bathroom ceilings in well-ventilated spaces without direct water exposure, but standard practice uses minimum 12.5mm moisture-resistant board in wet areas. For tile applications, 12.5mm moisture-resistant board with appropriate tanking is essential. See our guide to waterproof plasterboard for wet area specifications.
How much does 6mm plasterboard cost compared to 12.5mm?
In 2026, 6mm plasterboard (2400mm × 1200mm sheets) costs approximately £6-12 per sheet depending on supplier and brand, compared to £8-16 for equivalent 12.5mm board. The price difference is typically only £1-3 per sheet — negligible on most projects. The real cost benefit comes from reduced weight: easier handling reduces labour time by 15-25%, and a van can transport nearly twice as many 6mm sheets as 12.5mm. However, this labour saving only matters on larger projects where the weight difference becomes significant.
What screw length should I use for 6mm plasterboard?
Use 25-30mm drywall screws for fixing 6mm plasterboard to timber studs or battens. Standard 38mm screws designed for 12.5mm board over-penetrate thin board, reducing holding power and potentially damaging underlying surfaces or services. The screws need to penetrate at least 19mm into timber framework for secure fixing, meaning 25mm screws are the absolute minimum (6mm board + 19mm penetration = 25mm). Most professionals use 30mm screws as standard for 6mm installations, providing 24mm timber penetration with some tolerance for timber irregularities.