
Discover how a simple plaster repair kit can turn unsightly wall damage into a flawless finish – without calling in the experts.
Understanding Wall Damage and Repair Solutions
Wall damage is an all-too-common household problem that can significantly impact the aesthetic appeal of your home. Whether it’s caused by everyday wear and tear, accidental impacts, or settling foundations, damaged plaster walls can be both unsightly and concerning.
While many homeowners immediately think of calling in professional plasterers, modern plaster repair kits have revolutionised the DIY approach to wall repairs. These comprehensive solutions have made it possible for homeowners to achieve professional-quality results at a fraction of the cost.
Recent studies show that over 60% of UK homeowners attempt DIY wall repairs, with plaster repair kits being the most popular choice for addressing common wall issues.
What’s Inside a Professional Plaster Repair Kit?
Today’s market offers various professional-grade plaster repair kits, each designed to address specific repair needs. The contents typically vary based on the manufacturer and intended use, but most quality kits include essential components for successful repairs.
Understanding these components is crucial for achieving professional results:
- Adhesive: Professional-grade bonding agent that ensures strong adhesion between old and new plaster
- Conditioner: Preparatory solution that improves surface compatibility and enhances adhesion
- Clamps: Stabilising tools for securing loose plaster during repairs
- Application Tools: Spatulas, mixing containers, and specialist applicators
- Protective Equipment: Gloves and dust masks for safe application
- Finishing Materials: Sandpaper and texturing tools for the final touches
Assessing Your Wall Damage: Which Kit is Right for You?
Selecting the appropriate plaster repair kit depends largely on the extent and type of damage you’re dealing with. Professional plasterers recommend conducting a thorough assessment before purchasing any repair materials.
Here’s a comprehensive guide to help you choose:
| Kit Type | Coverage | Best For |
|---|---|---|
| Homeowner’s Pack | Up to 9 linear feet | Hairline cracks and minor damage |
| Painter’s Pack | Up to 40 square feet | Medium-sized repairs |
| Contractor’s Pack | Up to 160 square feet | Large-scale repairs and extensive damage |
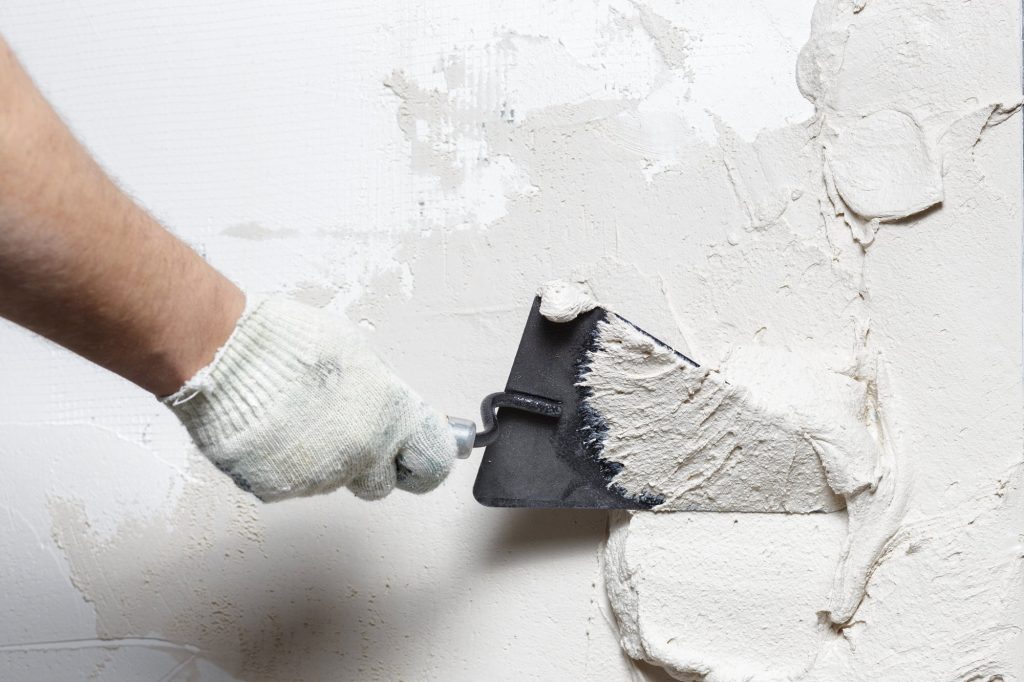
Step-by-Step Repair Process
A successful plaster repair requires careful attention to detail and following proper techniques. Here’s our professional guide to achieving excellent results:
Surface Preparation
Before beginning any repair work, proper surface preparation is crucial. Start by thoroughly cleaning the damaged area, removing any loose debris, and ensuring the surface is completely dry.
Use a wire brush to remove any loose plaster and create a slightly rough surface for better adhesion. Apply the conditioner according to the manufacturer’s instructions, typically allowing it to penetrate for 15-20 minutes before proceeding.
Application Techniques
The key to professional-looking results lies in proper application technique. Mix your repair compound according to the instructions, ensuring a smooth, consistent texture.
Apply the compound in thin layers rather than one thick application, allowing each layer to dry completely before adding the next. Use proper tools and maintain consistent pressure during application to achieve an even finish.
Finishing Touches
The final stage of repair is crucial for achieving a seamless finish. Once the compound has fully dried, sand the area smooth using progressively finer grades of sandpaper.
Pay special attention to feathering the edges to blend with the surrounding wall surface. For textured walls, use appropriate texturing tools or techniques to match the existing pattern.
Common Mistakes to Avoid
- Skipping surface preparation steps
- Using too much water in the mixture
- Applying thick layers instead of multiple thin ones
- Rushing the drying time between layers
- Inadequate sanding and blending
- Not matching existing wall texture
When to Call a Professional
While plaster repair kits are excellent for many situations, some scenarios require professional intervention. Consider calling a qualified plasterer when:
- Structural damage is suspected
- Repairs involve load-bearing walls
- Multiple large areas need repair
- Historical property restoration is required
- Water damage is extensive
Maintaining Your Repaired Walls
Proper maintenance can significantly extend the life of your plaster repairs. Regular inspection for early signs of damage, controlling indoor humidity levels, and prompt attention to any new cracks or issues can prevent more extensive damage.
Consider using quality primers and paints when decorating repaired areas, and avoid hanging heavy items directly on repaired sections without proper wall anchors.
Final Thoughts: Achieving Professional Results
With the right plaster repair kit and proper technique, achieving professional-quality results is within reach for most DIY enthusiasts. Remember that patience and attention to detail are your best tools for success.
While not every repair job is suitable for DIY, many common wall issues can be effectively addressed using quality repair kits and following professional guidelines. Whether you’re tackling a small crack or a larger repair project, the key is to choose the right tools, prepare properly, and take your time with the application and finishing processes.
FAQ
What anchors to use for plaster?
Toggle Bolts are among the most reliable anchors for plaster walls. They feature a spring-loaded toggle that expands behind the wall, creating a secure hold.
Is it better to patch drywall or plaster?
Plaster is a paste that’s installed in layers, while drywall is a panel that’s nailed to walls. Installing plaster is more time- and labor-intensive than installing drywall.
Drywall is easy and affordable to install for DIYers. Plaster can be highly customized and is more durable.
What to use to patch small holes in plaster?
There. Making sure that we fill this hole. Completely. Now be sure to completely cover the mesh. And so we can feather in the edges. Later it doesn’t show up when we sand.
Sources
[1] https://thecraftsmanstore.com/product/plaster-magic-plaster-repair-kits/
[2] https://plastermagic.com/product/homeowners-pack/
[3] https://www.lowes.com/pl/patching-repair/plaster/4294729323-2075430950