
Ever wondered why your freshly plastered wall seems dry to the touch but still feels damp underneath?
Understanding the drying process of plaster is crucial for achieving a flawless finish. While it may appear dry within hours, the reality is more nuanced.
Plaster drying involves two key stages: touch-dry and fully cured. Each stage requires patience to avoid issues like cracking or paint flaking later on.
Factors such as thickness, temperature, and humidity play a significant role in drying times. For instance, thinner layers dry faster than thicker ones, and higher temperatures can speed up the process according to industry drying studies.
However, rushing the process can lead to problems like shrinkage or brittleness, especially in hot weather according to professional plastering guidance. On the other hand, cold weather may extend drying times but allows for better curing.
In 2026, advanced plastering materials and application techniques have refined the drying process, but the fundamental principles remain unchanged.
Modern gypsum-based plasters now incorporate improved bonding agents that enhance moisture management while maintaining traditional drying timelines. According to the Construction Products Association, understanding these properties is essential for both DIY enthusiasts and professional tradespeople working in the UK construction sector.
If you’re unsure about the drying stages or need advice, don’t hesitate to contact Kent Plasterers. We’re here to help you achieve the best results for your project.
Key Takeaways
- Touch-dry in 24-48 hours, decoration-ready in 5-7 days, fully cured in 14-21 days
- Thinner applications dry faster than thick basecoats (2-3mm vs 10-15mm)
- Ideal conditions: 18-25°C temperature, 40-60% humidity, good ventilation
- Different plaster types have varying drying times—gypsum faster than lime
- Never rush drying—causes cracking, shrinkage, paint adhesion failures
- Visual check: Uniform pale pink colour indicates readiness
- 2026 best practice: Confirm dryness with moisture meter readings below 0.5%
- For expert advice, contact Kent Plasterers
Understanding the Plaster Drying Process
Plastering a wall involves more than just applying a smooth finish—it’s a meticulous process that requires attention to detail and technical understanding.
Whether you’re working on a small repair or a large project, understanding the stages from application to drying is essential for achieving a professional result.
The chemical reaction between gypsum and water during plaster application, known as hydration, determines how the material sets and subsequently dries. This process involves three distinct phases: setting, drying, and curing.
Overview of Plaster Application
The plastering process typically begins with an undercoat, which provides a solid base for the finishing layer.
Modern practice often involves applying a first coat of plaster that bonds properly to the substrate, whether it’s masonry, blockwork, or plasterboard.
Each layer has distinct setting and curing times, influenced by factors like material type and environmental conditions according to construction equipment suppliers.
Standard application thicknesses in 2026:
- Basecoats: 10-15mm thickness on masonry/blockwork
- Finishing coats: 2-3mm thickness for smooth surfaces
- Patch repairs: Match existing plaster depth
- Plasterboard skim: 2mm minimum coverage
For instance, thicker applications may take longer to dry compared to thinner ones according to home improvement cost guides.
The Building Research Establishment confirms that proper application techniques significantly reduce the risk of future defects such as cracking or delamination.
Once the undercoat is applied, a finishing plaster is added to create a smooth, even surface.
This stage is crucial for achieving the desired aesthetic and ensuring the wall is ready for paint or other decorative finishes.
Stages from Application to Drying
From the moment plaster is applied, it undergoes several distinct stages before it’s considered fully dry.
The three phases of plaster drying:
| Phase | Timeframe | What Happens | Key Indicators |
|---|---|---|---|
| Setting | 1-2 hours | Chemical reaction between gypsum and water creates solid crystals | Plaster firms up, becomes unworkable |
| Drying | 24-48 hours | Excess water evaporates from plaster surface | Touch-dry, colour lightens from dark to pale pink |
| Curing | 5-21 days | Deep moisture release, plaster reaches full mechanical strength | Uniform pale pink colour, cool sensation gone |
Initially, the surface may appear ready for decorating, but this is often just the touch-dry stage.
Curing, which ensures the plaster reaches its full strength, continues beneath the surface according to indoor air quality specialists.
During this period, the plaster releases moisture through evaporation, a process that must occur gradually for optimal results.
Ambient temperature and humidity levels play a significant role in this process. For example, ideal conditions include a temperature range of 18 to 25 degrees Celsius and humidity levels around 40-60% according to construction drying standards.
These factors help ensure even drying and prevent issues like cracking or brittleness.
In the UK climate, seasonal variations significantly impact drying times:
- Summer applications: 5-7 days typical drying time
- Winter applications: 10-21 days or longer
- Spring/Autumn: 7-14 days depending on conditions
- Coastal areas: Add 2-5 days due to higher humidity
Research from the UCL Bartlett School of Architecture indicates that moisture meters can provide accurate readings to determine when plaster has reached acceptable moisture content levels for decoration.
Professional plasterers in 2026 increasingly use digital moisture meters that provide percentage readings, with levels below 0.5% moisture content generally considered suitable for painting.
If you’re unsure about any stage of the plastering process, our team at Kent Plasterers is here to provide expert advice. We’ll guide you through each step to ensure your project is a success.
Factors Influencing Drying Time
The drying process of plaster is influenced by several key factors that interact in complex ways.
Understanding these elements can help ensure a smooth and durable finish. From environmental conditions to material choices, each factor plays a crucial role in determining how quickly plaster dries and reaches optimal strength for subsequent decoration.
Temperature and Humidity Considerations
Ambient temperature and humidity significantly impact drying times.
Optimal temperature conditions:
- Ideal range: 18-25°C for consistent, even drying
- Minimum safe temperature: 5°C (below this, avoid plastering)
- Maximum recommended: 30°C (above this, risk of too-rapid drying)
Warmer conditions, ideally between 18 to 25 degrees Celsius, promote faster curing according to seasonal plastering research.
Conversely, cold weather can slow down the process, potentially weakening the plaster’s strength. In extreme cold conditions below 5 degrees Celsius, plastering should generally be avoided entirely as the material may not set properly.
High humidity levels also extend drying times, as damp air retains moisture and reduces the evaporation rate from the plaster surface.
Using dehumidifiers or fans can help manage this, ensuring even drying and preventing issues like cracking according to professional plastering guides.
| Humidity Level | Impact on Drying | Recommended Action |
|---|---|---|
| Below 40% | Too rapid—risk of cracking | Add moisture to air, reduce heating |
| 40-60% | Ideal—even, controlled drying | Maintain conditions with ventilation |
| 60-80% | Slow—extended drying times | Use dehumidifier, increase airflow |
| Above 80% | Very slow—risk of mould | Essential dehumidification required |
According to the Met Office, UK humidity levels typically range from 70-90%, which means proper ventilation is essential year-round for optimal plaster drying.
In 2026, smart building technologies increasingly incorporate environmental monitoring systems that can alert homeowners and contractors when conditions fall outside optimal ranges for plastering work.
Impact of Plaster Type and Wall Surface
The type of plaster used affects drying times considerably.
Common plaster types and their drying characteristics:
- Gypsum-based (multi-finish): 5-7 days to decoration-ready, most common in UK residential work
- Lime-based: 4-12 weeks full cure, essential for heritage properties
- Cement render: 7-14 days surface dry, used for external work
- Specialist (damp-proof, thermal): Variable—check manufacturer guidance
For instance, gypsum-based plasters dry quicker than lime-based ones due to their moisture retention properties according to damp-proofing specialists.
Modern multi-finish plasters, commonly used in residential work, typically set within 90 minutes but require 5-7 days minimum before painting.
Specialist plasters like Thistle Multi Finish Plaster offer consistent performance characteristics that experienced plasterers rely upon.
Similarly, the wall surface—whether plasterboard or masonry—can influence overall drying time according to construction studies.
Substrate effects on drying:
- Porous substrates (brick, blockwork): Absorb moisture from plaster—faster surface drying but may trap deeper moisture
- Non-porous (plasterboard, painted walls): Slower, more even drying throughout
- Previously damp walls: Significantly extended drying times—address underlying issues first
Trapped moisture can lead to problems like cracking, especially in thicker applications.
Applying thin coats and ensuring proper ventilation can mitigate these risks according to professional application guidelines.
The Chartered Institute of Building recommends that plasterers assess substrate conditions before application and adjust techniques accordingly to ensure optimal adhesion and drying performance.
If you’re unsure about managing these factors, our team at Kent Plasterers is here to assist.
We provide expert advice to ensure your project achieves the best results, taking into account the specific conditions of your property and the materials being used.
how long does plaster take to dry
Drying times for plaster can vary significantly depending on the room’s conditions and the specifics of the application.
Factors such as size, airflow, and ambient warmth all contribute to how quickly or slowly the material sets.
For instance, a small patch repair may cure within a day, while an entire wall could take several weeks according to professional dry lining guidance.
Typical drying timelines for 2026:
| Application Type | Touch-Dry | Decoration-Ready | Full Cure |
|---|---|---|---|
| Small patch repair (under 1m²) | 12-24 hours | 2-3 days | 5-7 days |
| Single wall skim coat | 24-48 hours | 5-7 days | 14 days |
| Full room plastering | 48-72 hours | 7-10 days | 14-21 days |
| Thick basecoat application | 3-5 days | 10-14 days | 21-28 days |
| Winter/high humidity conditions | Add 50-100% to all timeframes | 10-21 days | 3-4 weeks |
In colder environments, drying can extend up to a month, especially if humidity levels are high according to construction equipment research.
Proper ventilation and maintaining a temperature between 18 to 25 degrees Celsius can help regulate this process according to professional plastering guides.
Rooms with poor airflow or excessive moisture may require additional measures, such as dehumidifiers, to ensure even drying.
Variations in Drying Times by Room Conditions
The type of plaster and its application thickness also influence drying durations substantially.
Thicker layers, often referred to as long plaster applications, naturally take more time to dry compared to thinner coats according to drying time studies.
For example, multi-finish plaster typically dries within 1-1.5 hours to a workable state, but curing can take up to 10 days before it’s ready for painting according to plastering specialists.
Room-specific drying factors:
- Bathrooms: High humidity from showers/baths extends drying by 30-60%
- Kitchens: Steam and moisture from cooking adds 20-40% to drying time
- Bedrooms/living rooms: Standard drying conditions with proper ventilation
- Basements: Poor ventilation and cooler temperatures can double drying time
- Coastal properties: Salt-laden air and higher humidity add 2-5 days
Room-specific factors create notable variations in drying times. A bathroom plastered in January may take 3-4 weeks to fully dry, while the same room completed in July might be ready in 10-14 days.
According to research published by the Imperial College London Department of Civil Engineering, moisture accumulation in poorly ventilated spaces can extend drying times by up to 60% compared to well-ventilated areas.
Checking for a uniform pale pink colour is a reliable method to confirm that the new plaster is ready for the next stage according to professional standards.
This visual indicator works because wet plaster appears darker than dry plaster due to moisture content.
However, professional plasterers in 2026 increasingly complement this traditional method with digital moisture meter readings to ensure accuracy, particularly for commercial projects where timing is critical.
Rushing this process can lead to issues like cracking or uneven surfaces, so patience is essential.
If you’re unsure about how room conditions might affect your project, don’t hesitate to contact Kent Plasterers.
We’re here to provide expert advice tailored to your specific needs, taking into account the unique characteristics of your property and the time of year.
Practical Tips for Faster Drying
Speeding up the drying process of newly plastered walls requires careful attention to environmental factors and proper technique.
While it’s tempting to rush, improper methods can lead to issues like cracks or uneven surfaces that compromise the longevity and appearance of the finish.
Here’s how to achieve optimal results safely while respecting the natural curing process that plaster requires.
Effective Use of Heating and Ventilation
Proper ventilation is essential for reducing drying time without compromising quality.
Opening windows can increase airflow, but avoid overusing heating methods. Excessive heat can cause the plaster to dry too quickly, leading to cracks according to equipment hire specialists.
The key is achieving a gentle, consistent drying environment rather than rapid moisture removal.
Effective ventilation strategies:
- Cross-ventilation: Open windows on opposite sides to create airflow
- Trickle vents: Keep them open 24/7 during drying period
- Avoid excessive drafts: Don’t create wind-tunnel conditions that dry surface too rapidly
- Internal doors: Leave open to allow moisture to dissipate throughout property
Maintaining a room temperature between 18 to 25 degrees Celsius is ideal for even drying according to professional drying guidance.
In colder months, portable heaters on a low setting can help, but avoid direct heat on the plaster according to regional plastering specialists.
Position heaters at least 2 meters away from plastered surfaces and never aim them directly at wet plaster.
The Health and Safety Executive also recommends ensuring adequate ventilation when using heating equipment in enclosed spaces to prevent carbon monoxide buildup.
| Drying Method | Best Practice 2026 | Common Mistakes to Avoid |
|---|---|---|
| Natural ventilation | Cross-ventilation through opposite windows, trickle vents open | Single window only, creating excessive drafts |
| Portable heaters | Low setting, 2m+ from walls, thermostat-controlled | High heat aimed directly at plaster, unattended operation |
| Dehumidifiers | Desiccant type, 40-60% target humidity, 30-50L/day capacity | Over-dehumidification below 40%, inadequate capacity |
| Central heating | Maintain 18-22°C consistently, avoid temperature swings | Cranking heat to maximum, switching on/off repeatedly |
Dehumidifiers can be valuable tools when used correctly. In 2026, modern desiccant dehumidifiers are particularly effective for construction drying, removing moisture more efficiently than older compressor models.
Set them to maintain relative humidity between 40-60% rather than attempting to remove all moisture rapidly.
Professional contractors often use industrial-grade dehumidifiers that can process 30-50 liters per day in large spaces, though domestic units are suitable for single-room applications.
Avoiding Common Pitfalls
Overusing dehumidifiers can remove too much moisture, causing the plaster to become brittle according to drying equipment guidance.
Instead, use them moderately in high-humidity environments. Monitor the plaster’s appearance—if it’s drying unevenly or showing stress cracks within the first 48 hours, reduce heating and dehumidification immediately.
Critical mistakes that ruin plaster finishes:
- Painting too early: Traps moisture causing blistering, flaking, mould growth
- Excessive heat: Creates surface hardening while deep layers remain damp
- Over-dehumidification: Makes plaster brittle and prone to cracking
- Sealing rooms completely: Prevents moisture escape and prolongs drying
- Applying thick paint coats: Blocks breathability before plaster fully cures
Ensure the plaster is uniformly dry before applying paint to prevent flaking according to professional application standards.
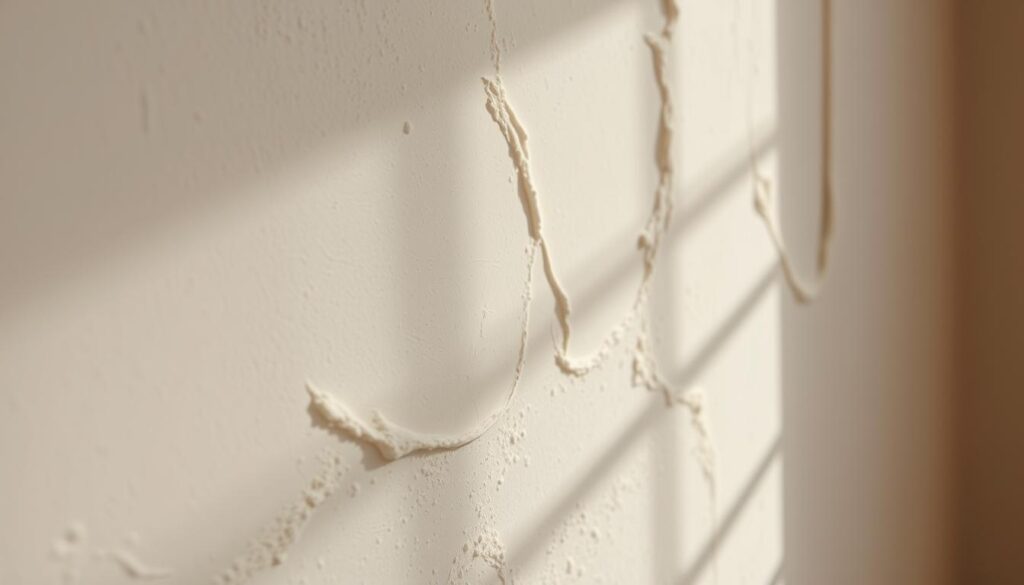
Dark patches indicate residual moisture, and painting over these areas will trap water beneath the paint film, leading to blistering and adhesion failure.
Professional painters recommend waiting until the entire surface shows consistent coloration before proceeding with mist coats.
Another common mistake is sealing rooms too tightly. While maintaining warmth is important, rooms need air exchange to allow moisture to escape.
Leave internal doors open where possible to allow moisture to dissipate throughout the property rather than concentrating in the plastered room.
Avoid applying excessive paint or thick coatings too early. The traditional mist coat—diluted emulsion paint (10-20% water) applied to new plaster—serves as a breathable first layer that allows continued moisture release while providing a surface for subsequent coats.
This technique, refined over decades of plastering practice, remains the gold standard in 2026 for achieving durable finishes.
If you’re unsure about the process, consulting a professional plasterer can save time and ensure quality results.
Their expertise can help avoid common mistakes and achieve a durable finish. At Kent Plasterers, we’ve developed specialized knowledge about local Kent conditions—from coastal humidity in Whitstable to the d