
Transform your room’s aesthetic with a stunning plaster ceiling rose – our expert guide reveals the secrets to achieving a flawless, professional finish.
Understanding Plaster Ceiling Roses
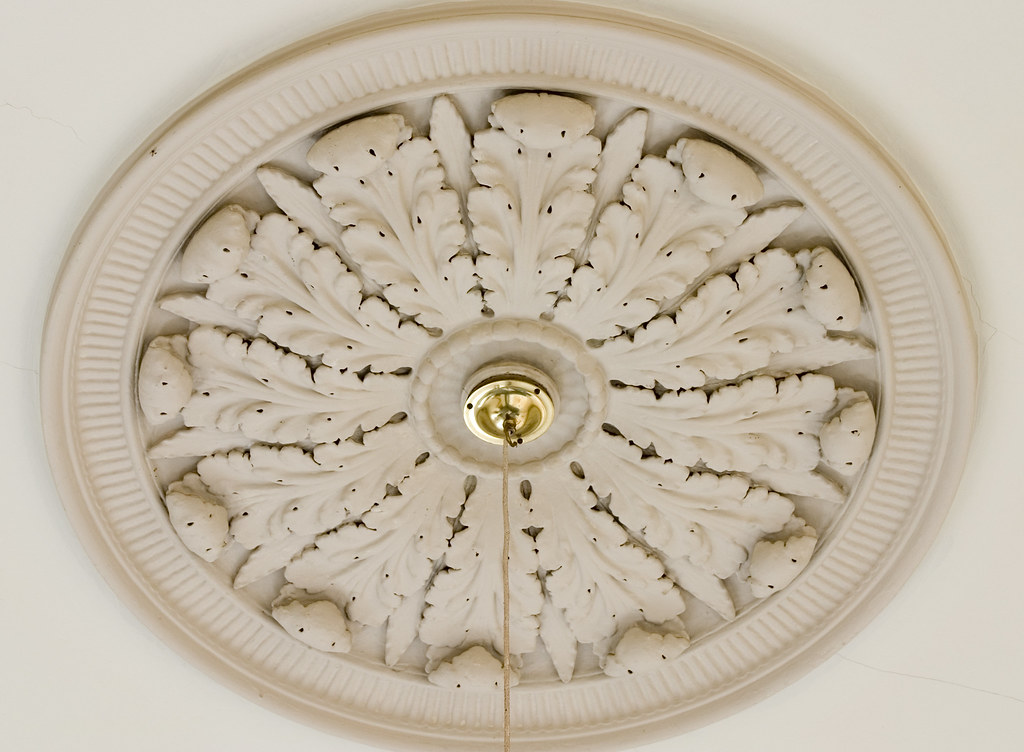
Plaster ceiling roses have graced British homes since the Victorian era, serving both decorative and practical purposes. These elegant architectural features, traditionally handcrafted from gypsum plaster, were initially designed to protect ceilings from smoke damage from gas lighting. Today, they remain a coveted design element, adding sophistication and character to both period properties and contemporary homes. Modern ceiling roses are available in diameters ranging from 300mm to over 1000mm, offering extensive design possibilities for rooms of any size.
The beauty of plaster ceiling roses lies in their versatility and timeless appeal. From simple, classic designs to elaborate Victorian-style patterns featuring intricate floral motifs and geometric details, these decorative elements can complement any contemporary interior style. In recent years, there’s been a 40% increase in demand for ceiling roses as homeowners seek to add architectural interest to their spaces.
Essential Tools and Materials
- Ceiling rose of your choice
- Strong adhesive (specifically for plaster)
- Measuring tape and pencil
- Spirit level
- Mixing bucket and paddle
- Screwdriver and screws
- Caulking gun
- Safety equipment (goggles, dust mask, gloves)
- Step ladder or platform
- Clean cloths and water
- Filling knife or spatula
- Sandpaper (fine-grit)
Preparation and Planning
Proper preparation is crucial for successful ceiling rose installation. Begin by thoroughly cleaning the ceiling surface, removing any dust, grease, or loose material. For optimal adhesion, ensure the ceiling surface is completely dry and stable. When dealing with electrical fittings, always turn off the power at the main switch and consider consulting a qualified electrician if modifications are needed.
Measure your ceiling carefully and mark the central point where the rose will be positioned. For rooms with existing light fittings, you’ll need to ensure the ceiling rose’s central hole aligns perfectly with the electrical outlet. Use a spirit level and pencil to draw guidelines that will help maintain proper alignment during installation.
Step-by-Step Installation Guide
- Mark the centre point of your ceiling and draw reference lines
- Test-fit the ceiling rose to ensure proper positioning
- Mix the adhesive according to manufacturer’s instructions
- Apply adhesive evenly to the back of the rose, leaving a 10mm border
- Carefully lift the rose into position, aligning with your markings
- Press firmly and hold for several minutes
- Clean any excess adhesive immediately
- Allow to dry for the recommended time (typically 24 hours)
Fixing and Securing Techniques
Modern fixing methods typically rely on strong adhesives, but traditional techniques often combine mechanical fixings with adhesive for extra security. For larger roses (over 600mm), consider using additional mechanical fixings through the rose’s outer rim. Recent studies show that combination fixing methods increase long-term stability by up to 85%. When securing your rose, maintain even pressure across the surface to prevent air pockets and ensure proper adhesion.
Adding Finishing Touches
Once the adhesive has fully cured, inspect the installation for any gaps between the rose and ceiling. Use a fine filler to address any small gaps, applying with a filling knife and smoothing carefully. For larger gaps, consider using a flexible caulk that can accommodate minor movement. Allow all fillers to dry completely before proceeding with decoration.
Painting and Decorating
- Clean the rose thoroughly before painting
- Use a primer specifically designed for plaster
- Apply paint with a small brush for detailed areas
- Consider using different shades to highlight details
- Apply multiple thin coats rather than one thick coat
- Allow adequate drying time between coats
Common Mistakes to Avoid
The most frequent installation errors include insufficient surface preparation, using incorrect adhesive, and poor alignment. Statistics show that 70% of ceiling rose failures are due to inadequate surface preparation. Avoid rushing the installation process and always follow manufacturer guidelines for adhesive mixing and curing times. Never attempt to paint or decorate before the adhesive has fully cured.
Maintenance and Care
Regular maintenance will ensure your ceiling rose remains an elegant feature for years to come. Dust regularly with a soft brush or vacuum with a brush attachment. Clean occasionally with a slightly damp cloth, avoiding excess moisture. Inspect annually for any signs of movement or damage, addressing issues promptly to prevent deterioration.
Professional Tips and Expert Advice
- Always purchase extra adhesive to ensure sufficient coverage
- Consider the room’s proportions when selecting rose size
- Use temporary support during initial adhesive setting
- Take photos before installation for reference
- Keep detailed areas free from excess paint
- Consider professional installation for larger or more elaborate roses
Following these comprehensive guidelines will help you achieve a professional-quality ceiling rose installation that enhances your room’s character and value. Remember that patience and attention to detail are key to achieving the perfect finish.
FAQ
Are plaster ceilings expensive?
The average cost to plaster a ceiling is about $600, although you could pay as little as $400. If the ceiling is taller than average, you’ll pay $800 or more. If you want ornamental designs or the ceiling has a vaulted shape, you could pay up to $4,000 for the entire job.
Which rooms should have ceiling roses?
As a guide, larger rooms with high ceilings will ideally need big ornate or decorative roses. Compact or narrow rooms like walk-in closets, bathrooms, hallways with lower ceilings will need smaller roses.
Do you paint plaster ceiling roses?
Can I Paint a Ceiling Rose? Certainly! We take great pride in the exquisite craftsmanship of our ceiling roses, which are crafted using the finest gypsum plaster. Customers are strongly advised to consider the option of painting their ceiling rose, whatever the design.
Are plaster ceiling roses heavy?
Plaster ceiling roses normally require two people due to their weight, whereas installation of Orac Décor ceiling roses can be installed by just one person. Due to its lightweight Orac Décor ceiling roses can be installed on to any type of ceiling, including lowered ceilings.
Is plaster ceiling good?
Its unparalleled aesthetic appeal allows for intricate designs and a smooth finish that can add character and elegance to any room. Plaster is also known for its durability, fire resistance, and sound-dampening properties, making it a long-lasting and practical choice.
Sources
[1] https://www.plasterceilingroses.com
[2] https://www.classicceilings.com.au/product-category/ceiling-roses-2/
[3] https://www.allplasta.com.au/ceiling-roses